Friday, January 31, 2014

SPARKLE N SPRINKLE'S FEBRUARY 1ST REVEAL

Welcome to Sparkle N Sprinkle's February 1st Reveal.  This month we are introducing three new sets. One of these sets is Spunky and Rocco, they're having a good laugh with each other - a great little friendship set!  With the awful frigid weather we've all been experiencing lately, I was thinking "warm and fuzzy", so chose to highlight this cute set for the reveal.  I struggled for a while with how I would stage these two fun critters, then last week, walking around Michaels, I happened upon a wooden shaped heart. The cogs started rolling and although it turned out much different than what I had first envisioned - the general idea remained! 


Here are the three sets being revealed this month:


Spunky and Rocco #526

Spunky and Bug #523

All you have to do in order to have a chance at winning one of these sets (along with a glitter and embossing powder of your choice) is to comment on each of the design members' blogs. Three winners will be selected by Random.org during the Designers Mystery party. We don't know who the three Mystery Designers are, so you should comment on them all to increase your chances of winning! Here is a list of the designers:
Cristina Ojeda
April Williams
Anne Temple
Anita Scroggins
Donna Ellis
Shona Erlenborn (you are here)
Eret Pank
Mayra Duran-Hernandez
Marie Berquist
Jazzy Jill (for the technique video)

Each of the three stamp sets are available at 20% off.
Promotion valid through February 3. 
You may also phone the SNS Shoppe to place your orders.

So there you have it, all the details on how to win one of these fun sets and some glitter and embossing powder to go with it. Now back to Valentine Decorations!

To start, I made my fuzzy characters!  I took a piece of white card and covered it with Snow White flocking. Using the Coloring with Copics technique, I colored Rocco and Spunky. I love this technique, because it means you can have flocking in whatever color you need! 


See how fuzzy they are?  I did stamp their faces twice and popped them up for a little more dimension. Copics used were: E33, E35, E37, C5, W5, R21 and R17.

For the background, I took the wooden heart and covered it with Versamark and then heat embossed with Cappuccino Star (one of the Tuscany collection embossing powders). It looked natural, but with a nice sparkly finish.

If you are a follower of my blog, you'll know that I've recently been using a few of the new chipboard words, that SNS is now carrying. My project today uses three of the words from the Words of Love set. "Love" and "Laugh" were heat embossed with Tuscan Star, as was the little silver heart brad. "Friends" was embossed with Pebbled Copper. I applied some Mega Tack Glue to the back of the words and set them aside to dry.

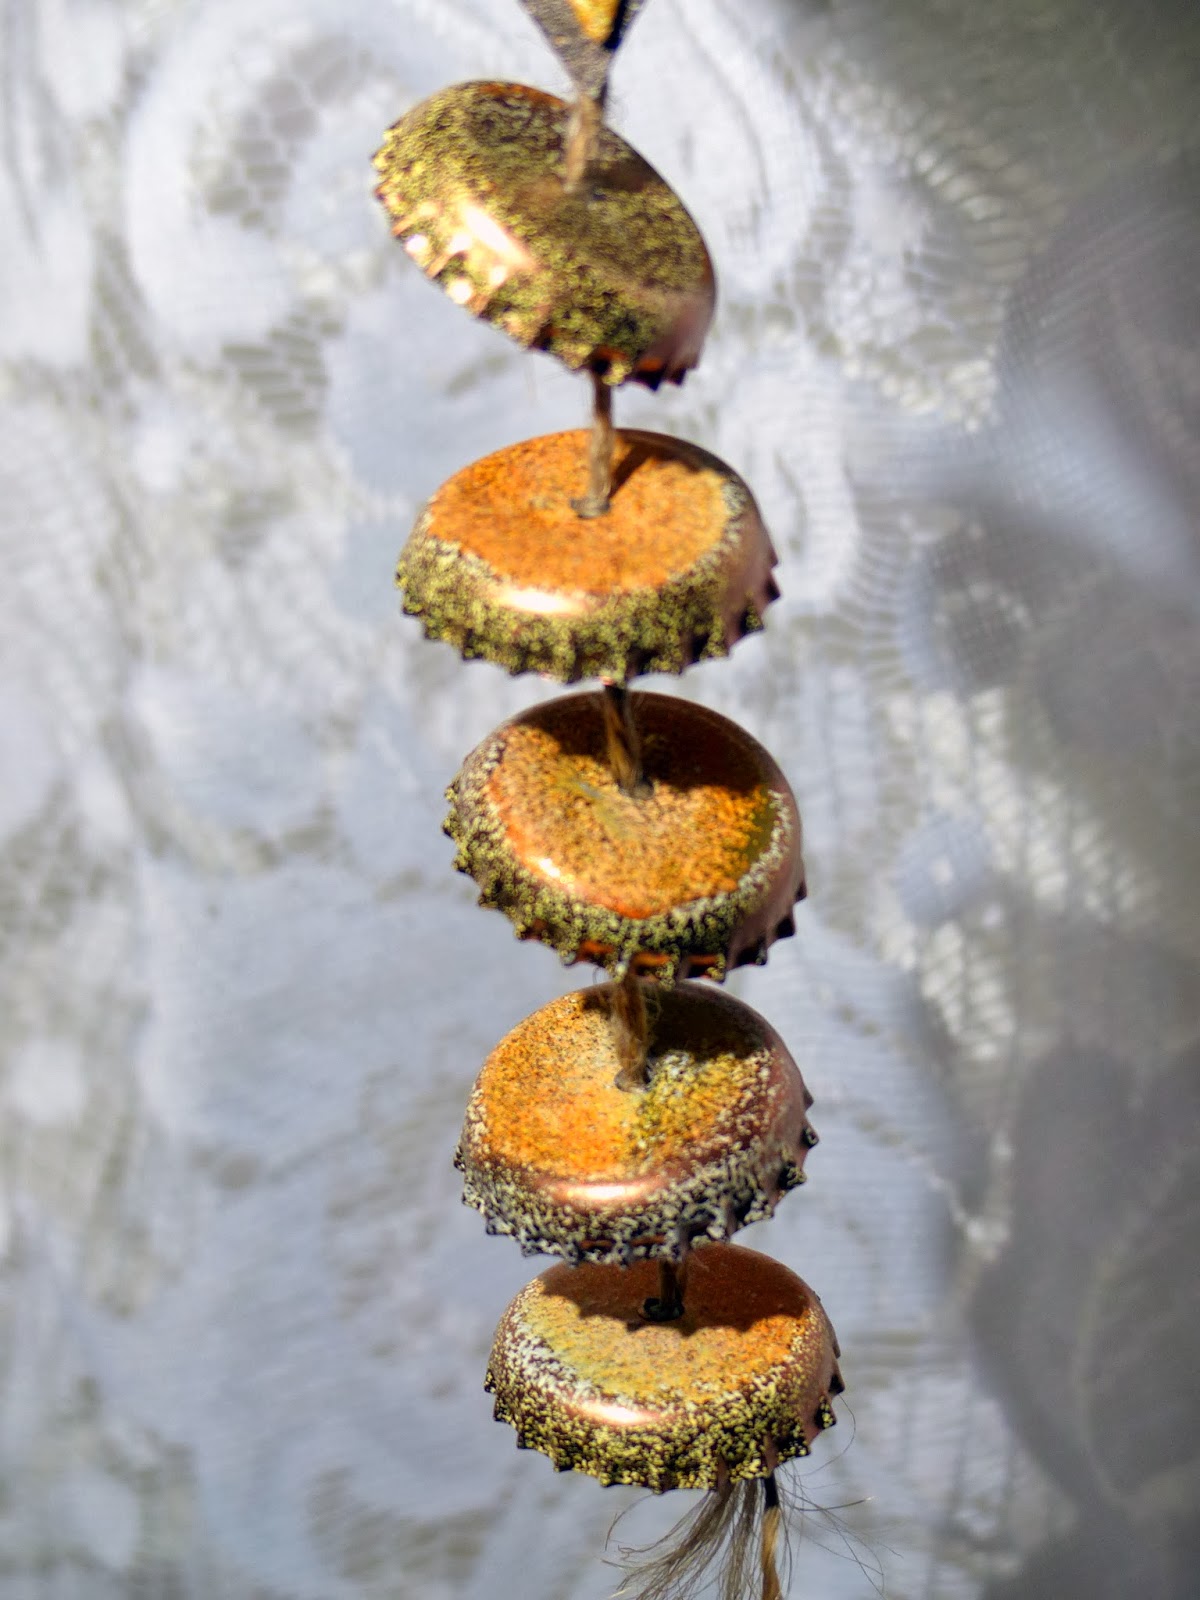
I don't know why, but I felt that my decoration needed a tail! So I heat embossed the five bottle caps with the same rustic powders that I had used on the heart and words. I punched a whole in the middle of each of them and threaded the jute string through them tying a knot at inch intervals, so they wouldn't slide down the tail.


Love the colors it created on the caps, when the powders melted in to one another!

I traced the shape of the heart onto black cardstock and cut it out. The tail was attached to the back of the heart as was the heart brad, before attaching the backing to the heart (I used the Mega Tacky Glue again for this). 


A hole was punched for the knotted string handle to go through. I attached the glued words and Spunky and Rocco were added with dimensionals. My project was complete!


I think I covered everything, but if you need more details you can check them out in my SNS Art Gallery, right here.

Hope you've enjoyed my part of the reveal today. After you leave me a comment, go check out the other designers to see what they have in store for you from these three fun sets, and for more chances to win!  Good luck!

Till next time!

Hugs,

Shona

Wednesday, January 29, 2014

A DRESSY THANK YOU!

When will this bitter cold spell end?  Another delayed opening this morning.  Now that everyone is out of the house, and I'm waiting on my stamping room to heat up, I'll just blog about the little sneak peak that I left you with in my last post:


I used the same Dress it up set as my last card, but used the other dress image. On this card I decided to use some embossing powders and glitters to give this card a more vintage look. 


I used a couple of different decorative Spellbinders that I've had for a while sitting waiting to be used. The Ribbon Threader die cut was used for the first time. I like brown and blue as a color combination, so thought I'd stick with that. After I had cut and embossed the frame I heat embossed with my favorite vintage look duo: Vintage and Magic Speckle! I threaded some blue ribbon through the slits. The netting at the back of the sentiment is actually a piece of loofah that I had tried to run through the washing machine (which didn't work), and now is a long piece of netting in my ribbon drawer! Waste not want not!


I then cut and embossed the image panel with Spellbinders Majestic Elements - Squares and heat embossed the image with Black Detail, coloring the top and base with Copics.  I  stamped the image again, this time in Memento Black ink, fussy cut the dress and colored with Copics. With the Sakura Glue pen I added Peruvian Lily glitter to the flowers and Cloud Nine to the belt, to add a bit of sparkle.

With a stiff paint brush I dabbed Versamark ink around the image on top of the cream frame and then sprinkled some more Vintage embossing powder on top and heat embossed, giving the frame a distressed look.

Finally the card front was layered on to a cream base which had been edged with 3/4" Tear-ific Tape and Florida Beach glitter was applied to the exposed tape.


Hope you've enjoyed my little show and tell today. Full details can be found here for the card.

I'd like to enter this card in the Created with Love Challenge, their theme is anything goes. Please pop over and take a look as their design team is featuring some of Sparkle N Sprinkle's digi stamps right now, and they've come up with some fun cards.

My next blog post will be the Sparkle N Sprinkle February 1st reveal, so here's a sneak peak of my project (not a card this time!):


Intrigued?  I hope you'll stop by on Saturday to see the rest!  There will be lots of prizes up for grabs too!  

See you Saturday!

Hugs,

Shona

Saturday, January 25, 2014

PUT ON YOUR PARTY DRESS!

Another snowy day!  I've really had enough of this!  Just got back from a Church Retreat this afternoon and have put the heat on up in my stamping room, as I've got a "few" projects that are calling me. Thought I'd put up a quick post of my sneak peak from last week, as I wait for the room to heat up:


Using the same Feather Fancy paper, one of the new papers in the exclusive line of papers offered by Sparkle N Sprinkle, but using the paper piecing technique instead.

The dress, from set 525: Dress Up, is stamped on top of a section of the paper and then cut out. I colored in the dots with a black Copic pen. Versamark was applied to the paper pieces and they were heat embossed with Sparkle embossing powder. After attaching the paper on top of the stamped image (on the die cut), I colored the belt and applied Dimensional Glue to make it nice and shiny!

I decided to use the same paper for the background, but wanted to "dress it up" a bit, so I ran it through a dot embossing folder and sanded the raised pattern which left me with white dots (should have taken a photo - but didn't!) Now what? How about we put little dots of our new Mega Tack Glue and cover them with some velvet glitters? I chose to use Luau Green and Orchid Rose.


Look at the dimension of those dots! 


I had cut a window at the base of the paper before I put on the dots, and stamped the sentiment in good old "Belgian Cream" embossing powder. This powder really gives a great detailed look on top of dark cardstock.

Edging the same cream cardstock, as the die cut, with 1/2" Tear-ific Tape, then centering the black base to the cream, applying Cloud Nine Velvet Glitter to the exposed sticky edges, to finish of the card. The die cut with dress is popped up with dimensionals.

I'd like to enter this card in the Bloggers Friday Challenge - Make your own background.  


Hope you've enjoyed seeing what I did with the papers and this awesome new set. Here's another sneak peak at another card, using the same set, but the other dress image and going with a more vintage look:


Till next time!

Hugs,

Shona

Thursday, January 16, 2014

FANCY FEATHERED PEACOCK

Hi there! today I'd like to share with you, a card I made using the Dreamweaver Peacock stencil and one of the Pocket Full of Paper line that Sparkle N Sprinkle is now carrying. These papers are exclusive to Sparkle N Sprinkle and they are all gorgeous. 


I thought that the peacock stencil went really well with this particular paper - Feather Fancy. If you are a regular to my blog, you'll also see that I've included some of my "old neighbor's ribbon stash"!  I would love to find more of that, if anyone has any idea, please share info!


I temporarily attached the stencil to the paper and applied embossing paste over the stencil.  Remove the stencil and wash it. When the paste is dry, (I leave it overnight to be safe) put the stencil back over the dry paste and apply Versamark, remove stencil and heat emboss with Black Detail. The base of embossing paste really makes the "image" pop!


I ran 1/4" Tear-ific Tape along the sides of the card and attached the ribbon, then ran 1/2" Tear-ific Tape over the edge of the card (on top of the edge of the ribbon) and applied Black Suede Velvet Glitter to the exposed tape. These tapes, in various widths are the best for sticking down glitters or flockings. No need to wait on glues drying and using the 2 1/2" or Super Adhesive Sheets you can make your own instant glittery or flocked shapes! Check out how, right here!


I embossed the sentiment with Belgian Cream, this is my favorite white embossing powder to use on dark cardstock. It is an opaque embossing powder and gives great coverage, even with a detailed stamp.

Well that's all for today, hope I've inspired you to look out some stencils and start playing. I bet, you can't stop at one card though!

Now I'm going to leave you with a sneak preview of what my next blog share will be. Using the same Feather Fancy paper, and one of the new sets that were revealed this month, Set 525: Dress Up, I paper pieced one of the dresses:


Loving these papers! See you soon,

Shona

Sunday, January 12, 2014

SING ON YOUR 18TH BIRTHDAY!

Today, I want to share with you the card that I made for our daughter's 18th birthday last week.


Sparkle N Sprinkle has recently started to carry some Chipboard items, which are great for embellishing with our embossing powders. This particular one, I picked up at a convention at the Want to Scrap booth. 

I also used another fun product that we're now carrying - Dreamweaver stencils. The background was made by using the "Petite Fern" sponged with Memento inks. On top of this background I laid the Peacock stencil and applied Versamark through the stencil. Take up the stencil and then heat emboss with Black Detail. 


"Sing" was covered with Versamark and then heat embossed with Dragon Fruit, Poolside and Spring Willow, repeating the colors of the fern background.

I ran a piece of ribbon down the left side, which reminded me of both the base of a treble clef and the "eyes" in the peacock's tail!  


The label was made by die cutting and embossing Spellbinders Labels Eleven from a piece of white card covered with Tear-ific Tape.  Remove the backing and stick down the outline sticker and then apply Black Suede Velvet Glitter to the remaining exposed tape.

Once I got started, I was on a roll with the stencils, here's a sneak preview of the next card I'll be sharing, using embossing paste with the same Peacock Stencil:


See you next time with my Fancy Feathers Peacock!

Hugs,

Shona 

Saturday, January 4, 2014

STROLLIN' ROCCO

Hi there, today I'd like to share with you another Valentine's Day card, featuring Sparkle N Sprinkle's "Rocco with Roses", which was one of four sets revealed New Year's Day.  Scroll down to the last post if you didn't get a chance to see the other three.

In the reveal last week, I left you with a sneak preview of Rocco:


Here is what I did with this little cutie:


Here he comes, strolling down the path to deliver roses to his sweetheart! I had the negative die from another card and thought it would make a perfect frame for Rocco, as it had the woodgrain look to it.  I used a border embossing folder (animal pattern) to make the path and then swiped over the raised pattern with Tea Dye ink. 


Sparkle N Sprinkle has recently introduced some awesome chipboard pieces by Want to Scrap.  I took the tree and covered it with Versamark and then heat embossed with Teddy Brown for the trunk and Indian Corn and Pebbled Copper for the branches.

Rocco was colored with Copics and cut out, then I added some dimensional glue to the roses to give them a shine. He is popped up on the path with dimensionals.


The sentiment was stamped in Versamark and heat embossed with Black Detail, cut out, embossed and swiped with some Antique Linen ink before removing the die.


Complete directions, if needed, can be found here in the SNS gallery.

Big news of this post:
Thanks to Mary, I've just entered my first ever card challenge over at Pixies Snippets Playground - Week 106.  I used a negative die cut (ie snippet) from a previous card. It was on my New Year's Resolution list to start entering challenges.  Thanks Mary!

Till next time,

Hugs,

Shona