Tuesday, February 28, 2017

SPARKLE N SPRINKLE'S MARCH 1ST REVEAL

Hi there and welcome "back" to my March 1st Sparkle N Sprinkle Reveal. I managed to completely lose my entire post this afternoon after it had been commented on! So I've sat here this evening and tried to remember everything I said in the first run!!

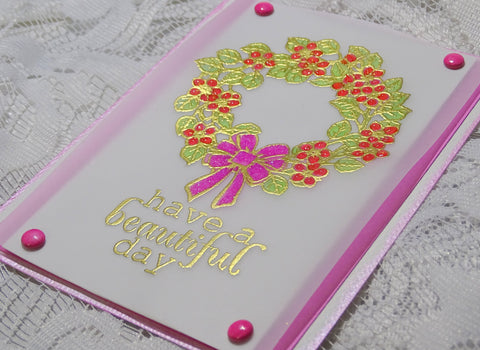
We are still experiencing lovely balmy temperatures, and although I know that doesn't mean that Winter is over, it definitely feels like Spring is around the corner. That's what made me choose to work with the Flower Silhouette Stamp Set 824.


Welcome to the ALL NEW 
Sparkle N Sprinkle
 March Reveal Blog Hop!


NEW STORE - NEW BLOG - NEW PRODUCT LINES!


There are FOUR new rubber stamp sets being released this month, plus a new Digi Papers set, and a Digi Only Bundle set full of lots of extras.   

The sets are:


Flower Silhouettes - 824  (digi version - DIGI824BG)

Patriotic Girlfriends - 827  (digi version - DIGI827J)

Irish Blessings - St. Patrick's Day - 834  (digi version  DIGI834B - includes additional images)

Bonnet Bouquet - 838  (digi version - DIGI838J)

DIGI3130FS - Blue Pansies Digi Bundle Pack   (includes lots of images, decoupage sheets, sentiments, and papers)

DIGI4002FS - Digi Watercolor Papers: Blue 

When you purchase the digital versions of any of the SNS rubber sets, you are getting lots of extras that are not available otherwise.  These extras can include additional images, sentiments, digi papers, and/or decoupage sheets that not available with the rubber version.  

Every new digi set purchased always includes the following:
 ~ black and white images
~ colored images
  ~ .jpeg format (white background) 
~ .png format (transparent background) 
 ~ a cut file to use with your electronic cutting machines!


You're definitely going to want both the rubber versions AND the digital versions of all our new releases.


The new sets are 20% off until March 3, 2017, so after the blog hop, hop on over to the NEW STORE and have fun shopping - be sure to check out the OTHER amazing new products as well! With names like TONIC and STAMPENDOUS and HOUSE MOUSE, you're sure to fill that cart up quickly!


SNS also has a brand new blogwhich can be found here!


On March 3, ONE GRAND PRIZE WINNER will be selected from the comments left on all the Designers' blogs listed below.  Please leave a comment with each designer to be eligible for the Grand Prize (checked for compliance).  The Grand Prize Winner will be announced on the SNS Facebook page and the SNS New Blog.  


The Blog Hop Order this month is:

Anne
Jess
Eret
Donna
Shona (that's me!)
Diane
Chris
Belinda

(*Tip: if you have difficulty with a particular link, try clicking on the Designer's blog title to send you to their Home page.)


We hope you enjoy the New Reveal Blog Hop as much as we do.  Thanks for joining us and remember to comment on each of the Designers' blogs to be eligible for the Grand Prize.  
 Wonder who the Mystery Host will be this month????


Have you checked out the SNS YouTube Channel featuring Demo Donna?  If not, then you are in for a real treat.  Subscribe today to get all the latest Demo Donna tips and techniques!


To begin with I stamped the garden scene on white cardstock in Versamark and then heat embossed with Black Detail.


I made my own little watercolor palette by putting some Nuance Powders in different wells in a little paint palette and adding a little water to each of the different colors. The flowers were then colored in with my home-made watercolors.


I then made watercolors by mixing a small amount of Nuvo Embellishment Mousses: Spring Green (for the grass) and Cornflower Blue (for the sky), adding a little water to them and then painting my grass and sky with a waterbrush. 


My painting was set aside to dry while I worked on the fence. I had discovered that those Nuvo Embellishment Mousses look awesome atop black cardstock. One in particular, the Mother of Pearl, gives a very realistic likeness to wrought iron. I cut out the fence from black cardstock using the Spellbinders Wrought Iron die and then daubed on some of the Mother of Pearl Mousse. Pretty cool, right?


The border frame was done in the same way, using Spellbinders Art Nouveau Belle Epoque.  I turned the border face down on a piece of protective backing from a piece of Super Adhesive Sheet and then laid down 3/4" Tear-ific Tape around the edges.


I attached the fence to the base of the frame before turning the frame over and placing it down on top of the flower panel. Black Suede Velvet Glitter was then applied to the sticky areas of the border.


The little orange butterfly was now hidden behind the fence, so I thought I'd free him and give him some pals. I stamped that portion of the image a few times in Black StazOn and then I colored the butterflies with the watercolors from my palette.


Once they were dried, they were fussy cut and placed around the image with a little mounting tape. The sentiment from the same set was stamped at the top of the garden in Versamark, after I swiped the area with the anti static bag first. It was heat embossed with Silver Detail. Nuvo Jewel Drops Limoncello, Orange Marmalade, Strawberry Coulis, Pale Periwinkle and Rosewater were then applied to the different flower centers to give a little more dimension.


and that finished off my card for today .....


I'd like to enter my card in the following challenges:

Dream Valley Challenges #150: Add some metal
Crafting From the Heart #148: Anything Goes
HeARTful Stamping: Feb 26 to March 5
World Wide Open Design Team Challenge: Anything Goes
Scrapy Land Challenge #61: Anything Goes


Hope you've enjoyed your visit today!

Your next stop on the hop is our very talented Diane, who has given this same image a completely different look. Remember to leave a comment on each of the blogs to be eligible to win the Grand Prize.

Till next time,

Hugs,

Shona

Thursday, February 23, 2017

Leafy Flower Spring Wreath

Hi there, 
Today I'd like to share with you a card made with the February Reveal Set 815: Leafy Flower Spring Wreath.
 
I began by stamping on top of a piece of vellum in Versamark and heat embossed with Gold Detail. This fine grained powder is great for detailed stamps and sentiments. 
Turning the vellum over to the back, I colored in the image using Copics. The gold embossed lines hide any "coloring outside the lines". 
After I wiped the front of my vellum panel with the anti static bag, (to make sure there would be no unwanted strays) I stamped one of the sentiments from the same set below the wreath in Versamark and heat embossed again using the Gold Detail powder.
 
I took four pink brads and "blinged" them with Raspberry Tart. First dipping them in Versamark (alternatively you could just heat up the brad with your heating tool) and then dip in to your jar of embossing powder. Once heat set this gives a lovely shiny finish to your brads, in matching colors to your projects.
The vellum was attached by the brads to a piece of white glossy cardstock (this ensures a nice bright contrast). Drops of Nuvo Jewel Drops Strawberry Coulis were applied to the berries and left to dry. 
After they were dry (an hour at most), Mauvelous Semi Transparent Glitter was applied to the bow with the Nuvo Fine Tip  Pen.
The panel was then mounted with foam to a piece of pink cardstock slightly wider than the vellum. A piece of textured white cardstock was used as the card base, after being edged with Peony Pink Nuvo Embellishment Mousse.
Here you can see the dimension of the Jewel Drops and the Gold embossing.
I'd like to enter my card in the following challenges:
Aurora Wings Challenge #44: Anything goes with hand colored image
Crafting From the Heart #147: Anything goes
Hope you've enjoyed my share today?
Thanks for stopping by,
Big hugs,
Shona

Thursday, February 16, 2017

Bird Flourish Wall Hanging

Hi there,

Today I'd like to share something other than a card - a little Spring wall hanging. I really liked the saying from the Cattelya Friendship Set 818, so decided to highlight that, along with some of the fun Tonic Studio products that SNS is now carrying.


I was using some Chipboard pieces from Want to Scrap, that were flourish like, so in order to keep that idea going I started by taking the Dreamweaver Large Flourish Stencil, laying it in the top right corner of the canvas and I then applied Lilac Lavender Nuvo Embellishment Mousse. This Mousse is very quick drying, but I set it aside anyway while I worked on the bird chipboard piece. I like to give the chipboard pieces two coats of white embossing powder to cover up the darkness of the chipboard. So I applied a coat of Versamark and heat embossed with White Detail, then repeated that step. This leaves a nice finish for the lighter colors to adhere to.


I applied Versamark Ink and then heat embossed with Key Lime and Raspberry Tart. Spring Willow and Pear were applied using the Versamarker Pen. Do you see my boo boo?


So let's use a little Magic Speckle and get some mottling effect going, shall we?


Magic Speckle was heat embossed (from the bottom) after being applied with Versamarker to specific areas on the branch and bird. OK, now that green tail has to be rectified!! Some Mulberry embossing powder and then Magic Speckle was how I handled it, making the tail a bit darker than the bird's body. On to the sentiment. After giving it two coatings of Versamark  and White Detail, I stamped directly on top of the Flourish Tag with Versamark and then heat embossed with Mulberry.


I used the Clearly Art Molding Film to make some more flowers, using the Spellbinders Rose Creations Die. These were then colored with Adirondack Inks with an applicator before being molded.


Ta da!!


So time to put it all together. The sentiment (with bows) was attached with Mounting Tape as was the Bird Flourish. The flowers were put together and attached with black brads which were then applied with some Brushable Glue and Sparkling Snow.  Then it was time to add the drops!


Nuvo Crystal Drops, Crushed Grape and Sweet Lilac and Glitter Drops Pink Champagne were applied as extra flourishes. A Nuvo Crystal Drop Ebony Black was applied as the bird's eye.


A couple of holes were punched in the canvas and then the same sheer purple ribbon, which was used on the sentiment, was attached with knots behind as a hanger.

Today I'd like to enter my project in the following challenges:
Crafty Creations #335: Anything Goes
Crafty Galz Corner #110 : Use your favorite things (Nuvo Glitter and Jewel Drops - at the moment!)
Simon Says Stamp: Fantastic Florals: Clearly Art Molding Film
World Wide Open Design Team Challenge (15 February 2017): Anything Goes


... and that's it for today. Something a little different in anticipation of Spring! Hope you've enjoyed stopping over?

Till next time,

Big warm hugs,

Shona

Thursday, February 9, 2017

Teacup Pansies

Hi there,

Today, I'd like to share another card with you from the fabulous February Reveal. Today I chose to use the New Pansies in Teacup Set 833.
I decided to take a shot at watercoloring with the Distress Crayons on Kraft cardstock. As I would be working with water with the crayons, I began with stamping the image on the Kraft cardstock with StazOn Jet Black ink.
I used a Waterbrush to "paint" the crayon onto the image.
The handle of the Teacup and the little line was applied with glue, using the Nuvo Fine Tip Pen, this was left to dry till tacky and then I applied Nuvo Radiant Gold Gilding Flakes. OK, now what? Let's antique that teacup, shall we? Using a spatula, I put a nice thick layer of the crackled Texture Paste over the whole cup - yes I even covered up the Gold Flakes! Though I did leave the handle as it was.
Now to bring those dull flowers back to life! I applied Brushable Glue to the leaves, Dimensional Glue to the flowers and Nuvo Sea Breeze Jewel Drops to the darker parts of the petals. Here is everything before it was left to dry overnight! A big messy blob!
Eight hours later: E voila!
Some Memento Desert Sand was sponged over the cracks of the cup before the cup was applied with Versamark, which was then applied with a coating of Clear Detail and heat set. But the magic happens after another application of Versamark and the Thick Clear Enamel! Ta Da!
OK, I think I'm happy with my focal image now! How about a background? In-keeping with the old and crackled look I decided to make a background using the Crackle Background Stamp Set 609, which was stamped onto Kraft cardstock in Versamark and heat embossed with Clear Detail
I then took a piece of black cardstock and die cut the Spellbinders Nestabilities Decorative Curved Square. But it needed some antiquing too! So I daubed on some Nuvo Mother of Pearl Embellishment Mousse - a recipe that you will see being repeated!!!
Loving my home-made wrought iron! Here is a look at what the other Embellishment Mousses do on black cardstock:
I found that dabbing the sponge on rather than rubbing it on, gave a nice mottled appearance which I liked. Now I have a whole new cardstock wardrobe!! A little of the mousse goes a long way too!
OK, so I digressed, but I really wanted to share my little metallic discovery! So let's put this card together, shall we?
So the crackle background was layered to the black card base with the wrought iron square taped down on top of that. A strip of cream pearled lace was placed underneath the wrought iron square, and simply snipped at the edges. The sentiment from the same Teacup Pansies Set was stamped in Versamark and heat embossed with Clear Detail. I just fussy cut that it - wanted the focus to be on the teacup. The sentiment was then popped up with mounting foam. It gave everything a pretty vintage look, I thought.
... and that finishes my card for today!
I'd like to enter this card in the following challenges:
Scrapy Land challenge # 59: Using a die that Scrapy Land carries
HeARTful Stamping: Feb 5th to 12th: For a Special Someone and a stamped image
Hope you've enjoyed my share with you today? Let me know in the comment section down below!
Big Hugs,
Shona

Sunday, February 5, 2017

You Crack Me Up

Hi there,

Gosh, February already! This is insane, it will be Easter before we know it! .... and on that note - here is my card today, which, with a different sentiment, could work for Easter, Baby, Birthday or just a fun because! This was one of the January Sparkle N Sprinkle Reveal Sets: Easter Chicky Set 820.


Such a cute little image, this time though, I went the soft and fuzzy route, instead of the glittery one! To begin with I taped a strip of 2 1/2" Tear-ific Tape onto a piece of white cardstock. After I removed the protective backing, I applied Twinkling Clouds to the sticky adhesive. The Easter Chick was stamped directly onto the Sparkle N Soft with Memento Tuxedo Black ink.


The same image was then stamped on a Post-It Note and the body, shell and background were fussy cut, to be used as masks.


I removed the head part of the masking and colored directly on top of the Twinkling Clouds with a sponge dauber, inked with Memento Dandelion and Cantaloupe.  


The chick's body was then masked too and the shell was sponged with Summer Sky.


The little "hat" was stamped on to a scrap piece of Super Adhesive Sheet and then after being fussy cut, the protective backing was removed and Blissful Blue Sparkle N Soft was burnished onto the piece. After cutting out the chick with Memory Box Cross Stitched Frame Borders, the chick's hat was attached with Mounting Tape.


For the card background, I stamped the Crackle Background Set 609 (it seemed appropriate for the sentiment!) in Versamark which was heat embossed with White Detail and then I sponged both the Memento Inks, Summer Sky and Dandelion Yellow over the top of the crackle pattern. 


The yellow frame was cut with the Memory Box Cross Stitched Frame Border and stamped with the Crackle Background, also inked with Versamark and heat embossed with White Detail. It was then just sponged with Dandelion Yellow. The sentiment, from the same set was stamped with Versamark on white glossy cardstock and then heat embossed with Skylight (EP212). This was then die cut with the small die from the set.


The background layer was centered on white cardstock, edged with 1/4" Tear-ific Tape and the sticky edge was applied with Canary Flocking. The yellow frame, the chick image and the sentiment were all layered "wonkily" on top of one another.


Nuvo Jewel Drops: Limoncello and Sea Breeze were then added sporadically added to the card to finish off.

I'd like to enter this little card in the following challenges:

Animal Friends Challenge: #47 February - No Design Paper
Crazy 4 Challenges: (c4c371) Add an animal
Crafty Gals Corner: Challenge 108 Add some Sparkle
Scrapy Land Challenge #59: Use a die that Scrapy Land Sells

Hope you've enjoyed this little card today? Hope I've inspired you to get out your white flocking and get coloring!

Till next time,

Shona