Wednesday, December 13, 2023

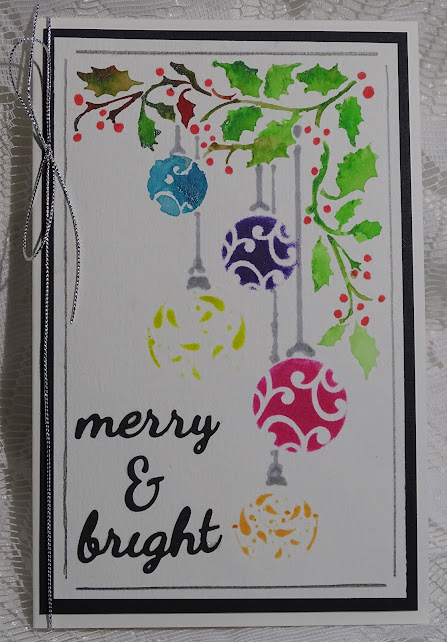
CCC Merry and Bright

 Hi there and thanks for stopping by today. Today is my last card for the year of 2023. It is for the Christmas Craft Creations Challenge.


The challenge this month asks that we incorporate Christmas decorations.


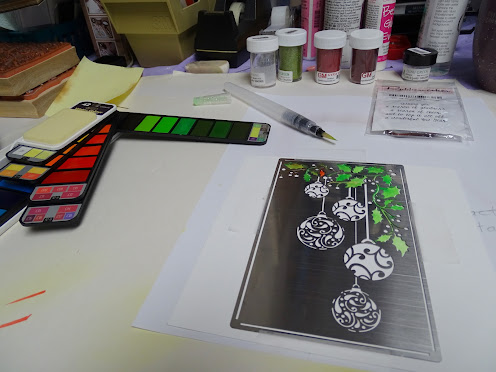
I chose to use the Sweet Poppy bauble die


I started with the watercolor paints and water brush for the holly leaves.


A red Copic was used for the berries and then I used four of the Versafine Claire inks with a finger dauber to color the baubles.


The two more detailed baubles didn't work so well, but it gave 
a sort of artsy look, so I left it as was. I used pencil for the outline.


I die cut merry and bright from black cardstock and then glued them  on to the base of the card.


The front panel was layered to black and then added to a white card base. Silver thread was tied around the spine to finish off my card for today!

We're going to be spending Christmas and New Year in Scotland, leaving next Monday, as we have recently bought a flat in my parents' hometown, so we will be literally "decorating" for the holidays!

I wish everyone a Merry Christmas and a very Happy New Year!

See you in 2024!

Shona

Tuesday, November 28, 2023

HAI Candy Cane Christmas

 Hi there and thanks so much for stopping by today! I have a card for the Holly and Ivy Challenge which is always "Anything Goes", as long as it has something to do with Christmas! I hope you'll be inspired to play along with us this month!


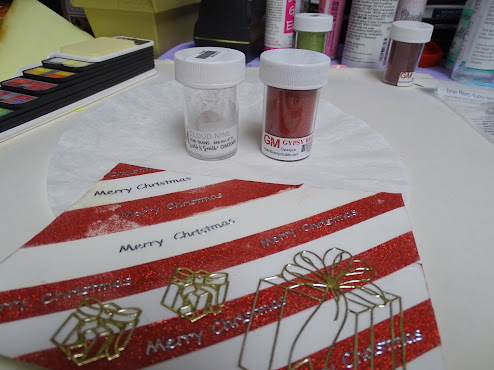
 I decided to play with glitter and tape this time round. I started with the half inch and 3/4" double-sided tape and laid the silver Merry Christmas stickers on top of the tape, before adding the Gypsy Red micro-fine glitter.


Then the protective coverings of the Cloud Nine strips were removed and the stickers (both "Merry Christmas" and the packages) were put down before adding the glitter. 


 The coverage of the glitter on the older 3/4 inch tape, which had apparently lost a lot of its "stick", was not acceptable.


I decided after adding the Cloud Nine Glitter to the other strips, that I would just cut the upper portion off and added a piece of red card stock to the upper left corner.


Another parcel and a "Merry Christmas" sticker was added to that area. 


The front panel was then added to a white card base and a red and white twine was tied along the card top to finish off the card for today.


Hope I've inspired you to play along in the challenge this month, anything goes remember and think of all the hand-made cards you can get done! Tis the season!

Will be back soon!

Shona
Tuesday, November 14, 2023

HAI Santa Suit

Hi there and welcome back to my blog. My header for November is native American Strawberry bush. I planted this four years ago and despite being "strimmed to near death" and then getting a bridge grafting done, it looks like it made it! Spring will tell! 

Today I have a card for the Holly and Ivy Challenge, where it is always Anything Goes!


I used the Words embossing folder from Tim Holtz Alterations December Calendar and Holiday Words Set. 

After embossing red cardstock, I sanded the surface to make the wording stand out more.


I added three foam pads to the card stock.


 Then I wrapped a piece of black ribbon around the piece of hardware to make it look like a buckle.


Hope you like my Santa suit card. Please check out my team mates creations and join us in the challenge this month!


Thanks again for stopping by!

Shona

Wednesday, November 8, 2023

CCC Watercolor Snowman

 Hi there and welcome back to my blog. 


Today my card is for the Christmas Craft Creations challenge and this month we ask that you add a hat to your project!

I know you have something with a hat in your stash! I went with this never before used snowman stamp from Penny Black.


I thought I would try a watercolor effect with this one, so after attaching the stamp to the stamping platform, I colored up the snowman with Distress Crayons then spritzed with water and stamped on to watercolor cardstock.


It gave a rather faint impression, so then I went over it with watercolor pencils and spritzed that.


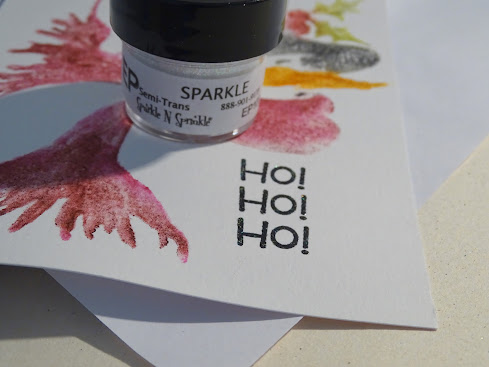
That made the colors more vivid! The sentiment was stamped 
in Versafine Clair Nocturne ink and was heat embossed with Sparkle.


I kind of like the softer/childish look of this? 


I layered the panel to a shimmery pink card base and added a little organdy ribbon to finish it off!

Hope you liked my little project today! Check out the challenge to see what my teammates found in their stashes with hats!

See you next time!

Shona


Tuesday, October 31, 2023

HAI Deer Trio

Hi there and welcome back to my blog. Today I have a card for the Holly and Ivy Challenge.

I used the Penny Black Snowy Grove stamp along with the Sizzix die cut Winter Deer. I stamped the snow scene in the stamping platform, using Versafine Claire Nocturne ink and then heat embossed with Clear Detail.


This was cut down to 3" x 6 1/2" to allow for a 1/4" layer of black before being layered onto 3 1/2" x 7" card base.


The deer were die cut from a piece of black card and then popped up with foam pads on the front panel.


Some black and white baker's twine was added to the top of the card, which finished off my card for today. Hope I've inspired you to join in the challenge, which is always anything goes!


Thanks again for stopping by! Till next time,

Shona

Tuesday, October 17, 2023

HAI Winter Spotlight

 Hi there and welcome back to my blog. Today I have a card for the Holly and Ivy Challenge, where it is always anything goes!


I used a stamp set from Sparkle and Sprinkle:


I thought it would be fun to do a spotlight card, so that is how it came about! First of all I stamped it twice, used one as the background and the other as the spotlight.


Then the rabbit, deer and cardinal were punched out of one. 


They were then colored with water color pencils. 


For the snow effect, I added the Nuvo Glitter Accents.


Hope you've enjoyed stopping over! Please look at my team mates' creations  over at the Holly and the Ivy Challenge


Till next time,

Shona


Wednesday, October 11, 2023

CCC Oh Christmas Tree!

 Hi there and welcome back to my blog. Today I have a card for the Christmas Craft Creations Design Team.

This month we are looking for monochromatic creations!

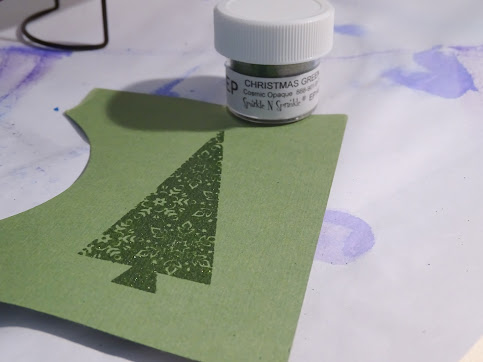
This was a fun way to use up some snippets of green cardstock from my box and then try to pair them up with inks and pretty embossing powders.  Some of the powders had glitter in them, some were opaque - I just played around a little!

The stamp set I used was from Prickly Pear and then I used a sentiment stamp from the Project Bin.


I proceeded to pair up each of the Christmas trees with the embossing powders that I thought best went with each piece of card.


I have three different hues of green ink in the Versafine Clair line, so tried to pair those up best with the card and powders. Here are a couple of the trees that I did:


Each of the seven trees were then fussy cut. I then stamped the sentiment three times along the bottom of the card, again using the three inks and three different powders.


Four of the trees were glued to the front of the card base and three of them were popped up on dimensional foam. I then ran a piece of double sided tape below the sentiment and burnished Luau Green microfine glitter to the strip.


That finished off my card for today. 


I hope you will go back and take a look at what my CCC team mates have created and then I hope to see you join in the challenge.

Till next time,

Shona

Tuesday, October 3, 2023

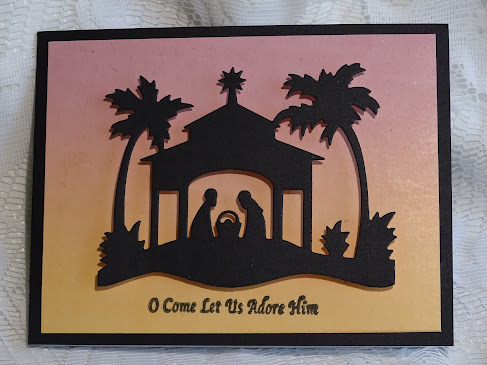
HAI Oh Come Let Us Adore Him!

Hi there and welcome back to my blog. I just got back from Scotland last Sunday, so have been MIA on blogland most of September. Yesterday, while I was doing some clean-up of my pots on the patio yesterday I happened across my October header, nectaring on borage!

My card for the Holly and Ivy Challenge uses the Die-namites Nativity Scene die cut, which I cut out from black cardstock.


The background was made by rolling ink from the Soothing Sunset rainbow ink pad over glossy white cardstock.


I chose the sentiment from an old Sparkle N Sprinkle set.


 I used the stamp positioner to ensure good positioning on the glossy surface. The sentiment was stamped in Versafine Claire Nocturne ink and heat embossed with Clear Detail.

This panel was then layered to a black cardstock base and the die cut was attached with foam pads.

Hope you've enjoyed your visit today and that I have inspired you to join in the challenge, which is always anything Christmas goes!

Till next time,

Shona