Thursday, December 22, 2016

MAY YOUR DAY BLOOM!

Hi there, 

Today I'd like to share my last December 2016 reveal card. I chose to work with the Rustic Flower Set 816.


To begin with, I stamped the jug of flowers in Versamark on Kraft cardstock and then I heat embossed with Sienna. The image was colored  with Copics.


This was then die cut using the Spellbinders Style Nouille Decorative Element, which was sponged with Wild Honey Distress ink before removing the die. I then placed a piece of Super Adhesive Sheet in the center of the reddish purple textured cardstock and removed the backing, the die cut image was centered on the adhesive and then Mystical Mauve was applied to the remaining sticky areas.


I used the Nuvo Fine Tip Glue Pen to add some of the Mystical Mauve Glitter to the purple flowers in the jug.


This tied the jug in nicely with the sparkly border.


The sentiment was stamped in Versamark on Kraft cardstock and then heat embossed with Mulberry, one of the detailed Tuscany colors. This was then die cut with Spellbinders Framed Tags One and was attached with Foam Squares, with one behind the hole which was then sprinkled with the Mystical Mauve Glitter.


I made up a flower from using various Prima flower parts, embossing a little Sienna powder to the larger petals. This was attached to the card front with a copper brad in the center.
Hope you've enjoyed my share today.

Big hugs,

Shona

Wednesday, December 14, 2016

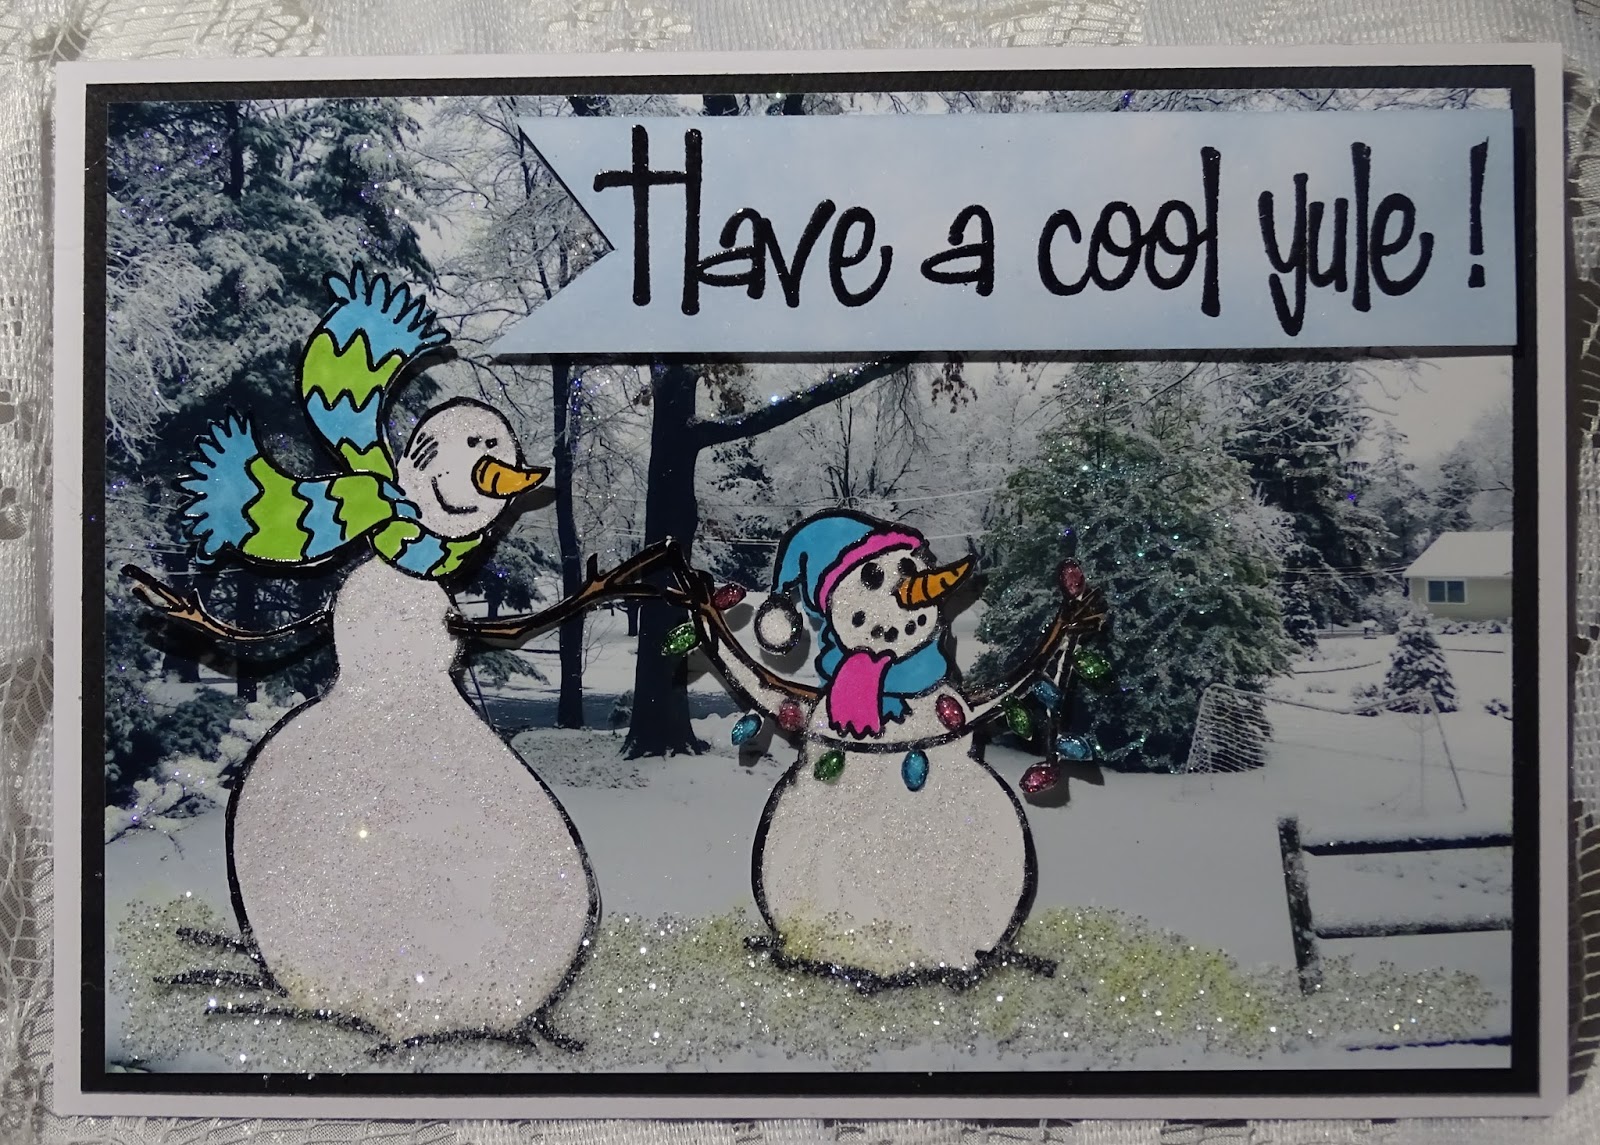
HAVE A COOL YULE!

Hi there,

So glad you stopped by today. Can you believe that we are less than two weeks away from the big day? I have no idea where 2016 went! Today, I'd like to share a card that I made, using one of the older Sparkle N Sprinkle sets Gothic Snow: Set 347 and another photo from my yard last winter. So much fun to use your own photos on a Christmas card!


This was a 5" x 7" print, as the stamps are pretty big - especially the sentiment. So I picked out the photo and stamped the snowmen on white cardstock with Versamark and heat embossed with Black Detail. The snowmen were then fussy cut.


Next was to create their background so the glitters and the adhesives came out!


I used the Nuvo Fine Tip Glue Pen for the trees and the finer glitters. I started with Crystal Ice, then applied some Sparkling Snow, Green Iris and Lavender Iris to the various trees.


The snow people were colored with Copics and then their bodies were applied with Brushable Glue and Twinkling Clouds Sparkle N Soft.


The little snow lady's string of lights were "lit up" with Nuvo Glitter Drops, Blue Lagoon, Emerald City and Sherbert Shimmer. While the drops were drying I moved on to the sentiment. From the same set, I stamped the sentiment in Versamark on white glossy cardstock and then heat embossed with Black Detail. I hand cut it out into a fish tail banner and sponged on some Memento Summer Sky. This was attached with Foam Squares.


The snow people were added to the scene with Tear-ific Tape at the bottom and then popped up at the heads with Foam Squares. Dimensional Glue was then brushed on at their feet ....


... and Diamond Dust was then applied.


The card front was layered to black cardstock and then to a white card base to finish.

I'd like to join in the following Challenges with this card:
Aurora Wings Challenge #41 Winter Wonderland
The Cutie Pie Challenge Blog #106 A Day in the Snow
Lawnscaping Challenge #143: Let it Snow
Make My Monday Challenge #36: Show me a Snowman
Simon Says Stamp: Let it Snow


Thanks for stopping by. Hope you've enjoyed my share with you today?

Till next time,

Big warm hugs,

Shona

Thursday, December 8, 2016

WISHING EWE A HAPPY VALENTINE'S DAY!

Good morning to Ewe!

Today, I'm jumping ahead to 2017, with this fun little set from the December Reveal, Will Ewe be Mine Set 813, to wish the recipient a Happy Valentine's Day.


I n"ewe" right away that I wanted these little lambs to be fluffy, and what better way to do that than with some fun Snow White flocking! Did you know you can color your flocking? Just dab a Copic marker using the side of the nib and the color transfers nicely on to the flocking. If you are doing larger areas - you can use a dauber. I used the marker for the inside of the little lambs' ears.

So to begin, I stuck a piece of 2 1/2" Tear-ific Tape to a piece of white cardstock. I took off the protective backing and added the Snow White Flocking to the sticky surface and burnished it in well with my finger tool. Once I was happy with the coverage, I stamped the image in Memento Tuxedo Black directly on top of the flocking. I then stamped the image on black cardstock in Versamark and heat embossed with White Detail.


After coloring in the lambs' ears, I fussy cut the two white lambs on the left and right so that I could pop them up along side the little black sheep.


I covered the silver brads in Versamark and then dipped them in the Red Apple embossing powder and heat set them.


Using a Versamarker Pen, I added a little embossing ink to the inside of the black sheep's ears and heat embossed with Petal Pink.


The white sheep were then adhered on top of the black version and I used a needle with silver thread to make the heart rope, before adding all the little hearts to the image.


Dimensional Glue was used to add the googly eyes. The red background was die cut with Lifestyle Crafts Nesting Scallop Rectangles before being embossed with the Darice Hearts embossing folder. This was then layered over the image then layered on white cardstock.


The sentiment was stamped on red cardstock in Versamark and then heat embossed  with Black Detail, this was also cut out using one of the smaller Lifestyle Crafts Rectangles. A piece of red and white gingham ribbon was attached to the back of the sentiment and this was popped up with Foam Squares at the base of the card.


The ribbon was attached to the back of the card front before being layered to the black card base to finish.

I'd like to join in the following Challenge with my card today:
World Wide Open Design Team Challenge: 15th November - Anything Goes


I hope "ewe've" enjoyed my share today!

Big Hugs,

Shona