Tuesday, March 31, 2015

SPARKLE N SPRINKLE'S APRIL 1ST REVEAL

Hi there, and welcome to Sparkle N Sprinkle's April 1, 2015 Reveal. I'm first up on the hop this month, and getting rather excited about the upcoming Spring season - when everything starts to bloom - I couldn't resist using the Spring Window Set 704 for my reveal card. 


This month we have FOUR new stamp sets to share with you and these sets are 20% off their regular price, until April 3rd.  All the new reveal sets are available on Cling Mounted Rubber and as a digital image.  Friendship Flowers #702 is the stamp set featured in  This Month's Technique Video.

The sets are:


Get Well Friends #701   (digi version DIGI701)
Friendship Flowers #702   (digi version DIGI702)
Old Well #703  (digi version DIGI703)
Spring Window #704   (digi version DIGI704)


On April 3rd,  one Grand Prize Winner will be selected from the comments left on the designers' blogs listed below.  The Grand Prize Winner will receive
all FOUR of the new rubber stamp sets (or digi sets, if you prefer)


The winner of the blog hop will be announced on April 3 on Facebook, the SNS blog, and on our blogs.  In addition to our regular designers, we are happy to introduce you to two of our new Guest Designers.  Diane and Ashley will be the Guest Designers for the months of April, May, and June.  This month's Blog Hop order is:

(Tip: if you have a problem with a particular link, try clicking on the person's blog title to send you to their Home page.)

Don't forget to leave a comment with each Designer to be eligible for the Grand Prize.  We love reading your comments and hope we have inspired you as well.  If you absolutely can not leave a comment for some reason, please email icinganne@yahoo.com with your comment and the name of the blog or Designer you are commenting about.

~~~~~~~~~

The new SNS Creative Challenges also begins today, with lots of prizes and recognition badges.  The theme is always Anything Goes using Loose Glitter, Embossing Powder, and or Flock.
~~~~~~~~~
I loved the "Spring Window" image, so I decided to use the image from the prospective of looking out of "my window" from across the street.

The image was stamped in Memento Tuxedo Black Ink on white cardstock and was colored using the following Copics: E11, E13, E25, E33, E35, R22, YR24, W-1 and W-3. The vase was colored using a Versamarker Pen and was then heat embossed with Verdigris. The Sakura Glue Pen was applied to the flowers in the vase and then I applied Pink Spirit Sparkle N Soft. The glass panes were achieved by applying the Versamarker Pen again and then were heat embossed with Clear Detail. I added Dimensional Glue to the tree flowers and left it to dry to give the flowers some shiny dimension.


I used a Spellbinders window die, which includes the curtains and the valance in the set.  I cut the window frame from beige cardstock and then distressed it with Memento Cantaloupe, Desert Sand and Rich Cocoa. The curtains and valance were made by applying a piece of Super Adhesive Sheet to the beige cardstock and running those through an embossing machine. I then removed the protective backing and applied Sparkling Sands Sparkle N Soft for a velvety feel for the fabric. I cut the frame from a piece of designer paper, which looked like wallpaper, and then placed the window frame in the die cut spot and taped them together from the back. The curtains were layered on top with dimensional dots. I tied little brown wool bows for the curtain tie-backs.


The window frame had an arch at the top, so left little room for the sentiment from the set. I set the sentiment on an acrylic block and made it curve before stamping it on beige cardstock in Versamark ink. It was then heat embossed with Sienna, one of my favorite Tuscan embossing powdersI cut out the saying using the Spellbinders Classic Ovals Large die, cutting above and  below the sentiment.  Distressed with some Desert Sand ink again, it was then added behind the window valance to mimic the arched top of the window frame.


Hope you've enjoyed the start to this month's Reveal Blog Hop. Next up is Diane - one of our new Guest Designers. Leave a comment on all eight blogs to be eligible to win all four stamp sets.  I wonder which Designer's blog contains the Grand Prize this month?

Till next time,

Springtime hugs,

Shona

Sunday, March 29, 2015

BENDY COFFEE!

Hi there, 

It's been a while since I last blogged.  I've been busy with College Spring Break for Gillian which ended up as a very fun and impromptu mother-daughter trip to New Orleans for five days! A funeral of a very dear friend in Washington D.C. last week and now Calum's Spring Break this week and so trying to get a few things taken care of before we head back to D.C. and Virginia this week. Today I'm sharing another coffee themed creation, from the March Reveal sets. I used two of the new sets on my card:  Coffee Shoppe Set 695 and Coffee Talks Set 700.


I decided to give the Bendy Card another try. I stamped the Coffee Shoppe on watercolor cardstock in black StazOn and used watercolor crayons and an aquabrush to color the scene. The girls at the table were stamped twice on watercolor paper and also colored with crayons and the waterbrush. 


One version was cut to just above the stools to become the left side of the bendy card. The girls and the table were fussy cut from the 2nd stamped image and were attached on top of the stools. The sentiment was stamped in Versamark and heat embossed with Black Detail.


Hope you've enjoyed your visit today. 

Stop by again on Wednesday, when we will be revealing our new April sets.

Hope to see you then!

Shona

Friday, March 13, 2015

SHARING YOUR SORROW

Hi everyone,

Well, I'm back quickly because unfortunately I have a sympathy card to share. Our family friend of 30 years, our softball coach - when David and I first met and "Uncle" Tommy to the kids, passed away rather unexpectedly this week. It's taken me a few days to get over the shock and put "ink" to "paper". Tommy was very connected to the Irish community in D.C. and so I wanted to keep the card in the green family in his honor. So out came the Brusho Crystals again!


I spritzed normal white cardstock with water and then sprinkled the paper with Yellow, Leaf Green and Emerald Green Brusho Crystals. I chased them around the paper with my heat gun until it was dried. (Not quite sure where the random pink spots came from?) So now what? It was a pretty background, but you know I can't leave well enough alone, and I had no idea in what direction this card was going.

I cut out the Die-Namics Daisy Bunch (love this die) from a lime green and yellow cardstock, saving the negative pieces of the die. One of the negatives was temporarily taped to the brusho surface after applying lots of anti-static dust. I used a dauber with Versamark to pounce down through the negative die. I lifted up the "stencil" and applied Black Detail embossing powder, which was then heated.


I covered that entire piece with Versamark and heat embossed with Clear Detail, then applied a little Magic Speckle on top of that, which gave it a marbled look. (Wish I had taken my camera upstairs with me!) It looked too dark, so I decided to put the die back over the top of the black "image" and cut it from the brusho piece. I used it in the inside of the card instead:


So then I took the yellow die cut piece and placed it back in the space where the black version had been. It was taped down from the back. I cut all the flowers off the green version and glued it on top of the yellow version. Using a Sakura Glue Pen I added Spirited Green Glitter to the stems and leaves and then Sunny Daze Glitter to the petals and buds.

I used Spellbinders Classic Scalloped Circles Large to cut out the center piece. The Grand Scalloped Circles was used to cut the black base card (leaving a fold uncut at the top of the circle). I die cut the same size Grand circle for the outside frame, from the brusho panel and glued that to the black base. I turned the front circle piece slightly so that the scallops had the black showing behind. It was then attached with Dimensional Foam.

h

The sentiment from Sympathy Set 579 was stamped in Versamark onto yellow cardstock and then heat embossed with Pine (one of the awesome Tuscan colors, which come in various colors and are detailed powders so are great for sentiments, when you don't want to use black). I fussy cut the sentiment and sponged it with a little Memento Pear Tart ink before attaching it to the card with dimensionals and tape.


I liked the inlay look. It gives dimension to the card without adding the bulk.

I'd like to enter this card in the following challenges:
Creatalicious Challenges #72: No square or rectangle cards
Scrapy Land Challenge #13: Use brand of die that Scrapy Land Sells

Here's a photo of Tommy giving me flowers as I arrived at the church before our wedding in Scotland. I think I remember he was crying more than I was!


I hope Wava, Tommy's wife will like the card. We're all going to miss this really special man. 

Hugs,

Shona

Thursday, March 12, 2015

NEVER UNDERESTIMATE BEING CAFFEINATED!

Hi there,

Here today sharing another caffeinated card! There were four awesome coffee themed sets released by Sparkle N Sprinkle this month.

Coffee Shoppe Set 695
Coffee Talks Set 700
Coffee Time Set 694
Espresso Yourself  Set 699

My card today uses the Espresso Yourself Set 699, with the sentiment from Coffee Shoppe Set 695.


I stamped the coffee cup in Versamark twice on pink cardstock and twice on brown cardstock and heat embossed the images with Pebbled Copper. The entire cups were then fussy cut from the brown and then just the holders were cut from the pink versions. The holders were taped down to the cups. I cut a little slit in the lids for the coffee stirrers.


The background was made by running pink cardstock through the Sizzix Embossing Folder "On the Go" which had been previously inked with Memento Rich Cocoa.

The sentiment was stamped in Versamark and heat embossed with Teddy Brown and was cut and embossed with Spellbinders Ribbon Tag Trio Two. The tag was attached to the background with a piece of organdy ribbon, sponged with Rich Cocoa, with a Dimensional Dot behind it, so I could tuck one of the cups under it.


The background was then centered on the white card base, edged with 1/4" Tear-ific Tape.  Sparkle N Soft Sparkling Coffee  (how appropriate is that?) was then applied to the exposed sticky edge. The cups were positioned and stuck down with Dimensional Dots as shown.


I'm really loving these new coffee themed sets. Hope I've inspired you to take a look at them if you haven't already done so.

Thanks for stopping by today.

Shona

Friday, March 6, 2015

MUM'S IN THE PINK!

Time to get my Mum's Mother's Day card in the mail, as it is next Sunday in the UK. I started by sprinkling some Scarlet and Brilliant Red Brusho crystals on a wet glossy white piece of cardstock. .... then pink seemed to evolve! 


I stamped the lilies three times in StazOn black and cut them out using my Brother Scan N Cut (sure beats all that fussy cutting!) I then used three different shades of pink crayons and an aqua pen and colored the lilies. After they were dry, I applied Versamark all over them and heat embossed with Clear Detail. This gave them a lovely shiny look. I used a Sakura Glue Pen to apply Cyclamen Glitter to the petals and then some Dimensional Glue was used to add pink glass beads to the flower centers.


The Brusho background was cut with Spellbinders Crisscross die. I die cut the pink cardstock  with Spellbinders Branching Out. The lattice was attached to the back of the frame along with a piece of wide organdy ribbon before being layered to a piece of light pink cardstock edged with 3/4" Tear-ific Tape. Bubble Gum Glitter was applied to the sticky edges.


The two small heart brads on the tag were heat embossed with Raspberry Tart. The two glass heart buttons were heat embossed with Princess Rose. The dark pink button was already that color. The sentiment, from My Rose Garden Set was stamped in Versamark and then heat embossed with Raspberry Tart. It was cut and embossed with Spellbinders Grommet Tags, then sponged with Memento Rose Bud and attached to the background with the brads. The background was then attached to a white card base.


The white organdy ribbon was sponged with Memento Angel Pink before being made into a bow and threaded through the buttons. It is all attached to the card front with Dimensional Foam.

The lilies were also attached with Dimensional Dots.


Well, that's it for today. Early Happy Mother's Day to all you Brits!

I'd like to enter this card in the following challenges:
DRS #164: Use Buttons
In the Pink: For a Special Lady
Scrap & Craft Inspiration: Challenge #4 - Mother's Day
Craft Stamper: Take It Make It Challenge
Scrapy Land: Challenge 13 - use any brand of die that Scrapy Land sells 

Wednesday, March 4, 2015

ONE FOR THE GUYS!

Hi there and welcome to yet another "SNOW DAY"!!!!!

OK - I am so done with this "white nonsense", along with so many other folks in the North East. I'm dog-sitting for my bowling buddy for a couple of weeks, while she visits her Mom in South Africa. The poor little dog can't even find grass to pee on! ...and to make it worse I forgot to put her jacket on for this photo shoot! The photo's blurred because she was shaking.


The grass is a foot under her! I should have made a spot for her and left a tarp over it when it was snowing - but I didn't think that far ahead!! Oh well, we'll just muddle through, right? It could be worse - I could be living in Boston!

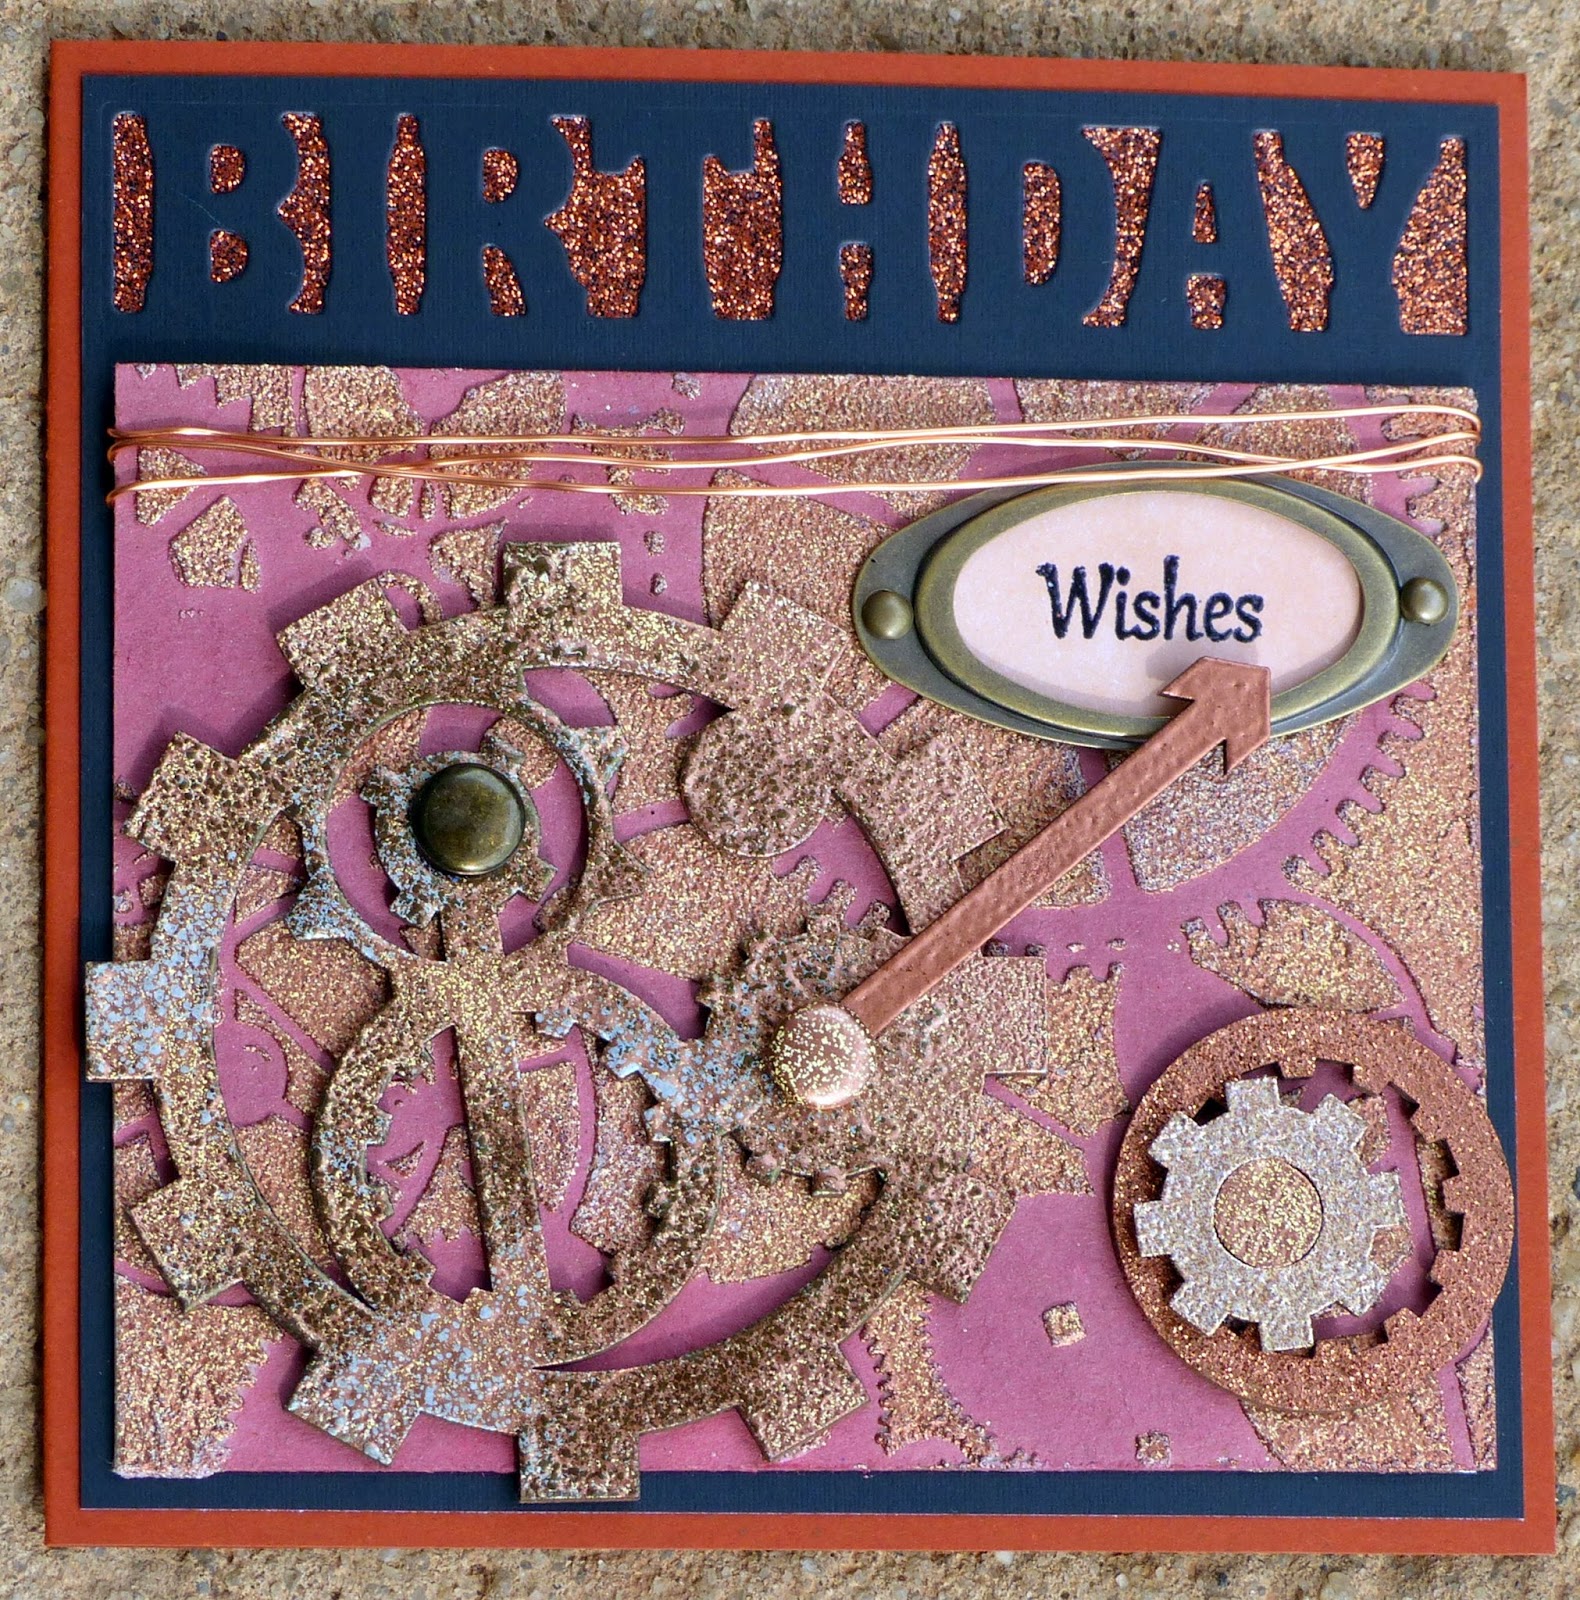
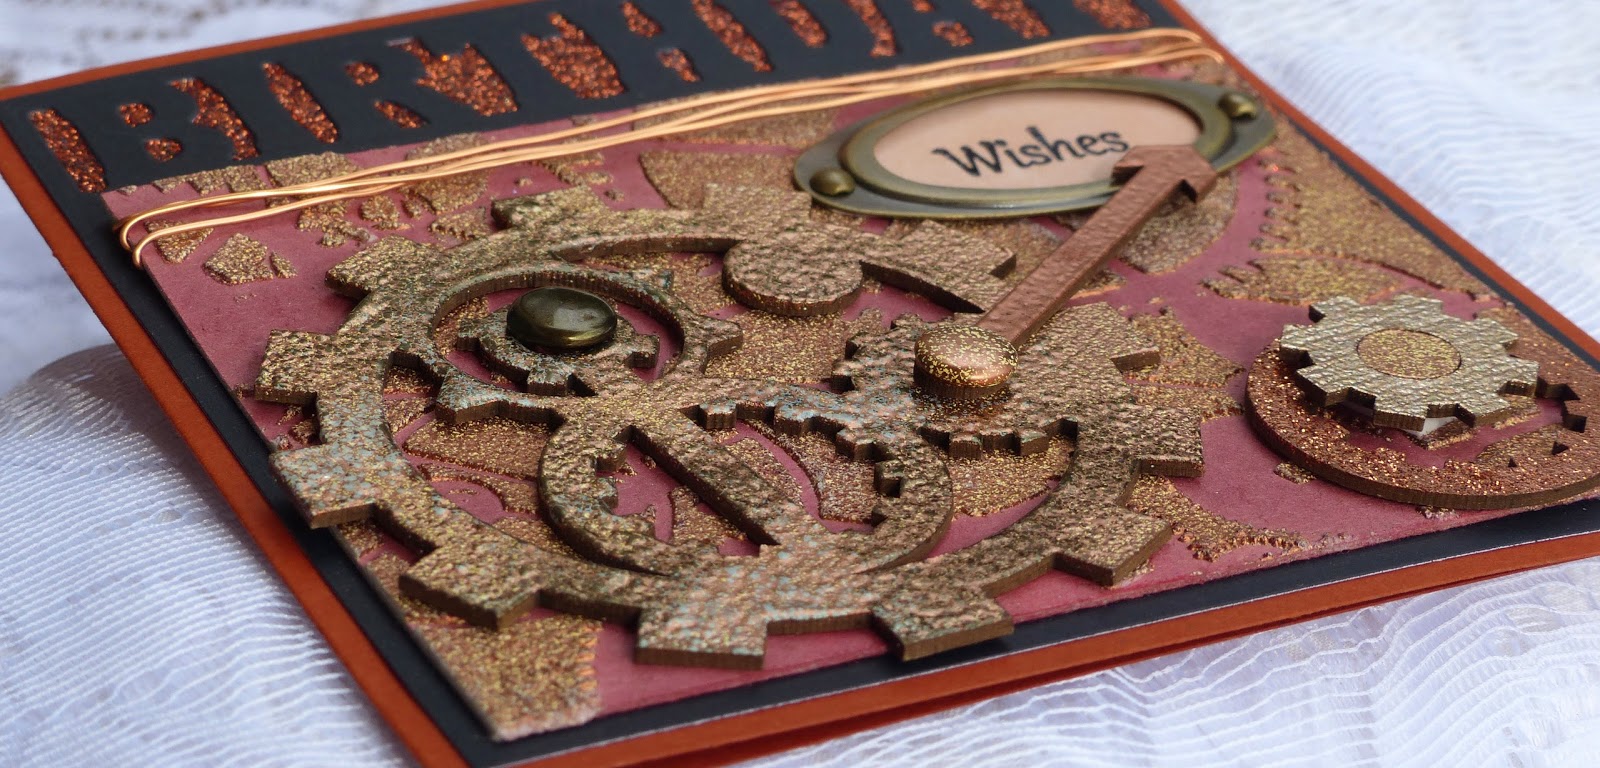
Well at least it gives me an excuse to just stamp. My share today is for a dear neighbor - Chet. He is the neighborhood fix-it angel! I was still in my stencil and embossing paste mode when I made this. So I had a masculine background to use.


I had made the background using the TCW Mini Gears stencil, white embossing paste and Sparkle N Sprinkle Pebbled Copper embossing powder. The background is chipboard which had first been sponged with Memento Rhubarb Stalk. The cogs and arrow are all from Blue Fern (Widget works and Industrial Gears). The brads were heat embossed with the Pebbled Copper and Blackened Bronze


The big cog was covered with Pebbled Copper and then I added a little Versamark ink and heat embossed again with a little Magic Speckle. This is an awesome embossing powder. - it gives a mosaic effect, and with the metallic colors it becomes, well let's just say, "well worn".

The other chipboard pieces were embossed with various metallic powders: Copper, Copper Dreams and Antiquities.


The Birthday Cut Out is from Die-Versions - yes I know I've been using it a lot - hoping they come out with a "Happy"! I cut it from a 5" x 5" piece of black cardstock. I applied a strip of 3/4" Tear-ific Tape behind the sentiment and then applied Embers Glitter to the front.


The sentiment was stamped in Versamark and then heat embossed with Black Detail. A little Desert Sand was sponged over the sentiment before I encased it with the hardware, which was from an old batch of Stampin' Up Hardware.

Well you know you have to use ribbon or lace for a girl card, right? What do you do for a guy?  I found some copper wire and wrapped it around the card front before adding it to the rust card base. Thought that it just finished off my card nicely. Happy Birthday Chet, dear friend!


Hope you've enjoyed my share with you today. 

I'd like to enter this card in the following challenges:

Stamping Sensations - One for the Guys!
Scrapy Land - Use a die cut that Scrapy Land sells

Hopefully next time I post it will be more Spring-like!

Hugs,

Shona

Tuesday, March 3, 2015

Woo hoo - Caliboo!

I'm so happy that someone won from my blog this month - Congratulations Caliboo! Great win too - seven sets!! Now you've got a lot of playing to do!

Thanks to everyone who participated in this month's release.  Hope you'll join us next month too - so much rubbah!

This month SEVEN new rubber stamp sets were introduced.   The sets are:


Coffee Time #694   (digi version DIGI694)
Coffee Shoppe #695   (digi version DIGI695)
Best Friends Forever #696  (digi version DIGI696)
Mustache #697   (digi version DIGI697)
Glasses #698  (digi version DIGI698)
Expresso Yourself #699  (digi version DIGI699)
Coffee Talks #700  (digi version DIGI700)

 One Grand Prize Winner was selected from the comments left on the participating Designers' blogs.  

The Grand Prize Winner will receive 
 each of the New Reveal rubber stamp sets (or digi versions, if preferred)


Congratulations goes to 
Caliboo

who said...
The brick work is awesome! Wonderful job incorporating parts of 3 sets into 1 card. So many different techniques too. Great card.


Her comment came from Shona's blog.


Please email Anne at icinganne@yahoo.com to claim your prize.  Be sure to include your mailing address and phone number (if you are an international winner).


Hugs from The Sparkle Team,


Sunday, March 1, 2015

BRIGHT BRUSHO WISHES!

If you are here for the Sparkle N Sprinkle March 1st Reveal, click here!

Hi there,

Oh my gosh! What fun! These Brusho Crystal Colors are to "dye" for!!


If you've stopped by before, then you know I rarely make a card without my own background!  Many different techniques get experimented with. Last month it was mostly Embossing Pastes and Stencils, this month I think it may be Brusho Crystals and "more". So be prepared there are probably more to come!

All I did was take a piece of watercolor cardstock and spritzed it heavily with water. Three Brusho colors (Orange, Lemon and Brilliant Red) were sprinkled on top - then you just watch it make a pattern right before your eyes! I also "puffed" at the paint with my Color Spritzer (which I may add doesn't like my Copics) so I'm glad I've finally found another use for it! After the background was dried, (it's apparently best to let it air dry for more vivid coloring - but just for the record I used my heat gun), I then applied Versamark all over and heat embossed with Clear Detail. What a bright and shiny effect it achieved.


The two dies were recent purchases from Scrapy Land, the Die-Namites Daisy Bunch, and Fall Breeze. I cut them out from black cardstock and gave them two coatings of Black Detail Embossing powder.


The sentiment (from Stamp Set 520: Flourishes 2) was applied to glossy white cardstock and heat embossed again with Black Detail. The sentiment was then cut and embossed with Spellbinders Ribbon Banners and was sponged with Memento Dandelion ink before the die was removed. The Fall Breeze was cut so that there were two pieces between which the Daisy Bunch was placed behind the sentiment banner. It was attached to the card front with Dimensional Dots.

Layered to black, then yellow and finally to a black card base, to finish off a rather CAS card!

I'd like to enter this card in the Scrapy Land Challenge # 12: SPLAT! 

Hope you've enjoyed my quick share - will be back soon - probably with more Brushos!

Hugs,

Shona