Thursday, March 21, 2013

LET'S DOODLE!

Well here we are, the second day of Spring - and it's snowing again!  I hope it's not going to come to much, as I've got too much to do today, most of which involves being out and about in the car.

I just got my Vamp Stamp News e-article yesterday. I had four cards published, so I thought I'd share them on my post this morning.

The challenge for March was Doodling, Hand-lettering and Stamps.  I really wasn't sure what to do here, but I played around with a couple of ideas and came up with the following cards:


You are supposed to use at least one stamped image in each of your cards.  So here I chose to start by stamping the three different butterflies from Sparkle N Sprinkle's Fancy Butterflies Set 437.  Then I just started playing!  

For the next one I thought I'd try doodling on the inside of the image.  Here is my attempt at that:


Next, I tried doodling with different colored pens.  I used outline stickers to doodle with!


... and for the last one .... I "cheated" and used  pre-made stamps from the Sparkle N Sprinkle set 463 - Zendoodle Flowers.


I stamped on top of Cloud Nine velvet glitter for the main image in this one and colored with Copics.

If you want more full instructions of any of the cards, or take look at the informative e.article you can see it here

Thanks for stopping by today,

'Till next time!

Shona

Wednesday, March 13, 2013

SPARKLE N SPRINKLE FAVORITE TECHNIQUE BLOG HOP


OK, fess up - who out there only has one favorite technique?  It would be impossible for me to narrow it down to just one, I try different techniques all the time - some work out well ... and some, of course, not so well!  One of my most favorite moments is when I find a new technique and that is what I am going to share with you today.

Hopefully you have arrived here from the talented Gita's blog. If you haven't then I suggest that you go back to the start of the hop at Sparkle N Sprinkle, so you can get in the running for all the wonderful prizes that you can win. Remember too, that you have to comment on each of the designer's blogs along the way to be eligible to win the goodies.

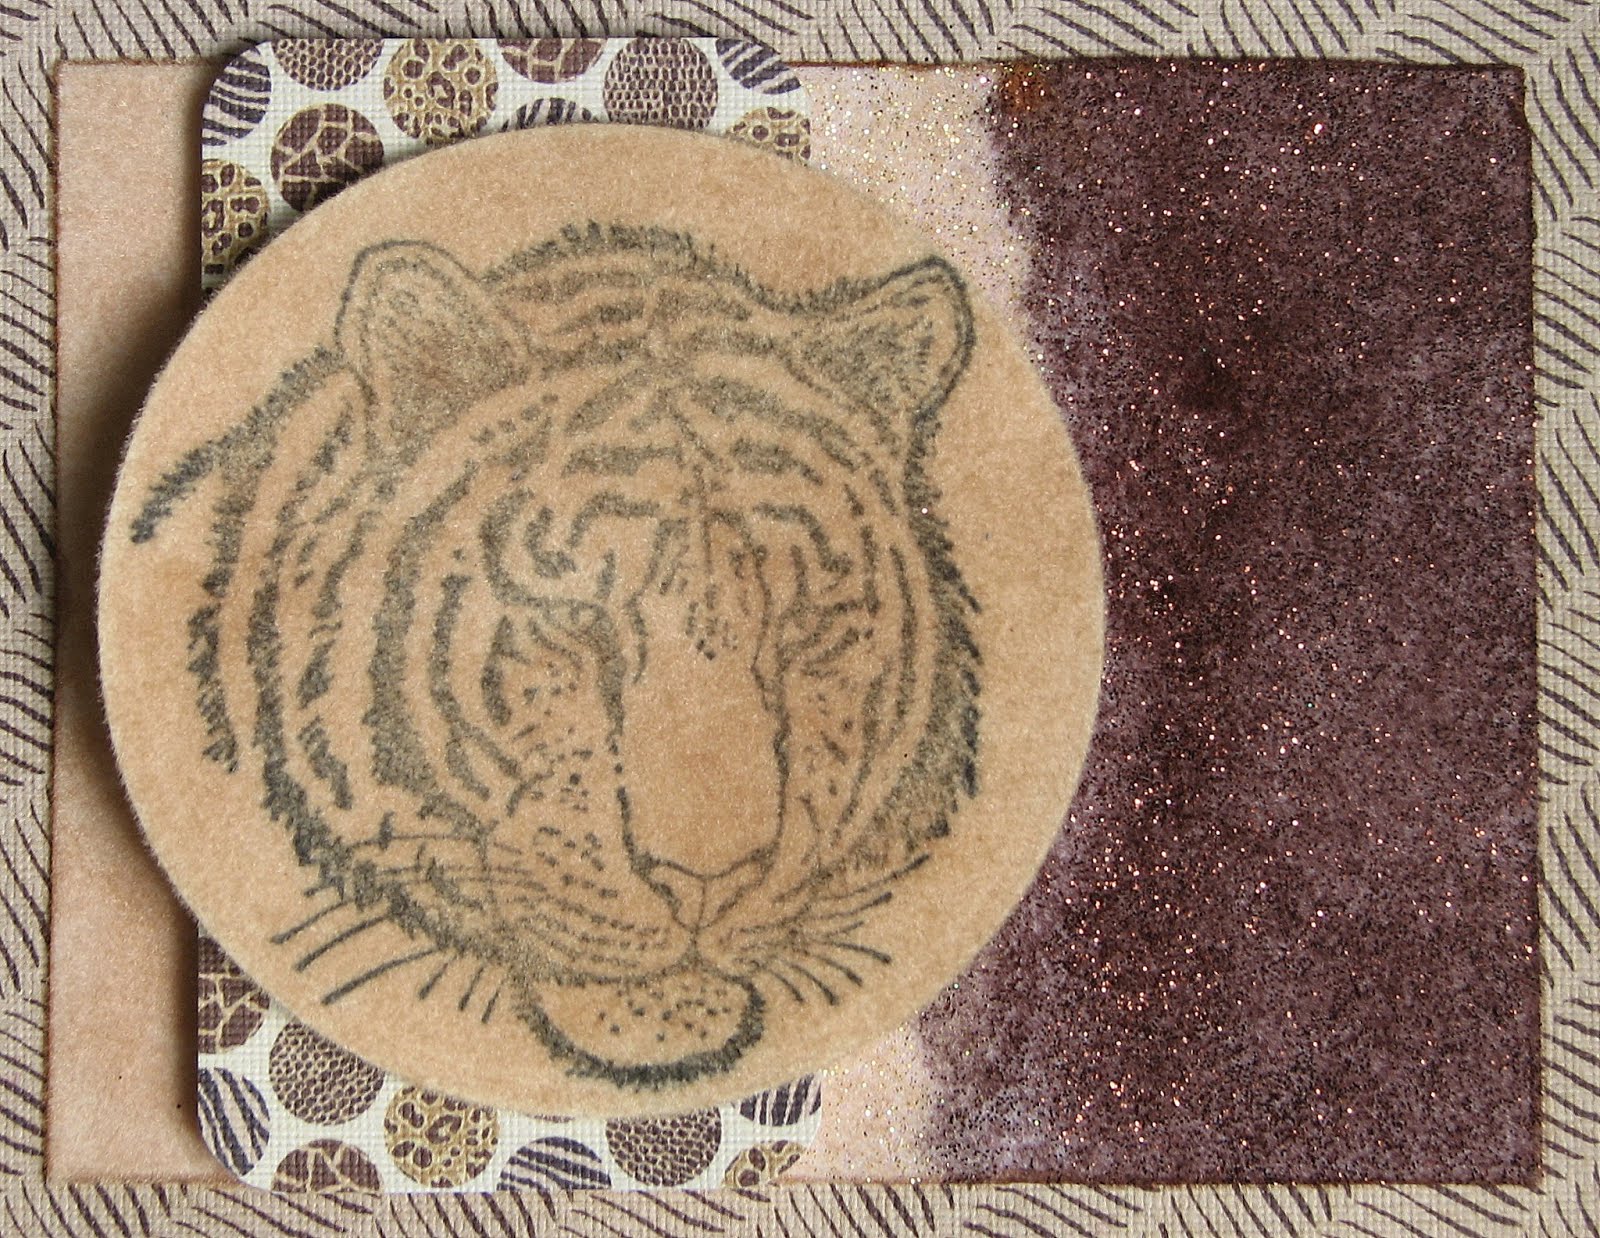
A couple of weeks ago, I was making a masculine birthday card and I had chosen to work with the Wild Cats set.  I had stamped the Tiger image in Memento black ink on top of the Buff flocking, and it looked OK, but I thought, I wonder if I could give him some green eyes?  So I tried with a Copic marker and guess what?  It worked!  This immediately got me to thinking, .... then trying ...... and then Eureka!

You can find a complete Tutorial on the Sparkle N Sprinkle website, but today I will share a couple of pics. and notes, to hopefully whet your appetite.

Caillie from Set 231 - Kitty Trio will be modelling our technique today!

Apply 2 1/2" Tear-ific Tape to a piece of white cardstock, (if the image is too large for the tape, then use Super Adhesive Sheets) remove protective backing and apply Snow White flocking to cover exposed tape. Burnish in well with your finger.  Stamp your image in Memento Tuxedo Black (you will be coloring with Copics - so you need to use Memento). Take a Copic marker of your choice and delicately dab the color onto the flocking.  You don't go in circles like you would on cardstock, or you will dig a hole in the flocking!


Continue, with different colors of markers, until you are done.


Just a couple of pointers:

1) If you don't like a color that you have used, you can go over with another color and change it.  Just remember - "dab" the color on - do not overwork it.

2) If you go outside the lines or you get the ink where you didn't mean to - you can remove it by using the blender.  The Copics work on the flocking, just as they do on cardstock.


...... and here is the finished card - Callie on the Cat Walk!


So that's all there is to it!  

Next you need to try just adding color to colored flockings!  Gives the image a more realistic look.  See the difference between the two tiger cards below:


Finally, let me leave you with a couple more samples. Leo was done with Snow White flocking, while the Puppies were shaded and highlighted over Buff and Elephant Gray flocking. If you click on any of the photos it will take you to the card and full instructions in the Sparkle N Sprinkle Gallery.


Well that's it for today from me.  I hope you'll give this a go.  Again, if you need it, you can find a full tutorial here at the Sparkle N Sprinkle Website.

Now after you've left me a comment, it's time to jump on over to see what fun technique, fellow designer, Anne has up her sleeve.  Enjoy the rest of the hop and have a great day!

Shona

Friday, March 8, 2013

THIS AND THAT

Hi there,

Another snowy delayed opening this morning!  Wish I had taken the opportunity of another photo!!  It was very pretty!

Gillian, (when I crept in at 5.20am to tell her, so she didn't have to get up so early to shower) was already awake and just about out of bed and said -"I hate snow!!"  She had a singing invitational with her school choir and she thought they were going to have to miss it.  But they got there to do their sing thing - so everything ended up fine.

Calum, my 12 year old, who also usually sleeps in, was down in the kitchen at 6.30am asking why he didn't get woken up!

Anyway, after all the early morning kerfuffle, I managed to get a few stamping things taken care off, and got a few extras projects taken care of too.  Our eldest, Struan comes home from uni. next Saturday (YEAHHH!)  for a couple of weeks, and I really want to keep those two weeks as free as possible.

I am also trying to clear up my "scraps", so this turned out to be a good exercise for that:

The first one, uses a brass stencil (which I am still trying to find out if is still around) with Velvet Glitters from Sparkle N Sprinkle.  I had an embossed piece of Forest Branches lying around - figured that could be seaweed! A frame made from flocking, and a little Happy Birthday saying and I was done:


Still with the fish theme, I had a couple of purple fish and thought I'd mix it up a little:

A little positive and negative - this way and that way?


Oh yeah, and use a marker for the saying - that way you can start "Wishes" with an "F"!

Now the third card, was much more rehearsed!  Actually I cased it from April's Technique Tuesday from a while back. I had started it back then and hadn't got to finishing it.  I kept it monochromatic (which as you can see was my theme here).

Loved how it came out:


Thanks for the inspiration April!

'Till next time!

Shona

Friday, March 1, 2013

SNS MARCH CREATIVE CHALLENGE

"IT'S ALL ABOUT THE GLITTER!"

Hi there, 

Welcome to March and the latest SNS Creative Challenge.  This month's challenge is to use glitter anywhere in your project!  Now, who out there has a problem with that? 

I was going to use my old faithful - Cloud Nine Velvet Glitter and color on it, but then changed my mind to go with an old technique - Glittered Lace Background - using some of the new Velvet Glitters that we have in the store.

Here is what I came up with:


There is glitter on every aspect of the card!  First I made the background using the Super Adhesive Sheets (SAS02) and a piece of random lace I had sitting around with two of the Velvet Glitters - Frosted Carmine Velvet Glitter and Cloud Nine. Then I covered the purple swirls with brushable glue and Celebration Velvet Glitter. Once I had "glitterfied" the butterfly I covered it with Versamark and heat embossed with Sparkle Embossing Powder.

Of course, in real life, the lace background is far more sparkly - but it still feels like fabric!  

Here's an up close and personal:


Here are the full instructions in case you need them.

So that's my show and tell for today!  Get the glitter out and get sparkly!  You have a whole month to join in the challenge. I look forward to seeing what you come up with.

'Till then,

Sparkle on!

Shona