Friday, February 28, 2014

SPARKLE N SPRINKLE'S MARCH 1ST REVEAL

Hi there, and welcome to the Sparkle N Sprinkle March 1st Reveal. Today we have five new stamp sets being revealed. I particularly gravitated towards the Iris Frame set this month, as it boasts three versatile sentiments, and being "away" from my home, this one will come in very useful for me!:


Two of the other sets are perfect for Christmas.
Many of our customers said they promise themselves to make Christmas cards a little bit each month, all year long, but they fail to find the time. So this month's technique kit uses the pretty Red Cardinal drawn by Rosiland Solomon.

The Winter Cardinal stamp set is available by itself on line.
It is also included in Jazzy Jill's Technique Video for the month.

The first of the month also means a new challenge at SNS Creative Challenges where the theme is always
"Anything Goes with Loose Glitter, Embossing Powder and/or Flocking."

Here are the four other stamp sets available this month:

Born to Shop #554
Winter Cardinal #518

Crystal Medallion #531
Springtime Spunky #537
A little something for everyone!


Five Winners (one for each new stamp set) will be selected by Random.org during the Designers Mystery Party. Winners will also get to choose one Glitter and one Embossing Powder to go with their new stamp set.

How the Mystery Party works:

On Five of the participating blogs below, a Commenter will be selected to receive the prize
No one knows who the five Mystery Designers are, so you may wish to visit each blog to leave a comment.

The winners will be announced on March 3 on Facebook, the SNS blog, and on our blogs:

April Williams
Anne Temple
Anita Scroggins
Donna Ellis
Shona Erlenborn (that's me)
Eret Pank
Mayra Duran-Hernandez
Emmy van den Heuvel
Belinda Shupe
Marie Berquist
Jazzy Jill

Each of the five stamp sets are available at 20% off.
Promotion valid through March 3. 
You may also phone the SNS Shoppe to place your orders.


So now you have all the necessary details on how to acquire these lovely sets, let me share my card with you. As I said, I really love the sayings in this set:

Iris Frame #532
The other draw for me was the dotted shading, and that was why I thought to make it into a shaker card, using the micro beads. 

For a different look, I stamped the Iris frame on Kraft cardstock in Versamark and heat embossed with my favorite white embossing powder - Belgian Cream. I then took an aqua brush filled with bleach and took out the color from the cardstock from the stems and flowers. I wish I had thought to take a photo, because that alone is a unique look, but I decided to do more!

I took some water color crayons and a Dove Blender Pen to color the image. I added some Dimensional Glue to the yellow stamen to give them a little height.


I cut out the window using an Exacto Knife and stamped my saying in Versamark onto Embossable Acetate, heat embossing with Concord embossing powder. These rich Tuscany powders are the perfect choice for detail embossing. I taped the acetate down to the back of the window and used dimensional tape to create a little well around the window outline.

I thought that the little butterfly brads would be perfect as embellishments so I attached a green one to a slightly lighter piece of card and applied little patches of Dimensional Glue to one of the wings and close by the butterfly (I did this so some beads would remain on these patches and not all fall to the base of the window). I put a teaspoon of micro beads into the well, removed the protective backing of the tape and closed the butterfly and beads inside.

I attached the two other butterflies to the card front and attached it to the indigo card base after scoring the edges.


I hope you've enjoyed my share with you today, and that you will also check out the other designers' blogs. Remember to leave a comment with each of us. Someone has to win these sets - and it could be YOU!

Let me leave you with a sneak peak of one other card that I made with the Born to Shop set. I'll be sharing this one with you in a few days:


Intrigued? Join me next week!  Till then, good luck winning some prizes and remember to enter the Creative Challenge for many other chances to win Sparkle N Sprinkle products!

Hugs, 

Shona


Wednesday, February 26, 2014

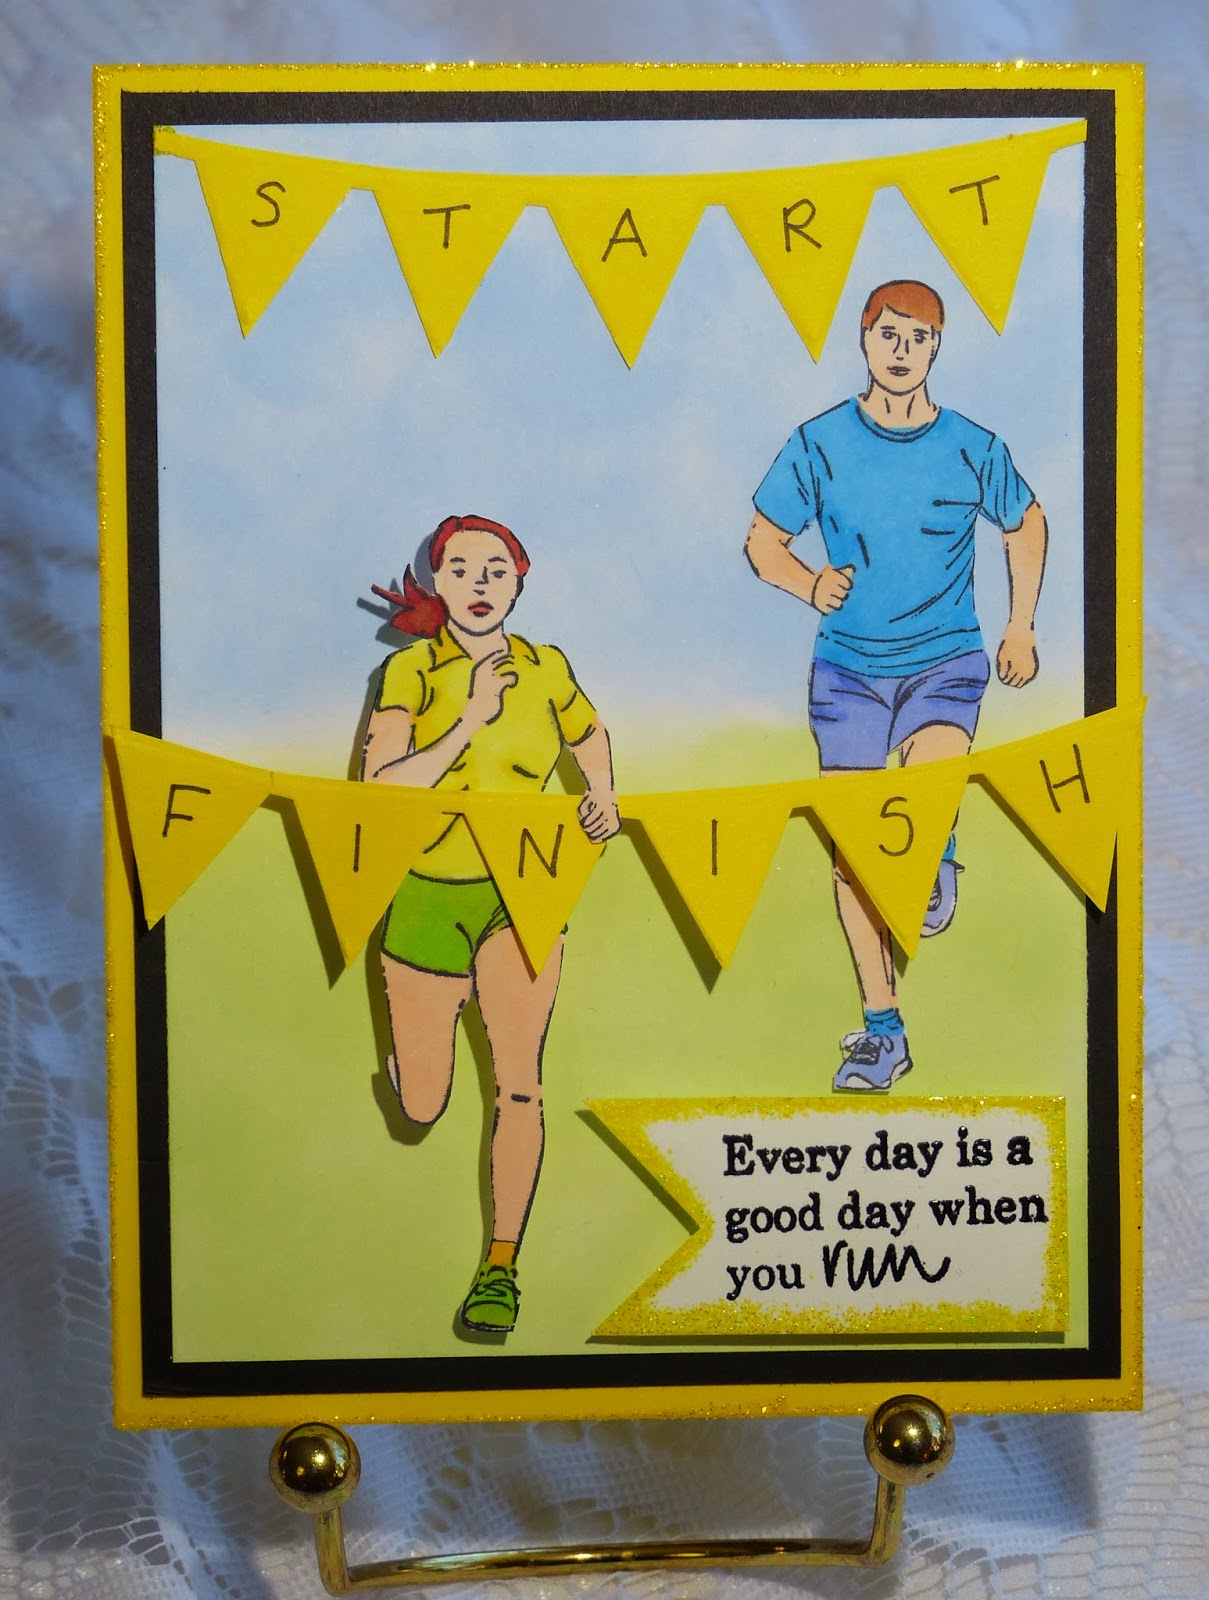
WE'RE OFF AND RUNNING!

Well hello again! I forgot I had another post obligation, so now you get to hear from me one more time before Saturday!! Yeah! I will make it brief!  I have to say today was not a good day, and it took me ages to come up with this card, which I had to completely redo because of all the boo-boos I tried to cover up!! Please tell me that that happens to you too?

Anyway, here is the end result using one of the latest Sparkle N Sprinkle sets 522: Running:


The background was sponged with Memento Summer Sky and New Sprout. I then cut out the embossed buntings from a Darice embossing folder from yellow cardstock and hand-wrote the letters. 

The runners were stamped in Memento black and colored in with Copics. 

The sentiment was stamped with Versamark and after hand-cutting the banner, the edges were distressed with a little Versamark and heat embossed with Dandy Dandelion.

After distressing the yellow base card with the same Dandy Dandelion, the card was assembled as shown.

See you Saturday?

Hugs,

Shona


Tuesday, February 25, 2014

BATHROOM RENOVATIONS USING STAMPING TOOL?

Hi everyone!

I've been noticing lately that a few of my blogging pals have been sharing their home renovation projects. Some are still in the throws of their projects, others are lucky enough to be done with them! I'm so happy to say that I am now one of the latter! 

Our story started with a little water leaking down into the front hallway. Hmmmm? You know how things go - one little thing leads to another (usually much bigger!). The bathrooms upstairs were the originals, and ten years ago we had changed out the sink, vanity and toilet in the master bathroom. The kids' hall bathroom was untouched and was awful, and has been on the to-do-list for a long while. The leak helped speed up the project commencement and of course while the plumbers were in redoing the piping, we decided to knock through the wall and do the master bathroom at the same time.

I'll try to make it brief, though I have hundreds of photos. 

So, here is the first reason for the demolition!


Here is the second: (that's where we looked for the leak - unsuccessfully).


Really attractive right?  Turns out when we did the demolition it was the original - from 1962!  We have the newspaper that came out from behind the walls! (The newspaper was from 1961!)

OK, so let's see how this one looks now:


I did this cute little collage with a clock in the middle of the kids when they were little (just took some of the older photos and had them printed in sepia). I thought it tied in nicely with the rubbed bronze fixtures!

Our master bathroom, though small, was not in quite as bad shape, or so we thought!


When we got to the old shower pan pull up, we found a colony of carpenter ants:


Our pest control guys, arrived in less than an hour to take care of that problem. 

... and so here is the finished product:


My favorite part (besides the rain shower) is the little niche to hold our toothbrushes and David's razor.


OK, so the question of the day is: There was one stamping utensil used in the renovations? 

Can you guess what it was?

One clue .... it was only used in the master bathroom.

.... and the answer is:


Yep, you guessed it - the handy, dandy brayer!! 

Hope you've enjoyed a little peek at our latest home project.

I'll be back on Saturday with the Sparkle N Sprinkle March 1st Reveal, hope you'll stop back then.

Hugs,

Shona

Saturday, February 15, 2014

Beautiful backgrounds made with Flocking and embossing folders


Dry Embossed Flocking Techniques


1. Cut a piece of Super Adhesive Sheet (SAS02) to 5.25" x 4". Remove Protective Backing and apply to cardstock. Trim off edges of extra cardstock (easier than trying to apply directly to same size piece of cardstock).

2a. Remove second protective backing (you can save these backings to cut borders and bunch shapes to be used in future projects) and apply flocking.


2b. Burnish the flocking very well with your finger.


3. Ink the inside of the embossing folder.


4a. Place flocked side face up on other side of folder, and...


4b. Close the inked side of the embossing folder on top of the flocked side.


5a. Run through embossing machine, then take out your flocked background.


5b. Wipe excess ink from folder.


Sample using bamboo embossing folder. Super Adhesive Sheet, Palm Leaf Flocking, Memento Rich Cocoa ink


Animal theme background. Super Adhesive Sheet, Snow White Flocking, Memento Tuxedo Black ink.

This method can also be done using STICKER PAPER (#99558).


The end result is a bit different because sticker paper only has sticky on one side, causing it have a white background, whereas the super adhesive sheets are colorless and transparent, so the color of the cardstock shows through a little, under the flocking. (Prepare your card base by gluing on the Sticker Paper with the protective covering side up. Tear-ific Tape may also be used to adhere the Sticker Paper. When ready to apply flocking, peel off the protective layer).

I have created two samples using the same colors of Flocking and Ink - the first uses Super Adhesive Sheets, the second uses Sticker Paper.
9a. Adhere Super Adhesive Sheet on yellow cardstock. and flocked with Sun Dazzle and folder is inked with Memento Lady Bug Ink.


9b. Flock with Sun Dazzle Sparkle N Soft and prepare embossing folder with Memento Lady Bug Ink.


9c. Finished panel.


10a.  Using Sticker Paper, adhere unsticky part to cardstock, leaving a white sticky-back panel exposed when the protective layer is removed.


10b. Ink embossing folder on one side and place flocked side up facing the ink.


10c. Same pretty effect, but lighter background because flocking powders are semi-opaque, allowing the white background to show through.


9d and 10d. Compare the two panels - Super Adhesive Sheets on the left, and Sticker Paper on the right.


TIPS

1. Flocking can be applied to colored cardstock for an even more opaque look, if necessary.

2. If you are working with more than one color of flocking, you should start with the lightest color.

3. Use a dye-based ink on the folder.  Just wipe ink off with wet cloth (no need for any cleaners or soap).

4. Remember there are two options for each folder - the results differ depending on the side the folder is inked.


Animal Print using 2 colors of flocking: Super Adhesive Sheet, Snow White and Amber Wheat Flocking and Espresso Truffle Ink.

Thursday, February 13, 2014

PANDAS IN THE SNOW!!


Hi all, and welcome to ANOTHER snow day in Martinsville, New Jersey!


This is what I woke up to this morning!  That's my stamping room over THERE! So after shoveling enough room for my neighbor's little 20 year old dog to go potty, I ice-picked my way back up our drive-way! I made a skinny little path to the garage door so that I could go up and put the heat on (there was no way I was getting to it from the side door!) I let it heat up and then ....

after an hour I went back out the side door of the house to this:


Wait a minute, I thought I said I'd already shoveled a path an hour ago?  Oh yes, I did - it's still coming down!! 

So up to the stamping room I went, where I have been experimenting over the last couple of days with some flocked backgrounds. I played for four hours!

I'm not going to share all the samples with you today.  There will be a full tutorial done over at Sparkle N Sprinkle at some point, but I was so excited,  I just had to make one card so that I could show off at least one of these backgrounds for now!

I was in snow mode - OBVIOUSLY! Who wouldn't be after the "fun" winter we've been having? So Panda's came to mind!!!! ... so what better background than bamboo?


What do you think? So easy, with lots of texture. A Super Adhesive Sheet, an embossing folder, some flocking and a dye ink pad and that's all there is to it!

Here is what you do. Take the Super Adhesive Sheet and cut it to 5 1/4" x 4", remove the protective backing and add it to cream cardstock. Cut off the edges of the cardstock, that's easier than trying to fit the SAS onto the specific cut piece of cardstock. 

Remove the protective backing and add Palm Leaf flocking to the entire piece. Ink the inside of the Darice embossing folder with Memento Rich Cocoa Ink pad:


Close the inked side over the flocked side and run it through an embossing machine:


So much texture! OK, then I got totally carried away and made seven other backgrounds, before I ran out of Super Adhesive Sheets!  But THERE'S MORE - you can do the same thing with Sparkle N Sprinkle's Sticker Paper! However, Sticker Paper is not double-sided, so one thing that you cannot do is stick it down to a colored card base, before flocking. I mean, you can do it, but the color won't show under the flocking. 

Confused? (I know I am!) Here are a couple of examples:

The one on the left is done with Super Adhesive Sheet on yellow cardstock, with Sun Dazzle Flocking and Memento Lady Bug ink. The one on the left is done with Sticker Paper, taped down to white cardstock, but with the same flocking and ink:


The left hand side is much more vivid, but actually in this instance - I happened to like the right hand side (the Sticker Paper) version, because of the side of the embossing folder inked!  Did you notice that they are positive and negative? Yep, by changing the side of the folder you ink on - changes the outcome!! See the endless possibilities with this technique?

OK? .... and now back to pandas! 

I used Sparkle N Sprinkle Sets 465: Panda's Birthday to compliment my bamboo background.


I wanted to let the background really be the focus of this card, so tried to keep everything else minimal. Just stamped the pandas with Memento black ink and colored the bamboo with Copics, adding a little Green Iris glitter to the bamboo. The handmade ribbon tag was stamped with Versamark and heat embossed with Black Detail embossing powder. A little Memento Bamboo Leaves ink was added to the edges of the tag. The image and tag were both attached to the background with dimensionals and then layered to a black card base. 

So where are the pandas in the snow? Funny you should ask! 


Till next time, keep warm,

Hugs,

Shona

Thursday, February 6, 2014

ICE HOCKEY ANYONE?

Hi everyone, so is it cold enough for you?  I'd like to share something in-keeping with the frigid temperatures we've been experiencing lately here in New Jersey. With freezing rain and ice yesterday, this seemed like an appropriate card to show today:


Sparkle N Sprinkle has recently released a few sport sets.This is Set 508: Ice Hockey:

Stamp Set 508 - Ice Hockey

I had recently picked up a fence stencil, but when I saw it it looked more like netting to me, and that is what I used it for. I taped the stencil over white cardstock and then sprayed with Dylusions Turquoise ink spray. 

For the ice, I covered a piece of white cardstock with Super Adhesive Sheet and cut the curved edge with Spellbinders Mega Oval die. I removed the protective backing and then applied Cloud Nine Velvet Glitter. Did you know you can heat emboss on top of the Velvet Glitters?


Just use the anti-static bag on top of the glitter, as you would normally. Stamp in Versamark and heat emboss with your choice of color. Here I used Red Apple embossing powder.

OK, your question for the day! What are the goal posts made from?
Yes, you're right! Glittered bendy straws!

I stuck one straw inside the other at the bendy end. I then trimmed the ends to a point, and wrapped 3/4" Tear-ific Tape all the way around the straws. My very sticky straws were then covered with Gypsy Red Velvet Glitter.


Love the dimension that it gave! 

My hockey player was stamped in Memento black ink and colored with Copics. You can find a complete list of ingredients in the gallery, if needed.

Hope you've enjoyed your visit with me today. Till next time,

Stay warm!

Shona