Monday, November 22, 2021

A Winter Wonderland

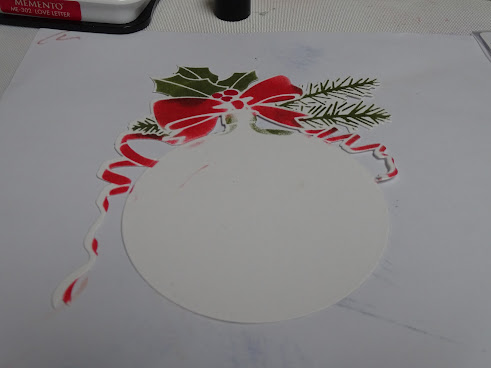
 Thanks for stopping by my blog today. My card is for the Holly and Ivy Challenge, where it is always an anything goes challenge. I found this old wood-mounted Hero Arts scene stamp the other day, which I've been playing around with. Here is one of the cards I made using it.


Using the Kaleidacolor Spectrum Blue Breeze ink pad with a brayer, I inked up a piece of glossy cardstock.


I then sprayed a light mist of water at the top edge of the darker blue and let the water drip down a little. This was then dried with the heat tool. Once it was dry, I rubbed the entire piece with the anti-static bag, before inking and stamping with Versafine Clair Nocturne. 


The inked image was then heat embossed with Clear Detail. After more anti-static powder was applied, I stamped the sentiment using my stamp platform also in the Nocturne ink and heat embossed with Clear Detail.


I cut the panel down a little on the top and the bottom edges and adhered it to an 5 1/2" x 4 1/4" glossy card base. A blue organdy ribbon was tied around the left edge to finish it off!


Below you can find the products I used today:

Hero Arts stamp K5524

Sparkle N Sprinkle Winter Swirl stamp set 414

Kaleidacolor Blue Breeze ink

Versafine Clair Nocturne ink

Clear Detail embossing powder

Nuvo Light mist sprayer

Blue Organdy ribbon


I hope this inspires you to join in the challenge over at the Holly and Ivy?

Happy Thanksgiving to all my American blog friends!

Hugs,

Shona


Wednesday, November 10, 2021

Snowgirl Gate Fold Card

 Hi there and welcome back to my blog. Today I have another Christmas card, this time for the Challenge over at Christmas Craft Creations, where this month, the theme is fun folds. I went with a Gate Fold card for this one and I think I am going to make a few more of these and use up some of my many Christmas papers.


I began with making my gatefold by taking a piece of red cardstock 8 1/2" x 5 1/2" and scoring at 2 1/4" off each long end.


The ends were folded in and then I cut two pieces of designer paper from Michaels at 5 1/4" x 2" and attached them with tape.


The little snowgirl (from Sparkle N Sprinkle Snow One Like You set) was stamped on white cardstock in Versafine Clair Nocturne ink.


She was then colored with Copics and attached to a red matte.


I placed snowflakes (from the same set) around the stamped image in the stamp positioner and those were inked with Versafine Clair Verdant ink and were heat embossed with Sparkle powder.


 I added some Best Glue ever and Twinkling Clouds flocking to her hat.


The focal panel was attached to the card base with mounting foam. That finished off my card for today.


I hope you've enjoyed visiting today? And that you will take a look over on the Christmas Craft Creations challenge page and check out what the other designers came up with. Lots of creative inspiration there!

Below please find the products that I used in the card today.

SNS Stamp Set 515 Snow One Like You

Versafine Clair Inks: Nocturne, Verdant

Sparkle embossing Powder

Copic Markers

Best Glue Ever

Twinkling Clouds flocking

Mounting Foam


Till next time,

Shona


Tuesday, November 9, 2021

Merry Christmas Bauble

 Hi there and welcome back to my blog. My November header was taken at the New York Botanical Garden last week, when a few of my Master Gardener buddies and I took a trip there. I believe it is a Catbird enjoying the berries of the Callacarpa. We had a beautiful, though brisk, day taking in the Fall foliage!

My card today is for the Holly and Ivy Christmas Challenge, which is always an anything goes challenge. I hope you will join in the fun, while adding to your Christmas card stash! You know it will be here before we know it! 


I had recently been "enabled" into acquiring the Sweet Poppy Christmas Snowflake Bauble stencil and die set. This was the first time I had played with it. I will be definitely be getting this back out to play around with.

Using the stencil on white cardstock and a piece of scrap paper to try to mask off areas not to be inked (not terribly successful on that, I may add), I used Memento inks Olive Grove and Love letter with a finger dauber to color in the ribbon and the greenery sprigs.


A red Copic marker was used for the berries.


After die cutting, not terribly straight, I inked up the entire ribbons.


I die cut the bauble from red cardstock and the Die-versions Merry Christmas Present die from green cardstock. 


The sentiment was attached to the bauble with a gold eyelet. The Mistletoe Moments embossing folder was run through the machine using the same cardstock as sentiment. 


This was layered on to red carstock, then layered to a white card base. The bauble was attached with tape and mounting foam.


A piece of red and beige bakers twine was tied around the spine to finish off the card for today.

Below, you will find the products used on my card today:

Sweet Poppy Christmas Snowflake Bauble

  Stencil and Die

Memento Inks: Olive Grove and Love Letter

Finger Daubers

Red Copic

Die’sire Embossalicious Mistletoe Moments embossing folder

Die-Versions Merry Christmas Present die

Gold Eyelet

Red and brown bakers twine


Please take a look over on the Holly and the Ivy Challenge blog and see the other design team members' inspirations. We look forward to seeing your entries!

Till next time,

Shona