Showing posts with label Copics. Show all posts

Tuesday, April 19, 2022

Snow Much Fun

 Hi there and thanks for stopping by! I was able to change my header today. I had had a quick trip to Scotland last week to celebrate my Dad's 90th birthday. My three brothers and some of their families, my hubby and daughter Gillian had a great weekend of celebration with Mum and Dad, whom we had not seen for almost 2 1/2 years. Needless to say we had a wonderful time, making more memories! I got back on Friday to very warm weather and had to go into my hives to check for swarming clues and try to reduce the chance of it happening. I took a few photos, this one is of the girls festooning between two frames. Aren't they so cute?

My card today is for the Holly and Ivy Christmas Challenge. Using the skiing snowman from a stamp and die set, that I recently purchased from Lifescraft, I have my little guy speeding down the snowy slope!
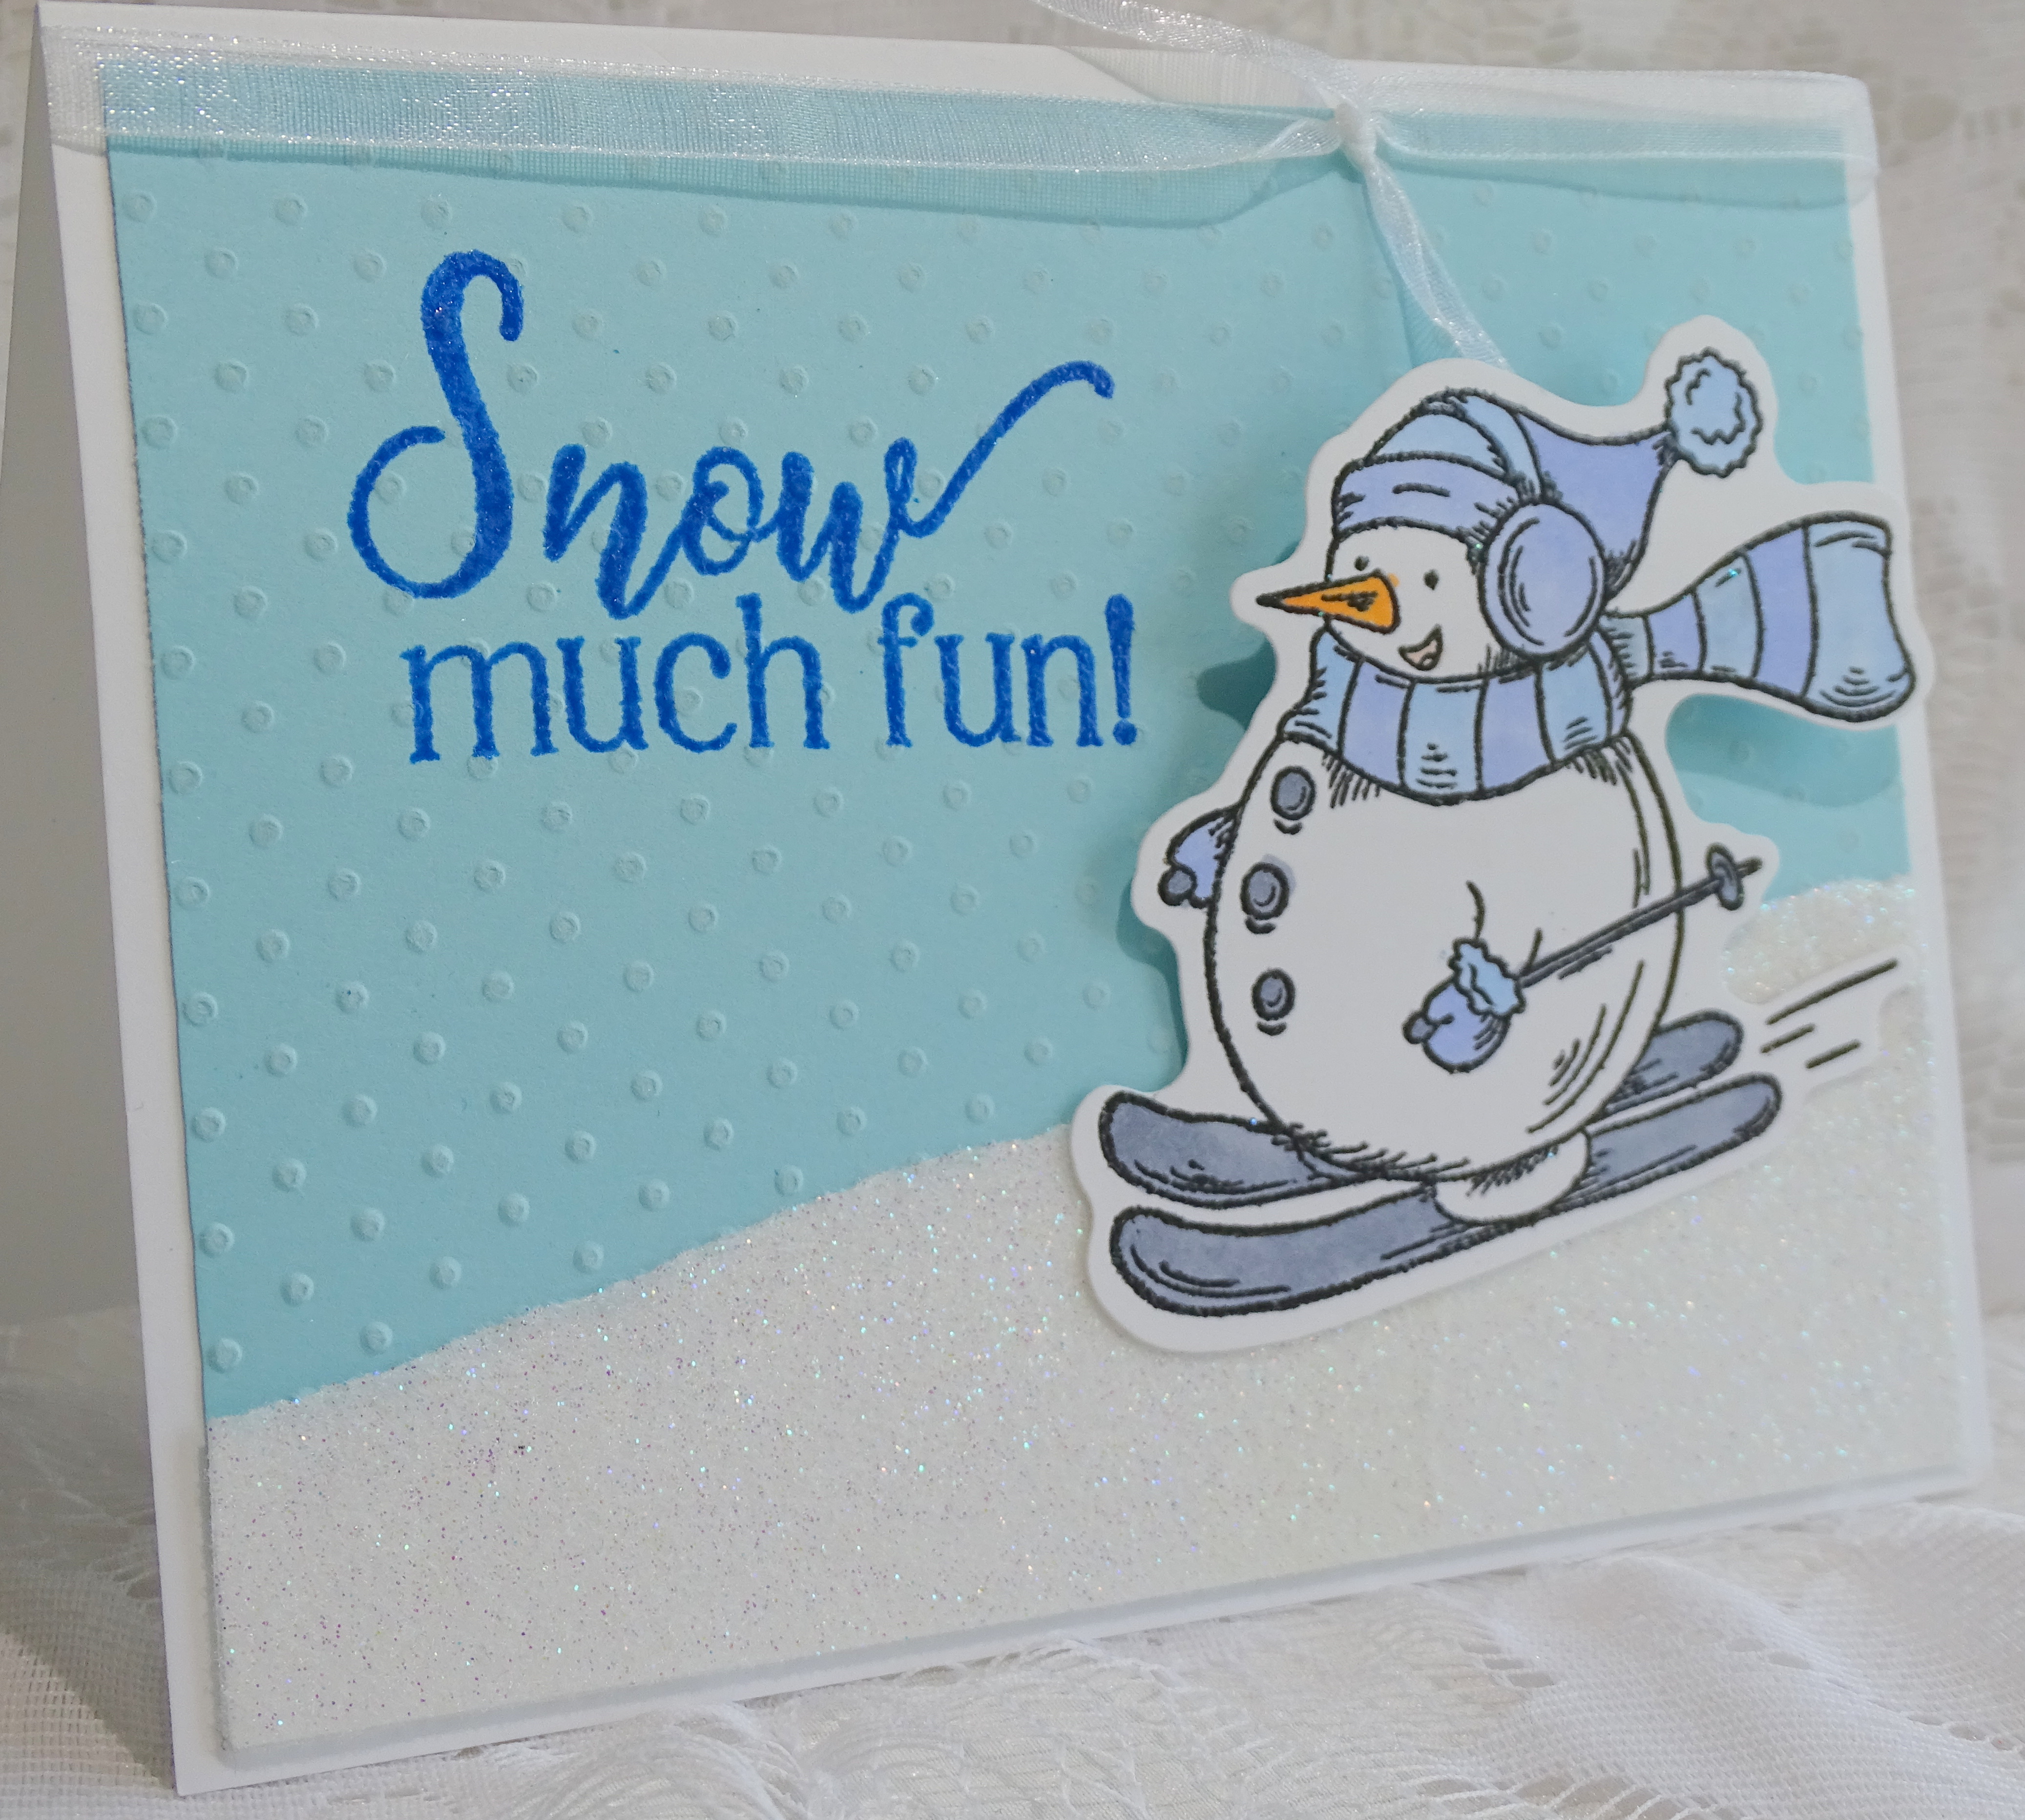

I began with stamping the snowman from the stamp set in Versamark Clair Nocturne ink. 


He was then heat embossed with Clear Detail.


I colored him with Copics and then die cut him.


I took a piece of light blue cardstock and using the Cuttlebug dotted embossing folder, I sanded the raised dots down to make them more white, like snowflakes. A piece of double-sided tape was layered to a scrap of white cardstock and was layered to the base of the blue background. I removed the protective layer from the tape and added Twinkling Clouds flocking to the sticky surface.


I placed the sentiment, from the same stamp set in my stamping platform and stamped directly on to the blue sky using Versafine Clair Paradise ink, I then added some Blue Ribbon glitter to add some sparkle.


The background was added to a white card base and then the little snowman was taped down to the snow and his body popped up with a foam pad for some dimension. White organdy ribbon was tied around the top of the card to finish.


I hope I have inspired you to pop on over to the Holly and Ivy Challenge? It's always an anything goes theme!

Till next time!

Shona


Tuesday, February 8, 2022

HAI February Warm and Toasty

 Hi there and welcome back to my blog. My header for February is a female cardinal who was outside my living room window, hiding from the snow!

Today my card is for the Holly and Ivy Christmas Challenge, which is always an anything goes theme! I hope you will take a look at what my teammates have prepared too!


I started by placing a 3 3/4" x 5" piece of double-sided tape on a piece of 4" x 5 1/4" light blue cardstock.


Next I applied a strip of double-sided adhesive to a strip of white cardstock and die cut several snowflakes from the Recollections set.


Fascination glitter was applied to the snowflake after the backing was removed.


The sentiment from the Stampin' Up Warm and Toasty set was stamped in Versafine Clair Nocturne ink and then heat embossed with Clear Detail powder.


The protective backing was removed from the blue cardstock and the glittered snowflakes and the sentiment were placed on the sticky surface.


Sparkling Snow glitter was then burnished in to the rest of the sticky adhesive.


The polar bear from the Stampin' Up Warm and Toasty set was stamped in Versafine Clair Nocturne, heat embossed with Clear Detail and then colored with Copic markers. He was then fussy cut and after the layers were added to a white card base, he was popped up on foam pads for a bit of dimension. Hopefully giving the idea of him skating on a frozen pond.


Here you can see all the sparkle from the different glitters and the embossing powder. I hope this gives you some inspiration to come and join along with our challenge?

I'd like to join in the following challenges, please:

Till next time!

Stay warm and toasty!

Shona


Wednesday, July 14, 2021

Dear Santa

 Hi there and welcome to my first July post. My header for this month is one of my honey bees nectaring on Bee balm.

My card is for the Christmas Craft Creations Design Team with a theme of anything goes. So please do try to join us this month for Christmas in July and get a jump on your Christmas stash! If you join in with a project you will be in the running for some fun prizes!


I went simple with an old Sparkle N Sprinkle/Bugaboo Stella image which was stamped in Versafine Clair Nocturne and heat embossed with Clear Detail. 


I colored the image with some Copics.


 I ran the image through the die cutting machine with Memory Box  Cross Stitched Frame Borders and did a little sponging of ink inside the die before I removed it. 


 This was then layered to a grey card base and I wrapped the red and white twine around to finish off my card.


Here is the list of products used on my card:


Stella - Dear Santa Sparkle N’ Sprinkle

Versafine Clair Nocturne

Clear Detail embossing powder

Copics

Memory Box Cross Stitched Frame Borders

Stampin’ Up Sahara Sand ink pad 

Red and White Twine


I hope I've inspired you to join in the fun over at Christmas Craft Creations? There are some beautiful dies and more for prizes this month - but you have to be in it to win it!! It's an easy one this month - Anything Goes!

Till next time!

Shona


Thursday, April 19, 2018

Calla Lilies with Love!

Hi there,

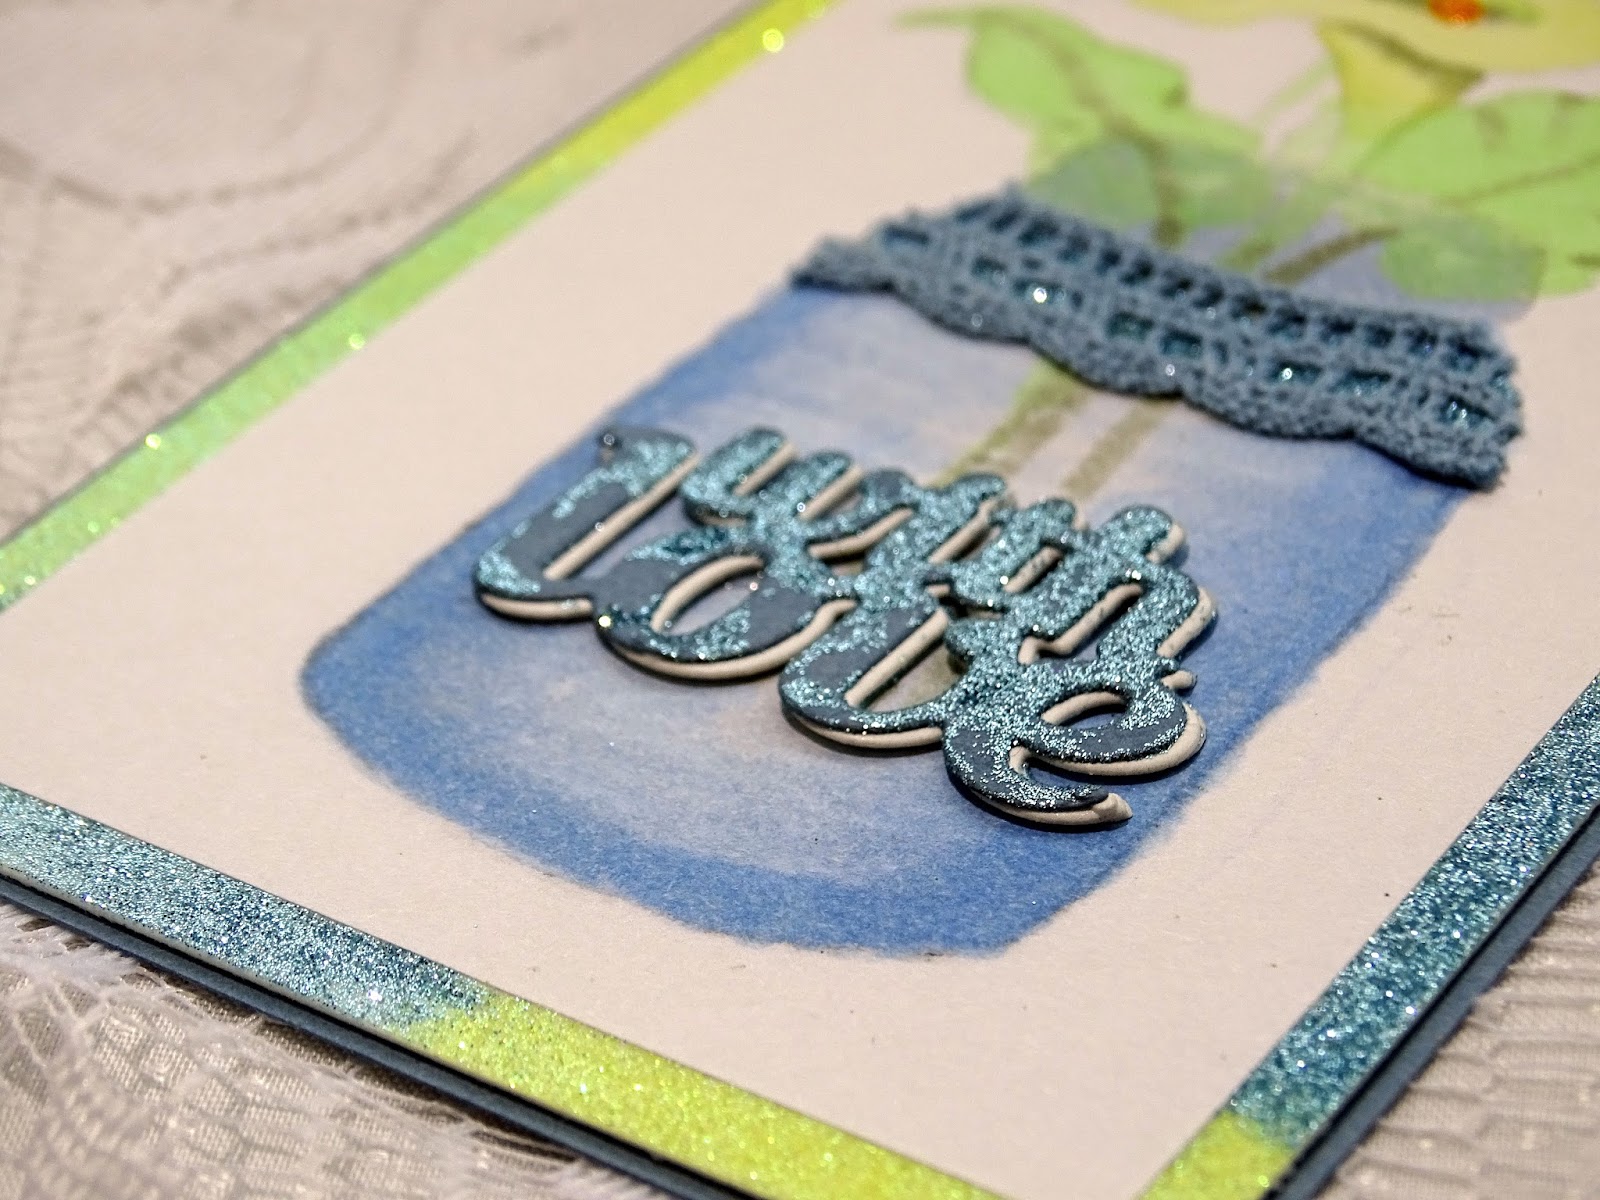
Thanks for stopping by! Today I'd like to share my second April Reveal project, which highlights the new Calla Lilies Set 888 along with the jar from an older set, Fill the Jar 423. The jar can now be found in the Bugs in a Jar set 510, featuring the Faux no line watercoloring technique, which blogger friend Verna introduced me to.


For this technique you stamp on to normal printer paper, not cardstock, color in your image and then turn the paper over to get the no line effect. So I began with stamping the Calla Lilies with the Hybrid Safari Green ink using the Stamp Platform.


The jar from the Fill the Jar set was stamped with Memento Tuxedo black using the Stamp Platform for positioning.


This was then colored in with Copics.


Turning the paper over you will see that the lines are not seen - and it looks like a watercolor painting. You can use the Copic Blender pen to take away any color that is too "outside the lines" if you wish.


I then cut a piece of 3 1/4" x 6 3/4" piece of Super Adhesive Sheet and centered it on to a piece of white cardstock. My image which measured 3" x 6 1/2", was then centered on top of the Super Adhesive Sheet. This gives a sticky edge to which you are going to apply Daisy (GM2019), Margarita (GM2032) and Ocean Breeze (GM2039) Microfine Glitters. After the glitters were applied I used the Tonic Guillotine and cut off the white edge (which served as rigidity) as the panel will be layered to a piece of 7" x 3 1/2" blue cardstock.


Next I cut out the Tonic Mini Moments With Love die, using the Tangerine - once from blue cardstock and twice from white.


Using the Nuvo Medium Glue Pen, I stuck the three die cuts together.


I placed a little strip of adhesive-backed lace to the top of the jar and filled in any remaining adhesive with the Ocean Breeze Glitter.


Nuvo Deluxe Adhesive was applied to the Die cut piece and it was adhered to the front of the jar.


Some of the adhesive was also applied to the front of the die cut, not completely covering it and then I added some more of the Ocean Breeze glitter, for a slightly distressed look.


Nuvo Glitter Drops White Blizzard were added to the center of the flowers for extra "pop" and dimension.


and that finished off my project for the day.


Hope you've enjoyed my share today. This really is a fun technique, thanks again Verna for the inspiration! Listed below are the materials I used to make my card today, most of which can be found in the Sparkle N Sprinkle store.

(using Faux no line watercoloring technique)
Recollections Lace on a roll
Copic Markers

Remember to leave a comment here, and then pop over and leave one on the SNS blog and that will get you in the running to win a $20 gift certificate to the store. The winner will be randomly picked from the comments at the end of the month. Good luck!

I'd like to play along in the following challenges:
Get Creative Challenge #68: No pattern Paper
Crafts Galore Encore Challenge # 50: Anything Goes
World Wide Open Design Team Challenge #4: Anything Goes
Classic Design Team Challenge #24: Anything Goes
Craft Stamper April Challenge: Anything Goes

Thanks again for stopping by,

Shona


Thursday, April 5, 2018

Tip Toe through the Tulips

Hi there,
Welcome to the new Sparkle N Sprinkle April Reveal Sets. Since it is the fifth of the month, I am up first with the new sets. Remember to leave a comment here on my blog and another over on the SNS blog to be eligible for the $20 gift certificate to the Shoppe! Today I would like to share what I did with the Tulip Square Set 894.


To begin with I placed the Tulip stamp in the Stamp Platform and wiped the black cardstock with the Anti-Static bag before stamping the image with Nuvo Clear Mark ink. Using the Anti-Static bag is especially important when using black cardstock and heat setting with white detail embossing powder.


Next I stamped the sentiment with the Clear Mark ink on white cardstock and this time I heat embossed with Raspberry Tart. I cut out the sentiment using the Sizzix Dotted Square with the Tangerine Machine.


I went on to color the Tulip Square with embellishment Mousses, Pink Flambe for the flowers and Spring Green for the leaves and stems and a little Cornflower Blue was added in places too. The mousse was applied using the Nuvo Water Brush. It gives a lovely chalky appearance and the white embossing powder resists the mousse.


Next using the Tangerine again, I cut out the stem from Tonic die Woodland Aster from black cardstock.


The Spring Green mousse was applied to the stem with a Jumbo Dauber.


I stamped the single flower from the Tulip Square set three times on black cardstock in Nuvo Clear Mark and then heat embossed with the Raspberry Tart. These were then fussy cut using the 5" Mini Scissors from Tonic.


I ended up adding some of the Pink Flambe mousse to those flowers too, before I put the card together. The stem was stuck down the left side with Tear-ific Tape and Mounting Tape behind the flowers. The front panel was then layered to bright pink cardstock before a black card base.


The sentiment was edged with RV04 Copic marker before being attached to the middle of the Tulip Square with an Action Wobble and that finished my card for the day. I liked the way the dotted square die coordinated with the dots in the image.


Below you will find all the products I used to create this card, most of which can be found in the Sparkle N Sprinkle store.
SNS is trying something new instead of our regular Blog Hop. In order to be eligible to pick up a $20 gift certificate to the SNS Shoppe, you need to leave a comment here on my personal blog  and then head over and comment on the SNS Blog as well. You have to comment in both places to be eligible. The winner of the certificate will be announced at the end of the month.

I'd like to play along in the following challenges with my card today:
Crafty Creations Challenge #363: Anything Goes
Crafting by Design - April Edition: Anything Goes
Crafty Gals Corner Challenge #162: Anything Goes
Scrapy Land Challenge #87: Anything goes using a die that SL sells
Craft Stamper - April Challenge: Anything Goes
World Wide Open Design Team Challenge #3: Anything Goes
Classic Design Team Challenge Blog #24: Anything Goes

Thanks for stopping by today. I hope you enjoyed what I had to share.
Shona

Thursday, December 7, 2017

MERRY AND BRIGHT!

Hi there,

This morning I'd like to share a card using the cute Snowman Couple - Christmas Set 872 from the November Reveal.


Isn't this the cutest little couple? I stamped the couple on to white cardstock in Black Memento ink using the Tonic Stamp Platform.


I removed the lid and worked on my coloring, using Copics, while leaving the stamped image on the platform.


This allowed me to come back and apply Nuvo Clear Mark ink onto the stamp and place stamp on top of the colored version and then heat emboss with Clear Detail powder.


This gives a lovely shiny raised outline to your images:


After fussy cutting the snow couple with my Tonic 5" mini snips I applied White Blizzard Glitter Drops to the baubles and the buttons. This was then set aside to dry, while I worked on my card base. I used the Tonic Merry and bright die, running it through my Tangerine. I then daubed the entire card base with Powder Blue embellishment Mousse.


Spellbinders Mega Oval die was used to cut the top out of a piece of the Freshwater Pearls Specialty Papers from Tonic. These are cotton based papers and I had difficulty cutting through them with my Big Shot but the Tangerine went through them like butter! My Cutterpillar also had issues, but the Tonic Guillotine had no problem.


I had some glittery foam self adhesive snowflakes that I had never used so I adhered a few of them around the card front, then popped up my snow couple. I added the Powder Blue Embellishment Mousse to the snowflakes and added some Sparkling Snow Glitter, quickly before it dried, to make the background more monochromatic.


A part of the cut out oval was then turned around and attached to the base of the card as a snow drift, which finished my project for the day. 


Here is a list of the products I used in my project, most of which can be found on the SNS website:

Spellbinders Mega Ovals Dies
Copics: Y17, C1, BG01, B34, B63, RV02, V04, V15

I'd love to join in the following challenges:

World Wide Open Design Team Challenge #28: Anything Goes
Classic Design Team Open Challenge #20: Anything Goes
The Holly and Ivy Christmas Challenge 20: Anything Goes
Tuesday Throwdown #371: Christmas Scene
Always Fun Challenge #35: Snowmen
Christmas Cards All Year 'Round: December Challenge
Sweet Stampin' Christmas November Challenge: Anything Goes
Mod Squad Challenge: What a Flake! (use a snowflake)
Crafty Gals Corner Challenge # 152: Anything Goes
Cards und More #199: Snowmen
Cardz 4 Galz Challenge #62: Show Me a Snowman

Thanks for stopping by today,

Warm hugs,

Shona