Showing posts with label Nuvo Aqua Flow Pens. Show all posts

Thursday, March 1, 2018

Balloon Birthday Wishes

Hi there,

Thanks for stopping by today. I'd like to share another February Reveal card using the fun Balloon Bunch Stamp Set 887.


When I saw this set I knew that I was going to use it along with the Sizzix Balloon Step Up die. Sparkle N Sprinkle recently brought out some fabulous new colors in microfine glitters, a few of them were purplish hues, Hyacinth, Caspia Sea, and Purple Fig, so I decided to go with a pink and purple theme. I began by cutting out the card base with my Tangerine and stamping the balloon image twice with StazOn Black, using the Tonic Stamp Platform, so that I could overstamp to ensure a crisp image.


I made a little paint palette with an acrylic block and a couple of Aqua Flow Pens and used a Water Brush to color in my balloons. I fussy cut the balloons using my Tonic 5" mini scissors.


Using the Versamarker Pen I "colored" the background balloons and then covered them with Clear Detail embossing powder. This was then heat embossed. I then applied the Versamark ink again to a couple of the balloons and this time heat embossed with Super Thick Clear, from the bottom. This gave the balloons all different looks.


A scrap of Super Adhesive Sheet was layered to a scrap of white cardstock and then I applied Cloud Nine to the sticky surface after removing the protective backing. The balloon image was stamped directly on top of the glittered surface with StazOn Black and the front balloon was fussy cut and popped up on top of the other balloons.


Some purple and white bakers twine was attached to the back of the balloons with 1/4" Tear-ific Tape. Scraps of Super Adhesive Sheets were stuck down to scraps of purple cardstock and then run through the Tangerine with the balloon dies from the die set.


The protective layer was removed and then Hyacinth, Caspia Sea, Purple Fig and Cloud Nine were used to color the balloons and their strings.


The happy birthday (also part of the die set) was die cut on the Tangerine from a piece of pale purple cardstock layered with the Super Adhesive Sheet, to which Hyacinth Glitter was applied.


Then it was time to assemble the card. A piece of Super Adhesive sheet was die cut with the front panel die and then the balloons and the sentiment were attached to the sticky surface and then Cloud Nine was applied to the remaining adhesive. This was then attached to the front of the card base, after which I ran purple STA metallic pen around the outside of the white panel.


The other balloons were attached to the card base with mounting tape and a piece of card with Happy Everything was attached to the inside of the card to finish it off.


This finishes my card for today. Here's a side view:


Hope you've enjoyed my share today. Below are the list of products that I used, most of which can be found over on the SNS website:

Memento Grape Jelly
STA Purple Metallic Pen
Mounting Tape
Sizzix 660024 Balloon Step-Ups
Purple Bakers Twine

I'd like to play along in the following challenges:
Crafting with Dragonflies Challenge Blog #98: Special Folds
Crafty Creations Challenge #361: Anything Goes
Scrapy Land Challenge # 84: Anything Goes
City Crafter Challenge Blog Challenge #401: Die Cuts
Allsorts Challenge Blog Week 456: "B": Birthday Balloons
World Wide Open Design Team Challenge #2: anything Goes
Classic Design Team Challenge #23: Anything Goes

Thanks for stopping by!

Shona

Thursday, July 20, 2017

Flamingo Christmas!

Hi there, today I'd like to share a fun little Christmas card using two of the July Reveal sets, Winter Flamingos Sets 1 and 2!

I decided to play with these two fun little sets of flamingos and the sentiment. They are still celebrating Halloween, in purples and oranges and are caught off guard with Christmas coming so soon! Sounds like me most years! The images were stamped in Memento Tuxedo Black and then colored with different hues of purples and orange Copics.
They were then fussy cut, made easier with the Tonic 5" Mini Snips. Love these little scissors for getting into the detailed areas.
The orange flamingos' shoes and hats were decked out in Nuvo Purple Glitter Markerwhile the purple flamingos are sporting the Nuvo Orange Glitter Marker!
The orange flamingoes got Nuvo Aqua Flow Markers orange scarves and the orange flamingos received purple ones!
 
Once they were all decked out in their finery, I gave googly eyes to the ones looking straight on and Nuvo Crystal Drops Morning Dew were applied to the other eyes.
For my background I ran a piece of glossy white cardstock through my machine with the Darice Snowflake background and then applied Nuvo embellishment Mousses Coral Calypso and Royal Aubergine (both from the new set of Mousses) with a large dauber, blending the colors in the middle.
Then I tore a scrap of Super Adhesive tape, so that it had a ragged edge and placed it along the base of the cardstock. Stampendous Royal Purple Crushed Glass Glitter was sprinkled over the sticky surface.
Then the new Creamsicle glitter was added to the remaining sticky surface. I burnished both glitters into the tape using the protective backing below my finger tool. 
My background was then layered onto glossy card edged with the Nuvo Coral Calypso Mousse and then the Royal Aubergine Mousse was used on the base card.
The sentiment was stamped on glossy cardstock with Versamark and was heat embossed with Concord embossing powder. It was cut out with the Lawn Fawn Stitched die and was attached to the front panel with purple and white baker's twine. My little flamingos were then arranged on top with Mounting Tape to finish off my card for today.
Here is a list of the supplies used in my card that are available in the SNS store:
5” Tonic Mini Scissors

I'd like to play along in the following challenges:
Crafty Gals Corner: Challenge 132 - Christmas in July
Sweet Stampin' Christmas July: Anything Goes Christmas
Unicorn Challenge Blog #23: Christmas in July
Classic Design Team Open Challenge #16: Anything Goes
World Wide Open Design Team Challenge #24: Anything Goes
Cardz for Guyz Challenge #174: Christmas in July
Win and Tonic Challenge Blog: July - Anything Goes

Thanks so much for stopping by today, I hope you've enjoyed your visit today?
Shona 

Thursday, June 8, 2017

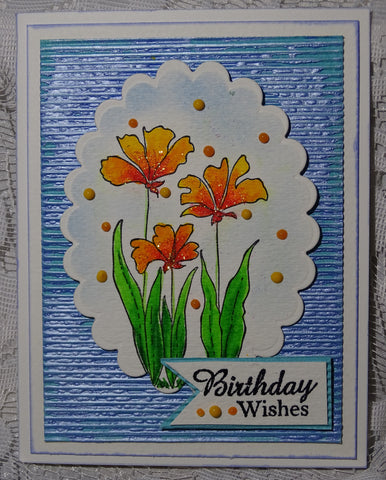
Happy Flowers! Happy Birthday!

Hi there, today I'd like to share a little birthday card that I made using the May Reveal Happy Flowers Set 840. This is such a cute little set. 
I stamped the image in Black StazOn on watercolor cardstock as I was going to color it with the new Nuvo Aqua Flow Markers. They are so vibrant and they blend really nicely too.
I only used four colors for my little scene: Spiced Ginger and Red Apple for the flowers and Fresh Green and Evergreen Fern for the leaves.
 
They color very similarly to Copics. Go in and paint the lighter color over the darker shade to blend the shades. The image was die cut with Spellbinders Classic Scalloped Ovals Large and a little Memento Summer Sky was sponged around the image before removing the die.I then added some Orange Crush Glitter to the flowers with the Quickie Glue Pen.
I took a piece of light blue corrugated cardstock and randomly applied the Nuvo Embellishment Mousse Cornflower Blue with a spatula. I actually used my heat gun to quickly dry the mousse and this made the mousse "bubble" which I happened to really like. Will be doing this again. 
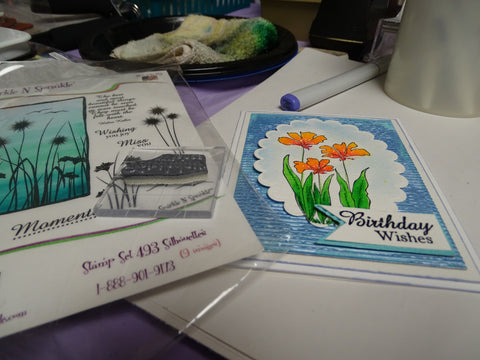
The sentiment was from the Silhouettes Set 493, one of my SNS all time favorite sets! I stamped this in Versamark and then heat set with Black Detail. This was fussy cut and layered to a little piece of the corrugated backing.
The backing was layered to a piece of watercolor cardstock edged with blue Copic B63 and was then layered to the white card base. The image and sentiment were attached with Mounting Tape. Then I applied the Nuvo Crystal Drops English Mustard and Ripened Pumpkin sporadically around my image and sentiment.
That finished up my card for today!.
I'd like to enter this card in the following challenges:
Creative Moments - Challenge 119: Anything Goes with a twist - Birthday
Mod Squad Challenge: Spark it Up
I hope you've enjoyed my share today? Thanks for stopping by.
Shona

Thursday, May 11, 2017

Glow in the Dark Peacock

Hi there,
I'd like to share another Glow in the Dark card that I made for the May Reveal, using the new True Beauty Set #844, along with some of the SNS Glow in the Dark products.
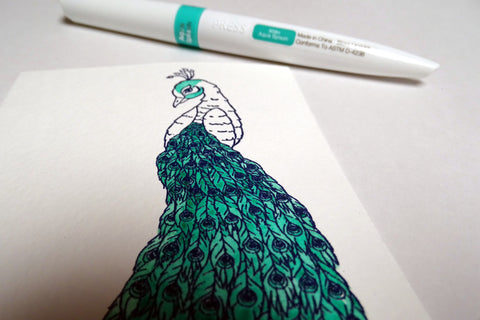
To begin with I stamped the peacock on Watercolor cardstock in Versamark and heat embossed with Cerulean. I colored the peacock using the Aqua Flow Pens, beginning with Fresh GreenAzure Blue and Aqua Splash:
Soft Rose and Rustic Oak were mixed together for the brown wings. These pens have a lovely shimmer to them.
Some Evergreen Fern was also added in the tail for highlights and finally Spiced Ginger was applied to the eyes of the tail, to which I then added Banana Split Glow Drops.
The sentiment was stamped in Versamark and heat embossed with Glow in the Dark EP, this was die cut with Spellbinders Classic Ovals Large and I added Memento Dandelion Yellow before removing the die.
The three feathers were then colored with the Green, Blue and Yellow Aqua Flow pens and they were stuck behind the sentiment panel.
The other two sentiments were stamped again in Versamark above and below where my popped up glow in the dark sentiment was to go. These were heat embossed with Cerulean Blue to match the peacock. The card front was layered to blue and then to a white card base. Here is the card in the dark:
Here it is in complete black:
Here is a list of the products used on my card today. Click to be taken directly to the Shop:
Thanks for stopping by today. I hope you've enjoyed my glow in the dark share?
Shona