Monday, June 21, 2021

HAI Ho, Ho, Ho Santa

 Hi everyone and welcome to the 2nd June Challenge for the Holly and the Ivy! As always, this is an anything goes theme - so we hope you will join in the fun and get your Christmas card stash moving!

I've had a fun Birthday weekend/Father's Day celebration. All the kids came over and Daddy and I didn't have to cook once! I took time out this afternoon to make this happy little card! Santa's out in the woods picking out his own Christmas Tree!


I started stamping the trees from the SU Perfectly Plaid set in Versafine Clair Nocturne and heat embossed with Clear Detail. 


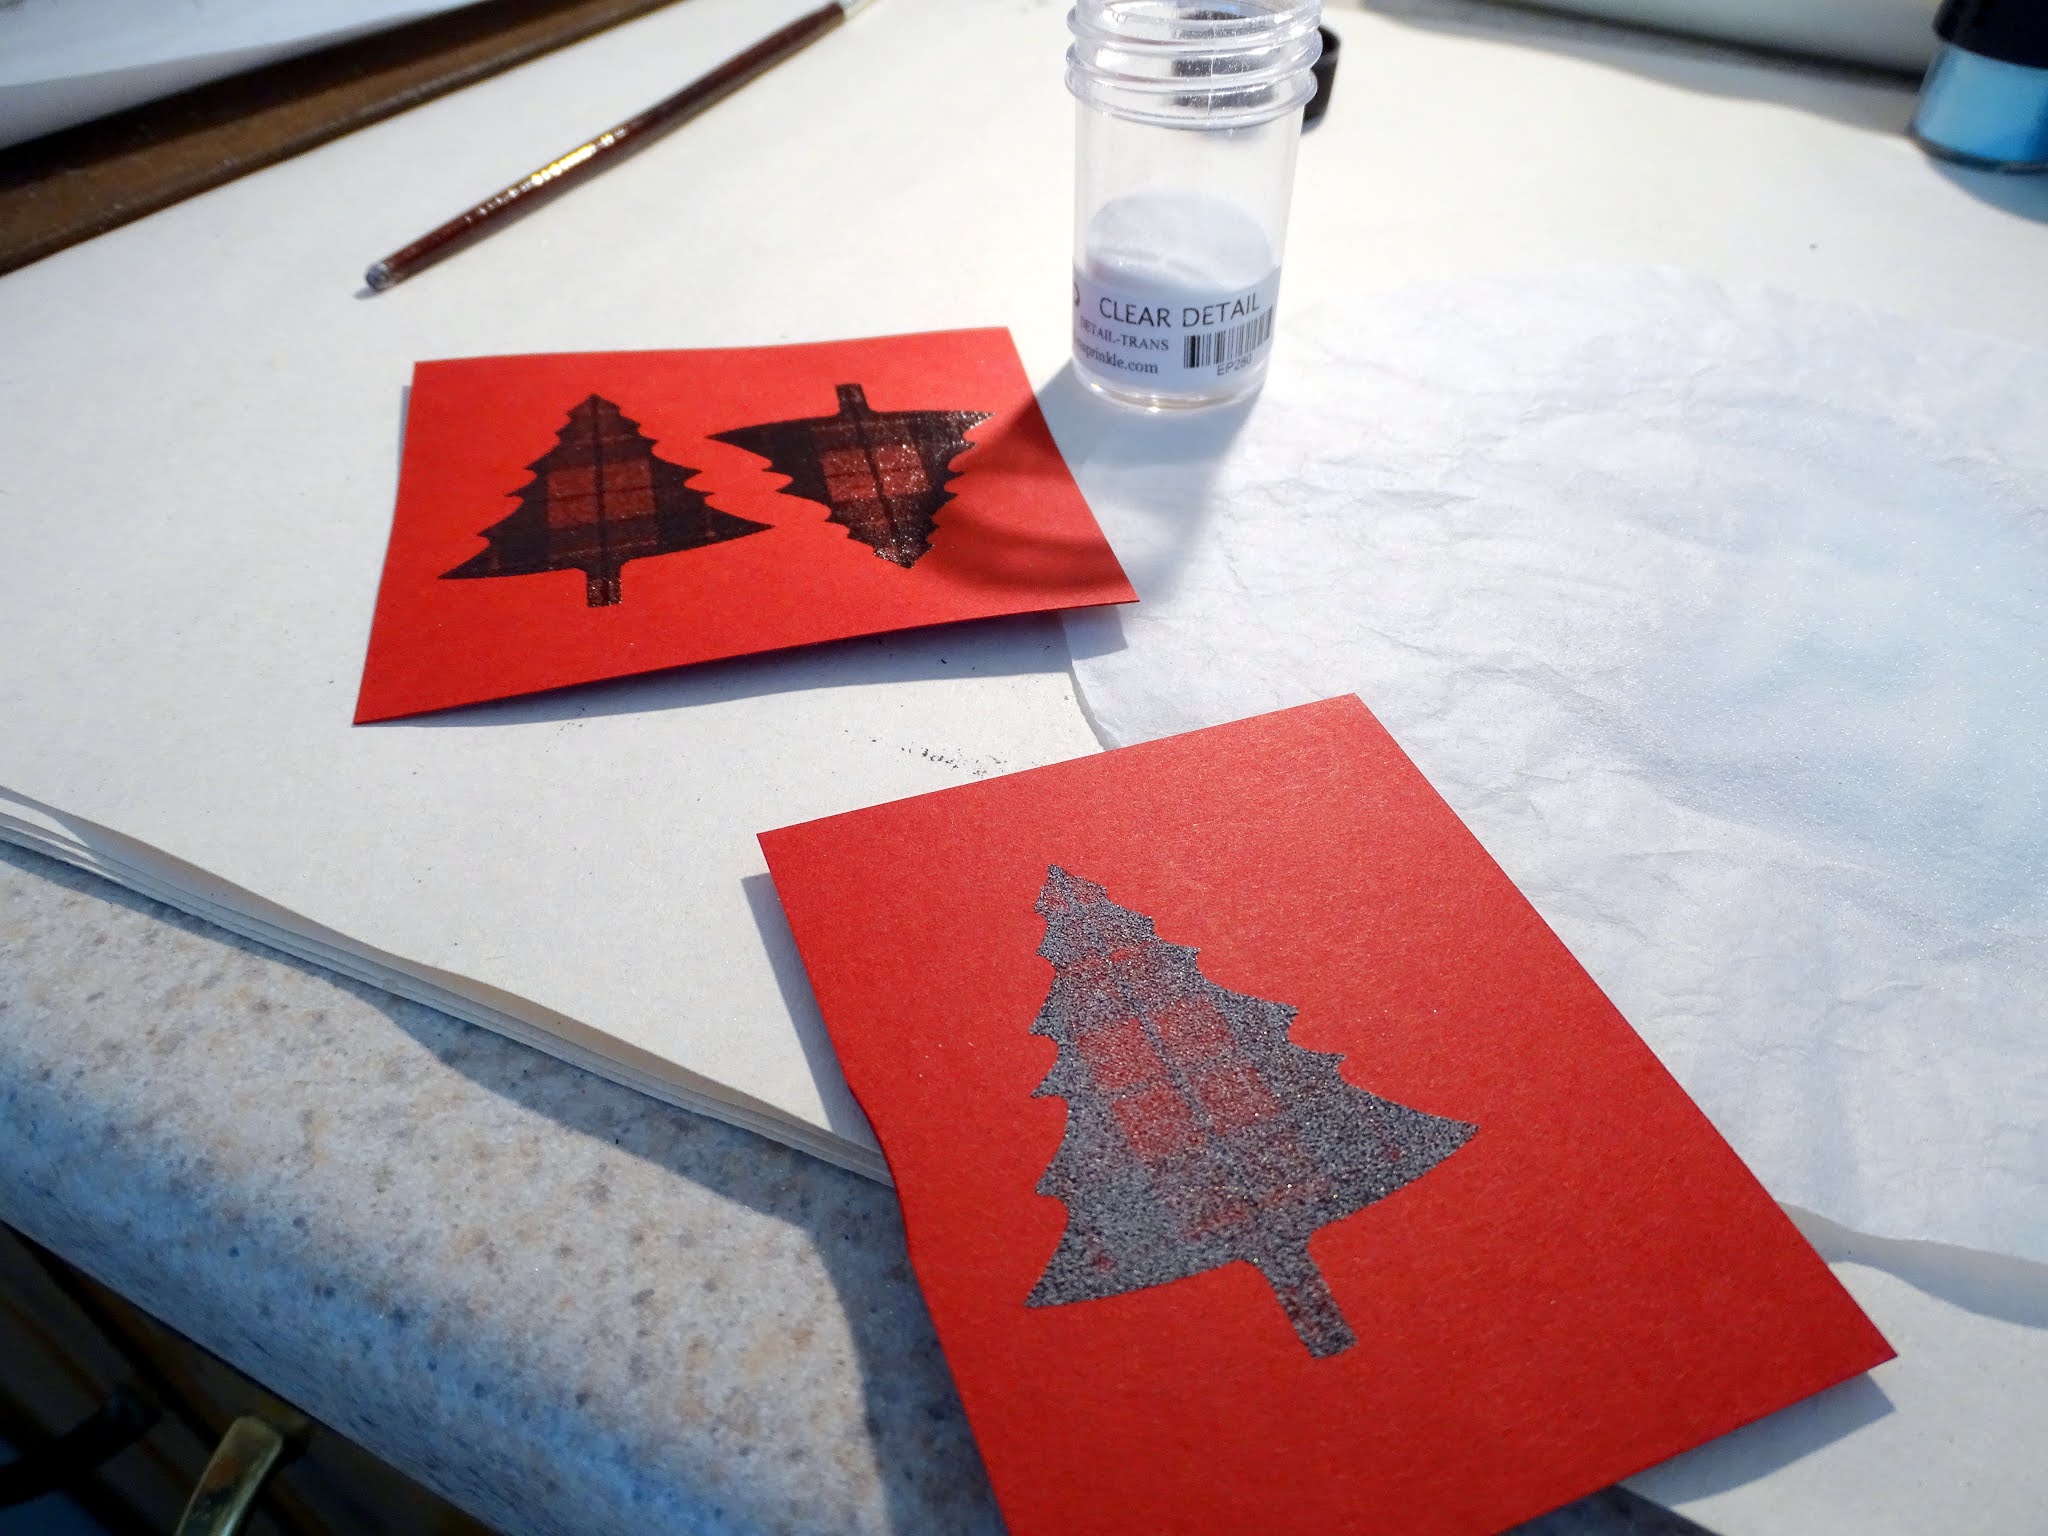
These were then punched out with the SU matching punch.


I was thinking a plaid background to go with the trees and so found this Sizzix embossing folder and ran a piece of white through the embossing machine. I then took the SU real red ink pad and ran it over the embossed piece to achieve my background.


I found an already made Santa in the Tonic Santa Claus Trio die set, he had already been colored with Copics. I just put little snippets of cardstock behind the spaces, black belt, silver buckle and red for his lips.


The sentiment from the same SU stamp set was stamped in Versafine Clair Nocturne and then heat embossed with Clear Detail. This was then cut out with the long Lawn Fawn die, though I cut it smaller by putting in back in the die, moving the sentiment over and running it back through the machine. 


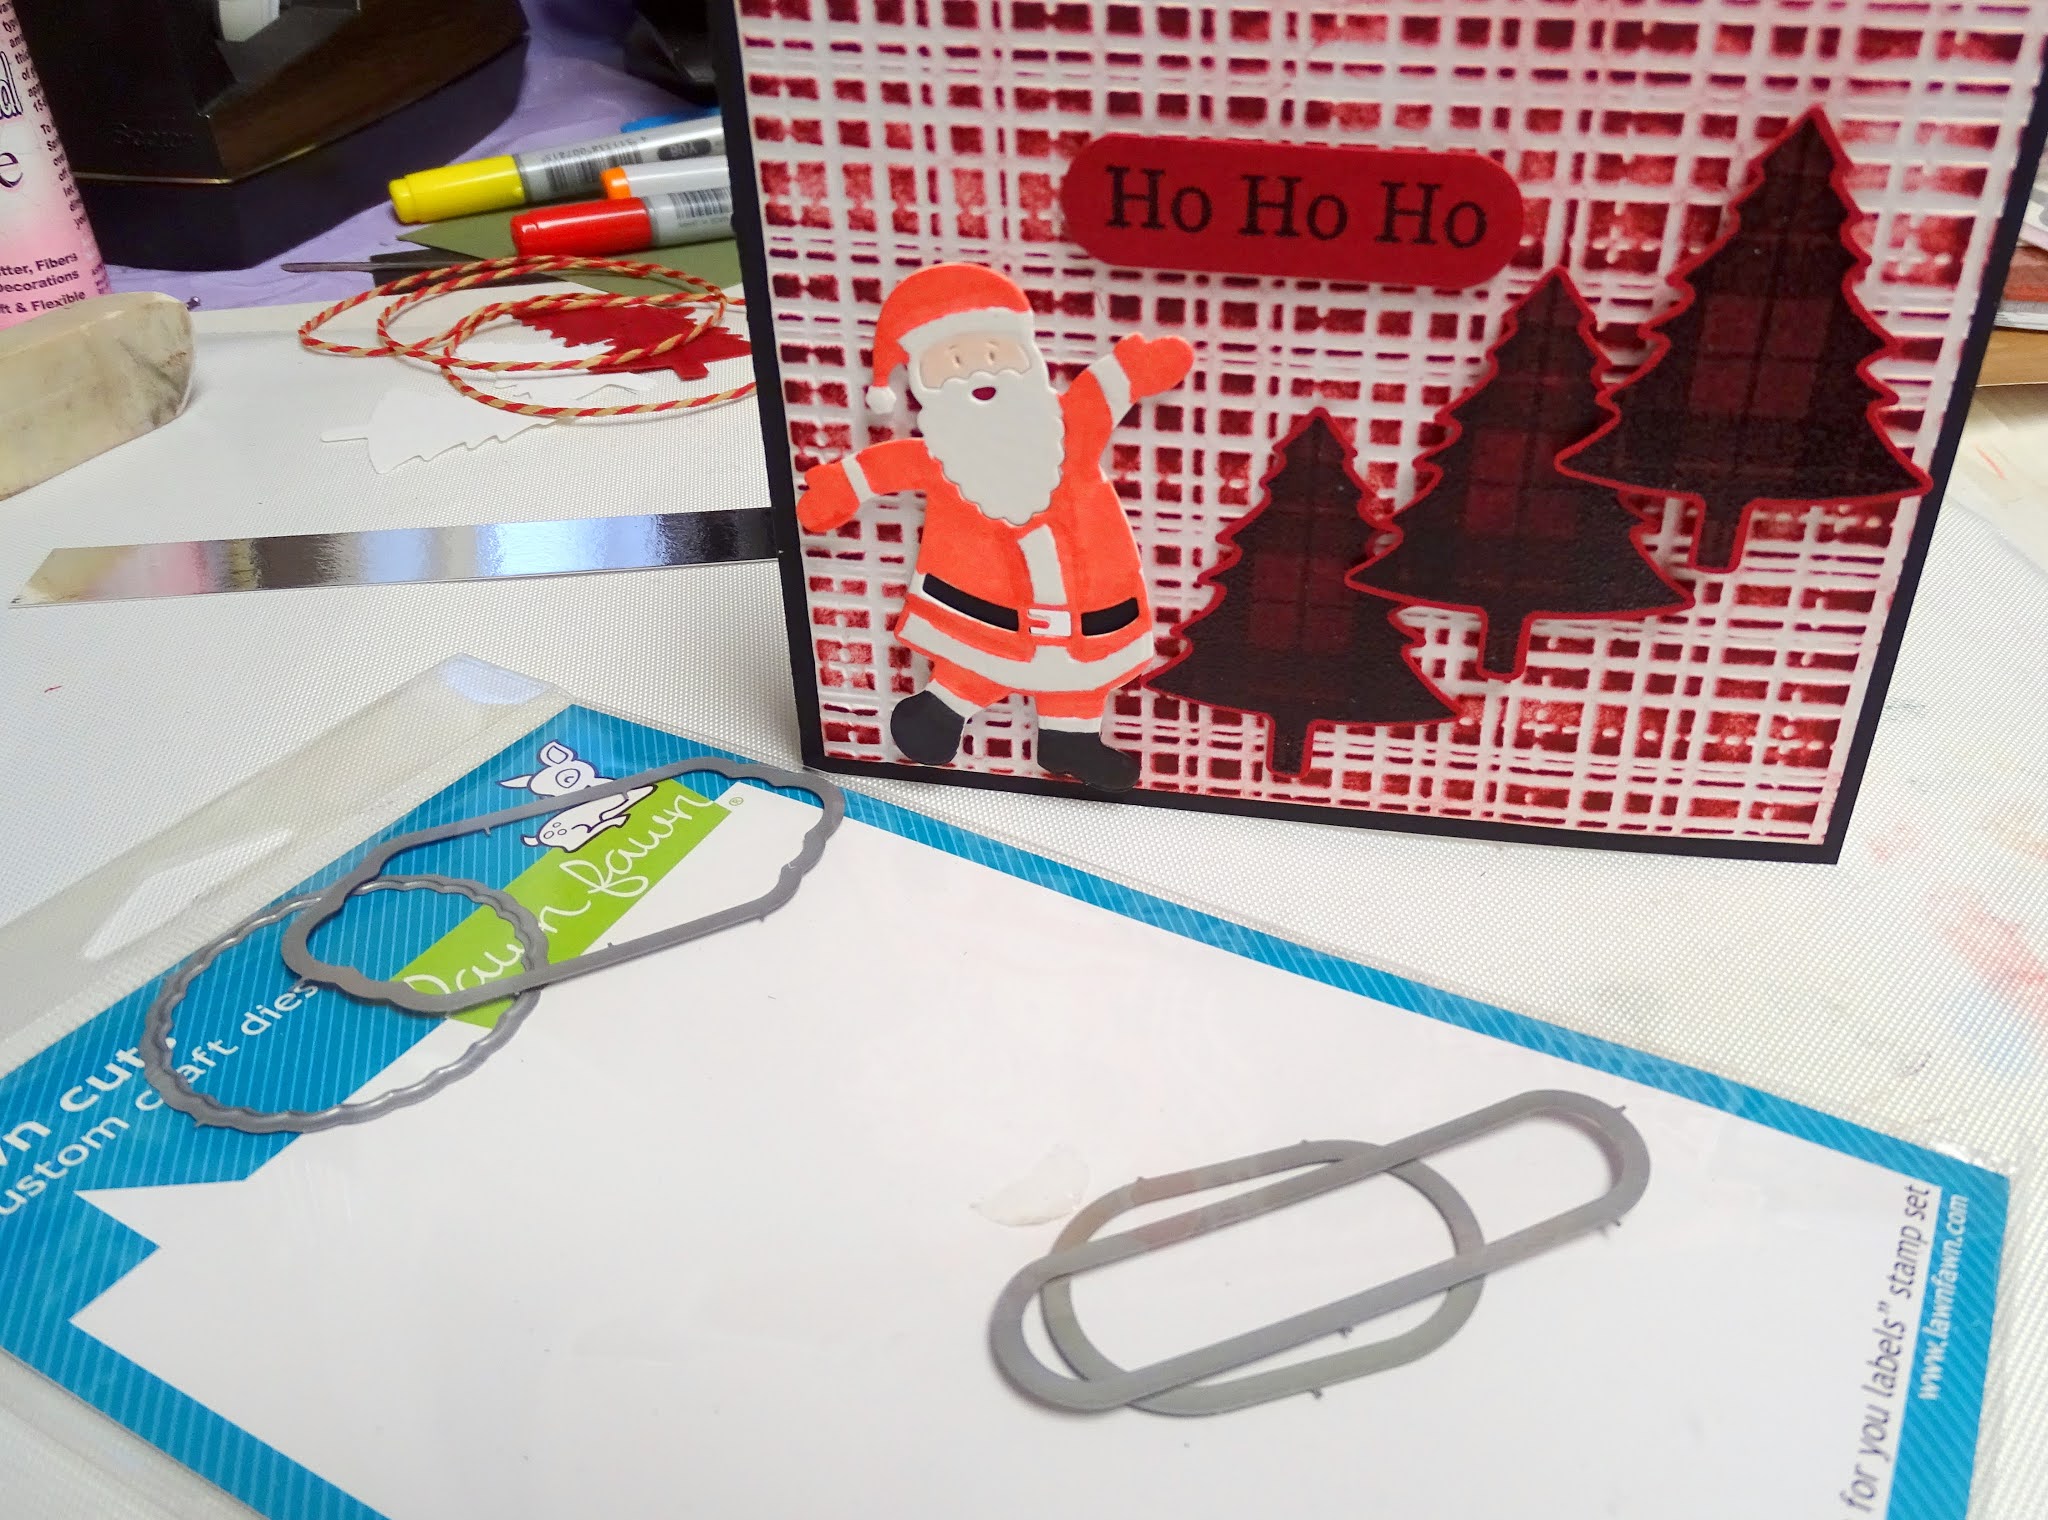
All the pieces were attached with tape and mounting tape to finish of my project. Below you will find the complete list of the products used today. 

Stampin’ Up Perfectly Plaid

Christmas Tree Punch

Tonic Santa Claus Trio

Lawn Fawn (Just for You Labels ) dies

Sizzix Plaid and Snowflakes embossing folders

Copics

Versafine Clair Nocturne

Stampin’ Up Real Red ink

Mounting Tape


I hope I've inspired you to pop over and take a look at my  Design Teammates' work and then to join in the Holly and Ivy Christmas challenge

Thanks for stopping by today!

Shona


Wednesday, June 9, 2021

CCC Butterfly Snowflake

 Hi there! Hope you are all doing well? Things here are improving. Getting out and about and although we can go into stores without masks, we're keeping ours on for the time being. It feels so good to have things open up a bit. 

I've been getting out to do activities with some of my Master Gardener friends - nice to be interacting with other humans again!

My June header is the first Monarch I've seen this year. It was visiting  my Waystation, though I didn't find any eggs.

My card today is for the Christmas Craft Creations Design Team. Our theme this month is Heat Embossing. I hope you will play along with us in the challenge, I chose to emboss with different powders through a homemade stencil.


I had a piece of card that I must have die cut, when I was making my Christmas cards last year, which had obviously been used for stenciling before, so instead of putting colored inks through the "stencil", I used Versamark ink on to white glossy cardstock. (I used my embossing buddy over the cardstock first). 


Then I chose 4 blue/silver embossing powders to sprinkle on one at a time, in different areas of the sticky snowflake. I started with Silver Detail. 


Once I had finished applying all four embossing powders, I heat embossed and there was one little bit that wasn't clear on the left hand side. So I replaced the stencil and used the Versamarker pen and added a little more ink and embossing powder to that area. It was quickly heat embossed.


I looked for a sentiment and finally found one that was perfect for me! It was from an old Sparkle N Sprinkle set called Winter Swirl! You know how I love my butterflies!


 I stamped the sentiment in Versafine Clair Paradise and then heat embossed with Clear Detail.


I found a blue frame that worked perfectly size wise and I used strips of mounting tape to add it around the sparkly snowflake and sentiment. A piece of silver thread was tied to the spine of the card to finish it off. Below are the products that I used in my project:

Sparkle N Sprinkle Winter Swirl Stamp Set

Snowflake Stencil

Versafine Clair Paradise Ink pad

Versamark Ink pad

Versamarker

Embossing powders:

Silver Detail, Silver Lightning, 

Blue Silver, Electric Blue, and Clear Detail

Strip mounting tape

Silver Thread


I hope I have inspired you to come join in the fun of Heat Embossing, over at the Christmas Craft Creations Challenge?


Till next time, stay safe!


Shona

Monday, June 7, 2021

HAI Merry Little Christmas

 Hi there and welcome back! Can you believe it is June already? Where is the time going? For me things are starting to open up a lot, so I am at least getting to join up with my Master Gardener friends as we get some outside work done. Lots of work to get our garden areas back to where they were, after lying dormant for two seasons! Also, the weather is so hot. We were out mulching this morning in 85° - 92° heat - not fun. But it is so nice to be working with other people again! 

My garden is thriving, though I've still got to mulch (lucky I have a strapping 21 year old home for the summer), to help me with the barrowing!

I spotted my first Monarch at my Waystation on Saturday (almost a month ahead of last year), which is my June header! That's the good news, the bad is the Spotted Lanternfly is sharing the milkweed. This is a terribly invasive insect which was discovered in 2014 in Pennsylvania and is quite quickly taking a firm standing in surrounding areas. 

Anyway, on to my card today for the Holly and Ivy Challenge, which is always Anything Goes. 


I chose to use one of the Stamper's Anonymous Holiday Scenes stamps, which has not seen any ink for quite some time. I inked it up with Versafine Clair Nocturne ink. Love the clarity I get with these inks, especially using them as embossing inks. I added some Sparkle embossing powder to give it a little shine.


Here you can see the sparkle!


Then on to the frame! I used (a new to me) Pink Fresh Studio Slim Stitched Scallop Rectangles die to make a frame from black cardstock. I didn't need to use the entire length of the die.


I then put the image behind it to see how long I needed the cut to be and placed the die cut down the left hand side to allow for enough space.  After cutting it I put little strips of tape to hold the corners in place (you don't notice it as it is black).


I marked on the image the corners of the image and then cut the panel down slightly, so that it would fit behind the frame. 


The moon was colored with a yellow Copic marker and then 1/8" Tear-ific Tape was used to attach the frame to the image. This was then mounted with mounting strips added to the back of the frame and placed on a 7" x 3 1/2" glossy white card base. A piece of white and gold bakers twine across the top finished off this card for today!


Hope I've inspired you to take a look at what the rest of the Design Team has done over on the
Challenge? Below is a list of the ingredients for my card today:

Stamper’s Anonymous Holiday Scenes CMS425
Versafine Clair Nocturne Ink
Sparkle embossing powder
Yellow Copic
PinkFresh Studio Slim Stitched Scallop Rectangles die
Gold and white bakers twine
Mounting Strips

Thanks for stopping by! I'll be back tomorrow for another card for the Christmas Craft Creations Design Team! Trying to get that Christmas card stash on it's way!!

Shona