Showing posts with label Teddy Brown EP. Show all posts

Saturday, December 31, 2016

SPARKLE N SPRINKLE'S JANUARY 1ST REVEAL

HAPPY NEW YEAR EVERYONE!!!!! and .....

Welcome to Sparkle N Sprinkle's
 January 1, 2017 New Reveal Blog Hop!

We're starting the New Year off with a BANG! We have a huge reveal to share with you - our largest ever! Can you guess which set I used? It's a trick question!

 There are TEN new stamp sets (one is a digi-only set) being released this month!  These new sets are 20% off until January 3, 2017.  So once you finish the blog hop, head on over to the store and start shopping.  

The sets are:

Right Beside You 812  (digi version DIGI812)
Milton Friendly Giraffe 817  (digi version DIGI817)
Cattleya Orchid Friendship 818  (digi version DIGI818)

Easter Chicky 820  (digi version DIGI820)
Party #1 821  (digi version DIGI821)
Party #2 822  (digi version DIGI822)

Eggs-traordinary Kindness 825  (digi version DIGI825)

Emily Showers of Love 831   (digi version DIGI831)

On Jan 3rd, ONE GRAND PRIZE WINNER will be selected from the comments left on the Designers' blogs listed below. Please leave a comment with each Designer in order to be eligible for the Grand Prize.  You never know who the Mystery Designer will be that has the winning comment.

The Grand Prize Winner, which will be announced on the SNS Facebook page and on the SNS Blog, will receive ALL of the new stamp sets released this month (or the digi versions, if preferred).

The Blog Hop order this month is:


(*Tip: if you have difficulty with a particular link, try clicking on the Designer's blog title to send you to their Home page.)


We hope you enjoy the New Reveal Blog Hop as much as we do.  Thanks for joining us and remember to comment on each of the Designers' blogs to be eligible for the Grand Prize.  
 Wonder who the Mystery Host will be this month????


The Sparkle N Sprinkle Creative Challenge also begins today.  There are lots of prizes and recognition badges.  Come check out how you can become a SNS Featured Artist as well.  The theme is always Anything Goes using Loose Glitter, Embossing Powder, and/or Flock.


Have you checked out the SNS YouTube Channel featuring Demo Donna?  If not, then you are in for a real treat.  Subscribe today to get all the latest Demo Donna tips and techniques!


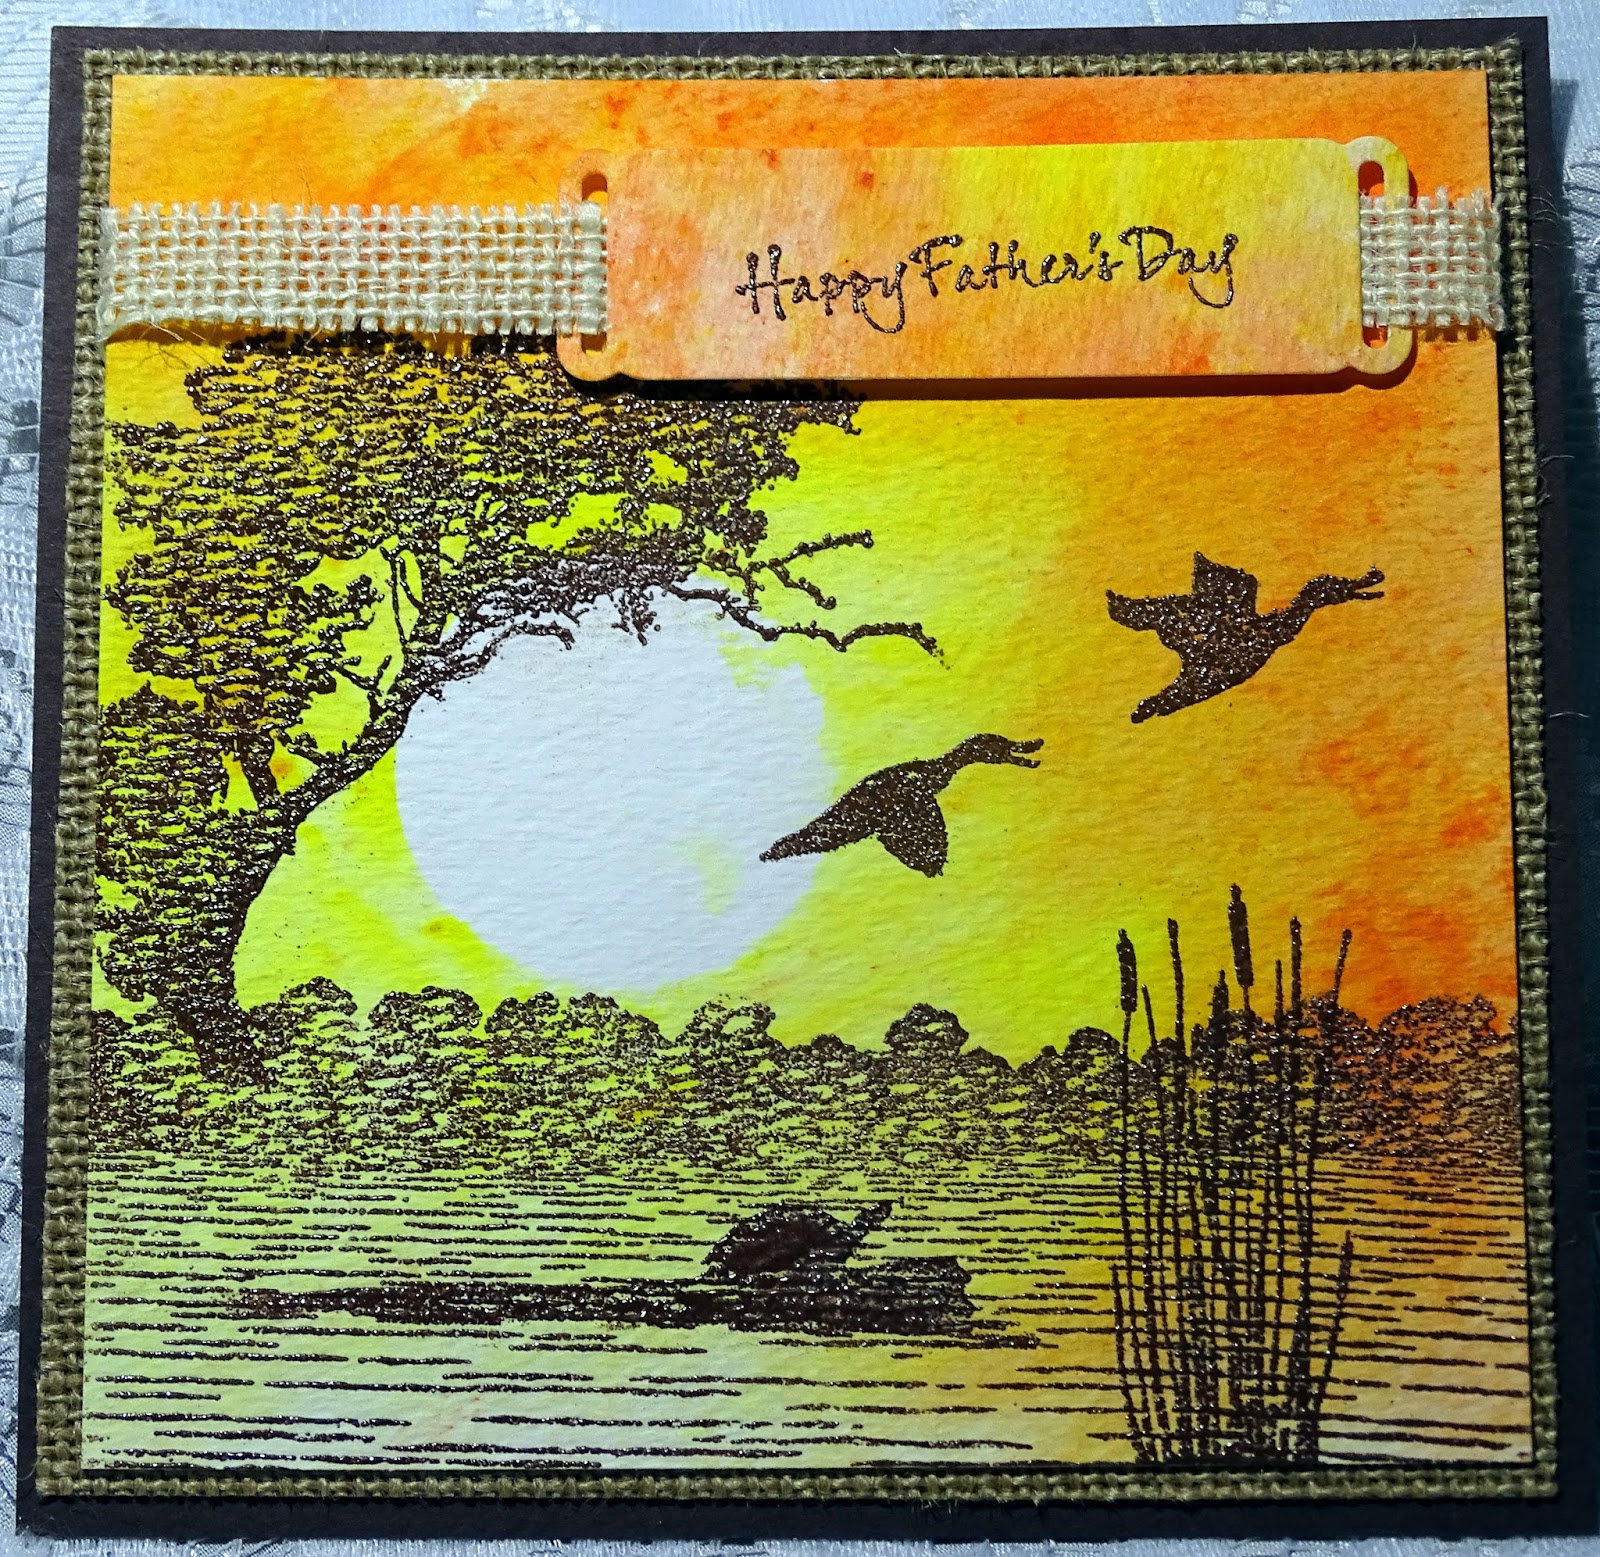
So did you find the hidden stamp? It was the big tree from the Right Beside You Set. You know how I love my silhouette stamps and this is no exception! I actually started out trying to create a Safari scene using the silhouette tree and Milton the Friendly Giraffe, but the styles were too different and the sizing didn't work either (another reason to use digi versions). So I began with making my background on watercolor cardstock, three of the Nuance Powder colors and the mini mister. I punched a circle from a Post-It Note to use as a mask for the sun.


I sped up the drying process with my heat tool. The tree from the new reveal set was stamped first in Versamark, leaving off the bottom of the image so that it would blend into the back of the bushes. All the images were heat embossed with Teddy Brown.


The bushes and water were from the Wetlands 1 set and the turtle, grasses and birds were from the Wetlands 2 set.


For the turtle stamp, I went over the turtle with my Versamarker Pen and added more Teddy Brown and heat embossed to fill him in a bit more and give him more dimension.


The sentiment from the Wetlands 2 set was also stamped in Versamark  and heat embossed with Teddy Brown, it really is a lovely detailed powder. I die cut with the Spellbinders Ribbons Tags Trio and threaded a little piece of canvas ribbon through the slits. I put some Foam Squares behind it for dimension. 


The card front was layered to burlap paper and then layered to a dark brown base to finish.


I'm the last on the hop this month. Have you commented on all the other Designers' projects? Some lucky winner will receive all ten of these fabulous new sets. You know that someone has to win!!! ...... and it could be you! What a great start to 2017 that would be, don't you think?

I'd like to join in the challenge over at the World Wide Open Design Team # 17: Anything Goes

May I wish you all a very happy and healthy 2017.

Big hugs,

Shona

Wednesday, April 20, 2016

HOPE YOUR BIRTHDAY'S A HOOT

Hi there,

I'm back today to share another card using the Want 2 Scrap Chipboard Embellishments, this cute little Owl and the DC Twin Trunk Tree. I have also used a Dreamweaver Stencil, some Gold Metallic Creative Medium and the new Nuvo Crystal drops!


I began my project with taping the Dreamweaver Spiral Dots Stencil to black cardstock, taping the top first, then the bottom and then the sides. After applying the Gold Metallic Creative Medium remove the tape in the reverse order, this will give you a nice clean, unsmudged result.


Set this aside to try. I left it overnight. For my little Want 2 Scrap owl, I applied two coats of White Detail embossing powder, as I wanted some white to show through when he was finished.


I went over the rings of his eyes with the Versamarker pen and heat embossed with Gold Coast.  


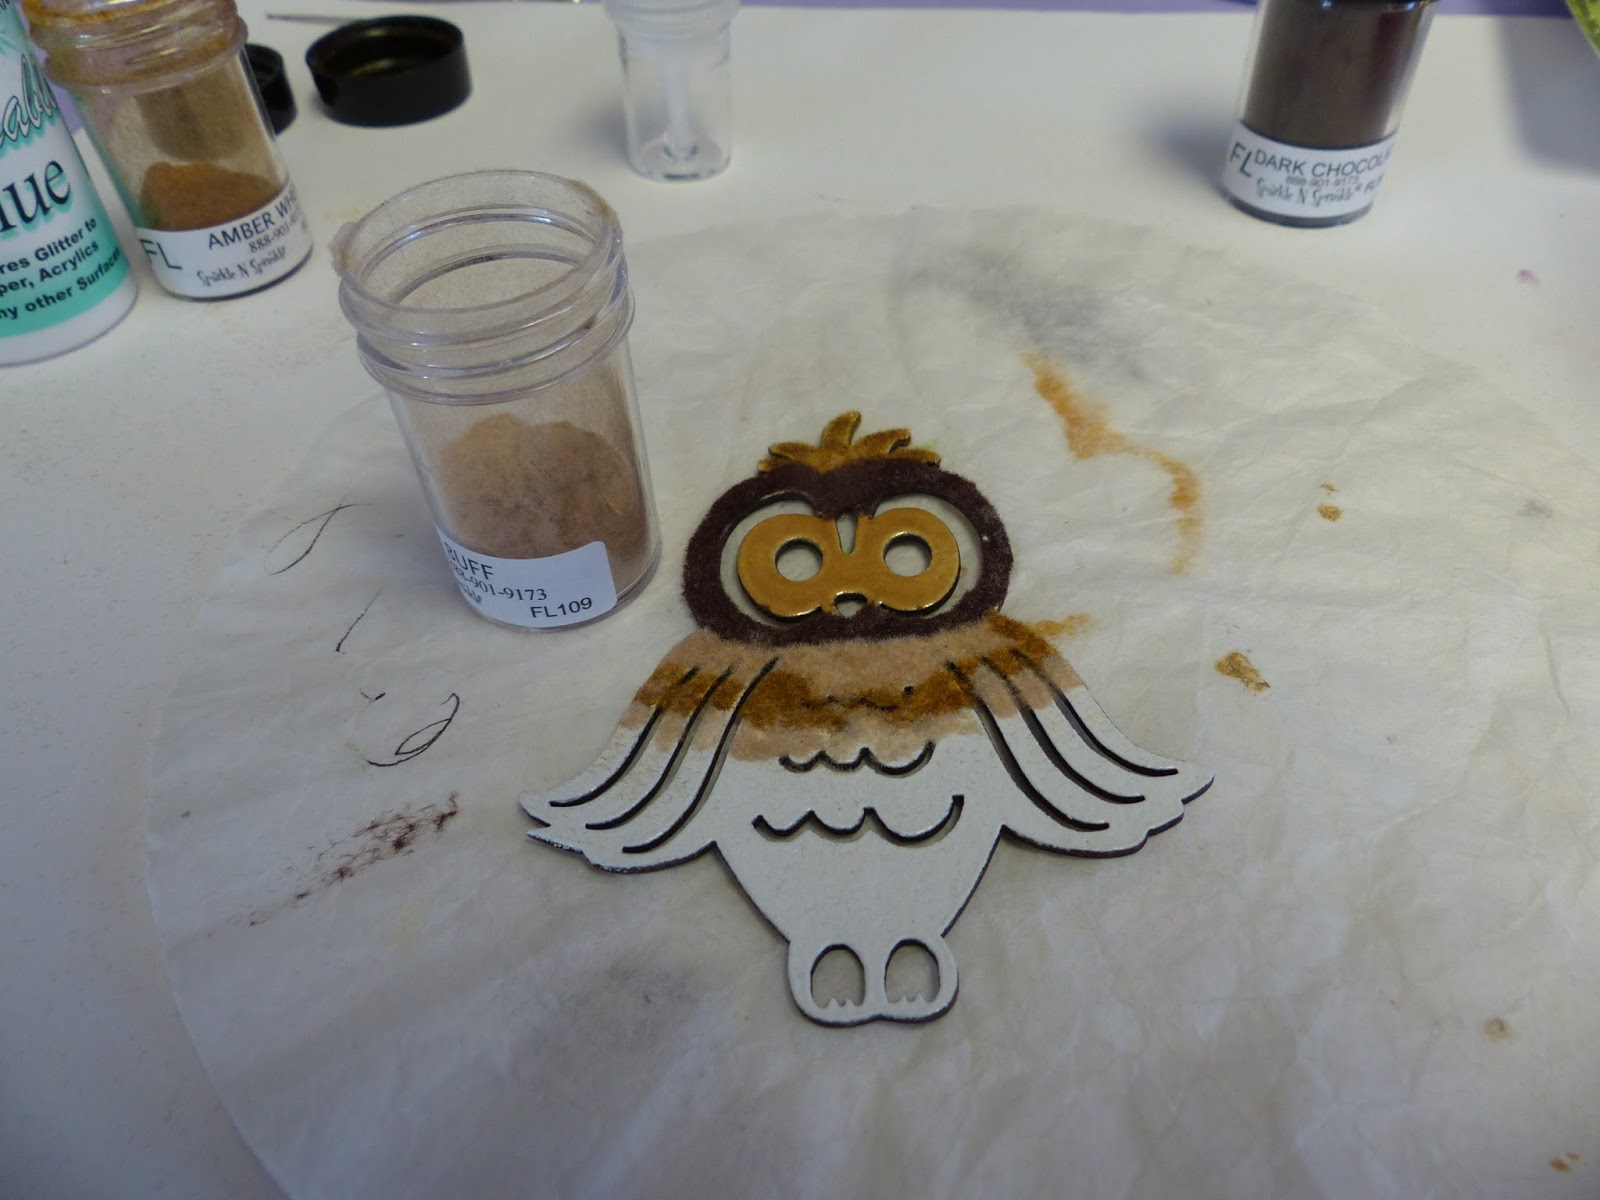
Then I began "coloring him in with Brushable Glue and three different Flockings, Dark Chocolate, Amber Wheat and Buff. I started at the top (with his crest) and worked my way down his body giving him uneven "stripes" of the different colors! I just brushed on another "stripe" of glue and applied another color of the Flocking, down the body until he was completely covered, with his little Dark Chocolate feet!


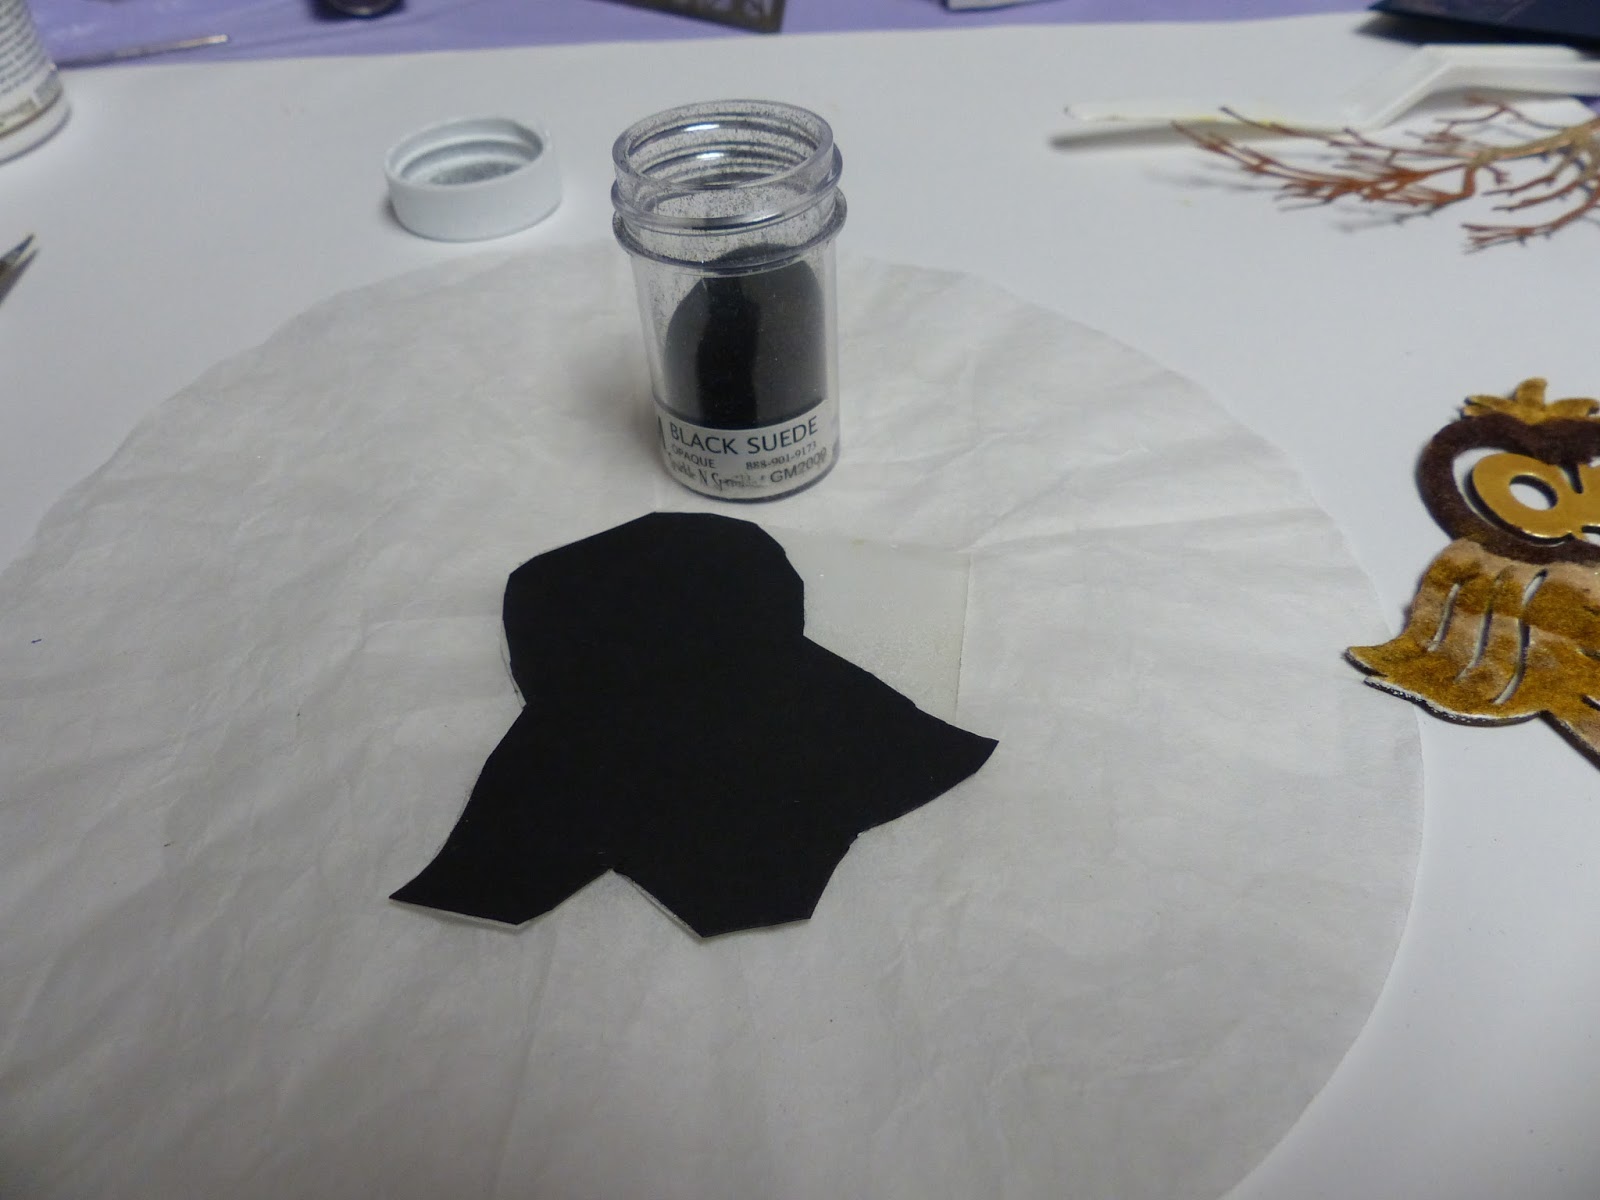
After he was colored in I covered a piece of black cardstock with Super Adhesive Sheet and cut it to the "approximate" shape of the owl. I removed the protective backing and placed the owl over the top.


I burnished Black Suede Velvet Glitter into all the nooks of the little owl. Yes, he looked a bit of a mess at this point!


But he cleaned up well with a couple of swipes of the chubby brush!


The sentiment shown above from the Owlettes Set 511, was stamped in Versamark and heat embossed in Teddy Brown and after it was die cut and embossed with Spellbinders Ribbon Tag Trio Two, it was highlighted around the edges with three of the new Nuvo Crystal Drops: Buttermilk, Dandelion Yellow and Copper Penny. 

Then on to his perch! Want 2 Scrap also carries these little paper silhouettes which is what this was. This one is the Twin Trunk Tree. After cutting one of trees away, I covered it in Versamark and heat embossed the branches with Sienna (which is one of the Tuscany Colors), I then chose Pebbled Copper for the "trunk". I did a couple of coats of each just to bulk it up a bit, as the silhouettes are much flimsier than the chipboard pieces. You will see in the photo below that there is a checkered finish to it too, after a couple of coats of embossing powder, the checks disappeared!


The tree was set sideways for his branch. The sentiment was attached with dimensional foam behind it and the ribbon threaded through it, which was attached to the back, before being layered on the mustard card base. I attached the owl to the branch with Tear-ific Tape and they were then attached with Dimensional Foam.


..... and that finished my project for today:


I'd like to join in the following challenges:

Fab 'n Funky Winged Things: Challenge # 301
Shopping our Stash # 248: Chip off the Old Block (Use Chipboard)
Critters and Creatures Linky Party No. 3
Love to Scrap Challenge Blog #76: Anything goes

Hope you've enjoyed your visit to my blog today. Please leave a comment to let me know you stopped by!.

Till next time,

Shona

Thursday, April 14, 2016

BIRD SONG

Hi there, 

Today I'd like to share with you a card using a Want 2 Scrap Chipboard piece (Bird on a Branch) and some of the new Nuvo Crystal Drops.

Bird Song

I began my project with the Bird on a Branch. I applied Versamark to the chipboard and then heat embossed with White Detail.  This makes the coverage of the other colors more vivid. I applied Versamark again and heat embossed with Pear, for the leaves, Teddy Brown for the branch and feet, and Concord (sprinkled on - for the speckled look) for the bird.

I added a Nuvo black eye!

Bird Song

On to the background, for which I ran a piece of black cardstock through the embossing machine inside a Darice folder - Dots. I placed it so that the dots would be indented, making little "wells" for the crystal drops. I used colors to compliment the Bird on a Branch using Apple Green, Bottle Green, Buttermilk, Crushed Grape and Raspberry Pink and just applied them sporadically into the little "wells".

Bird Song

This was left to dry for a couple of hours. The sentiment from the Bird Song Stamp Set 496 was stamped in Versamark on glossy white cardstock and was heat embossed with one of the detailed powders, Concord, from the Tuscany line - these are perfect for detailed sentiments when you don't want to use black. This was then die cut with Spellbinders Grommet Tag, being sponged with a little Memento Dandelion before removing the die.

Bird Song

A green Mon Ami Gabby Pull Ribbon was threaded through the hole along with a piece of matching sheer, green ribbon. Once the Nuvo drops were dry the sentiment and ribbon were attached with Dimensional Foam to the back of the card front and then layered to a yellow card base.

The Bird on a Branch was then attached with Dimensional Foam to finish off the card. Hope you've enjoyed my share with you today.

Shona

Friday, February 20, 2015

TIME FOR COFFEE!

Thanks for stopping by! If you haven't already got one, maybe you should pour yourself a cup of coffee to get you in the mood for the card I'm sharing today.

Every month, my Mum sends me the Craft Stamper Magazine, which is the UK's big stamping magazine. It's always full of great ideas and I usually find a technique to try that I would have never have thought of.

The January issue had an article about using coffee and tea as a coloring agent. I'm on the Design Team for Sparkle N Sprinkle, and on the first of March they will be revealing four new coffee-related sets. I decided to use the Coffee Shoppe scene for my card today. Think of this post as a "sneak preview". I am blogging this earlier than the reveal as I also want to enter this card in the Craft Stamper February Challenge - use a stencil.


So to begin with, I took a piece of watercolor paper and poured some coffee in the center of it and spread the coffee around with a brush, letting it pool in different areas. I then took my heat gun and chased the drips around the paper. Fun and it smells so good!


After it was completely dry, I flattened it out and swiped it with my anti-static bag. Always try to remember to do that before using a stencil - particularly when you are going to use embossing powders or glitters on top of the paste.

Copper Embossing paste was spread over the Tim Holtz Clockwork Stencil:


The stencil wasn't wide enough for the 4 3/4" x 6 3/4" piece of cardstock, so I just turned the stencil over (after cleaning it) and did the bottom half. It didn't matter that there was a line as it would be broken up by the scene and the clock. After removing the stencil I applied Bronze Splendor Glitter to the piece and left it overnight to dry.


The Coffee Shoppe was stamped in Versamark on watercolor paper and then heat embossed with Teddy Brown and was fussy cut. I dipped an aqua brush in my little jar of coffee and started to paint. To get the various degrees of tones of color on the scene I went over specific areas varying amounts of times, letting the coffee dry between applications.


The clock is the BigZ Dies Weathered Clock, I cut it out of watercolor paper and covered the face in Pebbled Copper embossing powder. The hands were heat embossed with Abracadabra embossing powder. I dipped the brad in Versamark and then it was also heat embossed with Pebbled Copper.


The sentiment, from the same Set 695, was stamped in Versamark and then heat embossed with Teddy Brown. I cut and embossed with Spellbinders Fancy Tags and then distressed the edges a little with Memento Potter's Clay ink.

Then all that was left was to assemble the card, which I did with tape and Dimensional Dots. The card front was layered to a rust colored card base, keeping the monochromatic look. 


Hope you've enjoyed my share with you today and that I've inspired you to get more from your morning coffee other than caffeine!

As I mentioned I would like to enter this card in the Craft Stamper February Challenge - Stencilling.

Till next time,

Shona