Showing posts with label Twinkling clouds Sparkle N Soft. Show all posts

Thursday, October 13, 2016

CHRISTMAS ELEPHANT IN THE WOODS!

Hi there, 

Today I'd like to share with you a card using the October Reveal Elephant Christmas Tree Set: 802 and the new Nuvo Glimmer Paste Moonstone.

Christmas Elephant

I made my step card base using the Sizzix Balloons Step-Ups as a guide. I cut the inside panels from Super Adhesive sheets and stuck them on to the front panel and the two little steps. I repurposed the stamp by stamping the image on white cardstock in Memento Tuxedo Black and then I fussy the elephant and tree out, as I wanted him to be decorating his chosen tree out in the woods! I know elephants don't live in the woods, but call it artistic licence!

Christmas Elephant

Our little friend was colored with Copics: YG03, YG06, YG67, Y17, R37, N2, C3, C5 and Dimensional Glue was applied to the baubles and the star, and to his hat and tail to which was added Twinkling Clouds Sparkle N Soft, for some dimensional sparkle. I die cut the trees with the Die-namites die cut Winter Forest and split it up so that it would fit on the steps of the card. The were sponged with Memento Olive Grove, Bamboo Leaves and Peanut Brittle and then once the inks were dry, I put them on a piece of left-over protective backing and applied the Moonstone Glimmer Paste with a spatula. I find that it is a very easy clean-up when you used the protective backing, none of the paste is wasted, just scoop up any paste from the sheet and put back in the jar. This was put aside to dry - though it doesn't take very long - half an hour at most.

Christmas Elephant

I did the same process with the Memory Box Curved Merry Christmas, leaving "Merry" white.

Christmas Elephant

The Glimmer Paste makes the piece very pliable.  When this was dry I stuck a piece of 3/4" Tear-ific Tape to the back of the "christmas" and burnished Cloud Nine to the word. The assembly of the card was next. I started with the steps, by removing the backing of the Super Adhesive Sheet scraps that I had put on the front of the steps. I then placed the two trees on the back step and then covered the remaining sticky surface with Cloud Nine Velvet Glitter. I repeated the process with the three trees and then placed the elephant on the front panel together with the Merry Christmas die. The Merry Christmas die was slightly wider than the card, so I turned it over and cut off the overlapping edges.

Christmas Elephant

Here is a closer look at the dimension achieved with the Dimensional Glue.

Christmas Elephant

I'd like to join in the following Challenges:

Scrapy Land Challenge #51: Use a die cut brand that Scrapy Land sells
Cardz for Galz Challenge #33: Use at least one die cut

Hope you've enjoyed my share today and that I have inspired you to look at your stamps a wee bit differently.

Hugs,

Shona

Monday, September 14, 2015

MR. AND MRS.!

Hi there, today I am sharing the first personal wedding card I've ever made. It was put together rather quickly and although it was, I have to say that I was pretty pleased with the outcome. All I had was a little bride and groom die and the Mr. and Mrs. chipboard from Want to Scrap. I was thinking along the lines of a 5" x 7" card, but how was I to make such a big card with those two items? How about using the "Lace Technique"?


So that was what I started with - taking a 4 3/4" x 6 1/4" piece of Super Adhesive Sheet and adhering it to white glossy cardstock. I removed the protective backing and covered the sticky surface with a piece of lace. Orchid glitter was burnished into the sticky surface and then after removing the lace, Bridal glitter (how appropriate - right?) was burnished to the remaining sticky surface.


I die cut the couple twice - once from black glossy cardstock and once from a piece of white cardstock covered with a piece of Super Adhesive Tape. I ran both through the embossing machine and then cut the dress and veil from the white version. Remove the backing and place the lace on top of the two pieces (dress and veil). Sparkling Snow was added first, then after the lace was removed, I applied Twinkling Clouds (one of the Sparkle N Softs). This really gave the dress a soft "material look".


The Want to Scrap Chipboard piece - Mr. and Mrs. was covered in Versamark and heat embossed with Morning Glory. I then applied a little more Versamark and sprinkled on some Magic Speckle which gave the lovely mosaic look. Got to love that Magic Speckle powder!

The Mr. and Mrs. Chipboard and the Bride and Groom were attached with little pieces of Dimensional Foam. I had some left-over netting ribbon from the bridal shower gift - so decided to use it on the wedding card! It was tied in a bow and then attached behind the card front. The entire piece was then layered to a piece of lilac cardstock before being layered to the glossy white card base.


Love the fact that the card probably looks more difficult than it was to make - that lace technique is awesome. Have you tried it yet?

Hugs,

Shona


Wednesday, October 8, 2014

PENGUIN PARTY TIME!

Hi there, 

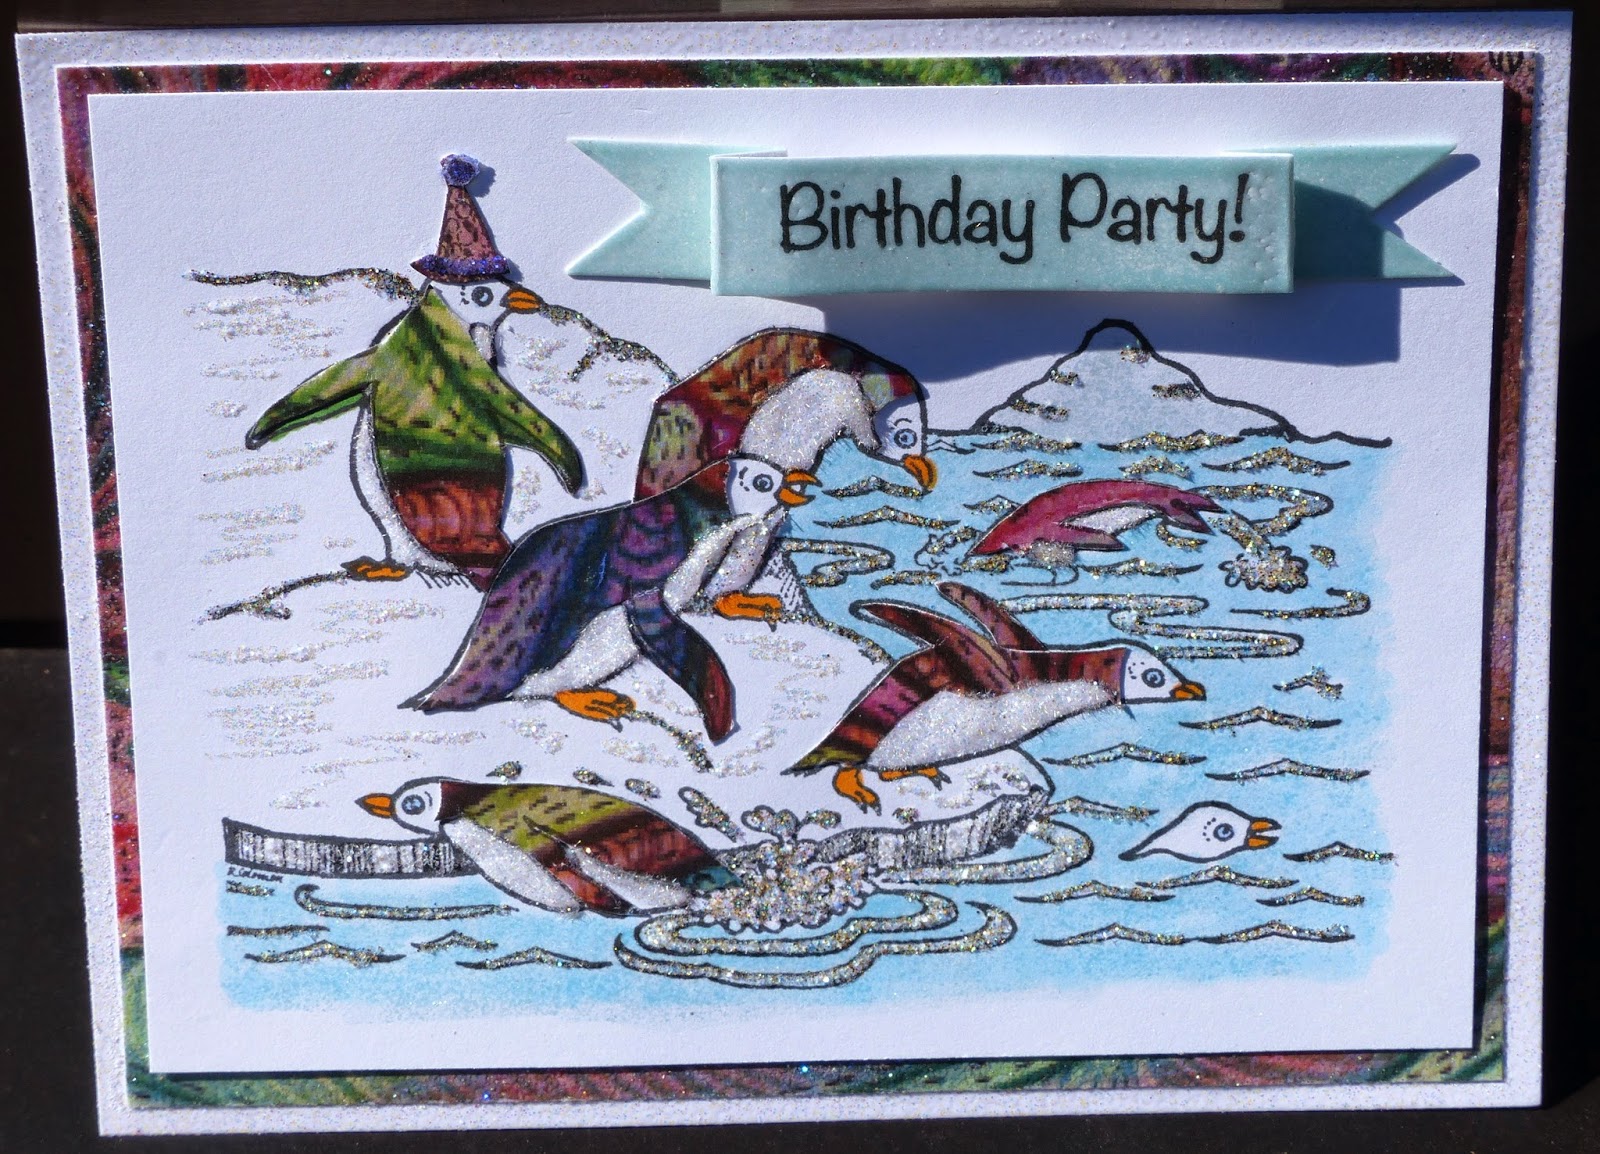
Here is the sneak preview that I shared with you last week. It's using one of the other SNS October Reveal Sets: 654 - Party Penguins. These guys are all dressed up in paper-pieced tuxedos ready for their festivities!


First, I stamped the image twice - once on white cardstock in black ink and then again on the Paisley, Pocket Full of Papers paper. I fussy cut the penguin backs from the DP, using the paper-piecing technique and set them aside, while I colored the image - beaks, feet, eyes and water (not the ripples) with Copics. I then took a Versamarker Pen and applied ink to the iceberg and over the top of the blue water and heat embossed with Ice. This gave the water a glassy look.


Try embossing the water in a vase of flowers or a jar to give the jar a glassy look! It looks great over a stamped and colored image!

I attached the designer paper penguin backs with Brushable Glue and added Twinkling Clouds with Dimensional Glue to the tummies. The party hat was done in the same way, but I used Purple Dust glitter for the trim.


I added Surf (G1117) glitter to the ripples in the water with a Sakura Glue Pen and Diamond Dust (G1116) to the edge of the ice block with Brushable Glue. The Sakura Pen was scribbled over the snow ledges and Sparkling Snow Glitter was applied. You can see from the photo above, the different dimensions achieved using the various glues and glitters.

I stamped the sentiment in Tuxedo black and cut and score to make the banner. It was also covered in Versamark and heat embossed with Ice.


The paisley designer paper was layered to a white card base. I then applied some Versamark around the edges and heat embossed with Sparkle. This gave a sparkly edge for the card front to be layered to. Full directions can be found in the SNS gallery if needed.


Hope you've enjoyed your visit today and that I've inspired you to get out some of your glitter and glues!

I would like to enter this card in the following challenges:

A Sprinkle of Imagination - Color Challenge
Tando Creative Challenge - As Cold as Ice
Love to Scrap - #39 - Anything Goes (No digis)

Thanks for stopping by,

Shona

Thursday, October 31, 2013

Sparkle N Sprinkle Winter Wonderland - November 1st Release

Welcome to the latest Sparkle N Sprinkle November Release
 (two lovely new sets), along with our November Challenge.

This month we have two new awesome sets by artist Rosiland Solomon and there are five chances to win these sets!

the first two chances are with our "Winter Wonderland" Release Contest
 and
three more chances with the SNS monthly challenge where the monthly theme is always "Anything Goes with Glitter, Embossing Powder and /or Flocking."
The Winter Wonderland stamp set and the Flourishes Two stamp set are both available on line.
The beautiful Winter Wonderland stamp set is included in Jazzy Jill's Technique Video for the month.


The Winter Wonderland stamp set, one glitter and one EP will be awarded to one commenter.
The Flourishes Two stamp set, one glitter and one EP will be awarded to another commenter.

To win, just come to our Mystery Designer Party!


I chose to "highlight" this lovely Winter Wonderland Set (literally I used the Spotlight "Highlighting" Technique in my card).  I took each of the three animals and framed them in the same way as the scalloped frame, by heat embossing with Vintage embossing powder, I then reapplied Versamark and heat embossed with Magic Speckle.


I stamped the same scenic image twice - one on glossy in detail black embossing powder and then the second in black StazOn and then used watercolor crayons with a waterbrush to apply color. I punched out the three animal images and framed them with the little Vintage/Magic Speckle frames.

I added more sparkle and shine with my favorite Cloud Nine glitter and Twinkling Clouds Sparkle N Soft, applied with Brushable Glue and a Sakura Glue Pen for the snow highlights. Here are another couple of angles to try to capture the sparkle and shine of the card:


 How the Mystery Party works:

On two of the participating blogs below, a Commenter will be selected to receive the prize
No one knows who the Mystery Designers are, so you may wish to visit each blog to leave a comment.

The winners will be announced on November 3rd on Facebook, the SNS blog, and on our blogs:


Both sets (here is the flourish set):


are available at 20% off 
as part of our Wintry specials. 
Just use the code WINTRY20 in the COMMENTS SECTION 
when checking out in the SNS on-line store 
to receive these brand new sets at 20% off.
Promotion valid through November 3.(sorry, credit card customers only. Total will be manually adjusted. Or phone the SNS shoppe on Wednesday and ask them to manually adjust the charge on the phone for you).