Showing posts with label StazOn. Show all posts

Thursday, November 2, 2017

Spot the Cow!

Hi there,

Glad you stopped by today. My post today is "spot the cow"! I incorporated two of the new October Reveal sets and an older Set to make my farm scene today.


I incorporated one of the older sets into this design today - the Farm Sweet Farm Set 652. I love this beautiful barn image which I decided needed a sort of aged look - so I stamped the image in Black StazOn using my Tonic Stamp Platform and would then color with Copics. This would give a look of weathered paneling on the barn, as the StazOn will mix with the Copics. The image was restamped as you can see on the photo below it didn't cover all the image. When you have a big image like this the platform really comes in useful. Rather than throwing out several copies until you get it right, you just need to reink in the same place!


The tractor from Farm Fresh Tractor Set 877 and the milk urns from Farm Fresh Set 878 were stamped in Memento Black ink to be colored with Copics. The tractor and milk urns were colored in Copics and then fussy cut with the Tonic 5" Mini Scissors - could not craft without these anymore!!


The picket fence is Kraft cardstock cut with a Martha Stewart punch. This was sponged with Seaspray Green Embellishment Mousse. 


The barn was then given a background with Memento Summer Sky and Olive Grove inks and the picket fence put in place.


There was a gap on the left side I thought after assembly. So the milk urns were removed from the picture for a bit!


... and a little cow was added! I cut up the group of cows from Farm Fresh Set Cows 877 and masked where it would have to go on the top of the grass. She was stamped with the new Nuvo Acorn Brown ink. 


The sentiment from the Farm Fresh Tractors Set 877 was stamped in the top left hand corner in the Nuvo Clear Mark ink before being heat embossed with Sienna (fine detail embossing powder and rustic).


By placing this on the Tonic Stamp Platform you can use the grid to get it straight the first time and not mess your project up!!!


The cardfront was layered to a piece of burlap and then Kraft cardstock, for a fun rustic look! The tractor and the replaced milk urns were attached with mounting tape to finish off the card.


Hope you've enjoyed your visit to the farm today? Here are the products that were used on my card today, most of which can be found on the SNS website:

Farm Sweet Farm Set 652
Sienna Embossing Powder (EP413)
Memento Summer Sky, Olive Grove
Copics:YR21, YR24, YG11, YG67, G94,
C3, C5, W7, R37
Martha Stewart Picket Fence Punch
Mounting Tape

I'd like to play along in the following challenges:
2 Crafty Critters Crazies Challenge #8: Add a critter
World Wide Open Design Teal Challenge #27: Anything Goes
Classic Design Team Challenge #19: Anything Goes

Thanks again for stopping by!

Shona

Thursday, September 21, 2017

Magnolia Birthday

Hi there,

Back today with a quick little card from the latest SNS Reveal, starring the Lovely Magnolia Set #853. This is a very versatile set and as you can see from my card I didn't even use the big flower from the set. I chose to make a little shaker card, so the little magnolias worked better.


I die cut the Tonic Happy Birthday from the middle of the white card front.


I then stamped the little magnolia around the die cut seven times in Black StazOn ink, as I was going to use the Nuvo Aqua Flow markers for the coloring.


I used only two Aqua Flow pens on an acrylic block and used that as a little paint palette. These markers really blend well and the tips go into the little spaces, so work well for corners and tight spaces.


After coloring, I made the shaker part of my card. I used mounting tape to make the well, using a piece of tulle instead of acetate. Some Shaved Ice was then put into the well before being covered with black cardstock.


So back now to the front! Nuvo Morning Dew Crystal Drops were added to the orange centers of the flowers. Then Dandelion Yellow, Honey Gold, Banana Split and Orange Marmalade were added around the rest of the card front.


The butterfly die, Little B Butterfly, was cut out and colored with the same Spiced Ginger Aqua flow marker.


This was then applied with Versamark and heat embossed with Clear Detail.


It gave the butterfly a lovely shine. The card front was attached to a black layer and then to the white card base. The little butterfly was attached with a couple of cut up pop dots.


Hope you've enjoyed my share today?

Here are the products that were used in making this card, that can be found on the SNS website:

Versamark, StazOn
Nuvo Jewel Drops Orange Marmalade

I'd like to enter my card in the following challenges:
Cards und More Challenge #193: Flower Power
2 Crafty Critter Crazies Challenge #6: Use a critter
World Wide Open Design Team Challenge #26: anything Goes
Classic Design Team Challenge #17: Anything Goes

Thanks for stopping by! Hope you'll stop back soon,

Shona

Thursday, June 8, 2017

Happy Flowers! Happy Birthday!

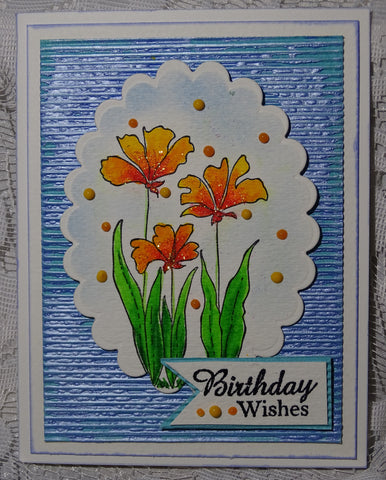
Hi there, today I'd like to share a little birthday card that I made using the May Reveal Happy Flowers Set 840. This is such a cute little set. 
I stamped the image in Black StazOn on watercolor cardstock as I was going to color it with the new Nuvo Aqua Flow Markers. They are so vibrant and they blend really nicely too.
I only used four colors for my little scene: Spiced Ginger and Red Apple for the flowers and Fresh Green and Evergreen Fern for the leaves.
 
They color very similarly to Copics. Go in and paint the lighter color over the darker shade to blend the shades. The image was die cut with Spellbinders Classic Scalloped Ovals Large and a little Memento Summer Sky was sponged around the image before removing the die.I then added some Orange Crush Glitter to the flowers with the Quickie Glue Pen.
I took a piece of light blue corrugated cardstock and randomly applied the Nuvo Embellishment Mousse Cornflower Blue with a spatula. I actually used my heat gun to quickly dry the mousse and this made the mousse "bubble" which I happened to really like. Will be doing this again. 
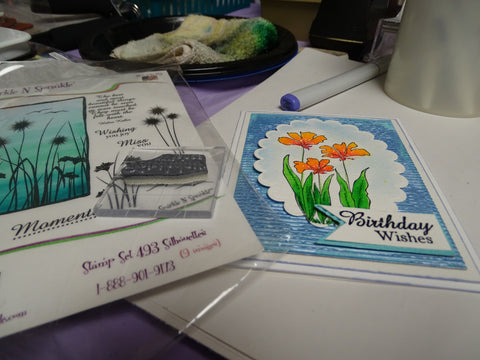
The sentiment was from the Silhouettes Set 493, one of my SNS all time favorite sets! I stamped this in Versamark and then heat set with Black Detail. This was fussy cut and layered to a little piece of the corrugated backing.
The backing was layered to a piece of watercolor cardstock edged with blue Copic B63 and was then layered to the white card base. The image and sentiment were attached with Mounting Tape. Then I applied the Nuvo Crystal Drops English Mustard and Ripened Pumpkin sporadically around my image and sentiment.
That finished up my card for today!.
I'd like to enter this card in the following challenges:
Creative Moments - Challenge 119: Anything Goes with a twist - Birthday
Mod Squad Challenge: Spark it Up
I hope you've enjoyed my share today? Thanks for stopping by.
Shona

Thursday, October 8, 2015

A "FLOCK" OF DISTRESSED BIRDS

Hi there, 

Glad you stopped by today, I've got a fun technique which I have played with before, Coloring on Flocking.  This time however, I used Distress Inks and Distress Markers to "color" my Snow White Flocking.  Even the sentiment is stamped on flocking!

Happy Bird Day

I used the other bird set (Wilson) from the October Reveal. Here are the ingredients I used to make my card:

Ingredients for Happy Bird Day

Distress Inks: Dusty Concord, Spiced Marmalade, Aged Mahogany
Distress Ink Markers: Pine Needles, Dusty Concord, Aged Mahogany, Spiced Marmalade, Black Soot

So let's start with the background, shall we?  I cut a piece of 4" x 5 1/4" Super Adhesive sheet and attached it to a piece of white cardstock. I removed the protective backing and covered the entire piece with Snow White Flocking, burnishing it in well with my finger tool.  I opened the Cuttlebug Leafy Branch embossing folder and applied Memento Summer Sky ink to the raised background of the folder. Taking the "fall" colored Distress Markers I then colored in the depressed areas. I "huffed" to remoisten everything as it took a few minutes to color in all the leaves.

P1450720

The white flocked piece was placed in the folder so that the flocking was face down to the inked side. It was run through the embossing machine to provide this gorgeous result:

P1450721

So then on to the birds! Since the Distress markers are dye based, I used Black Staz-On as my choice of ink. NB: If you prefer to use alcohol markers then you should stamp with Memento ink. I'm using the dye-based markers as I wanted to use the matching ink pads.
I took a piece of 2 1/2" Tear-ific Tape and attached it to white cardstock. I removed the protective backing and then applied the Snow White Flocking. The stamp was inked  up with the black StazOn and stamped directly on top of the flocking:

P1450723

Then get coloring!

P1450725

What I found with the Distress inks, that matched the Markers, is that I could daub the color directly to certain areas. This gives a more even look than using the markers. It's also a much quicker way to color bigger sections. When you use the daubers, just mask out the certain areas that you don't want colored. You can see the difference in the coloring with markers versus the daubers by looking at the tall bird. His belly was daubed, but I used the marker (Aged Mahogany) for his back. The marker produces a darker and more textured look. 


For the birds below. I daubed both of them (except for the masked eyes, beaks, belly and the legs).

P1450733

P1450734

Then they were all fussy cut!

On to the sentiment. I thought I'd see if it worked - and guess what? It did!
I placed a scrap of Super Adhesive Sheet on a piece of orange cardstock and removed the protective backing. I then applied Snow White Flocking and burnished it in well with my finger. I then inked up the sentiment stamp with Dusty Concord and stamped directly on top of the flocking. I loved the result. It was very clean and vivid. I hand cut it in to a fish tail banner.

P1450735

To put the card together, I layered the background on to a piece of purple cardstock and then to an orange card base. It was then just a case of placing the birds and the sentiment with some Dimensional Foam, though I did use 1/8" Tear-ific tape at the feet of the birds so that the heads kind of popped up to give the card a little more dimension. Now looking at the photo it looks like the little guy on the right has bunny ears! 

P1450736

Hope I've inspired you to get more colors from your flocking! It can be whatever color you want, or at least whatever color of markers and ink pads you own!

Have fun!

Shona

Sunday, September 20, 2015

SEPTEMBER MINI BLOG HOP - THE BIG DAY!

Hi there,

So glad you stopped by today. If you are participating in the Mini Blog for the chance to win the cute "Big Day Stamp Set", along with a calendar, you should have visited me via Chris's blog. If you didn't and want to be in the running for the prize this month then go back to the beginning of the hop with Jess.

Now that summer is" almost" behind us and school is back in session - it's back to getting up early (5.30am for me - GROAN!) and getting back to a routine! To help us keep everything straight, Sparkle N Sprinkle is debuting this cute little set - The Big Day! Here is what I created:


Decided to branch out and do something other than a card this time! Had no idea how far this was going to go, but I got on a roll and then just couldn't stop myself!!
This planner/calendar stamp set that was included in this month's video technique kit club. This new set is 20% off until Sept 23.  So once you finish the blog hop, head on over to the store and start shopping.  


A WINNER will be selected from the comments left on the Designers' blogs and will receive this new Big Day set along with the Basic Grey calendar kit also showcased in this month's video.

  Please leave a comment with each Designer in order to be eligible for this Prize.  You never know who the Mystery Designer will be that has the winning comment.  

The Grand Prize Winner, will be announced on Sept 23 on the SNS Facebook page and on the SNS Blog.

The Blog Hop order for our Mini Reveal is:

Shona (you're here)

(*Tip: if you have difficulty with a particular link, try clicking on the Designer's blog title to send you to their Home page.)

WARNING! This post is heavily loaded with pictures!

It was inspired by this:

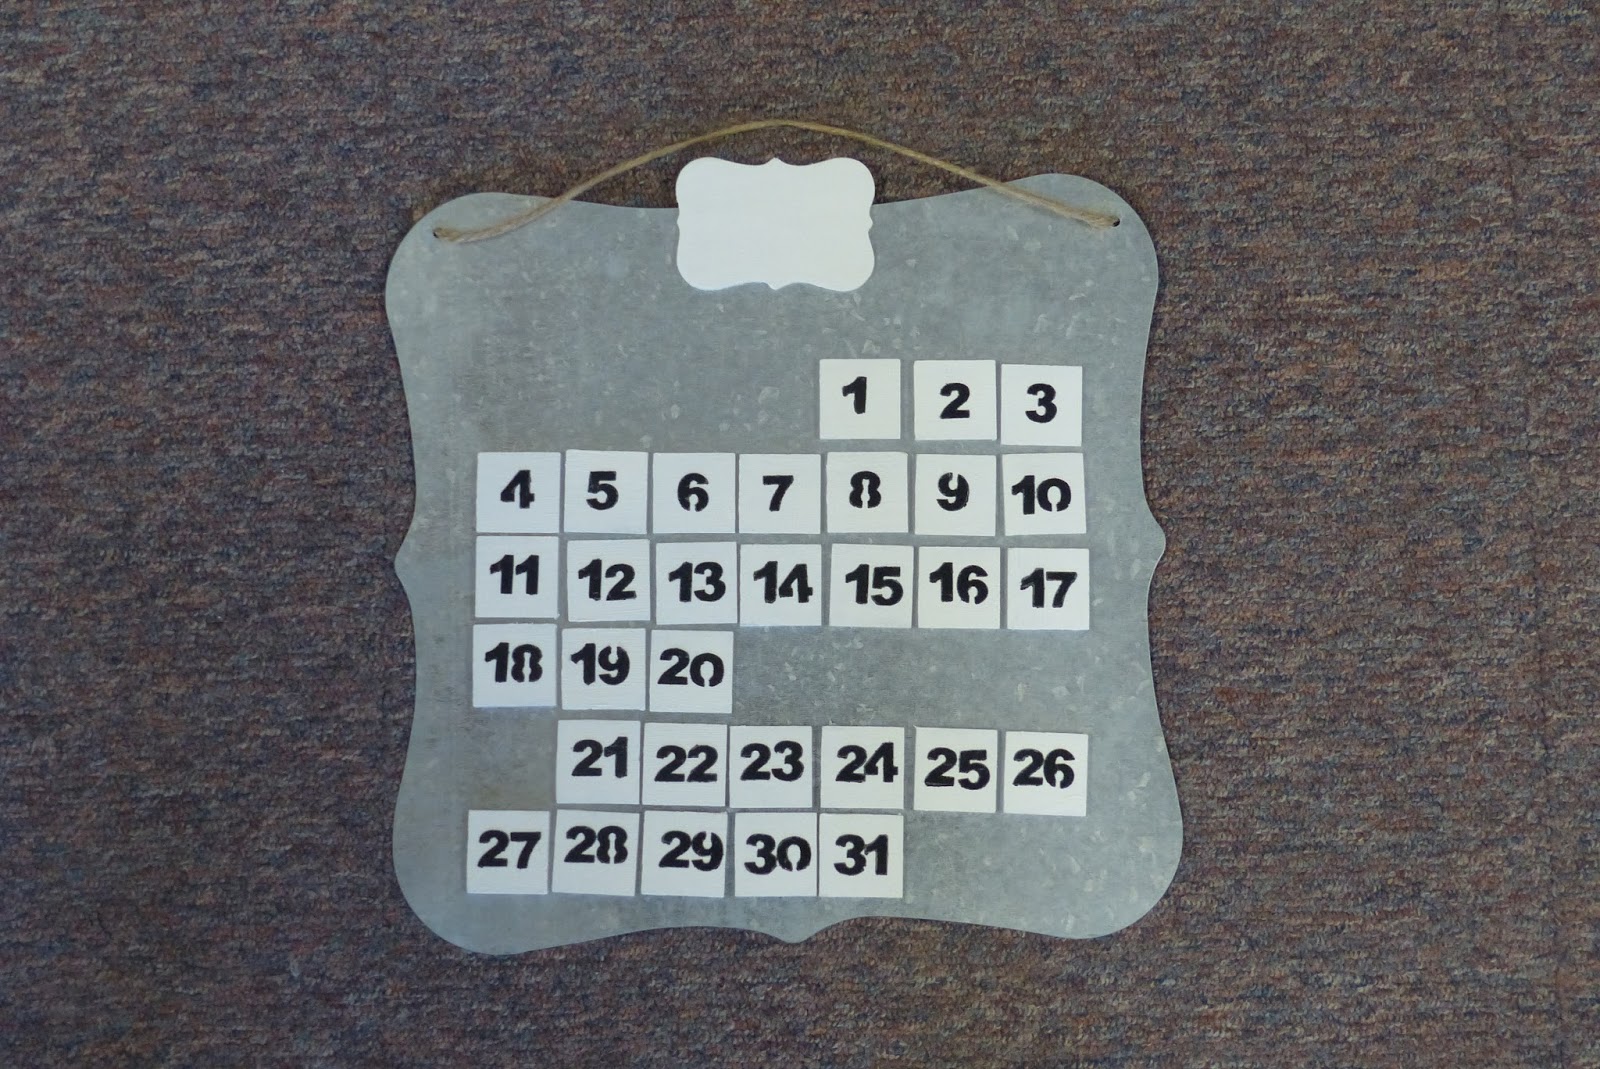
Hubby, David changes this daily (when he's home - I do it when he is travelling). I thought the little stamps were the perfect size for the little special days. Our new calendar will be more for our routine than just major holidays (afterall - you really do remember when Christmas and New Year's Day is, don't you? - they are on the back of the 25 and the 1st! - however, you don't always remember your anniversary!) Now you have no excuse!


So you see how it works? The month you are in is posted at the top and then there is a space between the dates and after the space is the date you are on (everything has a magnet on the back,  so the extras are kept conveniently on the back). The tin plaque hanger was a cheap find from Michaels. It was a happy accident that the month plaques coordinated nicely with the shape of the plaque!


I started with the special days from the stamp set. These were done using little wooden blocks, which were each given two coats of Acrylic paint. (Note to self - paint both sides of each wooden piece next time - I think it would look more professional). I then stamped the images with Black StazOn ink and colored them in with Dye based ink markers. I did a few extra birthday blocks. Pink icing for the girls and blue for the boys, as our calendar only had one, which was never enough!


The dates were created using a piece of black cardstock covered in Versamark and heat embossed with Clear Detail. This was then attached to a strip of 2 1/2" Tear-ific Tape and then each date was punched out.


These numbers were attached to each of the blocks from 1 to 31.


The Magnetic Sheets were cut into 1 inch squares, which worked really well with the little 1 1/4" wooden squares. They were attached to the back of each of the squares. 


So on to the months! Did you see Demo Donna's last video using Dimensional Glue as embellishments. I had to add a finer applicator to the dimensional glue spout as it needed to come out in a finer flow to fit the area I was working with - but doing this worked very well. I then applied 12 different glitters to the glued lettering:


Which colors to choose? Well, I decided to use the Velvet Glitters for the birthstone for each month and there was one for all, except for January and February! So for January I used Collegiate Garnet and Periwinkle for February, both Opaque Ultra Fine glitters:

January - Garnet - Collegiate Garnet (G1114)
February - Amethyst - Periwinkle (G1060)
March - Aquamarine - Teal Velveteen (GM2017)
April - Diamond - Reflection (GM2007)
May - Emerald - Lator Gator (GM2008)
June - Alexandrite - Purple Rain (GM2020)
July - Ruby - Gypsy Red (GM2005)
August - Peridot - Luau Green (GM2004)
September - Sapphire - Cobalt Glaze (GM2013)
October - Opal - Mountain Mint (GM2015)
November - Yellow Topaz - Daisy (GM2019)
December - Blue Topaz - Jasper Blue (GM2012)


All that was left was the letters for the days of the week. I found some letters that were self adhesive, and got permission to use two brand new, not-yet-released embossing powders - Polka Dot and Dalmation!:


Aren't these powders stunning? They will be in the Shoppe soon!


I practiced first on the least useful letters to make sure it would work! Loved the results!


All of the months, dates and images were sealed several times with an Acrylic Sealer. 


...... and then it was complete! Front:


.... and back:


  Thanks for joining us and remember to comment on each of the Designers' blogs to be eligible for the Grand Prize.  (We love reading your comments as they inspire us as well.)  Now it is time for you to hop on over to Eret's blog. 

Till next time,

Hugs,

Shona