Friday, July 31, 2015

SPARKLE N SPRINKLE'S AUGUST 1ST REVEAL

Hi there and welcome to our August Reveal (with a twist). Today we are having a Joint Blog Hop with our friends over at Die-Versions. Die-Versions has come out with nine new dies and Sparkle N Sprinkle has come out with three sets, all based around cancer awareness.


Let's get hopping shall we? I'm first up on the hop, so you should have come here by way of the Die-Versions blog page. 


Sparkle N Sprinkle and Die-Versions are partnering up for a very special joint blog hop, called the Awareness Campaign.  A portion of the proceeds from the sale of the newly released Die-Versions dies and the stamp sets revealed in the joint blog hop will go to help with cancer research.  
Almost every one has been touched by cancer is one way or another.  Either you or a family member has had cancer or you know someone who has had cancer.  The Designers from both teams are joining together to help the fight to eradicate all cancers by inspiring you.

Die-Versions

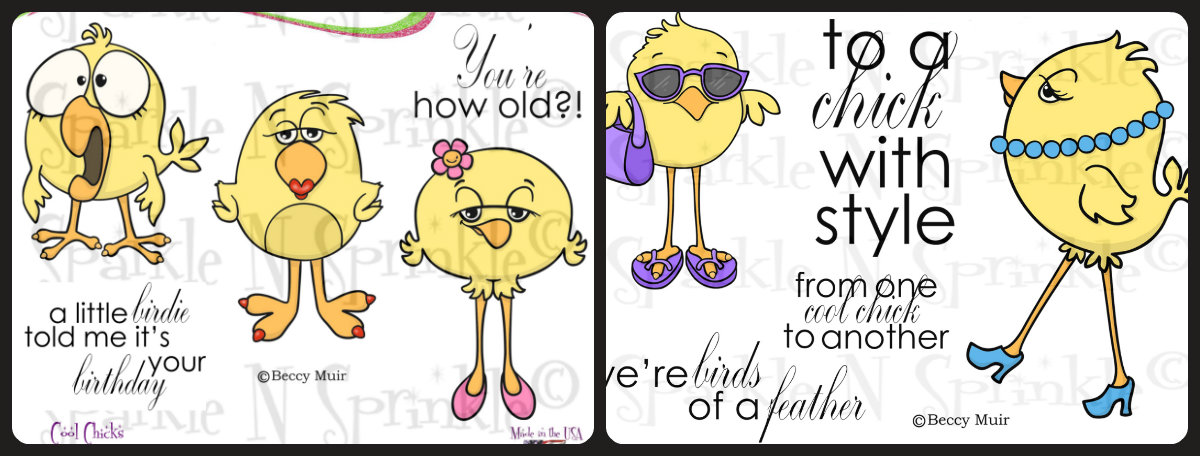
Die-Versions is debuting NINE new Die-Versions low profile dies (July 2015 Reveal - scroll down to the end of the reveal) and Sparkle N Sprinkle is revealing THREE stamp sets for this Awareness Campaign.  All stamp sets will be 20% off until Aug 3.  

Sparkle N Sprinkle
Pink Ribbon Background 408  (digi version DIGI408)
Survivor 713    (digi version DIGI713T)
Awareness 714   (digi version  DIGI714T)

A Grand Prize winner will be chosen from comments left on the Designers' blogs and will be announced on August 4th.  You won't know who the Mystery Designer is until after the Joint Blog hop, so remember to leave a comment with each of the Designers.  

The Winner will be announced on the Die-Versions Facebook page, the Sparkle N Sprinkle Facebook page, the DV Blog, and on the SNS Blog and will receive a $25 gift certificate from BOTH Die-Versions and Sparkle N Sprinkle.

We hope you enjoy the Awareness Joint Blog Hop as much as we have enjoyed creating new projects for it.  We also hope that we have inspired you as well.  Thanks for joining us and remember to comment on each of the Designers' blogs to be eligible for the Grand Prize.  (We love reading them too since your comments also inspire us.)  


The Sparkle N Sprinkle Creative Challenge also begins today with lots of prizes and recognition badges.  Find out how you can become a SNS Featured Artist with special recognition on the SNS Facebook page as well as the Creative Challenge Winner's post.  From time to time, we also have special prizes just for Featured Artists.  The theme is always Anything Goes using Loose Glitter, Embossing Powder, and/or Flock.

My card features all three of the stamp sets: the Pink Ribbon Background Set 408, Survivor Set 713 and the Awareness Set 414. I chose to compliment these sets with the Die-Versions Awareness Ribbon Words DV-485.


I began by die cutting the Sizzix Circle Flip-Its card base. My background cardstock was made by stamping the Pink Ribbon Background stamp on glossy white in Versamark. It was then heat embossed with White Detail. Memento Rose Bud ink was then rubbed over the entire surface and I wiped any excess ink off the white embossing with a tissue. The two panels were die cut from this prepared background and were adhered to the card base.


The two Spellbinders Standard Circles were cut and then I stamped the two sentiments in Versamark and heat embossed again with White Detail. The little ribbon was stamped after the circle had been applied with the ink. See the difference in the detail.


I attached a strip of 1/2" Tear-ific Tape down the center of the middle panel, before attaching the inside sentiment. The exposed tape was covered in Cloud Nine Microfine Glitter and then the little ribbon was stamped on top of the Cloud Nine using the Rose Bud ink.


Now for the little ribbons! I took the three dies I wanted to use. There are six altogether in the set. I took three scraps that I had of Super Adhesive Sheets (big enough to fit the ribbon - you could also use the 2 1/2" Tear-ific Tape). Place the adhesive on to white cardstock and put the die face down on the glossy protective side. Otherwise the wording will be backwards. Gently remove the protective backing from the letters only.


Raspberry Soda glitter was burnished into the spaces of the letters. Then I removed the rest of the shiny backing and Cloud Nine was applied to the rest of the ribbon. The ribbons were attached to the card with 1/4" Tear-ific Tape


Hope you've enjoyed the first of these Cancer Awareness projects. While I was photographing my project earlier this week, I thought how ironic that a little brown butterfly should land on my card. I wondered "had he been part of a butterfly release to commemorate cancer awareness". Nature amazes me every day! Here he is:


OK, that's all from me for now. Now after leaving a comment, you need to follow the little butterfly and flutter over to Patti's blog. She's from the Die-Versions team. I'm sure looking forward to seeing all the wonderful creations for the Cancer Awareness theme from both teams! If you get lost along the way or have a problem with a link, the complete list of Designers is located on both the Die-Versions Blog as well as the Sparkle N Sprinkle Blog.  Happy Hopping!

Hugs,

Shona


Thursday, July 23, 2015

THE RIGHT SHOES!

Hi there,

Today I'd like to share with you another card using the Birds of a Feather Set 726. I loved this cool little lady with the high heels and decided to combine the set with the Cinderella Slipper Set 528 for my card today.


I stamped the chick in Versamark and heat embossed with Dragon Fruit. I used the Spellbinders Eyelet Circles die to cut and emboss and daubered a little Memento Lulu Lavender around the image before I removed the die. She was then colored with Copics: V01, RV02, RV04 and V04. A Sakura glue pen was used to apply Lavender Iris Glitter to her wing, tail and tufts. Dimensional Glue was added to her eye and to the heels. A little thread of Diamond Mesh from Mon Ami Gabby was attached for her necklace. She was set aside at this point for the glue to dry.


To make my background I spritzed white cardstock with water and then applied some Violet Color Burst on top of the spritzed cardstock. I dried the cardstock with my heat tool. The Cinderella Slipper was stamped randomly in Versamark and heat embossed with Belgian Cream. I then decided to go over the entire background with Memento Lilac Posies, I rubbed a tissue gently over the entire piece to take any ink off the embossing powder, this really made the shoes pop!


The sentiment from the Cinderella Slipper Set was stamped in Versamark and then heat embossed with Mulberry (one of my favorite detailed Tuscany EPs that I like to use for sentiments!). It was die cut with Lifestyle Crafts Nesting Rectangles, daubered with some more Lulu Lavender.


Three brads were "blinged" with Mulberry and attached to the circle along with some pink adhesive pearls and rhinestones (Want to Scrap Bling). Three white feathers were threaded through holes and attached to the back with tape. The card was finished by layering the background piece to the card based, which had been edged with 1/2" Tear-ific Tape, then some Diamond Mesh from Mon Ami Gabby was added around the sticky edges. There was still some stickiness around the mesh and so I applied Bubble Gum glitter to take care of that! The sentiment and the image were then added with Dimensional Foam to finish up the card.


I hope I have given you some inspiration today to maybe pick up this sweet little chick set. Both of these new sets are such fun and are so versatile, they can be used for many different occasions.

Hope to see you this weekend for our Joint Blog Hop with Die-Versions where we will be featuring Cancer Awareness. 

Thanks for stopping by today,

Shona

Sunday, July 19, 2015

GEARED-UP FOR A GREAT BIRTHDAY!

Hi everyone,

I'm back today with a quick post of a card I sent to my brother-in-law for his 60th.  Paul loves to alter objects. We recently visited his studio down in Amissville, Virginia and he was altering an old gynecologist's examination table into a kitchen island table.  Well, I'm almost sure the buyers won't know it's original purpose!! Were he a card maker he would definitely be into Steam Punk - let's just leave it at that, shall we??!!

Here's the table that he is repurposing:


He just loves gears and metals! Here is a photo of a painting that he has recently completed. Note the still life that he put together to paint from!


Yes, I know - nuts right? (no - bolts too!)

Anyway back to the card! I had this background which I had made a while back - which involved gears with metallic colors and I thought that would be perfect for him!

I took the plastic TCW Mini Gears Stencil (262s) and taped it down to a piece of black cardstock. I applied Dreamweaver Translucent embossing paste and then after removing the stencil I applied both Shazam and Abracadabra (separately) before heat embossing the entire background.

h

The Happy Birthday is a Die Versions Die Cut (DVJ-081) cut out of white card stock to which I applied Versamark ink and then heat embossed with Copper Dreams. To make it look a little more rusted and worn, I added some more Versamark and then sprinkled on some Magic Speckle and heat embossed with the heat tool from underneath (to stop the powder from flying all over - which it will do if you heat from the top - just saying!) Love that look - I mean the rusted look - not the powder flying all over the place!

I had the self-adhesive numerical silver stickers in my stash, so trying to keep the card with the metallic look, I stuck them in the space of the cog. The background was attached to black cardstock (which is white on the inside). Happy Birthday was attached with Dimensional Foam and the card was complete.


Happy 60th Paul!

I'd like to enter this card in the Scrapy Land Challenge: No. 22 - Vintage/Steam Punk

Hope you've enjoyed stopping by today.

Hugs,

Shona

Wednesday, July 15, 2015

MID MONTH MINI REVEAL

Hi there,

If you came here from Ashley's fun blog, then you have made it through the entire surprise SNS chick marathon! Wasn't that so much fun? If you just stopped by to see what I'm up to, then run back to the beginning of the blog hop with Irit, and leave a comment on each of the designers' blogs for a chance to win both these cute sets. Someone has to win - and it could be YOU!

I chose to highlight the totally surprised guy - who just can't believe how old you are!! Isn't he just the cutest?


These new sets are 20% off until July 18.  So once you finish the blog hop, head on over to the store and start shopping.  All of the new sets are available on cling mounted rubber or as a digital image.  

The sets are:

Cool Chicks 725   (digi version DIGI725B)
Birds of a Feather 726   (digi version DIGI726B)

A WINNER will be selected from the comments left on the Designers' blogs and will receive BOTH of these new sets.  Please leave a comment with each Designer in order to be eligible for this Prize.  You never know who the Mystery Designer will be that has the winning comment.  

The Grand Prize Winner, will be announced on July 19 on the SNS Facebook page and on the SNS Blog.


The Blog Hop order for our Mini Reveal is:

Irit
Chris
Diane
Marie
Jess
Ani
Eret
Anne
Ashley
Shona (that's me!)

(*Tip: if you have difficulty with a particular link, try clicking on the Designer's blog title to send you to their Home page.)

We hope you enjoy this surprise Mini Reveal as much as we have enjoyed creating new projects for it.  And hopefully, we have inspired you as well.  Look for more of these cute chicks in the future too :-).  Here's my creation for this fun hop:


I stamped the little guy (from Set 725: Cool Chicks) in black Memento ink, fussy cut and colored him with Copic markers Y13, YR04, YR68 and 100.  I then applied Dimensional Glue to his beak and set him aside to dry.  I used a Quickutz Speech Bubble for the sentiment to make it appear like he was screaming.  It was stamped in Versamark and heat embossed with Black Detail.

I decided to try a different card idea, so using a Sizzix Movers and Shapers, Square Stand Up die I cut the base out of orange cardstock.  I then ran a piece of white cardstock through and cut 1/8" off all the edges of each piece.  The square that the chick is mounted on was rubbed with Memento Inks Dandelion and Cantaloupe before I ran it through the Darice "Crackled" embossing folder.  I then ran the Desert Sand ink pad over the raised surface.

  
For the layer behind the square, I ran the white cardstock through the embossing folder and this time inked with Dandelion the debossed side, so that the white showed through as the cracks.


The base piece was done the same way, using Dandelion and Cantaloupe, then I covered the entire piece with Versamark and heat embossed with Sparkle.  The sentiment (from Innies and Outies Set 311) was stamped in Versamark and heat embossed with Black Detail.  Both panels were cut using Lifestyle Nesting Rectangles, I applied Dandelion ink with a dauber before removing the die.


The candle was made by taping a piece a scrap of Super Adhesive Sheet (you could also use Tear-ific Tape) to yellow cardstock, running it through a die cutting machine with the Elizabeth Craft Designs 732 die cut.  Use an exacto knife to remove the backing from the candle details and add glitter to the sticky surface.  I used Sunny Daze for the center of the flame and Flaming Orange for the candle I used on the card.

h

The ribbon is a piece of 1/2" Tear-ific Tape which is covered on both sides with Mimosa Sparkle N Soft.  Here is a tutorial on how to make ribbon with the Tear-ific Tapes and glitter!  After I made the ribbon, I ran a piece of 1/4" Tear-ific Tape along the base of the card and attached the ribbon, crimping as I went to achieve the ribbed look.

The chick and sentiment were attached with Dimensional Dots to complete the card.


I hope you have enjoyed your visit with me, the rest of the SNS Design Team and these two fun sets.  I'm the last blogger for this mini hop, so that's all for now.  Make sure you commented on each Designers' blog.  Remember - we need a winner for these two sets!

.... and a little sneak peak of my next "chick card".  So many possibilities!  Not nearly enough time! 


Thanks for visiting today, 

Shona

Wednesday, July 8, 2015

FUNNY FARM CHRISTMAS

Hi there,

I'm here today to share with you another card from the new Reveal sets this month. This little guy, the Christmas Goose comes with a few fun sayings - so I decided to match him up with an older set for the sake of a laugh!


Firstly, I stamped the farm scene (from Set 652) on white glossy cardstock in Memento Tuxedo Black ink. I colored it roughly with Memento inks, London Fog, Summer Sky and New Sprout with a dauber, before going over the inks with some Copics: C5, E31, E35, Y17, for the details.

The Christmas Goose was stamped in Versamark ink on white glossy and heat embossed with Black Detail. He was fussy cut and I went around the outline with the black Copic to get rid of any stray white card. I then went on to color his hats, socks and lights, with some brighter shades of  Copics.


The colored light bulbs were given a little dab of Dimensional Glue to make them shine. The sentiment was stamped in Versamark on to the background (after applying the anti-static powder) and heat embossed with Black Detail. It gave a nice raised, detailed impression.


The background piece was centered to a piece of light blue cardstock, edged with 1/4" Tear-ific Tape. Diamond Dust Glitter (which is chunkier glitter) was then applied to the remaining exposed tape, to add a little extra bling to the piece.


Our Christmas Goose was then attached to the card front with Dimensional Foam, to finish. That ends my share for today. Hope I've inspired you to take another look at some of your old stash and stamp sets and use them in other ways than they were intended!

Be ready to join us again next week, when we will be doing an impromptu mini blog hop, featuring some other funny little birds!

Shona