Sunday, February 15, 2015

PANDA ANNIVERSARY

Thanks for visiting my little part of the world.  Hope things are well wherever you are.  We've just survived another "blizzard", which really wasn't a blizzard, I'm glad to say, but I'm typing this softly so as to not tempt fate! Feeling so bad for those in the New England area.

So, now with Valentine's Day behind us, what's next? Spring? Well, my share today has a little bit of both - some love and some fresh greens!


I've been having a lot of fun with various stencils and Sparkle N Sprinkle embossing powders this month. I love the effect of the TWC Mini Bamboo Stencil along with the cute Sparkle N Sprinkle Panda's Birthday Set 465. I sponged white cardstock with Memento inks, New Sprout and Bamboo Leaves and left it to dry. I found it best to treat the inked surface with the anti-static bag before putting the paste through the stencil - less stray embossing powder that way! 


After the embossing paste was spread over the stencil, I applied some Moss Star and then some Bullfrog embossing powders.


After being left overnight to dry, it was then heat embossed - so pretty:


The pandas were stamped in Versamark and heat embossed with Black Detail. They were then colored with Copics: N0, N2, 0, G07, YG09 and R02. I sponged some Pear Tart ink around the image before fussy cutting.


The leaves of the bamboo in the image were highlighted with Green Iris Glitter.

The banner (Sizzix Banners Framelits) was cut from a scrap of Super Adhesive Sheet, after being applied to piece of white cardstock. The protective backing was removed and the Spellbinder's Inspire Dies was cut out from black cardstock and then placed on top of the sticky surface:


Luau Green Velvet Glitter was then applied to the remainder of the banner - great way to use up strips of left-over Super Adhesive Sheets!


I heat embossed the little heart brads with Moss Star, Pear Star and Bullfrog which were then added to the card front along with the image and sentiment which were attached with Dimensional Dots before being layered to black and then to the white card base.

I hope you've enjoyed my share for today.

I'd like to enter this card in the Craft Stamper Challenge: Take a Technique - Stencilling

Thanks for stopping by,

Hugs,

Shona

Thursday, February 12, 2015

WINTER, SPRING, SUMMER, FALL!

Hi there,

Thanks for stopping by!  For the February Reveal I left you with a sneak peak of my four seasons. Today I'm going to share with you a set of cards made with the new Seasonal Trees Set 680. I used some little furry animals to bring my seasons to life!


So let's begin with winter:


For this card, I stamped the tree with Versamark then heat embossed with Silver Lightning. The little snowflakes were done in the same way. The deer was a die cut, which was cut from a piece of white cardstock covered with 2 1/2" Tear-ific Tape. After removing the protective backing I then applied Amber Wheat flocking to the entire piece. Copic Marker E47 was used to add color to the hooves, eyes and antlers. Here is the tutorial on how to add highlights to flocking, using Copic markers.

The snow banks were made by adding a strip of 2 1/2" Tearific Tape to a 4" wide strip of white card. I tore the tape in half lengthwise at an angle. After removing the protective backing, Twinkling Clouds was applied. The sky was sponged with Memento Summer Sky.

The sentiment (Penguin Trio Set 616) was stamped in Versamark and heat embossed again with Silver Lightning. The eyelet was also heat embossed with the same embossing powder.

The card front was centered on an A2 card base which had been edged with 1/4"Tear-ific Tape and then Reflection Glitter was applied to the sticky edges.

On to Spring:


This time the tree was stamped with Versamark and heat embossed with Pear. The sentiment (from Spring Swirl Set 425) tag was done in the same fashion. The little yellow brads were added to the tag and another was applied with Versamark and heat embossed with Pear Star to hang on the tree.

The bottom of the card front was dry embossed with a Darice (Nature 3-pack) embossing folder. I then applied Memento inks: Pear Tart, Cantaloupe and Summer Sky to color the background.

The little kitty (from Kitty Trio Set 231) was stamped in Memento Tuxedo black on top of a piece of white cardstock covered with Tear-ific Tape and then Buff Flocking. Copics YR02 and E25 were used to add highlights to the fuzzy cat.

The card front was layered to a piece of yellow cardstock and then to the card base which had been edged with Versamark and heat embossed with Pear Star.

Summer is up next!


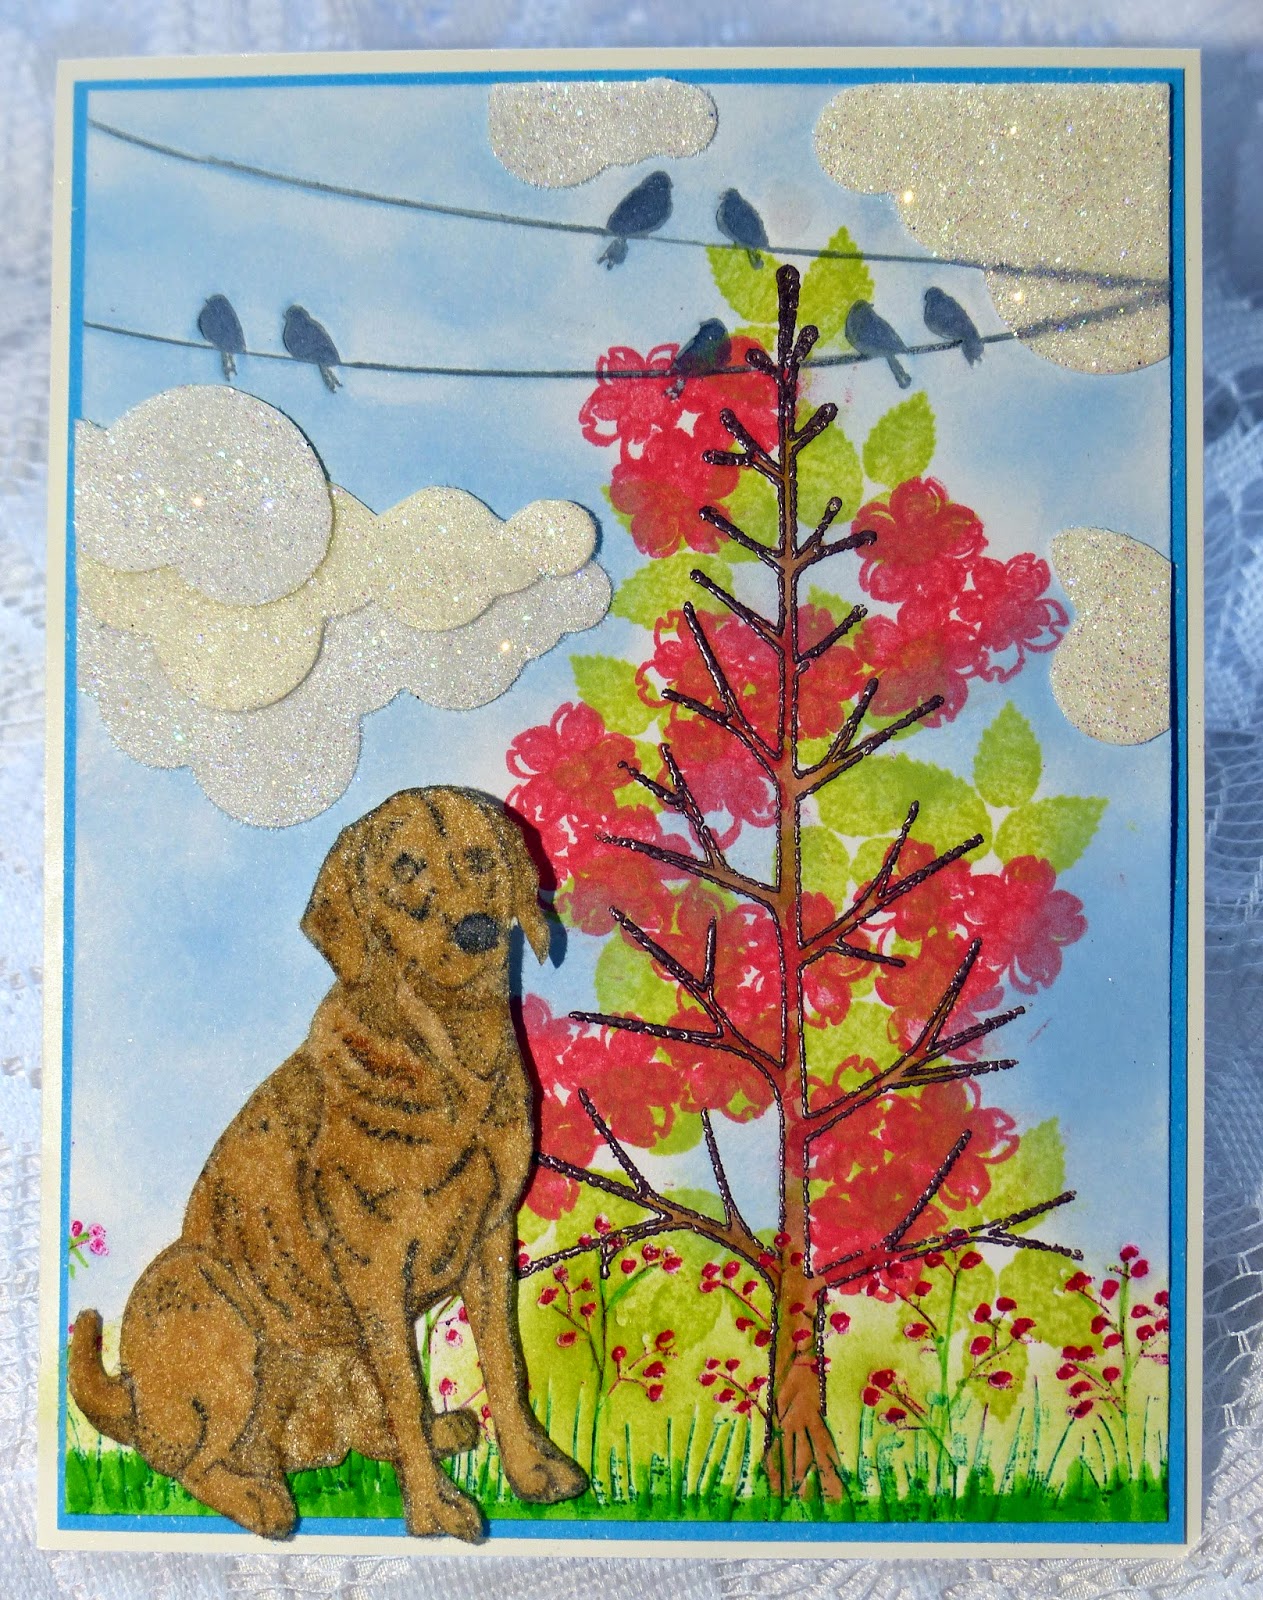
This time the tree was stamped in Versamark and heat embossed with Teddy Brown. The leaves and flowers were stamped with Memento inks, Pear Tart and Lady Bug. Two of the Darice borders were used - the flowers on the bottom and the birds on the top. Flowers were inked with Lady Bug and the birds were inked in Gray Flannel. Summer Sky and Bamboo Leaves were also sponged on the background.

The doggy was stamped in Memento Tuxedo Black on top of Buff Flocking. He was highlighted with Copics E33 and C5.

The clouds were done with white cardstock covered in Tear-ific Tape and then die cut with Spellbinders Rainy Day Dies. The protective backing was removed and they were applied with Twinkling Clouds Sparkle N Soft.

.... and to finish the year - Fall:


The tree was stamped in Memento Espresso Truffle ink. The fall leaves were stamped in the background with Memento inks: Peanut Brittle, Angel Pink, Potters Clay and Pistachio. The cattails was the third of the Nature 3-pack. and I went over them with some Toffee Crunch ink before adding Celestial Glitter to the plumes with a Sakura Glue Pen.

The sentiment (Harvest Pumpkins Set 228) was stamped in Versamark and heat embossed with Sienna. It was sponged with Cantaloupe and then cut up before being attached to cardfront with dimensional dots.

The critters (The Collector Set 682) were again stamped on top of a Buff flocked cardstock and then highlighted. This time Copics E00, E31, E33, R21, BV00, YG25 and W5 were used.

The card front was layered to purple cardstock, then on to a card base that had been edged with Versamark and heat embossed with Abracadabra.

.... and that concludes my four seasons! 

Hope you've enjoyed my take on the seasons and also that you'll give the little fuzzy animals a try. So much fun - with one flocking and a few Copics - the possibilities are endless.

Hugs,

Shona

Wednesday, February 4, 2015

VALENTINE BIRTHDAY LOVE!

Hi there,

I spent most of the morning playing in my stamping room with a couple of goodies that I had received on Monday as part of blog candy that I won from Carolina Cards. One was a Darice embossing folder Valentine Hearts and the other was the Spellbinder's 5 x 7 Enchanted Labels 28. Thank you so much Mary! Here is what I ended up with:


I started with the embossing folder. I inked up a piece of Kraft cardstock with Memento Angel Pink and then added some Rosebud. I then ran it through the embossing machine and sanded the raised pattern to remove the ink (sounds counterproductive - but the colors stay in the recessed areas). After fussy cutting the heart, I dabbed some Moonlight White Brilliance ink over the piece and heat embossed with Clear Detail.  


Next, I cut and embossed the largest frame from the Enchanted Labels 28 and inked it up with the same two pink as before. I applied Versamark to the entire piece and heat embossed with Clear Detail again.

I lay two strips of 2 1/2" Tear-ific Tape side by side on a piece of 5" x 7" Kraft cardstock. After removing the protective backing the frame was centered on top. Peruvian Lily Velvet Glitter was then applied to the remaining sticky areas.


I then die cut the Cheery Lynn DL 178 Heart Within my Heart from Kraft cardstock and after putting the little heart inserts aside (to reuse later) I applied Versamark and heat embossed with Bronze Rose.


Three of the little hearts were used. One was inked with Rosebud, then applied with Versamark and Magic Speckle. Another was inked with Versamark and heat embossed with Clear Detail, the third was heat embossed with Vintage.  

The big heart insert from the Cheery Lynn die was inked with the two pink inks first and then applied with Versamark. Vintage was then added and then Magic Speckle to achieve the lovely mottled look.


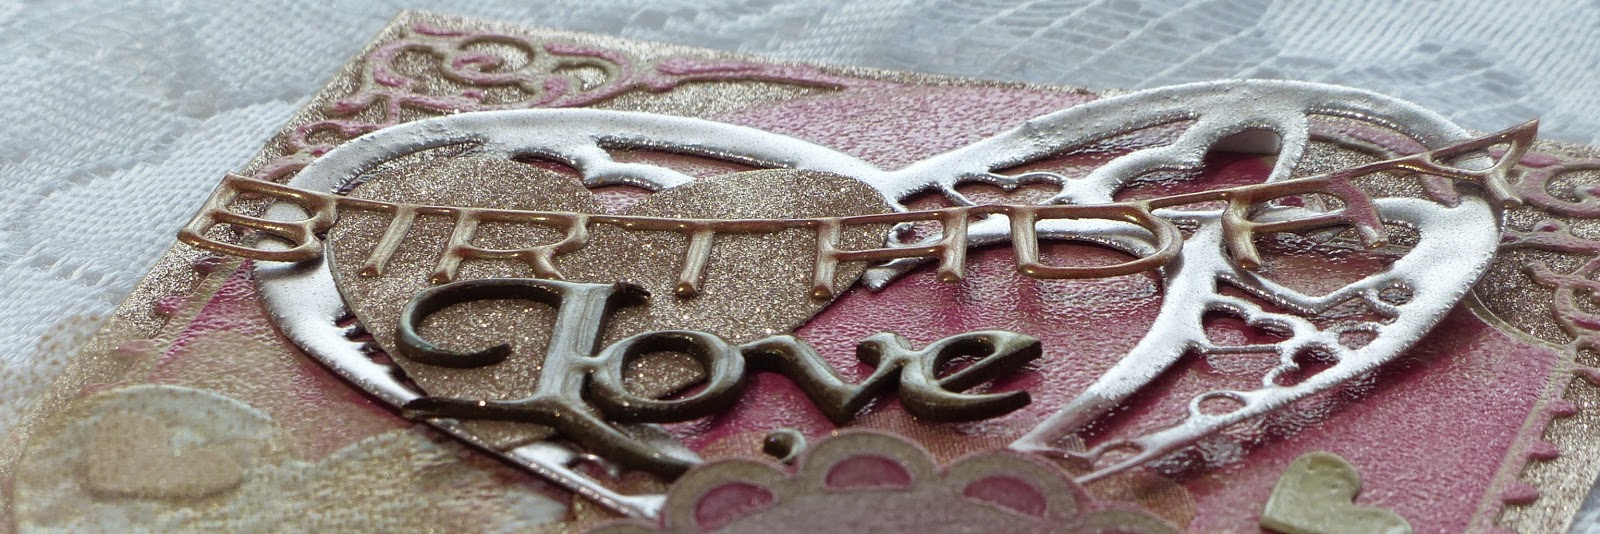
The Die-Versions Birthday die cut was inked heavily with Rosebud before I covered it in Versamark and then heat embossed with Vintage (Vintage is "near transparent" so that is why you see some of the pink showing through). I love using this embossing powder on any vintage/shabby chic project.


The "Love" chipboard was applied with Rosebud ink before being heat embossed with Vintage. 

A new technique for me today was to emboss a piece of tulle! But first I die cut it! So after cutting it with the Spellbinders Classic Scalloped Hearts (which it cut through very well, I may add!) I covered it in Versamark and then holding it with tweezers from the bottom of the heart I heat embossed with Vintage again. Loved the subtle look it gave. You can see it peeking out from behind the Darice heart.


So then to put it all together. The dilemna was to get everything to stick and stay put.

I figured if I stuck the words to Super Adhesive Tape then they weren't going anywhere - so that is what I did! I ran the Cheery Lynn die cut through the machine with a piece of Tear-ific Tape that was attached to a piece of Kraft that was big enough to hold the bigger heart from inside the die cut. I then removed the protective backing and attached both the "birthday" die cut and the "Love" chipboard to the surface, before applying Peruvian Lily glitter to the remaining sticky surface.


Tear-ific tape was used to adhere the hearts down, with some Dimensional Dots for dimension! Then the little hearts were adhered with Dimensional Glue. 

A look at the finished project once more:


I'd like to enter this card in the following challenges:

Sweet Stamps: Love is in the Air
Crafty Sentiment Designs: Include a Heart
Scrapy Land Challenge 11: Use a Die that Scrapy Land Carries
 (Spellbinders, Die-Versions, Cherry Lynn)

Thanks for stopping by today! 

Hugs,

Shona