Thursday, November 26, 2015

KISS CUT POPPIES

Happy Thanksgiving everyone! I wanted to share a technique that I came up with that gets more from your dies. We are calling it the Kiss Cut technique over at Sparkle N Sprinkle. 

Kiss Cut Poppies

This card uses the Sizzix Inksheets Transfer pad for the way it was planned but you can also use this transfer pad for the Sparkle N Sprinkle's Kiss Cut technique using Tear-ific Tape and glitters. This is how it works:

Apply a piece of 2 1/2" Tear-ific Tape to a piece of white cardstock and then using the die cut (I'm using Memory Box Dainty Poppies here)  run it through the embossing machine using the sandwich that Demo Donna does in the video. This way the machine will just cut through the protective backing of the Tear-ific Tape (which is what you want) and not cut completely through the cardstock too. On my machine I can use the normal cutting plates, if it is cutting too far (through your cardstock too) just place a card shim on top of the adhesive sheet. It will cut through the card and then just "kiss cut" the tape. I've found that the calibration of each machine is different.

Kiss Cut Poppies

Using an exacto knife or other piercing tool, remove the outline first. It's best to work from the darkest colored glitters through the lightest ones - so as not to contaminate the lighter shades. So I started with Gypsy Red (for the flowers), followed by Luau Green (for the stems) and then Orange Tiger and Daisy (for the petals).

Kiss Cut Poppies

Remove the background protective layer and apply Cloud Nine Velvet Glitter to the entire background. Your piece is then ready to be die cut. I used Spellbinder's Mega Oval die.


Now on to the background. So this is what the Transfer Inksheets Pad was initially purposed for, but who doesn't like tools that are "ambidextrous"! So place the gold Sizzix Ink Sheet (shiny side up) on top of the black cardstock. Run through your machine as indicated.  I did this process a few times to get the effect I was going for to get my background. It's a great way to get use from your dies other than just cutting. Looks like a stamp - but it is from a die! Very cool. 

Kiss Cut Poppies

Using the same die as the focal image, I used the same die as a "stamp" with the gold Ink sheet on the black background. Once I had "stamped" it five times, I then attached the poppy oval to the card front and tied the yellow bow (made using my new Craft-Dee BowZ) around the bottom of the cardstock.

Kiss Cut Poppies

Also, take a look at another blogger friend, Kathi Jo, (tell her I sent you!) who extends the use of dies even further by using your dies with ink pads. This gives you an unlimited color range, instead of just the five colors that are available in the sheets. 

My card base was distressed with Versamark and then Gold Detail embossing powder before the card front was layered to it. Hope you've enjoyed your visit here today! While you're waiting on the turkey to cook or "settle" down - take a quick run to your stamping room and give this technique a try.

Big hugs,

Shona

Thursday, November 12, 2015

GELATOS CHICKEN RUN

Hi there, 

Today I decided to step out of my comfort zone and try something new. I have recently been playing around a bit with Gelatos, so decided to have a go at making a little canvas creation.

Gelatos Chicken Run

First I took a blank 5" x 7" canvas and scribbled Yellow, Orange and Red Gelatos over it. I took a baby wipe and using a circular motion I blended the gelatos into one another to create a "sunset" hue.

Gelatos Chicken RunGelatos Chicken Run

I dried this with my heat tool, before proceeding.  Then I took a stencil (TCW Mini Meadow) and stencil brush and began to create a meadow with grass, stems, butterflies and flowers, using different colors of Gelatos:

Gelatos Chicken Run
Gelatos Chicken Run

I kept going until I had an entire meadow. Then it was time to add my chickens, from the Chicken Run Set 761, using Versamark and Black Detail embossing powder:

Gelatos Chicken Run

Gelatos Chicken Run

So now it needed some dimensional elements and I did want to include a sentiment from the set, which was stamped on white cardstock in Versamark and heat embossed with Black Detail. The chickens stamped out like they were made of burlap, because of the canvas backing, so I decided to make a burlap frame to be in-keeping with the chickens:

Gelatos Chicken Run

I cut a piece of burlap ribbon in half and attached it around the sentiment using 1/2" Tear-ific Tape, this was then colored with Yellow and Red Gelatos and dabbed with the wipe again to tie it in with the background.

Gelatos Chicken Run

I repeated the Gelatos and wipe technique with three Prima flowers, whose centers were made by "blinging" a brad with Tequila Sunrise embossing powder after applying Versamark to the brad. Then a Sakura Glue pen was used to add Sparkling Snow glitter to the petals to give them some sparkle.

Gelatos Chicken Run

The frame and the flowers were attached to the canvas with dimensional foam. I added dots to the butterflies and flowers with a white Signo pen, for some highlights.

Gelatos Chicken Run
... and I added some gold Prills with Dimensional Glue at the chickens feet for seed.

Gelatos Chicken Run

I think I might be doing some more of these. Kind of liked having a play date in my craft room today! Hope I've inspired you to get those Gelatos out and start playing!

Gelatos Chicken Run

Enjoy your day!

Shona

Tuesday, November 10, 2015

GOOD PUDDLE!

Hi there,

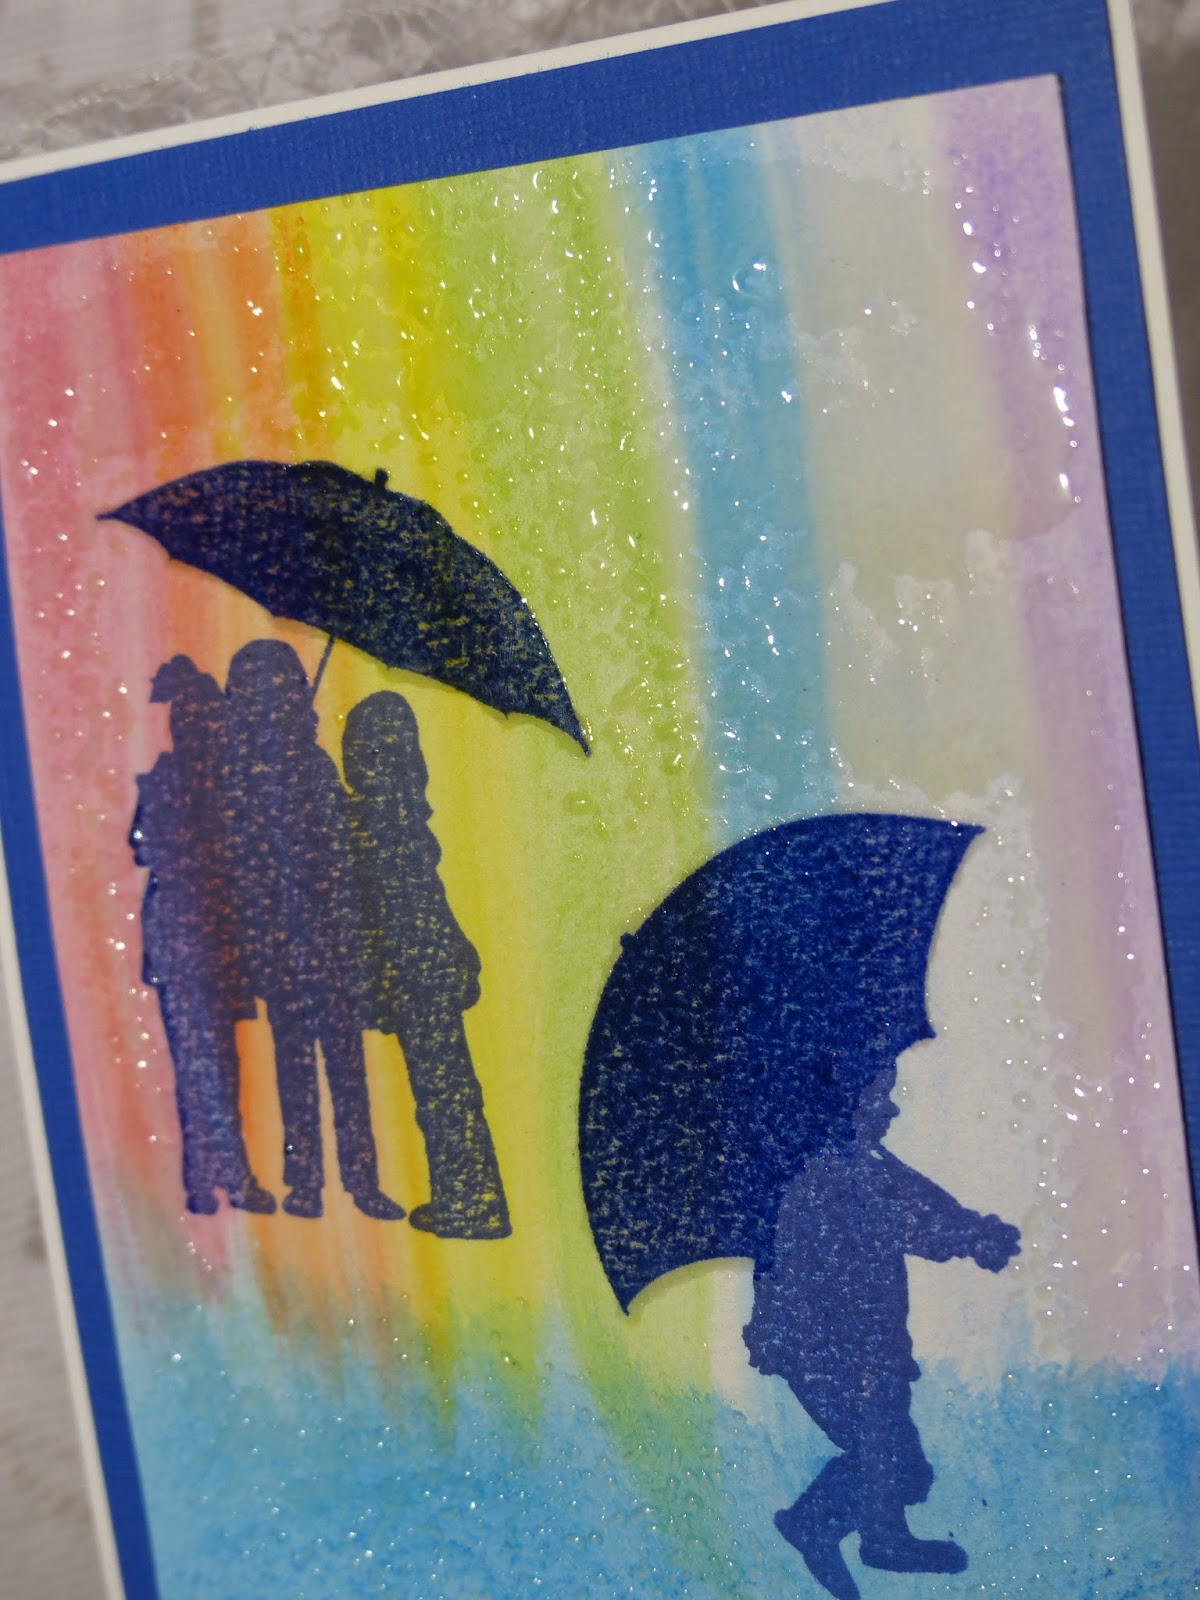
Today I'd like to share a CAS card with you. Clean and simple, using Gelatos, one ink (Memento Paris Dusk) and a Versamarker Pen with two embossing powders (Clear Detail and Super Thick Clear) to produce the wet look of rain!


Firstly, rub a little of each of the Gelatos along the top edge of your watercolor paper (in order of the rainbow), then take a baby wipe and pull down the colors towards the bottom. Rub a little blue along the bottom and using the wipe, blend up into the rainbow.


Leave to dry (or speed it along with your heat tool) then stamp the two silhouette images from Stamp Set 762 Splish Splash and the sentiment from Stamp Set 760 Puddles in Memento Paris Dusk Ink. Wipe your anti-static bag over the card front before you start the embossing, then using a Versamarker Pen, outline and fill in the umbrellas with ink.


Apply Clear Detail to the first umbrella.


Have a coffee filter and Super Thick Clear ready to pour over the hot Clear Detail powder and heat from underneath this time.


I did two coats of the Super Thick Clear to make it extra shiny and dimensional. Repeat the process with the second umbrella.

Apply Super Thick Clear powder all over card, brushing off any powder that is lying "under the protection of the umbrellas". Work in sections for this step rather than trying to do the entire card at one go.


I put a lot of embossing powder over on the right side to make it look like the rain was coming down "in sheets"!


The card front was layered to a blue layer before a white card base to finish.


Love that shiny umbrella! Hope you've enjoyed my quick card for today.

Hugs,

Shona