Saturday, January 28, 2017

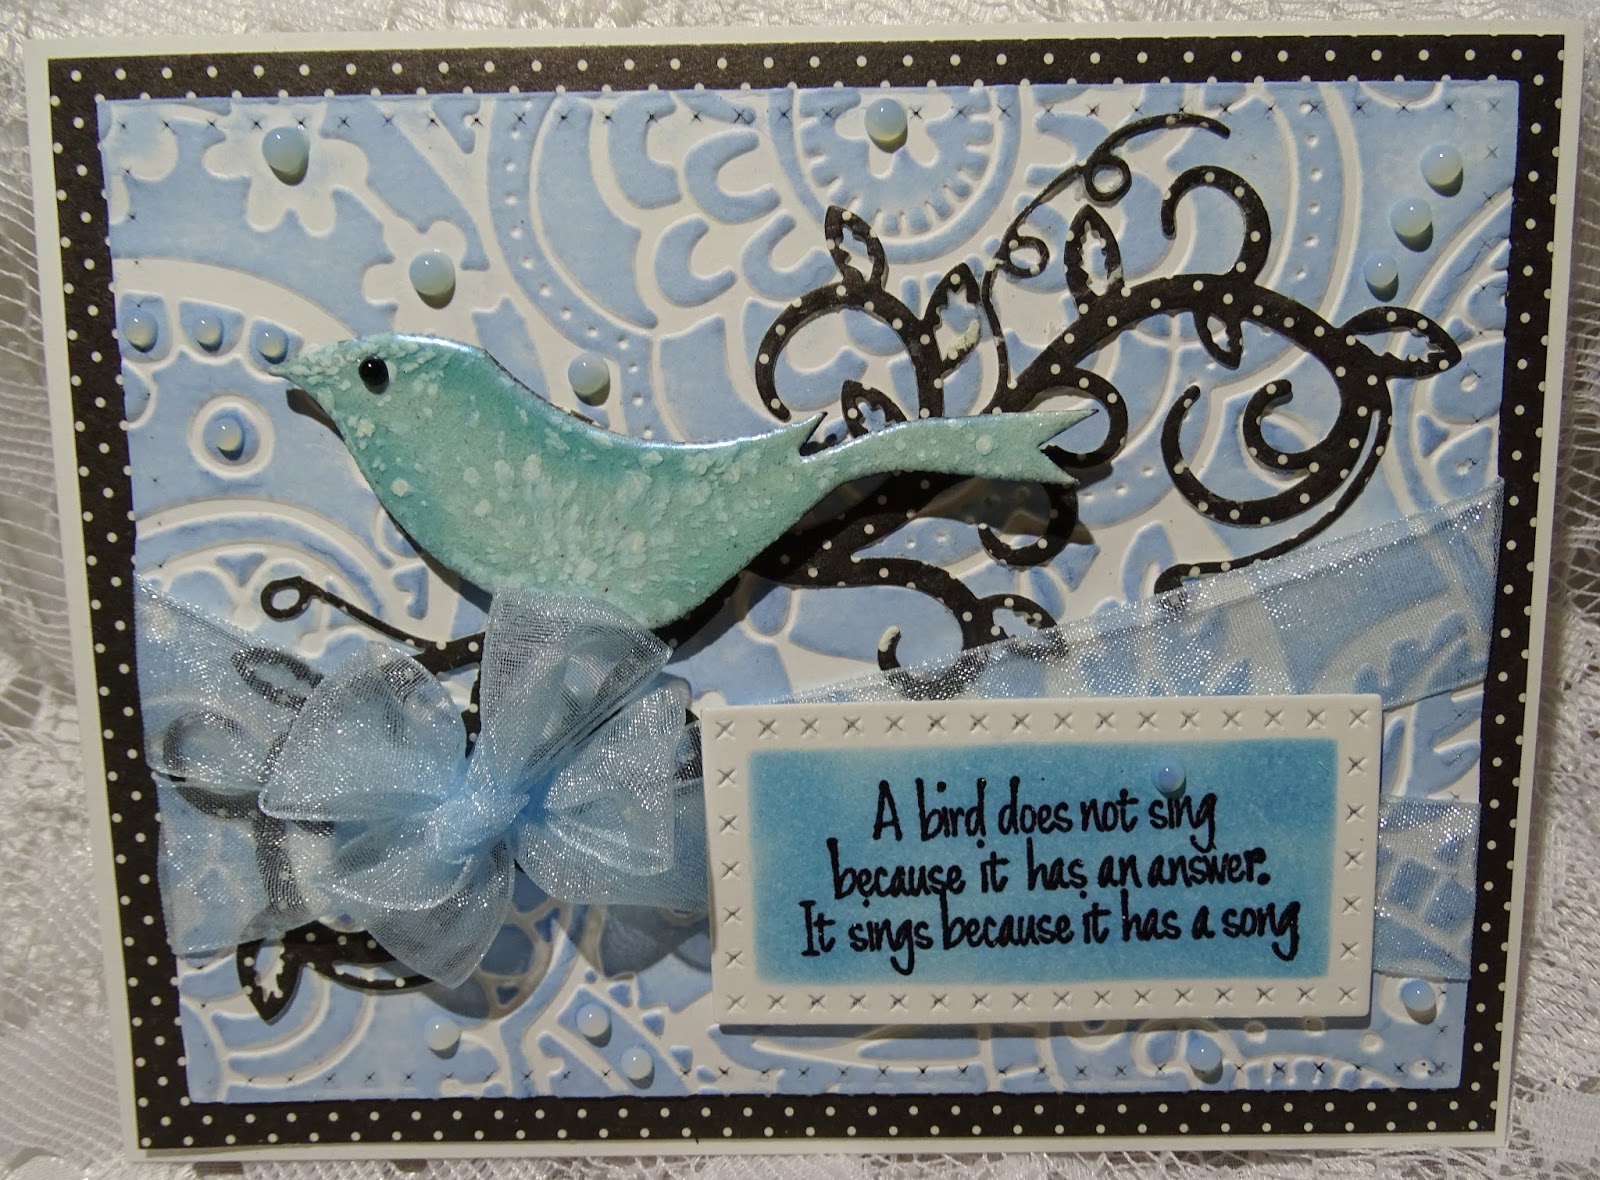
A BIRD SINGS BECAUSE IT HAS A SONG!

Hi there,

A quick extra post in here today, as I had a couple of hours just "doodling" in my stamp room. Felt like creating, but didn't have a deadline or required project - such a great feeling. I did want to open and use a new embossing powder from Sparkle N Sprinkle - Robin's Egg! 


There was a little chipboard bird from Want to Scrap, left-over from another upcoming project, sitting alone on my desk and so I started with those two things. First I covered the bird in Versamark (I use an old pad, specifically set aside for chipboard pieces), then I applied a couple of layers of Belgian Cream, before applying the Robin's Egg. I did this because the Robin's Egg is a light color and it is better to have it go down on white rather than the brown chipboard.


Next I pulled out a virgin embossing folder - Cuttlebug: Bit of Paisley. I ran a piece of cardstock, that had already been die cut with the Memory Box Cross Stitched Framed Border, through my machine and then inked the raised pattern with Memento Summer Sky.


Another newbie was used for the "branch". So I die cut Spellbinders: Foliage Flourish out of a piece of black and white dotted designer paper. I applied a coat of Brushable Glue to the underside and then glued it down to the embossed card front.


The sentiment is a favorite of mine from the Sparkle N Sprinkle Bird Song Set 496. This was stamped in Versamark and heat embossed with Black Detail. Before removing the Memory Box Cross Stitched Framed Borders, I sponged with Memento Summer Sky.


I tied two sheer blue bows together and wrapped them around the back of the card front and layered to the black and white dotted paper before layering to white card base. The bird and sentiment were attached with mounting foam.


The final touch was the Nuvo Jewel Drops Sea Breeze, which were added sporadically over the project and one Nuvo Crystal Drop of Ebony Black was added for the bird's eye! I have to say it was kind of fun, just getting to play!

I'd like to enter this card in the following challenges:
Moving Along with the Times: Challenge 37: Swirls and/or curls
Craft Rocket Challenges: #31 Add a Bow
Craft-Dee Bowz: January Challenge: Use a hand-made Bow
Perfectly Created Chaos: #9 Black, White + 1 Color

I'll be back in a couple more days, with my card for the new February 1st Sparkle N Sprinkle Reveal. Till then enjoy the weekend!

Big hugs,

Shona

Wednesday, January 25, 2017

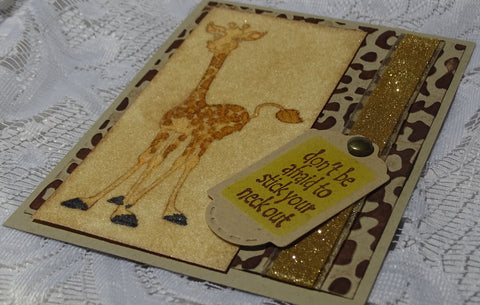
Don't be afraid to stick your neck out!

Hi there, 
I'm here today to share with you a card I made using one of the January Reveal Sets 817: Milton the Friendly Giraffe.
I started with the background. I ran a piece of Kraft cardstock through my embossing machine with the Cuttlebug Animal Print embossing folder. Once it was embossed I took the Memento Rich Cocoa ink pad and ran that directly over the raised pattern.
So on to Milton (our Friendly Giraffe!). I took a piece of 2 1/2" Tear-ific Tape and attached it to a piece of white cardstock. After removing the protective backing, I covered the sticky surface with Buff Flocking. Milton was then stamped directly on top of the flocking with the Memento Rich Cocoa ink. I "colored" Milton using Copics (YR02, C7, YR00, E35). When coloring on top of the flocking, you gently dab the image with the side of the marker instead of using the point of the marker. Once he was colored in, he was taped down to the embossed background.
  
I wrapped a piece of sheer gold ribbon around the right side of the background and added a strip of 1/2" Tear-ific Tape down the center of the ribbon and once the protective backing was removed I applied Golden Wheat Velvet Glitter.
The sentiment was stamped on Kraft cardstock with Versamark and was heat embossed with Teddy Brown. This was die cut using the Spellbinders Framed Tags One. I sponged some Memento Dandelion Yellow ink before removing the die. This was then attached to the ribbon strip with a brass Brad. The card front was then layered to a Kraft card base.
 
That finishes my card for today. Hope you've enjoyed your visit today. 
I'd like to enter my card in the following challenges:

Thursday, January 19, 2017

"Clearly" With Love!

Hi there,

Today, I'd like to share something a little different. I was cleaning up in my stamping room/and everything else room (luckily I have a split wall and I'm behind it) The rest is a complete utter mess right now! February's project maybe???? As I was putting things in their correct places I came across this product that I didn't even know I had "Clearly For Art: Modeling Film". So I decided to give it a go! After you stamp, you can color with alcohol inks and then heat set it, and actually mold it into whatever shape you like!


So I started off with the flowers and leaves from the Sparkle N Sprinkle Build-a-Flower Set 811. You need to use Archival Jet Black Ink for this technique.


I actually rubbed off the veins (using the alcohol blending solution) from the leaves before using them, as I thought it would have competed with the veins in the flowers. I stamped the flowers and leaves from Set 811 and then used Adirondack Inks: Meadow, Lettuce for the leaves and Cranberry and Purple Twilight for the flowers. Just daubed them on with a little blending solution.


I wanted the flowers and leaves to have center stage and so looked for something to display them on. I found the Poppy Large Circle Burst Die. Punching holes in the three leaves first and combining it with the big flower and threading it through the front of the Circle Burst, then the two other smaller flowers were positioned on either side:


The sentiment from Blossom Sets 429 was stamped in Versamark and then heat set with Belgian Cream on the black card front. All the corners were cut off at this point with the corner rounder.

A sheer green ribbon was threaded through on the opposite side of the flowers.


I then decided that it should become an easel card at this point.


Nuvo Jewel Drops: Pale Periwinkle and Key Lime were added to the corners of the card front. The sheer Lime Green Ribbon was just mounted on top of Mounting Tape to give the Easel it's "stop". "With Love" from Wetlands 2 Set 791 was stamped above the "stop".


That completes my project for today!

Hope you've enjoyed your stay today, please let me know in the comment section.

I'd like to share my project over at the following challenges:

Craft Rocket Challenge #31: Add a Bow
Fab and Funky Challenge #334: Must use a Bow
Craft-Dee-Bowz January 2017 Challenge: Use a hand-made bow
World Wide Open Design Team Challenge January 15th: Anything Goes

Big hugs,

Shona