SPLISH SPLASH ULTRA THICKS!
Nov 1st Reveal Blog Hop!
We have FIVE new stamp sets to share with you today. These new sets are 20% off until Nov 3. So once you finish the blog hop, head on over to the store and start shopping. All of the new sets are available on cling mounted rubber or as a digital image.
The sets are:
On Nov 3rd, ONE GRAND PRIZE WINNER will be selected from the comments left on the Designers' blogs listed below. Please leave a comment with each Designer in order to be eligible for the Grand Prize. You never know who the Mystery Designer will be that has the winning comment.
The Grand Prize Winner, which will be announced on the SNS Facebook page and on the SNS Blog, will receive ALL of the new stamp sets released this month (or the digi versions, if preferred).
The Blog Hop order this month is:
(*Tip: if you have difficulty with a particular link, try clicking on the Designer's blog title to send you to their Home page.)
We hope you enjoy the New Reveal Blog Hop as much as we do. Thanks for joining us and remember to comment on each of the Designers' blogs to be eligible for the Grand Prize.
Wonder who the Mystery Host will be this month????
The Sparkle N Sprinkle Creative Challenge also begins today. There are lots of prizes and recognition badges. Come check out how you can become a SNS Featured Artist as well. The theme is always Anything Goes using Loose Glitter, Embossing Powder, and/or Flock.
 Have you checked out the SNS YouTube Channel featuring Demo Donna? If not, then you are in for a real treat. Subscribe today to get all the latest Demo Donna tips and techniques!
So without further ado - let's get jumping into some puddles, shall we?
For my card today I decided to work with the rain-themed sets,
Puddles Set 760 and
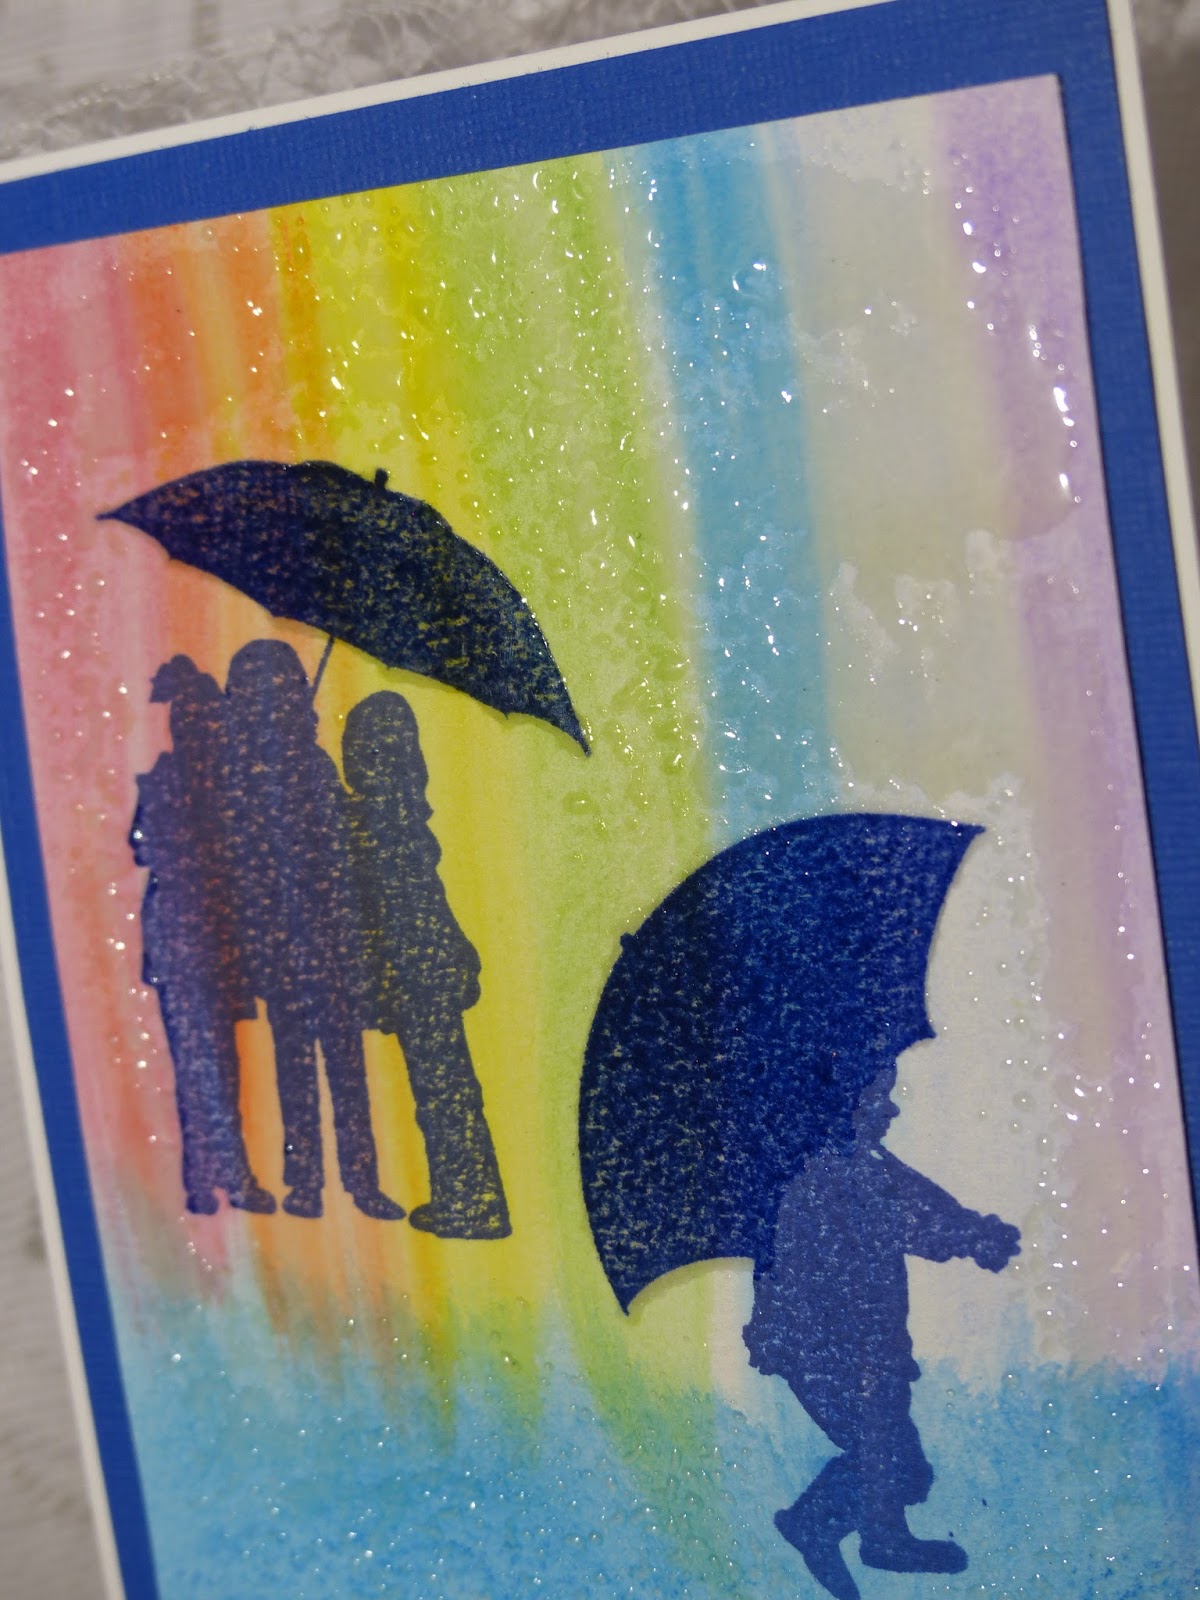
Splish Splash Set 762 along with the new Ultra Thick Embossing Enamels. I love silhouette stamps first of all and the Ultra Thicks work really well with Silhouette stamps. And for some reason the ultra-thick embossing powders (with their shiny appearance) screamed "brollies", "wellies" and slickers to me! So this is what I came up with this month:
I began by painting my rainbow. Using the following Adirondack inks on the edge of a dense sponge, I swiped across the top of the glossy card stock in a semi-circular motion.
The background was then daubed with Memento
Summer Sky and then the Silhouette stamps were stamped in Memento
Tuxedo Black.
The puddles were stenciled in using the
Dreamweaver Stencil - Paint Splats. I sponged Teal Zeal through some of the splashes. Then the Quickie
Glue Pen was applied on top of the Teal Zeal and some
Waterscape Glitter was added for some sparkle to the puddles.
The slickers were the first to be created. I stamped the child image in Versamark and heat embossed using
Super Thick Red. The slicker part of the image was fussy cut and taped down to the image. For the adult slicker, the image was stamped on top of a piece of yellow cardstock in Versamark and then heat embossed with
Super Thick Clear embossing powder. (BTW, If you need a certain shiny single color, but don't have the colored powder, you can always add Clear (or Super Thick Clear) embossing powder to any color cardstock to get the color you want.) The adult slicker was also taped straight to the image.
I then stamped the two images again, this time in
Versamark and heat embossed with
Dalmation. The umbrella part of the child image was cut out and "paper-pieced" over the top of the stamped image with Dimensional Foam. The wellingtons were cut out and added on top of the adult image.
I repeated the process with the adult image with
Checkers embossing powder and cut out the umbrella. Lastly for the child's wellingtons, the image was stamped on white cardstock in Versamark and was first heat embossed with
Firefly embossing powder and then I reapplied Versamark and heat embossed some
Super Thick Clear to them. This gave the boots a sparkle
and a shine.
In-keeping with the rainbow idea, I stamped the sentiment (also from the
Puddles Set 760) on white glossy with the Kaleidacolor Spectrum pad. I cut and embossed it using the Spellbinders Ribbon Tag Trio Two die cut and then applied Versamark and heat embossed it with
Clear Detail, to give it a shiny, wet look too! A little ribbon was threaded through the tabs and Dimensional Foam was put behind the sentiment before layering it to the card front. This was then layered to black before finishing off with the glossy white card base.
Hope you've enjoyed my share today for the November 1st Reveal. These new Ultra Thick enamels are so much fun to play with. They make awesome backgrounds too and can be used well with dies, using the Sparkle N Sprinkle tapes, just apply and heat.
Next up on the hop is our talented
Marie. Remember to leave a comment with each one of the Designers to be eligible for all these great sets!
Till next time,
Hugs,
Shona