Showing posts with label 1/4" Tear-ific Tape. Show all posts

Thursday, September 7, 2017

Candle Birthday Wishes

Hi there,

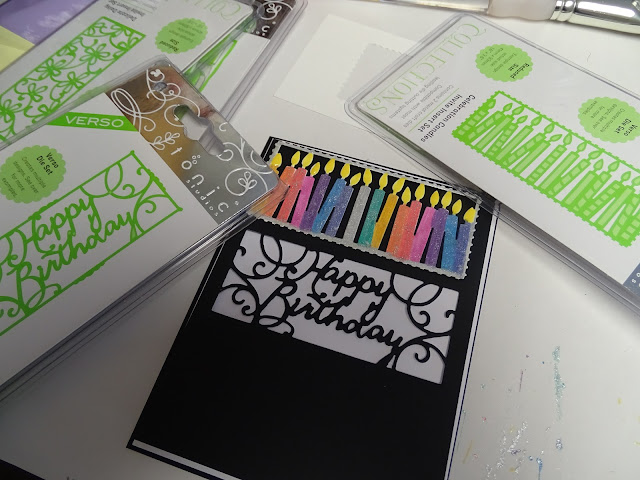
Today I'd like to share with you a card that I made using two of the new fun Tonic Invite Dies: Celebration Candles and Happy Birthday.


I die cut the Celebration Candles from white cardstock twice and colored them with all three sets of the new Nuvo Glitter Markers. This gave the candles a nice sparkly appearance.


Nuvo Dandelion Yellow Crystal Drops were added for the flames. The two candle pieces were set aside to dry, while I worked on the shaker portion.


I die cut the Happy Birthday from the center of a piece of black cardstock.


A piece of tulle was taped down with 1/4" Tearific Tape behind the Happy Birthday and then I made a "well" for my shaker with mounting tape. Shaved Ice was put into the well. The taped area was then covered with white cardstock.


The candle pieces were glued on to the top and bottom of the front panel with the Nuvo Deluxe Adhesive. This has a fine applicator so was great for just running along the backs of the candles.


The front panel was layered to white cardstock and then to a black card base to finish off my card for today.


Hope you've enjoyed my share today. Below is a list of the products that I used that can be found on the SNS website:


Thanks for stopping by today,

Shona

Thursday, August 3, 2017

Robin Wreath Christmas Greetings

Hi there, 
I'm back today with another card from the SNS July Reveal using the cute Winter Greeting Bird and Wreath Set 855.
I ran the Sizzix Holly embossing folder with green cardstock through my embossing machine. Spring Green Nuvo Embellishment Mousse was then sponged on the piece.
The wreath image was stamped in Versamark on white cardstock and was heat embossed with Christmas Green. I fussy cut with my Tonic Mini Scissors then the holly leaves were colored with a Copic Green marker and then the Spring Green Mouse was sponged around the inner and outer edges.
The berries were colored with the Red Berry Nuvo Crystal Drops. I did this in stages so the drops would dry between applications, so that they didn't become one large berry! 
The robins were stamped with Memento Tuxedo Black and colored with Copic markers. I fussy cut them with my Tonic 5" Mini Scissors. I took a strand of 1/4" Tear-ific Tape and rolled it between my hands to make a little rope and then passed it through a "puddle" of Gypsy Red Velvet Glitter to make a sparkly little red rope!
I then took a silver brad and dipped it in the Versamark pad and heat set it with Red Apple. This was wrapped around the little rope bow and attached to the bottom of the wreath.
The wreath was then popped up on the embossed background and with mounting tape and the little birds were attached with tape and foam as shown. This was layered to red cardstock before being layered to a white card base. The sentiment was stamped on glossy white in Versamark and heat set with Christmas Green, was fussy cut and attached with mounting tape.
This finished up my card for today, Below are the products used on this card. Just click on the item to find them in the SNS store.
I'd like to play along in the following challenges:
Crafty Creations Challenges: Anything Goes
Sunny Day Crafting #46: E is for emboss
World Wide Open Design Team Challenge 24: Anything Goes
The Merry Christmas Challenge #28: Animals

Thanks so much for stopping by!

Shona

Friday, July 14, 2017

SPARKLE N SPRINKLE'S JULY REVEAL

           Welcome to the Sparkle N Sprinkle
 Christmas In July ðŸŽ„🎅🤶 New Reveal Blog Hop!
(where apparently, I'm dreaming of a white and gold one!)


We have six new Christmas themed rubber stamp sets plus two huge digi bundles being revealed this month. 

The sets are:


(Digital Version DIGI855FS
(Digital Version DIGI858BG)


  (Digital Version DIGI860SG)
(Digital Version DIGI861SG)
(Digital Version DIGI862B - huge digi bundle)

(Digital Version DIGI868FS)

DIGI4005FS - Winter Greetings digi papers


When you purchase the digi versions of any of the SNS rubber sets, you are getting lots of extras that aren't available otherwise.  These extras include additional images not available with the rubber version, digi papers (in some cases), and now a cut file to use with your electronic cutting machines will also be included with all digi images purchased!

You're definitely going to want both the rubber versions as well as the digi versions of all our new releases.

The new sets are 20% off until July 20, 2017.  So once you finish the blog hop, head on over to the New Store and start shopping.

On July 18th, ONE GRAND PRIZE WINNER will be selected from the comments left on the Designers' blogs listed below. Please leave a comment with each Designer in order to be eligible for the Grand Prize.  You never know who the Mystery Designer will be that has the winning comment.

The Grand Prize Winner, which will be announced on the SNS Facebook page and the SNS Blog, will receive ALL of the new rubber stamp sets revealed this month.

The Blog Hop Order this month is:


(*Tip: if you have difficulty with a particular link, try clicking on the Designer's blog title to send you to their Home page.)


We hope you enjoy the New Reveal Blog Hop as much as we do.  Thanks for joining us and remember to comment on each of the Designers' blogs to be eligible for the Grand Prize.  

 Wonder who the Mystery Host will be this month????


Have you checked out the SNS YouTube Channel featuring Demo Donna?  If not, then you are in for a real treat.  Subscribe today to get all the latest Demo Donna tips and techniques!


We are very happy to announce the new and improved SNS Creative Challenge is now being held on Facebook. 

 Head on over to the Sparkle N Sprinkle Creative Challenge group and ask to join today.  This is a closed group, but we want anyone who wants to participate to join (just trying to keep out spammers 😀).  You can join today!

 The new challenge began July 1 and will run from the 1st - 25th of each month.  Be sure to read the Challenge Rules before adding a photo.  A SNS image (either rubber or digi) needs to be used.  If you don't have any yet, no worries, there are some Freebies located on the new website.  They are located on the Home page, just scroll down a bit to see them:

The Winner and Top Three will be posted on the last day of each month.  The Winner will receive a $15 Gift Certificate to the new on-line store.  Please review all the Challenge Rules before submitting your photo.

We hope to see you soon in our new Facebook Group!


So, on with my card. First I stamped the sentiment from the new Spirit of Christmas Poinsettias Set 862 in Versamark and then heat embossed with Gold Detail embossing powder. This is a lovely fine powder and it is great for detailed stamps.


Then I stamped the larger image three times in Versamark and heat embossed again with the Gold Detail


I then fussy cut the actual Poinsettia flowers with my Tonic 5" Mini snips. These scissors cut beautifully and they don't get gunky with adhesive which is their best attribute!


I cut the sentiment with the Spellbinders Classic Scalloped Circles and then started to arrange the flowers above and below the sentiment, some attaching with 1/4" Tear-ific Tape and others with Mounting Foam, to give it more dimension.


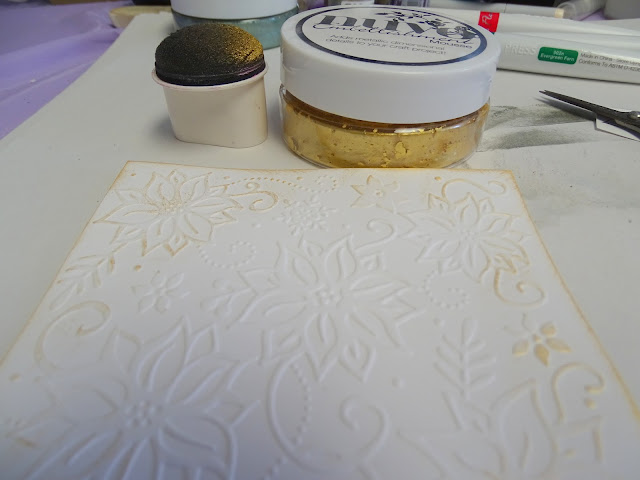
I used a freebie Poinsettia embossing folder that I received with a magazine. After running the white cardstock through the machine, I sponged on some Indian Gold Nuvo Embellishment Mousse, just to give it some gold highlights.


This was then layered on to Gold Mirror Cardstock. This is difficult to photograph, but looks really nice in real life!


I scored around the edge of a white piece of card to which the Gold Mirror Cardstock was layered. Then the white layer was attached to a gold card base. I then added a few different sized Honey Gold Nuvo Glitter Drops around the card to finish it off.

Hope you liked my project and are enjoying seeing the team's creations with this month's fun sets. Next on the hop is our talented Jess.

Here is a shopping list of all the SNS products used in my card today:
Tonic 5” Mini Scissors

I'd like to join in the following challenges:
Cut it Up Challenge #126: Christmas in July, using a die cut (SB Classic Scalloped Circles)
Pause Dream Enjoy Challenge #181: Emboss it (wet or dry)
Aud Sentiments Challenge 184: Christmas in July + Sentiment
Sweet Stampin' Christmas: July: Anything Christmas Goes
Creative Moments Challenge 122: Anything Goes with a twist Christmas in July
Mod Squad Challenge: Make the sentiment the Focal Point
Classic Design Team Open Challenge Blog: Anything Goes - July

Thursday, January 12, 2017

You Crack Me Up

Hi there,
Today I'd like to share with you this cute little flip-it card, using the new January Reveal Set Easter Chicky Set 820. 
To begin I stamped this cute little chick on ivory cardstock in Memento Tuxedo Black and colored her in with some pastel colored Copics.
This was then die cut with the Spellbinders Standard Circles die and sponged with a little Memento Angel Pink around the edges before I removed the die. I then layered this to a piece of peach cardstock, cut with the Classic Scalloped Circles die and this was then attached to the center of the circle in the Sizzix Circle Flip-Its die. I used 1/4" Tear-ific Tape as my adhesive.
I stamped the shell twice in Memento Tuxedo Black and after coloring them with Copics I covered both pieces in Moonstone, one of the Nuvo Glimmer Pastes.
When dry (it takes 15 minutes at most) one would serve as a bonnet and the other would be attached to the back sentiment panel, done in the same way as the front. Two pieces of Super Adhesive Sheets were run through on the short edge of the Flip-Its die and would be adhered to the front side panel and one to the back side panel (leaving a little space for any written note.
I stamped out the little pansy border from the set three times in Memento Tuxedo Black and they were also colored with Copics before having LemonadeLavender Iris and Green Iris Glitters added to the respective colors, using the Nuvo Fine Tip Glue Pen.
I removed the backing of the front side panel adhesive and placed the border of pansies along the edge before adding Daisy Microfine Glitter to the rest of the sticky panel.
The back panel was covered with Peach Bellini, another Velvet Glitter and then the three single pansies were popped up at the base with Foam Squares.
The "peep peep" was stamped in the little note area and that ended my card for the day.
One last view to leave you with:
Hope you've enjoyed your visit here today? 
Warm hugs,
Shona

Wednesday, December 14, 2016

HAVE A COOL YULE!

Hi there,

So glad you stopped by today. Can you believe that we are less than two weeks away from the big day? I have no idea where 2016 went! Today, I'd like to share a card that I made, using one of the older Sparkle N Sprinkle sets Gothic Snow: Set 347 and another photo from my yard last winter. So much fun to use your own photos on a Christmas card!


This was a 5" x 7" print, as the stamps are pretty big - especially the sentiment. So I picked out the photo and stamped the snowmen on white cardstock with Versamark and heat embossed with Black Detail. The snowmen were then fussy cut.


Next was to create their background so the glitters and the adhesives came out!


I used the Nuvo Fine Tip Glue Pen for the trees and the finer glitters. I started with Crystal Ice, then applied some Sparkling Snow, Green Iris and Lavender Iris to the various trees.


The snow people were colored with Copics and then their bodies were applied with Brushable Glue and Twinkling Clouds Sparkle N Soft.


The little snow lady's string of lights were "lit up" with Nuvo Glitter Drops, Blue Lagoon, Emerald City and Sherbert Shimmer. While the drops were drying I moved on to the sentiment. From the same set, I stamped the sentiment in Versamark on white glossy cardstock and then heat embossed with Black Detail. I hand cut it out into a fish tail banner and sponged on some Memento Summer Sky. This was attached with Foam Squares.


The snow people were added to the scene with Tear-ific Tape at the bottom and then popped up at the heads with Foam Squares. Dimensional Glue was then brushed on at their feet ....


... and Diamond Dust was then applied.


The card front was layered to black cardstock and then to a white card base to finish.

I'd like to join in the following Challenges with this card:
Aurora Wings Challenge #41 Winter Wonderland
The Cutie Pie Challenge Blog #106 A Day in the Snow
Lawnscaping Challenge #143: Let it Snow
Make My Monday Challenge #36: Show me a Snowman
Simon Says Stamp: Let it Snow


Thanks for stopping by. Hope you've enjoyed my share with you today?

Till next time,

Big warm hugs,

Shona

Thursday, November 24, 2016

DEAR SANTA!

Hi there, and a very Happy Thanksgiving to all,

I'm here today to share my last November Reveal card using the Stella -Dear Santa Set 804. What a fun little "Stella" set for Christmas!

Dear Santa

I started with the background, using the Spellbinders Ripples Embossing Folder - I ran red cardstock through the embossing folder and then daubed Pure Platinum embellishment mouse to the piece to accentuate the pattern (which kind of reminded me of baubles).

Dear Santa

I built her wall with the Darice Brick Pattern embossing folder using watercolor paper (which had the texture already), then I daubed Cosmic Brown embellishment mousse over the bricks and "grouted" with the E25 Copic Marker.

Dear Santa

The wall was layered to the red rippled background. Santa Stella was then stamped with Memento Tuxedo Black and colored with Copics, R37, C3, C5, B32, E02, E25, and 0. She was then fussy cut, along with the baubles. I added some Dimensional Glue to all of the white trim around her hat, cuffs and skirt and applied Twinkling Clouds. This was set aside to dry.

Dear Santa

I applied a little Nuvo glue with the fine tip pen and then added some Blissful Blue Sparkle N Soft to Stella's hair.

Dear Santa

Adding a little of the Nuvo Fine Tipped Glue Pen to the top of the baubles and applied Reflection Velvet Glitter. When this was dry, I covered the colored part of the baubles with Dimensional Glue and they were set aside to dry.
.
Dear Santa

Dimensional Glue was also applied to her glasses and the new Nuvo Ruby Slipper Glitter drops were used for a sparkly red pair of earrings. I cut a slit in the scroll, so that the scroll would go behind the wall. Stella was then attached with Foam Squares. A piece of silver thread was tied with three little bows and then the shiny baubles were stuck down with glue dots and Foam Squares.

Dear Santa

The card front was layered to a white card base, which was edged with 1/4" Tear-ific Tape and then the sticky adhesive was covered with the new Merlot Velvet Glitter.

Dear Santa

That finishes off my card for today. Hope you've enjoyed my share today and that you're having or have had a wonderful Thanksgiving Day! Time to get to those Christmas cards now!

Big hugs,

Shona