Showing posts with label Sparkle N Soft. Show all posts

Thursday, November 24, 2016

DEAR SANTA!

Hi there, and a very Happy Thanksgiving to all,

I'm here today to share my last November Reveal card using the Stella -Dear Santa Set 804. What a fun little "Stella" set for Christmas!

Dear Santa

I started with the background, using the Spellbinders Ripples Embossing Folder - I ran red cardstock through the embossing folder and then daubed Pure Platinum embellishment mouse to the piece to accentuate the pattern (which kind of reminded me of baubles).

Dear Santa

I built her wall with the Darice Brick Pattern embossing folder using watercolor paper (which had the texture already), then I daubed Cosmic Brown embellishment mousse over the bricks and "grouted" with the E25 Copic Marker.

Dear Santa

The wall was layered to the red rippled background. Santa Stella was then stamped with Memento Tuxedo Black and colored with Copics, R37, C3, C5, B32, E02, E25, and 0. She was then fussy cut, along with the baubles. I added some Dimensional Glue to all of the white trim around her hat, cuffs and skirt and applied Twinkling Clouds. This was set aside to dry.

Dear Santa

I applied a little Nuvo glue with the fine tip pen and then added some Blissful Blue Sparkle N Soft to Stella's hair.

Dear Santa

Adding a little of the Nuvo Fine Tipped Glue Pen to the top of the baubles and applied Reflection Velvet Glitter. When this was dry, I covered the colored part of the baubles with Dimensional Glue and they were set aside to dry.
.
Dear Santa

Dimensional Glue was also applied to her glasses and the new Nuvo Ruby Slipper Glitter drops were used for a sparkly red pair of earrings. I cut a slit in the scroll, so that the scroll would go behind the wall. Stella was then attached with Foam Squares. A piece of silver thread was tied with three little bows and then the shiny baubles were stuck down with glue dots and Foam Squares.

Dear Santa

The card front was layered to a white card base, which was edged with 1/4" Tear-ific Tape and then the sticky adhesive was covered with the new Merlot Velvet Glitter.

Dear Santa

That finishes off my card for today. Hope you've enjoyed my share today and that you're having or have had a wonderful Thanksgiving Day! Time to get to those Christmas cards now!

Big hugs,

Shona

Thursday, September 22, 2016

BE THE PERSON YOUR DOG THINKS YOU ARE!

Hi there,

Today I'd like to share a card with you using the new reveal set 793: Puppy Girl.

Be the Person

To begin with I stamped the image with Memento Tuxedo Black and then colored with Copics, YR00, RV42, RV95, R21, R22, E04, E13, E33, E35. For the background I took a piece of pink cardstock and covered it with a piece of Super Adhesive Sheet. I removed the protective backing and burnished Pink Spirit Sparkle N Soft onto the sticky surface.

Be the Person

I then took Rich Cocoa and inked the raised side of the Darice Paw Print Background embossing folder, The pink, flocked piece was inserted so that the ink would transfer on to the fuzzy surface.

Be the Person

This is the result - a sparkly, fuzzy background.

Be the person

I didn't want to cover up the majority of my background so I decided to make a frame around the image instead. I cut the background in half, then used the Spellbinders Mega Ovals Large to make an "opening" for my image. Place the die on the cutting plate, then position the background halves, so that the top and bottom corners are where the die will start cutting. I taped them to the plate, so they wouldn't move, then I ran it through the Big Shot.

Be the Person

The pieces were then taped down on top of the image.

Be the Person

I decided to curve the sentiment along the edge of the image. Place it on the acrylic block and bend it slightly before you ink up. I used Memento Rich Cocoa to stamp with.

Be the Person

Next step was to "give a dog a bone!" In fact he got three! I had little white bone brads, so I dipped them on my Versamark pad and then with tweezers dipped them into Vintage embossing powder and heat set them. They were then added to the image.

Be the Person

Be the Person

I attached the card front to a piece of 6" x 6" cardstock edged with 1/4" Tear-ific TapeSparkling Sands was then applied to the remaining sticky edge to finish off my card today. Not sure what that little speck is on the leash. Didn't notice it until now, but it's not on the card!

Be the Person

I'd like to join in the following challenges:

Hope you've enjoyed my share today,

Hugs,

Shona

Sunday, July 31, 2016

SPARKLE N SPRINKLE'S AUGUST 1ST REVEAL

Welcome to Sparkle N Sprinkle's
 August 1st New Reveal Blog Hop!


We have five new stamp sets to share with you today.  These new sets are 20% off until the 3rd of the month.  So once you finish the blog hop, head on over to the store and start shopping.  All of the new sets are available on cling mounted rubber or as a digital image.  

The sets are:


Eskimo Kisses 788 (digi version DIGI788)
Pool Friends 792 (digi version DIGI792)
Get Your Craft On 794  (digi version DIGI794)
Stella-Happy Meds 796  (digi version DIGI796)
Flower Cart 798  (digi version DIGI798)


On August 3rd, ONE GRAND PRIZE WINNER will be selected from the comments left on the Designers' blogs listed below. Please leave a comment with each Designer in order to be eligible for the Grand Prize.  You never know who the Mystery Designer will be that has the winning comment.

The Grand Prize Winner, which will be announced on the SNS Facebook page and on the SNS Blog, will receive ALL of the new stamp sets released this month (or the digi versions, if preferred).

The Blog Hop order this month is:


(*Tip: if you have difficulty with a particular link, try clicking on the Designer's blog title to send you to their Home page.)

We hope you enjoy the New Reveal Blog Hop as much as we do.  Thanks for joining us and remember to comment on each of the Designers' blogs to be eligible for the Grand Prize.  
 Wonder who the Mystery Host will be this month????

The Sparkle N Sprinkle Creative Challenge also begins today.  There are lots of prizes and recognition badges.  Come check out how you can become a SNS Featured Artist as well.  The theme is always Anything Goes using Loose Glitter, Embossing Powder, and/or Flock.

Have you checked out the SNS YouTube Channel featuring Demo Donna?  If not, then you are in for a real treat.  Subscribe today to get all the latest Demo Donna tips and techniques!


For my card today, I chose to work with the Eskimo Kisses Set 788, while highlighting one of the sentiments included in the set: "Friends warm the heart". I started off by stamping the image with StazOn Jet Black and then used watercolor pencils along with the Dove Blender to blend the colors. 


The image was then fussy cut, before I used Flockings and Sparkle N Soft to spice up my little friends! Irish Sparkle, Pink Spirit and Blissful Blue, (the more pastel hues) were added to the little snowman and then I went with the bright tones of Cherry Sparkle, Berry Red, Glistening Emeralds, and Mimosa for the little friend. Some Snow White was added to the base of the image. I used Brushable Glue to apply these flockings, using the applicator that comes on the bottle.


I then went on to set the stage for my little friends, using the Spellbinders Classic Scalloped Heart dies. I covered a piece of white cardstock with a piece of Super Adhesive Sheet, and ran it through my embossing machine with the largest heart and the second smallest inside along side the second largest die as shown below:


I removed the protective backing from the largest and the smallest heart and applied Gypsy Red Velvet Glitter to those and to the other large heart, Cloud Nine was added.


I made a little easel base with red cardstock, by folding it in half and then the front gets mountain folded again in half. The sentiment was stamped on the base with Versamark and heat embossed with White Detail. I tied a little bow with a piece of Mon Ami Gabby Pull Ribbon (which had lost it's pull - waste not want not!) and attached it to the front of the card base. The large red heart was then taped to the front and the Cloud Nine heart was attached with Foam Squares, as were the two friends.

I used the little red heart as my easel stop, by popping it up on dimensional foam, but as it was over to the left side the image was coming forward on the right, so I decided to make another stop, on the right hand side. I needed something small that would fit above the sentiment. I decided on a silver heart brad and dipped it in Versamark and covered it in Polka Dot Enamel Powder, before attaching it to the card base.


That finished off my card for today. Hope you've enjoyed your visit today.


I'd like to enter my card in the following challenges:
Crafty Ribbon Challenges: Easel Card with ribbon
Fab 'n' Funky Challenges: #315 Christmas
Little Red Wagon Challenge #352: Christmas in July
Mod Squad Challenge: Christmas in July

Your next stop on the blog hop is Jess. Remember to leave a comment with each of the designers to become eligible for all five sets.

Good luck and hugs,

Shona

Thursday, July 28, 2016

DANCING MILDRED

Hi there, 

Today I'm here to share a card using the July reveal set: Milton Catching Snowflakes. I chose to repurpose the stamp:

Dancing Milton

I matched my dancing giraffe with a saying from the Spring Time Spunky set, added a fuzzy giraffe background and some purple tulle for a totally different look. I began with the background. Taking a piece of yellow cardstock, I applied a 4 1/2" x 6 1/2" piece of Super Adhesive Sheet. After removing the protective backing I applied Mimosa Sparkle N Soft. 


Then I applied Memento Rich Cocoa ink to the raised patches on the inside of the Darice Giraffe embossing folder and ran the top half of the fuzzy cardstock through the embossing machine, then reinked the patches and ran the bottom half through.


Here is the finished background:

Dancing Milton

Milton was stamped on white cardstock in Versamark and heat embossed with Teddy BrownCopics were used to color. Sparkling Coffee Sparkle N Soft was applied to the patches with Brushable glue.

Dancing Milton

Dimensional Glue was then applied to the hooves. This was then set aside to dry.

Dancing Milton

I stamped the sentiment in Versamark on white glossy cardstock and heat embossed with Sienna. The Tuscany EP's are my go to detail embossing powders, which I use a lot on sentiments. The saying was cut up as shown to be attached to the card with foam squares. When the glues were dry, I added the velvet glittersHyacinthOrchid Rose and Ballerina, to the scarf, using the glue pen - Milton becomes Mildred!!

Dancing Milton

Spellbinders Mega Ovals Large was used to cut out the giraffe and before removing the die I sponged some Memento Cantaloupe ink around the image.

Dancing Milton

The background was layered to a piece of mustard cardstock, edged with Memento Rich Cocoa ink, before being layered to a white card base. I then attached a piece of purple tulle to the back of the image before attaching both the cut up sentiment and image with foam squares as shown.

Dancing Milton

That finishes my project for today. Hope I've inspired you to try out some of the Sparkle N Softs.

I'd like to enter my card in the following challenges:
Crafty Sentiments Designs - Animals Challenge
Simon Says Stamp - Monday Challenge: Add some texture


Hugs,

Shona

Thursday, June 4, 2015

BRUSHO'S BLOOM!

Hi there,

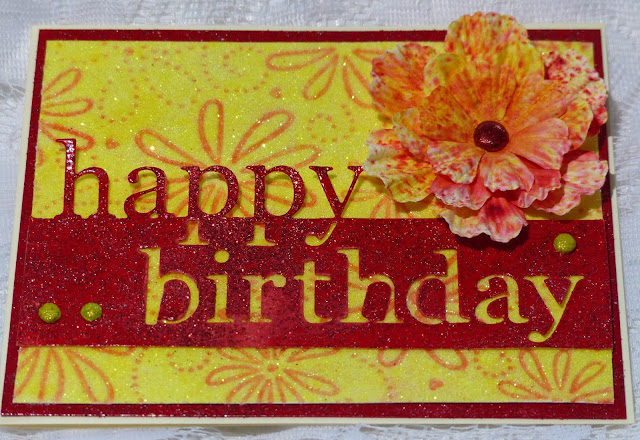
Things have been a little hectic around here for the last month, so I've barely been able to keep up with my stamping "duties". The end of the school year always does that to me and this year although I've not got proms or graduations for any of my kids, there is plenty volunteering activities to take care of. Today's card was put together for my Sister-in-Law using the Memory Box Grand Happy Birthday die, a couple of  Brushos, two embossing powders and a Sparkle N Soft from Sparkle N Sprinkle.


I cut a 4" x 5 1/4" piece of Super Adhesive Sheet. I removed the protective backing and covered the entire piece with Sun Dazzle Sparkle N Soft. Next I ran it through the Darice Daisy and Swirl embossing folder, which had been inked on the inside with Memento Lady Bug ink. There is a detailed tutorial on how to make these flocked backgrounds here.


Next I cut out the Happy Birthday die from white cardstock, covered it in Versamark ink and heat embossed the entire piece with Firecracker Red.

Dandy Dandelion and Firecracker Red embossing powders were used to bling up the silver brads. 


The flower was three Prima flowers layered on top of each other, after I had spritzed them with water and shaken the Brusho Crystals on them. Another spray of water and then they were dried with the heat tool, to compliment the colors of the card.


The card front was put together using the brads to hold everything in place. It was then layered to a piece of white cardstock edged with Versamark and heat embossed with the Firecracker Red. It was this was then layered to a cream card base. 


I'd like to enter this card in the Scrapy Land: Challenge 19 - Use a die cut that Scrapy Land carries.

Hope you've enjoyed my quick share with you today. 

Till next time,

Shona

Tuesday, March 31, 2015

SPARKLE N SPRINKLE'S APRIL 1ST REVEAL

Hi there, and welcome to Sparkle N Sprinkle's April 1, 2015 Reveal. I'm first up on the hop this month, and getting rather excited about the upcoming Spring season - when everything starts to bloom - I couldn't resist using the Spring Window Set 704 for my reveal card. 


This month we have FOUR new stamp sets to share with you and these sets are 20% off their regular price, until April 3rd.  All the new reveal sets are available on Cling Mounted Rubber and as a digital image.  Friendship Flowers #702 is the stamp set featured in  This Month's Technique Video.

The sets are:


Get Well Friends #701   (digi version DIGI701)
Friendship Flowers #702   (digi version DIGI702)
Old Well #703  (digi version DIGI703)
Spring Window #704   (digi version DIGI704)


On April 3rd,  one Grand Prize Winner will be selected from the comments left on the designers' blogs listed below.  The Grand Prize Winner will receive
all FOUR of the new rubber stamp sets (or digi sets, if you prefer)


The winner of the blog hop will be announced on April 3 on Facebook, the SNS blog, and on our blogs.  In addition to our regular designers, we are happy to introduce you to two of our new Guest Designers.  Diane and Ashley will be the Guest Designers for the months of April, May, and June.  This month's Blog Hop order is:

(Tip: if you have a problem with a particular link, try clicking on the person's blog title to send you to their Home page.)

Don't forget to leave a comment with each Designer to be eligible for the Grand Prize.  We love reading your comments and hope we have inspired you as well.  If you absolutely can not leave a comment for some reason, please email icinganne@yahoo.com with your comment and the name of the blog or Designer you are commenting about.

~~~~~~~~~

The new SNS Creative Challenges also begins today, with lots of prizes and recognition badges.  The theme is always Anything Goes using Loose Glitter, Embossing Powder, and or Flock.
~~~~~~~~~
I loved the "Spring Window" image, so I decided to use the image from the prospective of looking out of "my window" from across the street.

The image was stamped in Memento Tuxedo Black Ink on white cardstock and was colored using the following Copics: E11, E13, E25, E33, E35, R22, YR24, W-1 and W-3. The vase was colored using a Versamarker Pen and was then heat embossed with Verdigris. The Sakura Glue Pen was applied to the flowers in the vase and then I applied Pink Spirit Sparkle N Soft. The glass panes were achieved by applying the Versamarker Pen again and then were heat embossed with Clear Detail. I added Dimensional Glue to the tree flowers and left it to dry to give the flowers some shiny dimension.


I used a Spellbinders window die, which includes the curtains and the valance in the set.  I cut the window frame from beige cardstock and then distressed it with Memento Cantaloupe, Desert Sand and Rich Cocoa. The curtains and valance were made by applying a piece of Super Adhesive Sheet to the beige cardstock and running those through an embossing machine. I then removed the protective backing and applied Sparkling Sands Sparkle N Soft for a velvety feel for the fabric. I cut the frame from a piece of designer paper, which looked like wallpaper, and then placed the window frame in the die cut spot and taped them together from the back. The curtains were layered on top with dimensional dots. I tied little brown wool bows for the curtain tie-backs.


The window frame had an arch at the top, so left little room for the sentiment from the set. I set the sentiment on an acrylic block and made it curve before stamping it on beige cardstock in Versamark ink. It was then heat embossed with Sienna, one of my favorite Tuscan embossing powdersI cut out the saying using the Spellbinders Classic Ovals Large die, cutting above and  below the sentiment.  Distressed with some Desert Sand ink again, it was then added behind the window valance to mimic the arched top of the window frame.


Hope you've enjoyed the start to this month's Reveal Blog Hop. Next up is Diane - one of our new Guest Designers. Leave a comment on all eight blogs to be eligible to win all four stamp sets.  I wonder which Designer's blog contains the Grand Prize this month?

Till next time,

Springtime hugs,

Shona