Showing posts with label Dies. Show all posts

Tuesday, May 16, 2023

HAI Christmas Cheer

 Hi there and welcome back! Today I have another card for the Holly and Ivy Challenge, which is always anything goes!

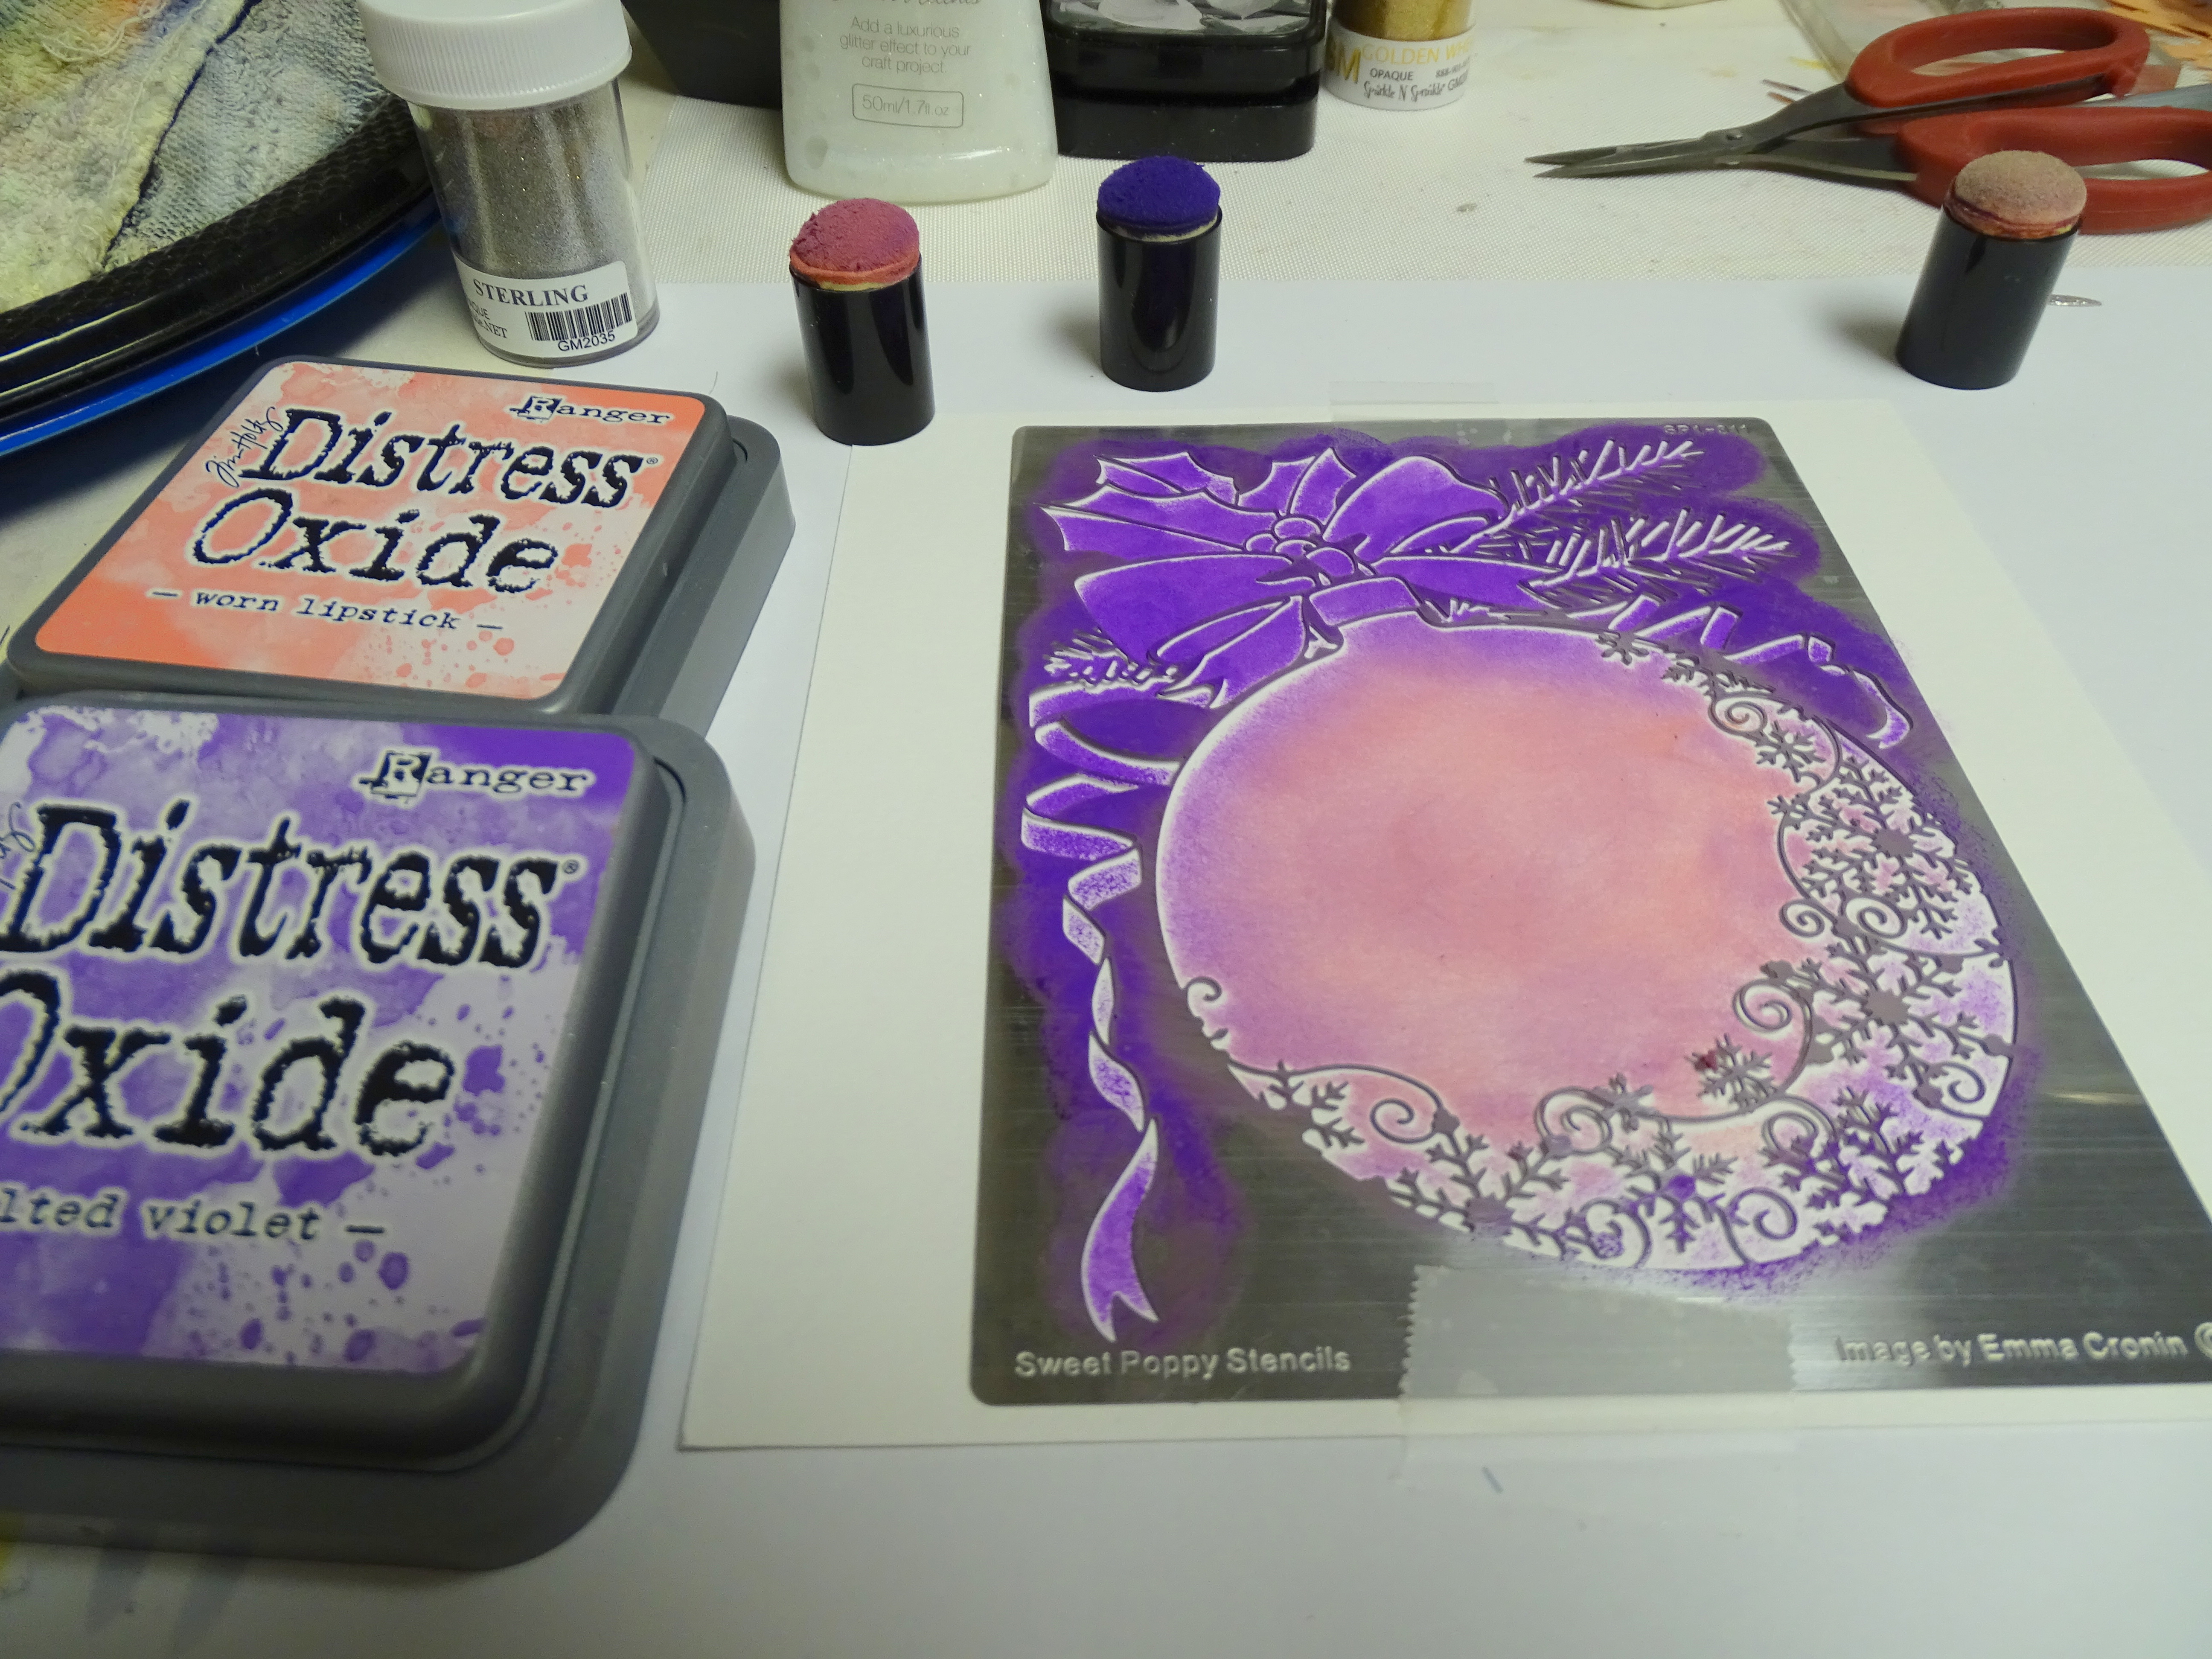
I decided to go with the Sweet Poppy set of the bauble stencil and die! Love this combo! So versatile!


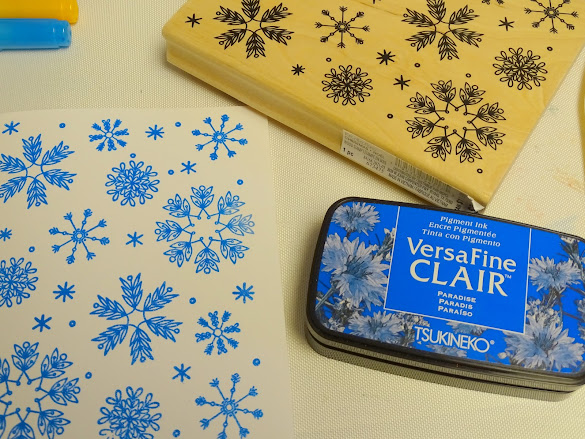
First I inked the bauble stencil with Distress inks Worn Lipstick and Wilted Violet. These inks blend so nicely!


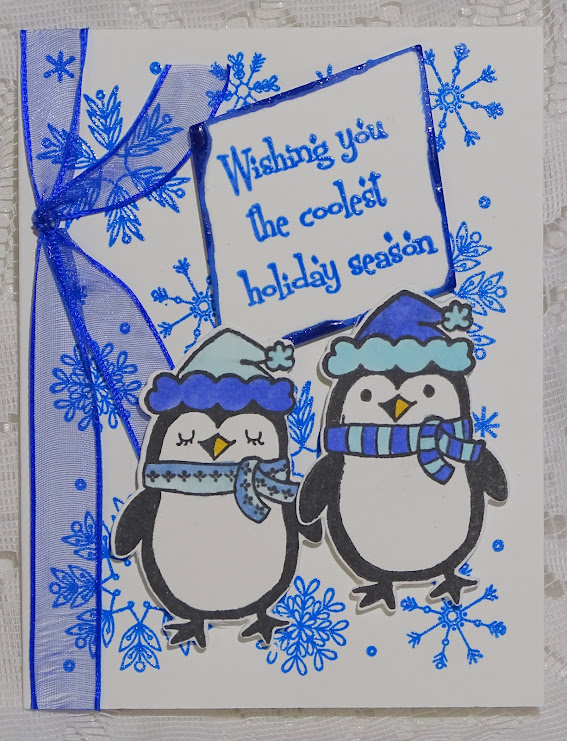
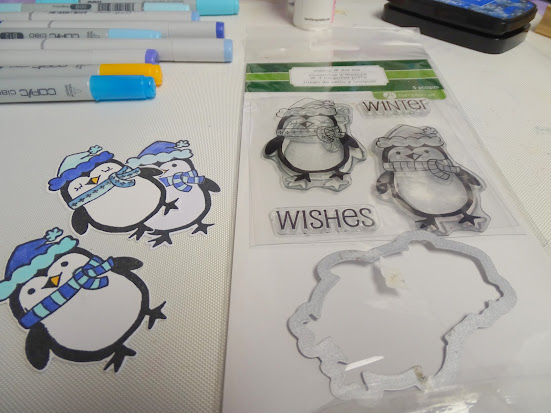
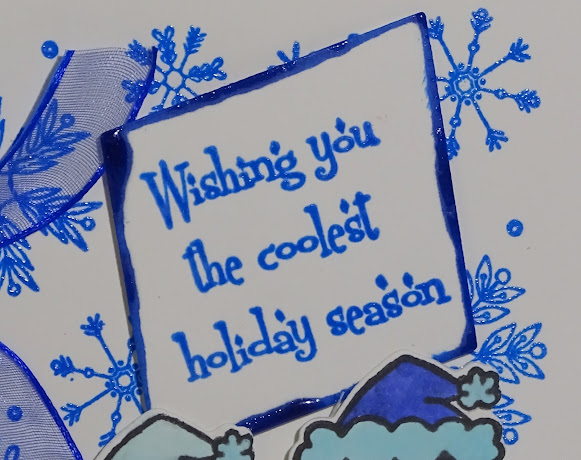
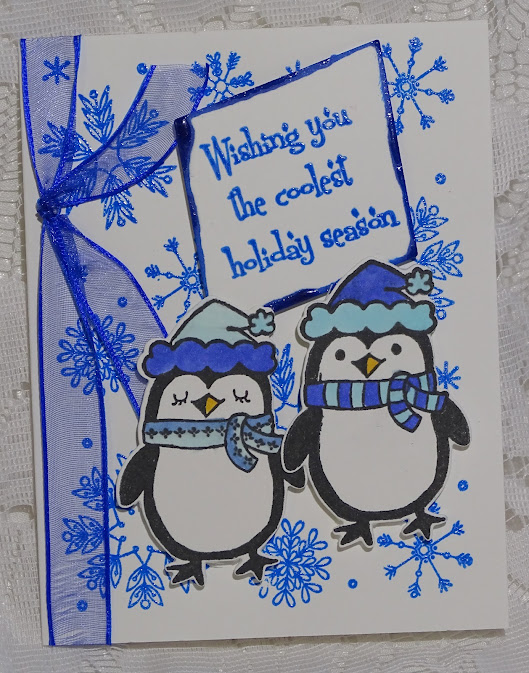
Next I stamped the little image and sentiment from the Stampin' Up Warm and Toasty set in VersaFine Claire Monarch ink.


The bauble was then die cut using the coordinating die.


I layered this to a piece of blue card which was then layered to a white card base.


A pink and blue ribbon were then added to finish off the card.


That's it for today. I hope you will join in the challenge?

Till next time,

Shona


Tuesday, May 3, 2022

Have a Holly Jolly Christmas

 Hi there and thanks for dropping by today. I have to confess that this is a last minute card as we are in the middle of swarm season and coupled with just getting back from Scotland, I am completely swamped! What more appropriate a header than a photo of my first swarm this year! I had the first one on Friday and then a second on Sunday! The bees are certainly keeping me on my toes!

My card today is for the Holly and Ivy Challenge, which is always an anything goes challenge. I don't know why, but I decided to go with some watercolor pencils on Kraft cardstock for a change of pace and I kind of liked the result!


So I started with inking up the background foliage stamp, which has no name on it, in Versafine Claire Pinecone ink.


Next step was to color it in with colored pencils. These were old Stampin' Up pencils that hadn't seen the light of day in I don't know how long!

The recollections holly stamps and dies were then stamped in the same ink and colored with the same pencils.


.... and then die cut.


The sentiment from the same stamp set was stamped in the Versafine Clair Pinecone ink too and then die cut with the Lawn Fawn Stitched Labels.


The sentiment and the holly sprig were then popped up on top of the front panel, which was attached to a white card base to make the mistletoe berries pop?


... and that's it for today's card. Hope I've inspired you to get out something to create a Christmas card and join in over at the anything goes Holly and Ivy Challenge

Till next time!

Shona

Tuesday, March 22, 2022

Joy to the World

Hi there and welcome back and Happy Spring!!!

 Today I have my second card for March for the Holly and Ivy Challenge. I decided to go with a monochromatic card and do white on white.


 I recently bought a few articles from Lifescraft and one of them was this town houses and trees die. 


I ran it through my die cutting machine with white cardstock. Yellow cardstock was taped to the back of the die cuts to look like there was light coming from inside the houses. 


Next I ran the Cuttlebug dot embossing folder through with a piece of white cardstock. This would be my snowy background!


Adhesive foam was then added to the back of the die pieces.


The two pieces were then layered to the front of the snowy background.


The second piece was layered to the top of the first to give some dimension. The sentiment from an old Sparkle N Sprinkle set was stamped in Versafine Clair Nocturne ink and heat embossed with Clear Detail.


This was then die cut with the Spellbinders Grommet Tag die.


The sentiment was attached to the front panel with pale yellow brads to finish my card off for today.


Hope you've enjoyed your visit today and that I have inspired you to join in the fun over at the Holly and the Ivy Challenge? It is always an anything goes theme and it is a great way to add to your 2022 Christmas card stash! You know how fast time flies!!

Till next time, take care!

Shona

Wednesday, March 9, 2022

Slimline Winter Wonderland

Hi there! Today I'm back with another Christmas card for the March Christmas Craft Creations Challenge, where the theme is slimline.


I die cut the deer scene from black cardstock and then also with the slimline die from Pinkfresh studios. The ends of the scene were cut out so that there were no side edges.


I then applied a piece of double sided tape to a piece of white cardstock and die cut the same slimline die. I removed the protective backing and placed the black scene on top of the framed piece.


Waterscape glitter was then burnished in to the remaining sticky surface. This piece was then taped down to a piece of white cardstock leaving enough space below for the sentiment (from an old Sparkle n' Sprinkle set). This was stamped in Versafine Clair Nocturne ink and heat embossed with clear detail.

I ran white organdy ribbon across the top and bottom of the frame and wrapped it around the back. This complete piece was then layered to a silver panel before being layered on to a white card base. Here you can see the shine from the glitter.


I hope you have enjoyed my share today and that I have inspired you to make a slimline card to join in the March Challenge of Christmas Craft Creations.  

Till next time,

Shona

Tuesday, February 22, 2022

Deer Winter Wonderland

 Hi there are welcome back to my blog. Today I have my second February card for the Holly and Ivy Challenge.


I cut out part of the die (not sure where it came from) from black cardstock. 

A strip of of double-sided tape was added to the back of the deer scene and added to the glossy card front, after the little extra adhesive was cut away.


Waterscape glitter was then added to the sticky surface, to make it look like a snow scene.


All that was then needed was a sentiment from an old Sparkle n' Sprinkle set which I stamped in Versamark and then heat embossed with White Detail powder.


Of course you can't see the sparkle! It really is there! And an added ribbon finishes off my card for today!


Hope you liked my share today and that you will join in with the Holly and Ivy Christmas Challenge. 

Till next time! 

Shona

Tuesday, February 8, 2022

HAI February Warm and Toasty

 Hi there and welcome back to my blog. My header for February is a female cardinal who was outside my living room window, hiding from the snow!

Today my card is for the Holly and Ivy Christmas Challenge, which is always an anything goes theme! I hope you will take a look at what my teammates have prepared too!


I started by placing a 3 3/4" x 5" piece of double-sided tape on a piece of 4" x 5 1/4" light blue cardstock.


Next I applied a strip of double-sided adhesive to a strip of white cardstock and die cut several snowflakes from the Recollections set.


Fascination glitter was applied to the snowflake after the backing was removed.


The sentiment from the Stampin' Up Warm and Toasty set was stamped in Versafine Clair Nocturne ink and then heat embossed with Clear Detail powder.


The protective backing was removed from the blue cardstock and the glittered snowflakes and the sentiment were placed on the sticky surface.


Sparkling Snow glitter was then burnished in to the rest of the sticky adhesive.


The polar bear from the Stampin' Up Warm and Toasty set was stamped in Versafine Clair Nocturne, heat embossed with Clear Detail and then colored with Copic markers. He was then fussy cut and after the layers were added to a white card base, he was popped up on foam pads for a bit of dimension. Hopefully giving the idea of him skating on a frozen pond.


Here you can see all the sparkle from the different glitters and the embossing powder. I hope this gives you some inspiration to come and join along with our challenge?

I'd like to join in the following challenges, please:

Till next time!

Stay warm and toasty!

Shona


Tuesday, January 11, 2022

Coolest Holiday Season

Hi there and a very healthy and happy New Year to everyone! I've unfortunately not started off on a good note - having come down with a very minor case of Covid last week. Anyway, hopefully that will be it for me going forward. Kind of glad I did get it, as the Omicrom variant is rampant around here in New Jersey, just now. 

My January header is American Witch hazel. A cheery addition to the backyard when nothing else is blooming at this time of the year!

So on to my card for the Holly and Ivy Christmas Challenge, which is always "anything goes". I had picked up the Reflections snowflake background stamp and thought to team it up with the two cute Hampton Arts penguins!


I started with stamping the background stamp on to a white card base with Versafine Clair Paradise ink and heat embossing with Clear Detail ink. 


The two different penguins were stamped on to white cardstock in Versafine Nocturne ink and heat embossed with clear detail. They were colored with Copics and die cut using the die included in the Hampton Art set.


I found the cute sentiment in an old Sparkle n' Sprinkle set, called Holiday Penguins. This was stamped in the same Paradise ink and then heat embossed. I cut the sentiment out with an old Spellbinders Classic Diamonds die and then edged it with Paradise ink, quite heavily in places and then heat embossed that with the Clear Detail powder - it gave a lovely shiny appearance!


The sentiment and penguins were then added to the front with foam pads and a blue organdy ribbon finished off my card for today!


... and so my 2022 Christmas card stash begins! I hope you will be inspired to make a card to enter into our challenge and add to your stash too! The ingredients are listed below:

Hampton Art Penguin Set and die SC0665

Recollections Christmas Noel

Holiday Penguins (Sparkle N Sprinkle)

Spellbinders Classic Diamonds dies

Versafine Clair Paradise  Ink

Versafine Clair Nocturne ink

Clear embossing powder

Copic markers

Foam tape

Blue Organdy ribbon


I'd like to play along in the following challenges with my little card:
Dies R Us Challenge #184: Using a die that DRU carries
Peace on Earth Challenge #7: Anything Christmas Goes
Crafty Hazelnuts Christmas Challenge #576: Using something old (sentiment and diamond die)

... and that is it from me for today! See you real soon! Actually tomorrow! Till then, stay warm and safe!

Shona

Wednesday, December 8, 2021

Scenic Bauble

 Hi there and welcome back to my blog. My header for December is one of my backyard bird boxes which during the Spring and Summer is home to families of bluebirds. A squirrel was enjoying breakfast on the bird house patio this morning! My card today is for the challenge over at Christmas Craft Creations


The Challenge for December is to make a scene!


I began with stamping the scene on glossy white cardstock with Versafine Clair Nocturne ink and heat embossing with Clear Detail.


The Sweet Poppy bauble stencil was placed over the scene and I applied Broken China ink to the bauble area. 


The inked scene was die cut and then spritzed with water. It gives a lovely mottled effect.


The stencil was placed on white glossy cardstock again and I colored the leaves with Peeled Paint and the ribbon with Iced Spruce. A red Copic marker was used for the berries.


The die cut bauble was then taped on top.


The panel was layered to a light blue mat and then layered onto a white card base to finish off my card for today.


Below you will find the products that I used for my card today:

Hero Arts Stamp K5524

Sweet Poppy Christmas Bauble Stencil and Die set

Distress Oxide inks: Broken China, Peeled Paint, Iced Spruce

Versafine Clair Nocturne

Clear Detail Embossing Powder

Mister

Red Copic

Silver Thread


I hope that I have inspired you to join in the Challenge over at Christmas Craft Creations

I'd like to join in the following challenges with my card:
Crafty Calendar Challenges - December - Christmas
Sweet Stampin' December - Anything Christmas
Winter Wonderland - Anything Christmas

Happy Holidays!

Shona