Showing posts with label Vintage EP. Show all posts

Thursday, September 22, 2016

BE THE PERSON YOUR DOG THINKS YOU ARE!

Hi there,

Today I'd like to share a card with you using the new reveal set 793: Puppy Girl.

Be the Person

To begin with I stamped the image with Memento Tuxedo Black and then colored with Copics, YR00, RV42, RV95, R21, R22, E04, E13, E33, E35. For the background I took a piece of pink cardstock and covered it with a piece of Super Adhesive Sheet. I removed the protective backing and burnished Pink Spirit Sparkle N Soft onto the sticky surface.

Be the Person

I then took Rich Cocoa and inked the raised side of the Darice Paw Print Background embossing folder, The pink, flocked piece was inserted so that the ink would transfer on to the fuzzy surface.

Be the Person

This is the result - a sparkly, fuzzy background.

Be the person

I didn't want to cover up the majority of my background so I decided to make a frame around the image instead. I cut the background in half, then used the Spellbinders Mega Ovals Large to make an "opening" for my image. Place the die on the cutting plate, then position the background halves, so that the top and bottom corners are where the die will start cutting. I taped them to the plate, so they wouldn't move, then I ran it through the Big Shot.

Be the Person

The pieces were then taped down on top of the image.

Be the Person

I decided to curve the sentiment along the edge of the image. Place it on the acrylic block and bend it slightly before you ink up. I used Memento Rich Cocoa to stamp with.

Be the Person

Next step was to "give a dog a bone!" In fact he got three! I had little white bone brads, so I dipped them on my Versamark pad and then with tweezers dipped them into Vintage embossing powder and heat set them. They were then added to the image.

Be the Person

Be the Person

I attached the card front to a piece of 6" x 6" cardstock edged with 1/4" Tear-ific Tape. Sparkling Sands was then applied to the remaining sticky edge to finish off my card today. Not sure what that little speck is on the leash. Didn't notice it until now, but it's not on the card!

Be the Person

I'd like to join in the following challenges:

Hope you've enjoyed my share today,

Hugs,

Shona

Wednesday, February 4, 2015

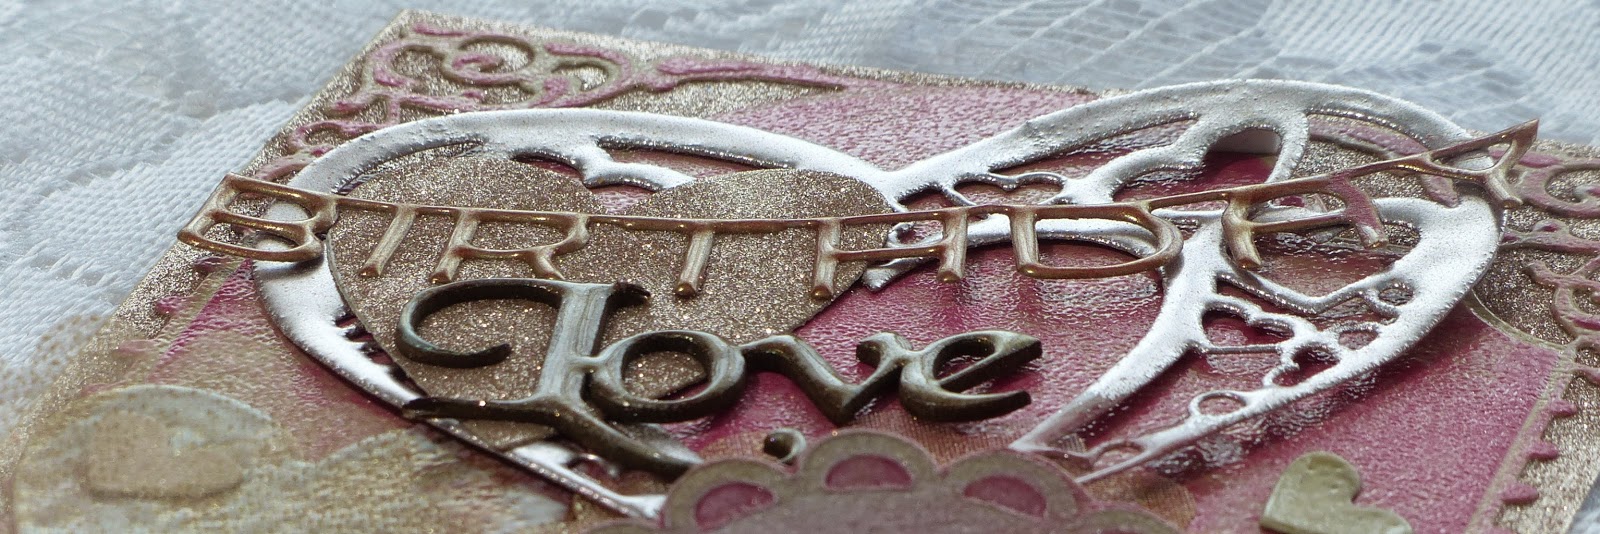
VALENTINE BIRTHDAY LOVE!

Hi there,

I spent most of the morning playing in my stamping room with a couple of goodies that I had received on Monday as part of blog candy that I won from Carolina Cards. One was a Darice embossing folder Valentine Hearts and the other was the Spellbinder's 5 x 7 Enchanted Labels 28. Thank you so much Mary! Here is what I ended up with:


I started with the embossing folder. I inked up a piece of Kraft cardstock with Memento Angel Pink and then added some Rosebud. I then ran it through the embossing machine and sanded the raised pattern to remove the ink (sounds counterproductive - but the colors stay in the recessed areas). After fussy cutting the heart, I dabbed some Moonlight White Brilliance ink over the piece and heat embossed with Clear Detail.  


Next, I cut and embossed the largest frame from the Enchanted Labels 28 and inked it up with the same two pink as before. I applied Versamark to the entire piece and heat embossed with Clear Detail again.

I lay two strips of 2 1/2" Tear-ific Tape side by side on a piece of 5" x 7" Kraft cardstock. After removing the protective backing the frame was centered on top. Peruvian Lily Velvet Glitter was then applied to the remaining sticky areas.


I then die cut the Cheery Lynn DL 178 Heart Within my Heart from Kraft cardstock and after putting the little heart inserts aside (to reuse later) I applied Versamark and heat embossed with Bronze Rose.


Three of the little hearts were used. One was inked with Rosebud, then applied with Versamark and Magic Speckle. Another was inked with Versamark and heat embossed with Clear Detail, the third was heat embossed with Vintage.  

The big heart insert from the Cheery Lynn die was inked with the two pink inks first and then applied with Versamark. Vintage was then added and then Magic Speckle to achieve the lovely mottled look.


The Die-Versions Birthday die cut was inked heavily with Rosebud before I covered it in Versamark and then heat embossed with Vintage (Vintage is "near transparent" so that is why you see some of the pink showing through). I love using this embossing powder on any vintage/shabby chic project.


The "Love" chipboard was applied with Rosebud ink before being heat embossed with Vintage. 

A new technique for me today was to emboss a piece of tulle! But first I die cut it! So after cutting it with the Spellbinders Classic Scalloped Hearts (which it cut through very well, I may add!) I covered it in Versamark and then holding it with tweezers from the bottom of the heart I heat embossed with Vintage again. Loved the subtle look it gave. You can see it peeking out from behind the Darice heart.


So then to put it all together. The dilemna was to get everything to stick and stay put.

I figured if I stuck the words to Super Adhesive Tape then they weren't going anywhere - so that is what I did! I ran the Cheery Lynn die cut through the machine with a piece of Tear-ific Tape that was attached to a piece of Kraft that was big enough to hold the bigger heart from inside the die cut. I then removed the protective backing and attached both the "birthday" die cut and the "Love" chipboard to the surface, before applying Peruvian Lily glitter to the remaining sticky surface.


Tear-ific tape was used to adhere the hearts down, with some Dimensional Dots for dimension! Then the little hearts were adhered with Dimensional Glue. 

A look at the finished project once more:


I'd like to enter this card in the following challenges:

Sweet Stamps: Love is in the Air
Crafty Sentiment Designs: Include a Heart
Scrapy Land Challenge 11: Use a Die that Scrapy Land Carries
 (Spellbinders, Die-Versions, Cherry Lynn)

Thanks for stopping by today! 

Hugs,

Shona

Thursday, April 24, 2014

SEASIDE PEACE

When I think of the word peace, calming sounds are what come to my mind.  When it comes to calming sounds - nothing can beat that of the tide lapping up on a beach, with the soft breeze rustling the sea grasses - just all so soothing! 

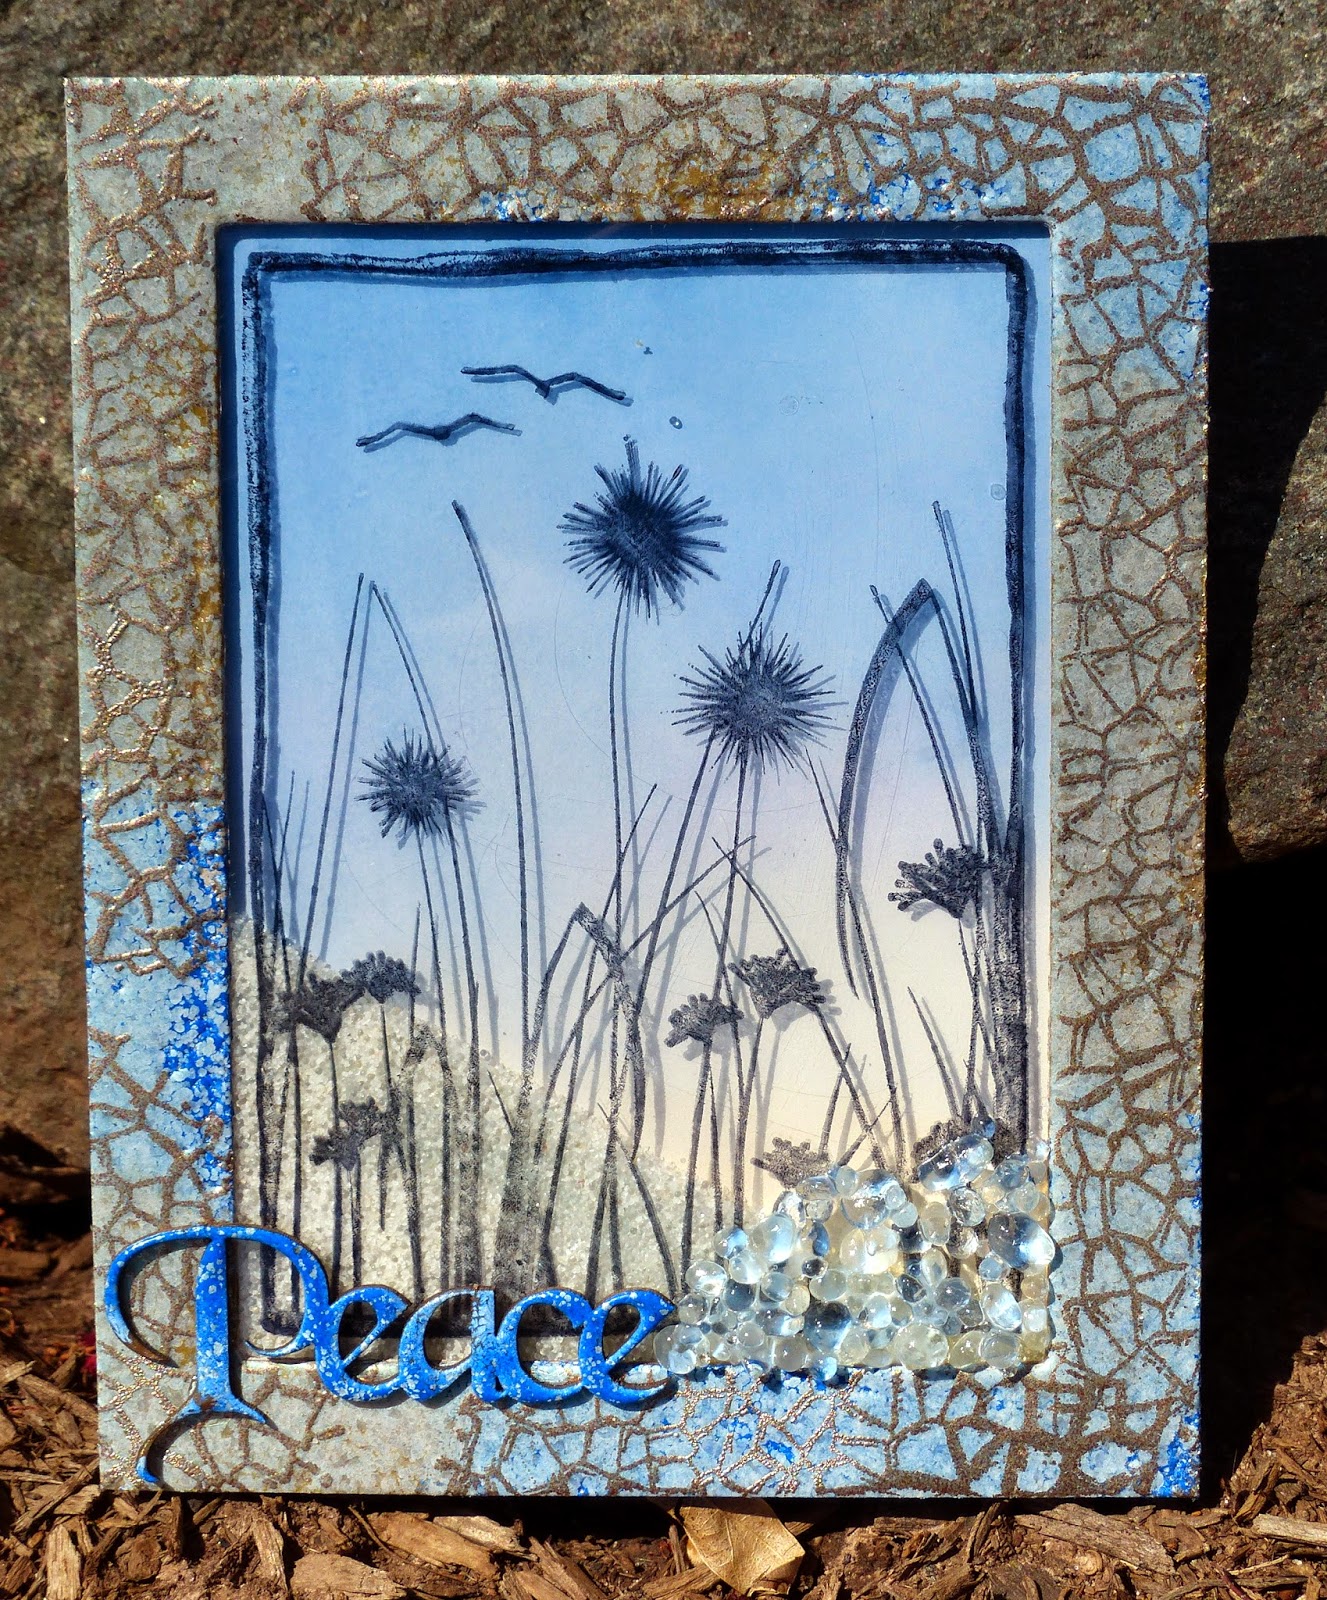
So here is my photo of peace: The North Sea!! Taken from behind the sand dunes in St. Andrews, Scotland. It was a warm and not windy day, I might add!


In an attempt to capture the sea breeze and the sound of the tide I used Sparkle N Sprinkle's Set 493: Silhouettes, which till now has been one of my favorite sets. I have to say I am a little partial to silhouette stamps on the whole - and therefore was delighted when another Silhouette Set was brought out - it's with a garden theme, but you'll have to wait till next week for the May 1st Reveal to see that one!


After stamping the scene on Embossable Acetate with Black StazOn, I tried to make the scene look like it was viewed through an old cracked window, as I wanted to use the new Crackle Background from this month's reveal. However, it was too much on top of the scene, so I decided to go with a "crackled" frame instead.

The frame was cut and embossed from a piece of chipboard and then after applying Versamark, I heat embossed with Ocean and Squash embossing powders first. Versamark was reapplied and then Magic Speckle was next. It is best to heat from the underside when using the marbled embossing powders as the white flecks tend to fly off if heated from the top. With the chipboard being thicker, it took a while to emboss this! Vintage embossing powder was used to achieve the crackled background.


The background isn't quite so swirly in reality - but I loved what the camera did here, so kept it!  I wanted to create a dreamy looking background and was able to achieve it by dabbing ink from the Kaleidacolor Creole Spice Ink Pad directly onto an acrylic pad, then misting with water, before placing glossy white cardstock face down in the ink.


The acetate scene was attached to the back of the frame and then I attached dimensional foam to make a well for the shaker card.  I put in some real sand and some micro beads, thinking that when it got shaken it would make the noise of the tide on the beach! Which it actually does! The protective backing was removed from the tape and the inked background was placed over the well, encasing the sand and the beads.


The Chipboard word "Peace" was covered with Versamark and heat embossed with Antiquities, then again with the Ocean marbled powder. I added some Ice Sea Glass Mudd Puddles to the right hand side and attached "Peace" with some Mega Tack Glue to finish off the card.

I'd like to enter today's "Peace" card in the challenge over at the Path of Positivity. 


Can't you just hear the tide swishing over the beach? Summer will be here before we know it! Yeah!

Remember to stop back next week for our May 1st Reveal - to check out the new Garden Silhouette set. I assure you - you will not be disappointed! OK, I'll be nice - here's a little sneak preview!  


Hope you've enjoyed your visit, see you next week!


Hugs,

Shona