Showing posts with label Versafine Clair inks. Show all posts

Tuesday, January 11, 2022

Coolest Holiday Season

Hi there and a very healthy and happy New Year to everyone! I've unfortunately not started off on a good note - having come down with a very minor case of Covid last week. Anyway, hopefully that will be it for me going forward. Kind of glad I did get it, as the Omicrom variant is rampant around here in New Jersey, just now. 

My January header is American Witch hazel. A cheery addition to the backyard when nothing else is blooming at this time of the year!

So on to my card for the Holly and Ivy Christmas Challenge, which is always "anything goes". I had picked up the Reflections snowflake background stamp and thought to team it up with the two cute Hampton Arts penguins!
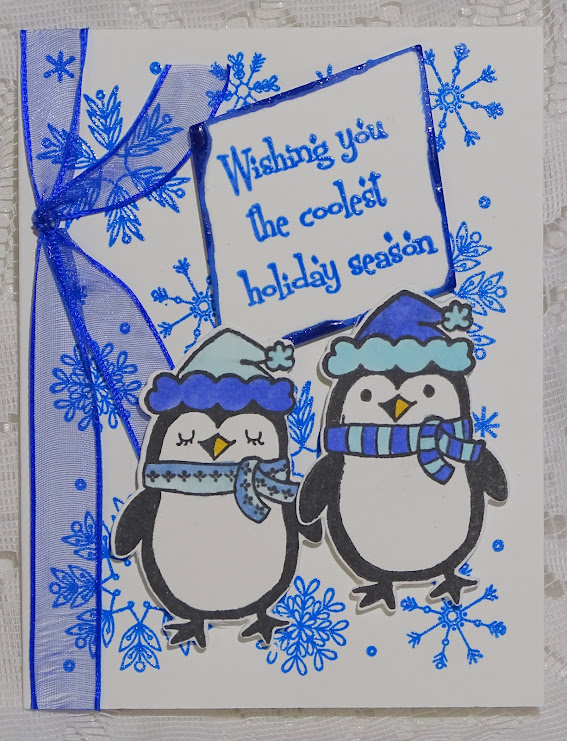

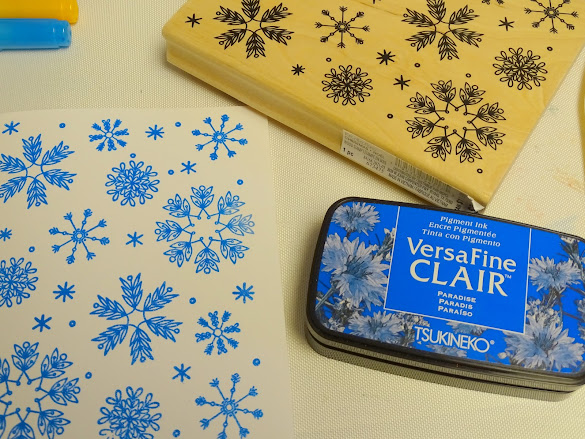
I started with stamping the background stamp on to a white card base with Versafine Clair Paradise ink and heat embossing with Clear Detail ink. 

The two different penguins were stamped on to white cardstock in Versafine Nocturne ink and heat embossed with clear detail. They were colored with Copics and die cut using the die included in the Hampton Art set.
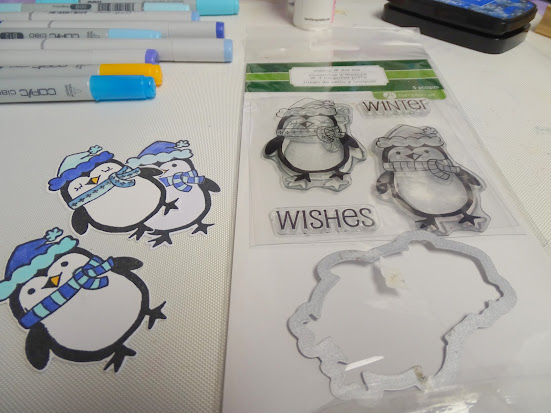

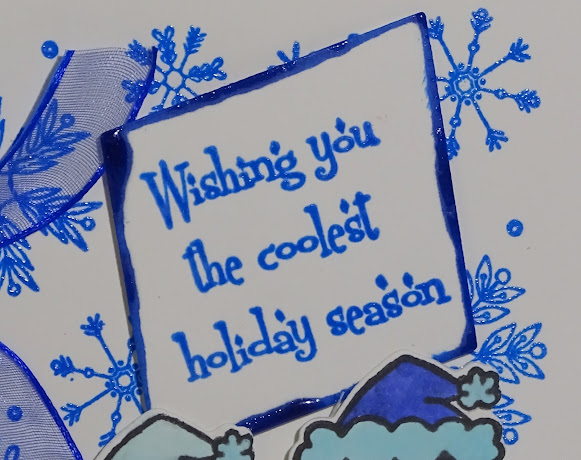
I found the cute sentiment in an old Sparkle n' Sprinkle set, called Holiday Penguins. This was stamped in the same Paradise ink and then heat embossed. I cut the sentiment out with an old Spellbinders Classic Diamonds die and then edged it with Paradise ink, quite heavily in places and then heat embossed that with the Clear Detail powder - it gave a lovely shiny appearance!

The sentiment and penguins were then added to the front with foam pads and a blue organdy ribbon finished off my card for today!
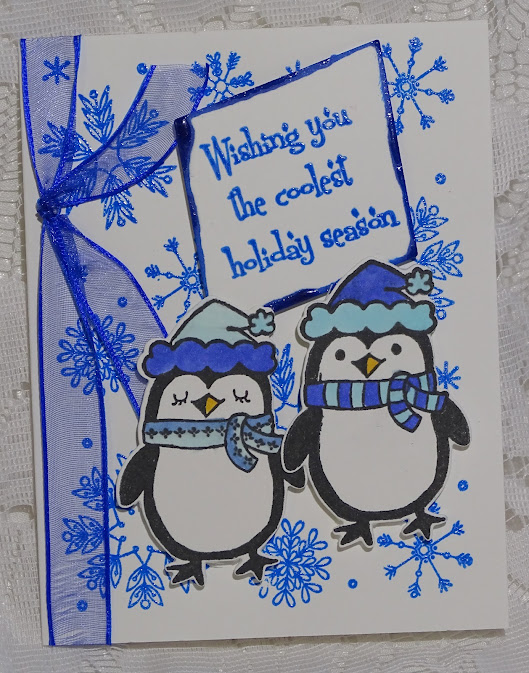

... and so my 2022 Christmas card stash begins! I hope you will be inspired to make a card to enter into our challenge and add to your stash too! The ingredients are listed below:

Hampton Art Penguin Set and die SC0665

Recollections Christmas Noel

Holiday Penguins (Sparkle N Sprinkle)

Spellbinders Classic Diamonds dies

Versafine Clair Paradise  Ink

Versafine Clair Nocturne ink

Clear embossing powder

Copic markers

Foam tape

Blue Organdy ribbon


I'd like to play along in the following challenges with my little card:
Dies R Us Challenge #184: Using a die that DRU carries
Peace on Earth Challenge #7: Anything Christmas Goes
Crafty Hazelnuts Christmas Challenge #576: Using something old (sentiment and diamond die)

... and that is it from me for today! See you real soon! Actually tomorrow! Till then, stay warm and safe!

Shona

Saturday, February 27, 2021

Turner Syndrome Awareness

 Today I am sharing a card I made specifically for a Challenge that promotes Turner Syndrome Awareness. I first became aware of  Turner Syndrome two years ago when the stamping community, headed up by Lori Kobular, started the Turner Syndrome Awareness Blog Hop. 

Turner Syndrome is a genetic disorder where a female is born missing all or part of her second X chromosome leaving her with life-long medical issues and learning disabilities. This condition occurs one in 2,000 female births worldwide, but is more common among pregnancies that do not survive to full term. That is why Turner Syndrome Females are considered MIRACLES! I hope you will go to Lori's site to learn more!


Here is the mood board for the Challenge:


I started this card a couple of weeks ago and it changed directions several times before it was finished. I had this never before used Stampendous Hydrangea Garden stamp, stencil and die set that I recently came across during a clean-up in my stamping room. Since the Butterfly is also a symbol of TSF, I thought this set was the perfect choice!


I began with stamping the hydrangea bloom in my stamping platform with Versafine Clair Nocturne ink. The outline part of the stencil was placed around the bloom and I colored using inkers and some Distress Oxide inks.


This was returned to the stamping positioner and was reinked with Nocturne and then heat embossed with sparkle. The mask part of the stencil was then placed on top of the bloom in the stamping positioner and the leaves were positioned and stamped with the Nocturne ink.


I then placed the leaf mask over the first set of leaves and stamped a second set over to the left.


This was the result, once the masks were removed.


The leaves were then colored using inkers and different green inks, with the bloom and leaf stencils being put in place of areas not to be inked.


The butterfly was then stamped, colored with Copics and die cut.


I covered the butterfly with Versamark ink and then heat embossed with Clear Detail and then again with Super Thick Clear. This gave the butterfly a beautiful shiny coat!


Back to the hydrangea, Broken China was applied to the background and then misted with water.


I found this a little darker than I had wanted, so I'll deal with that later!!

I covered a piece of pink cardstock with double sided adhesive and cut out a frame with the Tonic Topnote Trellis Layering die.


Lavender Iris glitter was then applied to the sticky surface of the frame when I took of the protective backing.


To tone down main image I decided to cover it with vellum. I attached it with a little Pixie Spray to hold it in place temporarily. I attached the glittered frame to the piece using a flower and brad in each of the four corners.


I placed the finished panel back in the stamp positioner and positioned the butterfly stamp on top of the vellum.


Just the body of the butterfly was then inked:


The glazed butterfly was then placed on top of the body of the butterfly. Now she has legs and antennae again! The card front was layered to pale purple and then on to a white card base.


I searched high and low for a sentiment. As luck would have it another dear stamping friend, Donna Ellis, had recently gifted us a sentiment that we could use on our personal projects and I thought it would be perfect for my card. However I did have to change the size to fit where I wanted it to go. So after adjusting the dimensions on my computer, I printed it out on the same pink cardstock that I had used for the frame. I then die cut the sentiment using the inside die cut of the Tonic die set. 


The sentiment was attached with some mounting foam. Some pink baker's twine was knotted around the spine of the card to finish off my project.


I hope you have enjoyed stopping over today? I also hope that you take the time to go back and check out the Turner Syndrome Awareness Blog Hop. Not are there many fun prizes to be won, but you can also learn much more about these miracle girls!

Below you will find a complete list of all the products that I used in my project today:

Donna Ellis’s sentiment

Stampendous Fran’s Hydrangea Garden Stamp and Stencil Set

Stampendous Fran’s Hydrangea Garden Die Cut Set

Versafine Clair Nocturne ink

Sparkle embossing powder

Distress Oxide Inks:

Worn Lipstick, Wilted Violet, Peeled Paint, Fossilized Amber, Broken China

Versafine Clair inks: Cheerful, Verdant, Shady Lane

Blending Brushes

Vellum

Copics markers: RV02, Y13, YG256, YG13, W-3

Versamark ink

Clear Embossing powder

Super Thick Clear embossing powder

Tonic Topnote Trellis Layering Die Set

Double sided adhesive sheet

Lavender Iris glitter

Flowers

Brads

Pink Baker’s twine

Foam mounting tape


Along with the Turner Syndrome Awareness Challenge I would also like to take part in the following challenges:

Creations in Pink Challenge #31: Anything Goes: Mainly Pink

Take care, until next time!

Shona

Wednesday, April 8, 2020

Oh Christmas Tree!

Hi there, Spring has definitely arrived here as per my header for April! One of the pretty daffodils in my yard right now.


Welcome to my first card for the Christmas Craft Creations Design Team. This used to be the old Christmas at Sweet Stampin'. We will be doing the same thing, creating all types of Christmas projects, with a different monthly theme/twist. We hope you will play along in our new challenge. For April, we would like you to "Use a Stamp"!

I chose to use some plaid on my project today, so I combined two sets, the Stamping Up Perfectly Plaid and Concord & 9th Plaid Background.


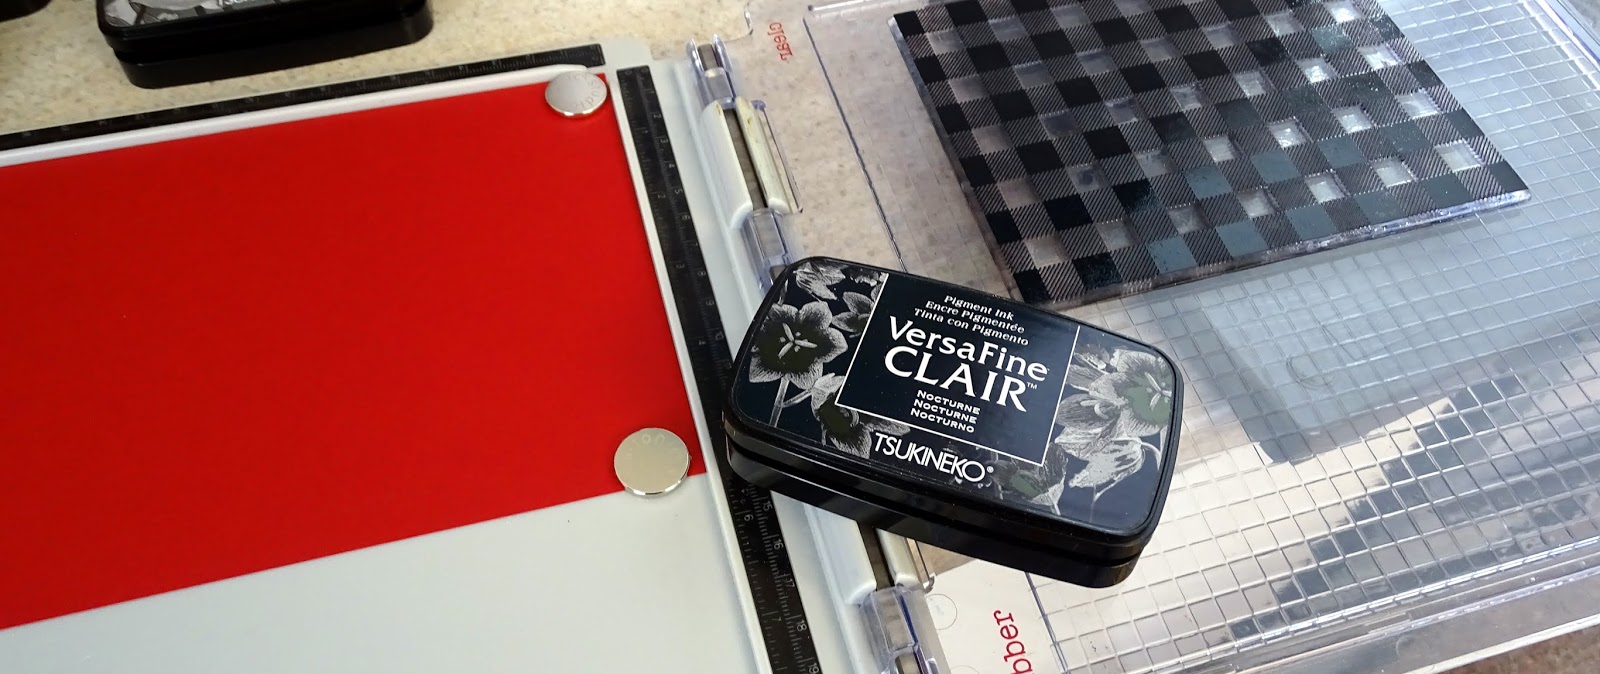
I began with stamping the plaid background on red cardstock with Versafine Clair Nocturne ink, using my stamp platform so that I would get a nice crisp impression.


I then stamped the plaid tree with Versafine Clair Nocturne ink, which was then heat embossed with Sparkle.


Two more trees were stamped with Versafine Clair Morning Mist. The three trees were then cut using the matching tree punch from Stampin' Up.


The Tonic Oh Christmas Tree Sentiment die was used for the frame. 


I then die cut a piece of light green cardstock using the two outline dies used in making the frame.


The red frame was glued to the green frame with Scraperfect Best Glue Ever.


The plaid background was laid in the center of the darker green layer. The light green frame was then positioned on top. The two plain trees were taped in place and then the sparkly tree was mounted on foam. The red frame was then mounted also with foam tape.


After the front panel was layered to a red card base, I finished off my card today with a green organdy bow.

Below is a list of the products that I used today:


Concord & 9th Plaid Background 

Stampin’ Up Perfectly Plaid

Tonic Oh Christmas Tree Sentiment Die Set

Stampin’ Up Christmas Tree punch

Versafine Clair Nocturne
Versafine Clair Morning Mist
Sparkle embossing powder
Scraperfect Best Glue Ever
Mounting Tape
Green Organdy Ribbon

I hope you will take a look at what the rest of my teamies have done for the Christmas Craft Creations debut! Lots of creative ideas!! We hope that you will play along with us in the April Challenge - all you have to do is use a stamp!

Stay well!
Shona

Friday, January 31, 2020

Plaid Happy Birthday

Hi there,
Today I'd like to share a different kind of card for me, i.e. no glitter or flocking! Picking myself off the floor! This card was made for the Dies R Us Design Team.


Just an FYI, the die I used today is a fraction of it's original price - $5.60 instead of $22.49, so grab it now if you can! I hadn't realized that when making this card and it is much bigger than I had thought it was too. This card ended up being just a little shy of a 5 x 7.


First, I stamped the plaid background from Concord & 9th in Versafine Clair Charming Pink. I used my Stamp Platform to do this to get good coverage. 


Re-inking and stamping three times, gave a nice even result.


Once it was dry, I die cut the Die-Versions Happy Birthday Solo Sentiments die from the middle of it, being careful that I didn't lose any of the little negative pieces. Then I ran black cardstock through with the same die.


A piece of Super Adhesive Tape was stuck to the back of the plaid negative piece and the black Happy Birthday outline was placed in the sticky space. The little plaid pieces were inserted into their respective spots. I neglected to take a photo of that ... my bad!


The plaid piece was then popped up with little mounting foam strips, but I moved it all slightly intentionally to the left.


Another "Happy Birthday" was die cut from another piece of black cardstock that would be used as the layer on top of the card base. This was then taped again slightly to the left so that it achieved more dimension.


The black piece was then layered to a white card base and then the focal panel was taped on top. A piece of black and white cord was tied around the top of the card to finish it off.


Here are the products that I used in my project today: 

Concord & 9th Plaid Background Stamp
Super Adhesive Sheet
Mounting Foam
Black and White cord

Hope you liked my project today? Please stop by and leave me a comment!

I'll be back tomorrow with my Turner Syndrome card, you won't want to miss that. There are tons of prizes up for grabs as you learn about Turner Syndrome Awareness! See you tomorrow!

Big Hugs,

Shona


Thursday, May 16, 2019

Smell the Sea

Hi there,
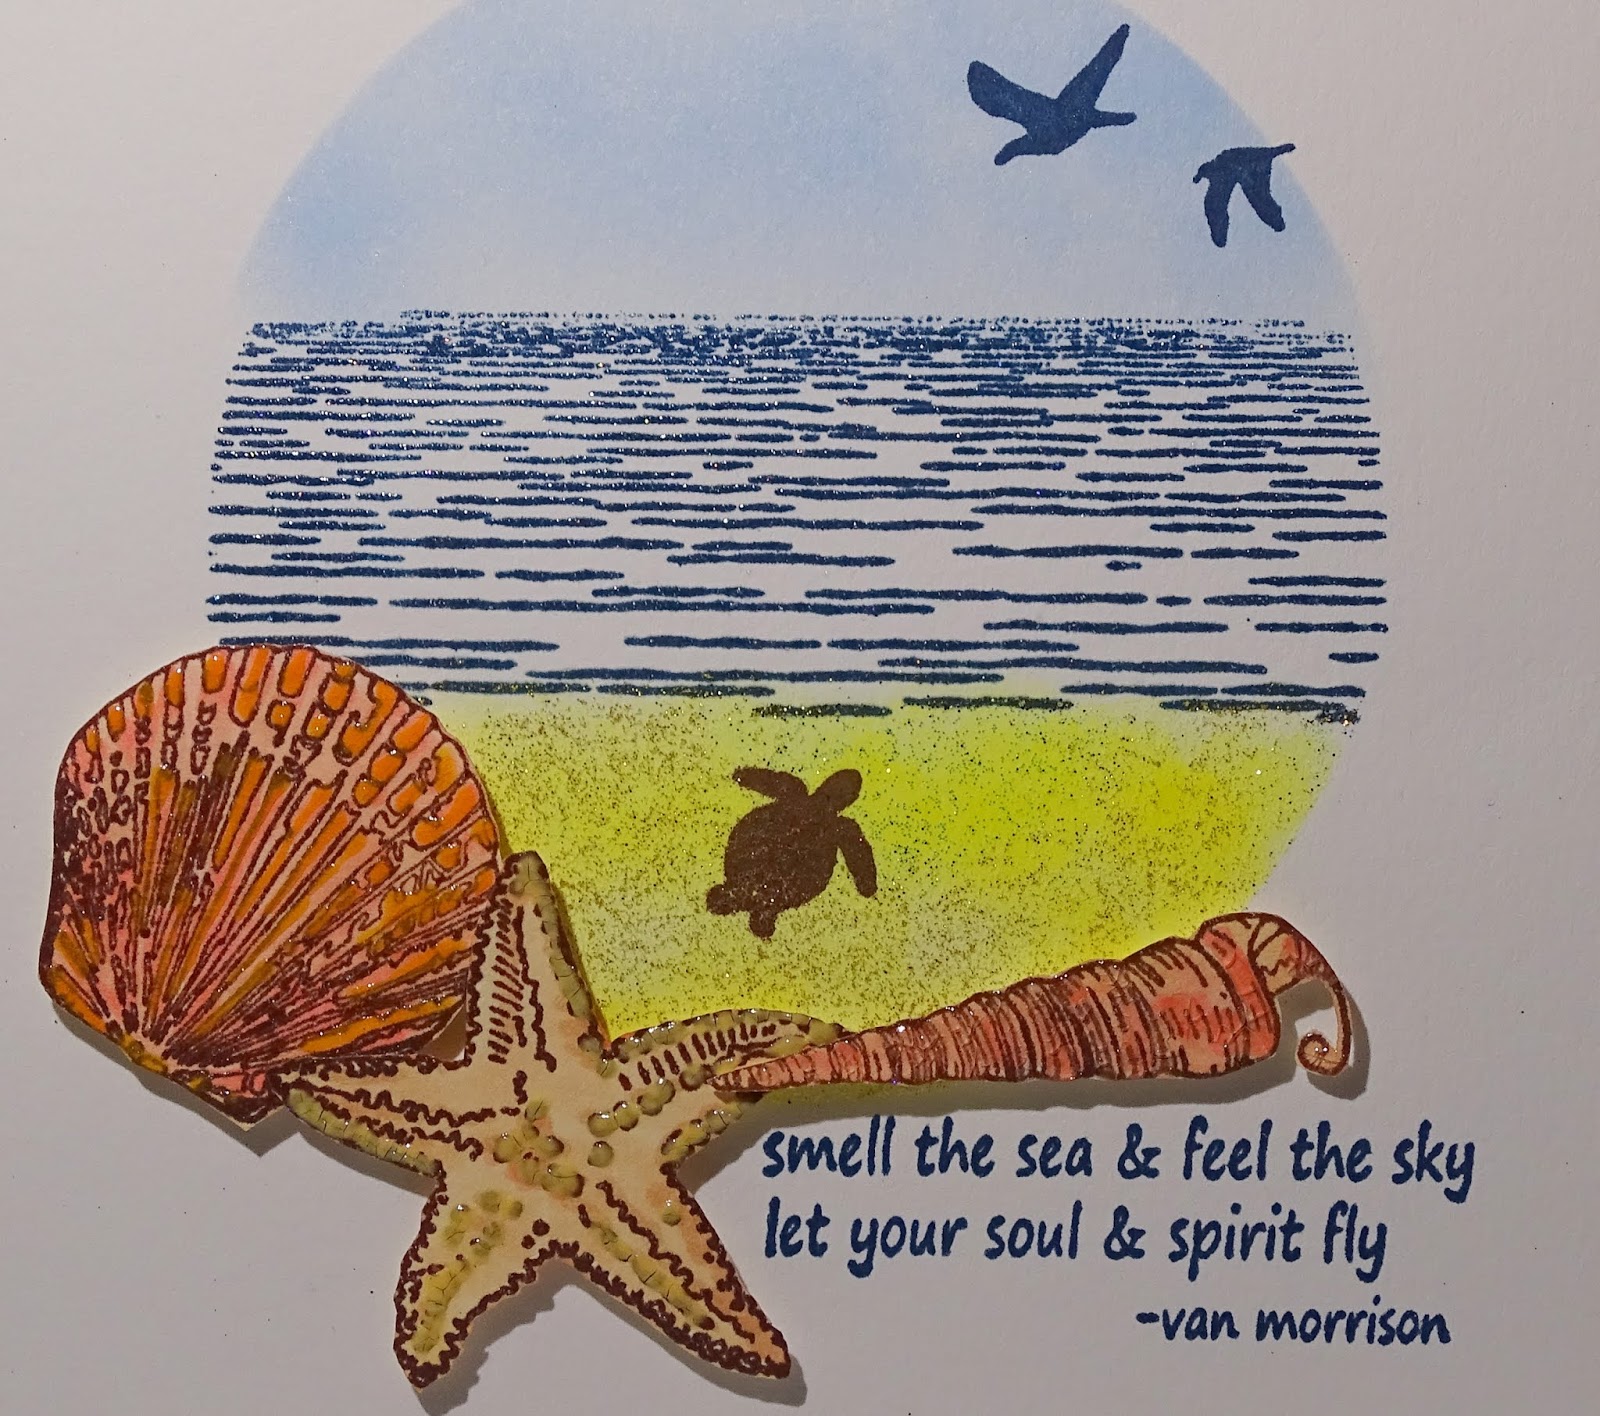
Thanks so much for stopping by today. I'd like to share a Sparkle N Sprinkle card with you using two of our May release sets, Sand Dune Silhouettes 940 and Nature of the Beach 929 along with an older set Wetlands 1 790.  

I started with making a mask, by die cutting a circle (Lifestyle Nested Circles) and using the frame part, taping it lightly to my white cardstock square. 

I positioned the "water" in the stamping platform so that it would stamp in the middle of the circle. I stamped with Versafine Clair Twilight and heat embossed with Sparkle. 

Memento Sky Blue was sponged on for the sky. 

After inking the bottom third with Versafine Claire Cheerful I sprinkled on some Celestial Glitter which attached to the Versafine like an embossing powder. This gave a shimmery, sandy look. 

The mask was then removed and the birds and the sentiment were then placed on the stamping platform and stamped in Versafine Clair Twilight, I then heat embossed the sentiment with Sparkle. 

1/4" tear-ific Tape edged a 5 3/4" square piece of card and after attaching the scene to the middle, Autumn Frost was burnished in to the sticky edges. The little turtle was stamped on the beach with Versafine Clair Acorn ink. I inked and stamped a couple of times to give it good coverage on the textured sand.
 
The shells were stamped in Versafine Acorn and were colored with Copics. Nuvo Crystal Drops Ripened Pumpkin, Sugared Almond and Jewel Drops Rose Water were then added to the shells for some dimension. Once dry they were mounted to the bottom of the scene using foam tape. 

That finished off my card for today. 

Below you will find all the products that I used in my card and those with a link can be found over at the Sparkle N Sprinkle website. You can use my code ShonaDT10 for a further 10% of your purchase.
Memento Summer Sky
Lifestyle Nested Circles Dies
Copics
Hope you'll come back to visit again soon. Thanks again for stopping by!

Shona