Showing posts with label 1/4" Tearific-Tape. Show all posts

Wednesday, July 8, 2015

FUNNY FARM CHRISTMAS

Hi there,

I'm here today to share with you another card from the new Reveal sets this month. This little guy, the Christmas Goose comes with a few fun sayings - so I decided to match him up with an older set for the sake of a laugh!


Firstly, I stamped the farm scene (from Set 652) on white glossy cardstock in Memento Tuxedo Black ink. I colored it roughly with Memento inks, London Fog, Summer Sky and New Sprout with a dauber, before going over the inks with some Copics: C5, E31, E35, Y17, for the details.

The Christmas Goose was stamped in Versamark ink on white glossy and heat embossed with Black Detail. He was fussy cut and I went around the outline with the black Copic to get rid of any stray white card. I then went on to color his hats, socks and lights, with some brighter shades of  Copics.


The colored light bulbs were given a little dab of Dimensional Glue to make them shine. The sentiment was stamped in Versamark on to the background (after applying the anti-static powder) and heat embossed with Black Detail. It gave a nice raised, detailed impression.


The background piece was centered to a piece of light blue cardstock, edged with 1/4" Tear-ific Tape. Diamond Dust Glitter (which is chunkier glitter) was then applied to the remaining exposed tape, to add a little extra bling to the piece.


Our Christmas Goose was then attached to the card front with Dimensional Foam, to finish. That ends my share for today. Hope I've inspired you to take another look at some of your old stash and stamp sets and use them in other ways than they were intended!

Be ready to join us again next week, when we will be doing an impromptu mini blog hop, featuring some other funny little birds!

Shona

Thursday, December 12, 2013

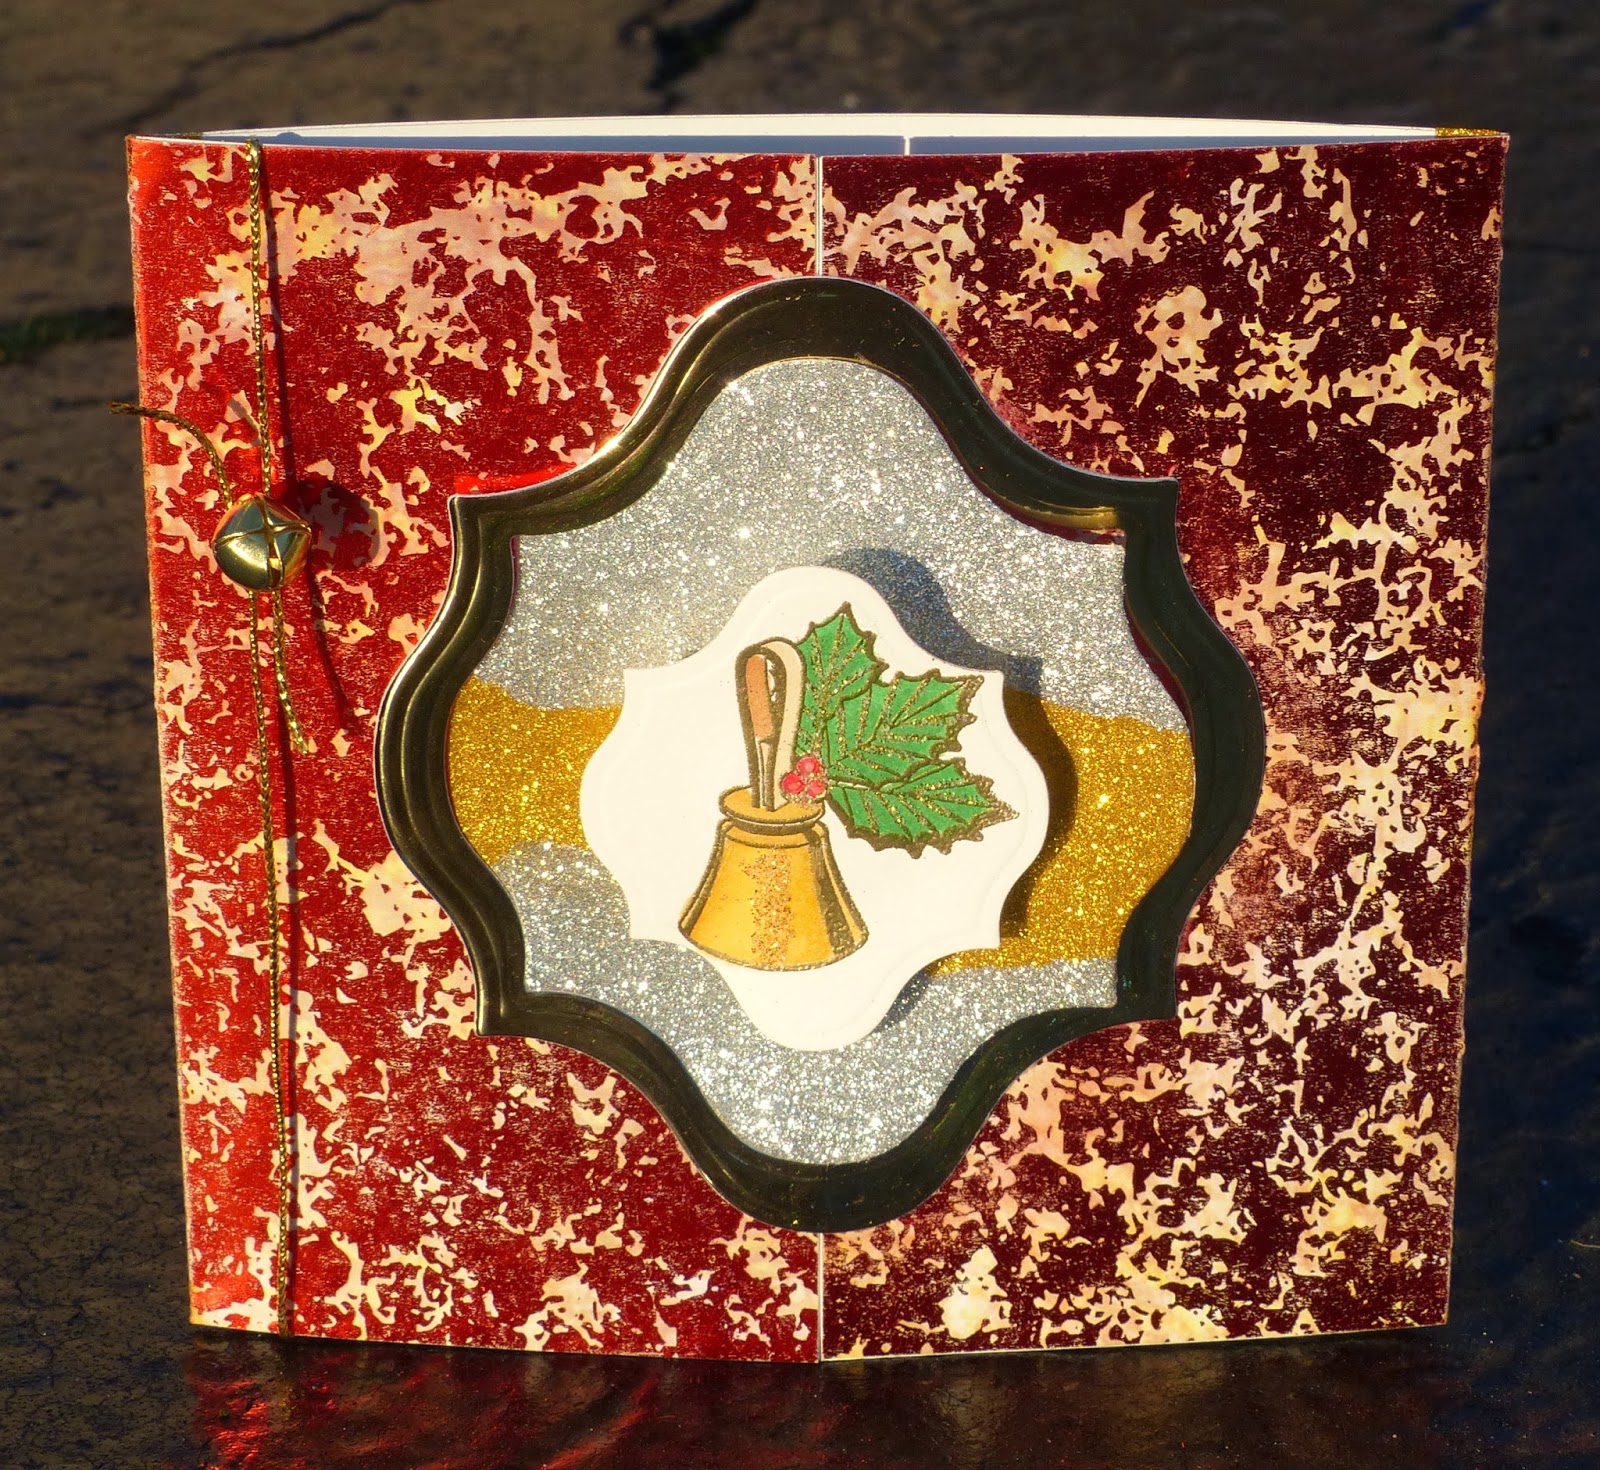
JINGLE BELL!

Hi there,


Here today with a personal card that I just finished up for the Handbell Choir Director at the church. Just want to point out that there is a definitely a dearth of handbell stamps out there!  Anyone have any leads? I've managed to pick up a wee collection over the years when attending handbell festivals with the kids.

Each winter and summer break for the past 10 years at least, I've been making a card for this wonderful lady. She has instilled a love for handbells in our family, particularly Gillian, who is set to pursue this as a career. This Christmas, I was stumped, as I hadn't managed to get a new bell stamp this year.  Well, I'll just have to do something different with the fold and use this little Christmas handbell stamp as the main focus. 


I had taught a class for Sparkle N Sprinkle at a Convention in the fall and thought that I could use the same card fold idea. The base of the card is 11" x 5 1/2". You will score 2 3/4" in from each end of the long side:


I had been at Michael's over the weekend and picked up some metallic paper - and thought that the red, with gold and silver flecks might work for what I had in mind.  It wasn't too heavy a cardstock, so I had to beef it up with cream on the inside. I added some Goldenrod Velvet Glitter with 1/4" Tear-ific Tape to the edges of the middle inside panel. I used a Tim Holtz Holly bough stencil for the side panels, sponging with Memento inks Pistachio, Ladybug and Desert Sand.  

For the focal image I heat embossed the pretty little Christmas Handbell in Gold Detail and colored in with Copics, to match the colors of the holly on the inside.


I added Dimensional Glue to the bell base and berries and left it to dry. Then used the Sakura Glue pen to add some Celestial glitter to the leaves and bell for extra sparkle!

Using Spellbinders Labels 13, the frame is made by cutting and embossing two of the dies from Gold Metallic cardstock - so pretty!

For the center of the frame, apply Super Adhesive Sheet to white cardstock and use the smaller of the frame dies to cut and emboss, then rip the protective backing so that there is a strip left in the middle of the piece, and to the exposed tape add Reflection Velvet Glitter. Remove the middle section and apply Goldenrod.

Glue the right hand side of the gold frame to the middle of the front and using 1/4" Tear-ific Tape, stick the left hand side of the glittered piece to the left hand side panel. The little handbell, cut and embossed with the small sized matching die cut is attached with a Wobble!


Now for the sound of the bells! I added my "jingle" to the left hand side panel with some gold thread. Here is the closed finished project:


You get the jingling of the bell when you open the card! Hope you've enjoyed my little show and tell today.  Enjoy the rest of the holiday bustle - only 13 days to go! Hey, but whose counting?

Hugs,

Shona

Tuesday, September 3, 2013

"HOOT OF A PRIZE" WINNER!

A big thanks to all of you that joined us for the latest Sparkle N Sprinkle release of Set 510: Owlettes.  The winner was randomly picked from the (Mystery Designer) Belinda Shupe's blog: 

CONGRATULATIONS KAREN LADD!

Please e-mail SNS_Artist@tampabay.rr.com with your mailing address, choice of one glitter and embossing powder which can be used with your dear little owlettes, and we will get your prize in the mail!

While we were preparing for our big release, I played a little with the Owlette set and some of the many products that Sparkle N Sprinkle has to offer. Here are three more designs that I came up with:

  
This one uses our "Glow in the Dark" embossing powder!  I used a Versamarker pen to apply the embossing powder to the rings around the eyes.  It's also a great embossing powder choice for those upcoming Halloween projects! The instructions are here.


Then I decided to glitter things up a bit, using the Tear-ific Tapes. It's so easy to add strips of bling (not to mention furry softness) to your projects! 


For the little owl, I used the 2 1'2" Tear-ific Tape with some Buff Flocking and then shaded with Copics on top. He is also attached to a wobble, another fun element to add to your projects!


I also edged the card base with the 1/2" Tape, centered the card front and applied the Buff Flocking to the exposed edges. Can you see the fuzziness in the frame?  

For my last card I decided to use two of the new marbled embossing powders, Ocean and Mojito:


Mojito for the grass, Ocean for the sky! Full details can be found here, if needed:


So there you have a few more ideas for this adorable little set.  

Owl be back soon!

Shona  


Thursday, September 22, 2011

MAGICAL WINTER MOMENTS

Hi there, so glad you have stopped by for a look at the Sparkle N Sprinkle September Blog Hop.  Now that the temperatures are dropping, along with the first of the leaves, it is time to get a start on those holiday cards.  To make things easier on the pocket book, for the month of September, all of our Christmas & Winter, Christian & Sympathy and Jewish images are on special at 15% off along with some coordinating glitters and embossing powders.

So let's get on with the show!  If you came here by way of the amazing Linda Loew,  then you are on the right trail, but if not, in order to be eligible for the Grand Prize, plus three other prizes, you should go back and begin your tour at the SNS home page.

For my first card I decided to use our new Playful Pengies set.  So many fun images in this set, I know a good few of my Christmas cards this year will be made from this set.  This month I challenged myself to think outside the box (or should I say card), so I decided to make a Gatefold card using this set:

Here is the finished card:


If you wish to give this one a go, you will find  complete instructions here.


 Below, you can see the opened card.  I used a mirror stamp to stamp the penguins for the inside.  Doing this (apart from making the inside cuter) it also helped to steady the card.


So then for my second card, I decided I would take a stab at creating a Step Card.

I made my own Star of David using the SNS Tear-ific Tapes and lots of glitter!!  Click right here for full details, on how to make my Happy Chanukah card:


Thanks again for stopping by today.  Remember to leave a comment for me, to increase your chances of winning!  Then continue on the trail by hopping over to see what my awesome fellow Designer, Barbara Bruder has in store for you.