Showing posts with label Sienna EP. Show all posts

Thursday, December 22, 2016

MAY YOUR DAY BLOOM!

Hi there, 

Today I'd like to share my last December 2016 reveal card. I chose to work with the Rustic Flower Set 816.


To begin with, I stamped the jug of flowers in Versamark on Kraft cardstock and then I heat embossed with Sienna. The image was colored  with Copics.


This was then die cut using the Spellbinders Style Nouille Decorative Element, which was sponged with Wild Honey Distress ink before removing the die. I then placed a piece of Super Adhesive Sheet in the center of the reddish purple textured cardstock and removed the backing, the die cut image was centered on the adhesive and then Mystical Mauve was applied to the remaining sticky areas.


I used the Nuvo Fine Tip Glue Pen to add some of the Mystical Mauve Glitter to the purple flowers in the jug.


This tied the jug in nicely with the sparkly border.


The sentiment was stamped in Versamark on Kraft cardstock and then heat embossed with Mulberry, one of the detailed Tuscany colors. This was then die cut with Spellbinders Framed Tags One and was attached with Foam Squares, with one behind the hole which was then sprinkled with the Mystical Mauve Glitter.


I made up a flower from using various Prima flower parts, embossing a little Sienna powder to the larger petals. This was attached to the card front with a copper brad in the center.
Hope you've enjoyed my share today.

Big hugs,

Shona

Wednesday, November 30, 2016

SPARKLE N SPRINKLE'S DECEMBER 1ST REVEAL

Welcome to Sparkle N Sprinkle's December 1st Reveal. I chose to work with the Build a Flower Set 811, along with some of the bright and cheery Nuance powders.


We have six new stamp sets to share with you today.  These new sets are 20% off until the 3rd of the month.  So once you finish the blog hop, head on over to the store and start shopping.  All of the new sets are available on cling mounted rubber or as a digital image.  

The sets are:


Build A Flower 811  (digi version DIGI811)
  Will Ewe Be Mine 813  (digi version DIGI813)
   Light Up My Life 814  (digi version DIGI814)
Rustic Flowers-Snapdragons 816  (digi version DIGI816)
Spring Bunny 819  (digi version DIGI819)
Build A Wreath (Digi Only)  DIGI3128B
   
On Dec 3rd, ONE GRAND PRIZE WINNER will be selected from the comments left on the Designers' blogs listed below. Please leave a comment with each Designer in order to be eligible for the Grand Prize.  You never know who the Mystery Designer will be that has the winning comment.

The Grand Prize Winner, which will be announced on the SNS Facebook page and on the SNS Blog, will receive ALL of the new stamp sets released this month (or the digi versions, if preferred).

The Blog Hop order this month is:

Eret
Chris
Shona (you're here)
Belinda
Jess
Anne
Diane
Donna

(*Tip: if you have difficulty with a particular link, try clicking on the Designer's blog title to send you to their Home page.)

We hope you enjoy the New Reveal Blog Hop as much as we do.  Thanks for joining us and remember to comment on each of the Designers' blogs to be eligible for the Grand Prize.  
 Wonder who the Mystery Host will be this month????


The Sparkle N Sprinkle Creative Challenge also begins today.  There are lots of prizes and recognition badges.  Come check out how you can become a SNS Featured Artist as well.  The theme is always Anything Goes using Loose Glitter, Embossing Powder, and/or Flock.


Have you checked out the SNS YouTube Channel featuring Demo Donna?  If not, then you are in for a real treat.  Subscribe today to get all the latest Demo Donna tips and techniques!


So now on to my card. To begin, I stamped the flower pot on Watercolor card in Versamark and heat embossed with Sienna. I then masked the pot so that it would look like the stems were coming out of the pot, which ended up not mattering, as I layered another pot on top for dimension. The stems and flowers were stamped in Versamark and then heat embossed with White Detail.


I then sprinkled yellow, orange and green Nuance Powders over the flowers stems and leaves.


This was then misted with water, using the Mini Mister, and was then left to dry.


I stamped three more flowers and three leaves on a scrap piece of watercolor card and repeated the process with misting the Nuance Powders. When dry (you can speed up the drying process by using your heat tool) these were then fussy cut.


I then added Nuvo Crystal Drops Dandelion Yellow to all petals and as they dried they pulled up the color from the Nuance Powder beneath, which made the little dots different colors. The three additional leaves were applied with some Moonstone Nuvo Glimmer Paste for some added shine. The fussy cut flowers and leaves were added to the bouquet with foam squares. Now my bouquet had come alive!


I stamped the pot again on a piece of scrap white card with Versamark and heat embossed with Sienna. Using the Nuvo Fine and Medium Tipped Pens, I "colored" in the pot. I waited till the glue dried and then applied the Nuvo Sunkissed Copper Gilding Flakes.


I used a stippling brush to burnish the flakes in well. I then stamped the sentiment from the Blossoms Set 581 directly on top of the Gilding Flakes in Versamark. This was then heat embossed with Black Detail. I wasn't sure if it would work terribly well on top of the flakes. I used my anti-static bag first and found it worked rather well.


This was fussy cut and then added to the card front with Foam Squares. I decided to add Nuvo Crystal Drops Copper Penny to the pot rim, to finish off.


The card front was then layered on a black card base to finish. I needed a card for my Mum's birthday this weekend, so made another version of this using the jar from the Fill the Jar Set 423. I stamped the jar twice in Versamark and heat embossed one in Ice Rink and the lid in Silver Detail. 


I stamped the Versamark pad completely over the jar and heat embossed with Ice. I did this twice to get a frosted green glass. The lid was colored in with a grey Copic. I stamped the same "Blossoms" sentiment in Versamark on Kraft card and then cut it out with Spellbinders Framed Tags One. This was attached with raffia as shown.


The lid was attached to the jar and this was then popped up on top of the bouquet.


I'd like to join in the following Challenges:
Color Inspiration Monday: Link Up #4: Anything Goes with a hand colored image.
Get Creative Challenge #52: Birthdays

Hope you've enjoyed my share today. Remember to comment on all the Designers' blogs to be eligible to win all six new sets. That would be a nice early Christmas gift, wouldn't it? Now you should hop over to see what talented Belinda has to show you. 

Big Hugs,

Shona

Thursday, July 14, 2016

Wetlands Shadow Box

Hi there, 

I'm here today to share with you a variation on a shadow box, using the two new July Reveal Wetlands 1 (790) and 2 (791) sets and the Just Go Fishing set. Silhouette sets are definitely up there as my favorite sets to play with and these two new sets are no exception. I thought I would try to make a scene and so instead of just stamping on top of other images, I thought I could layer them by stamping them and heat embossing on Embossable Acetate.

Wetlands Shadow Box

To begin with, I created my background by brayering a piece of white glossy cardstock with the Big and Juicy Soothing Sunset ink pad. I then took the water and horizon stamp and stamped it on to the prepared background in Versamark and then turned the image upside down and continued with more water to the bottom of the background. This was then heat embossed with Black Detail.

Wetlands Shadow Box

Dad and son fishing image was stamped on to a 4 3/4" x 6 x 3/4" piece of embossable acetate. This was prepared with a lot of anti-static powder prior to being stamped with the Versamark. The humidity was really high today! I heat embossed with Black Detail.

Wetlands Shadow Box

On the second layer of acetate, I stamped the flying birds and the two lily pads as shown. They were then also heat embossed with Black Detail. I put the background behind the acetate so that I could make the placement of the lily pads more easily.

Wetlands Shadow Box

Then I popped each of the acetate layers on top of one another on top of the base, using Foam Squares.

Wetlands Shadow Box

For the frame, I started with a piece of glossy white cardstock and stamped the hanging branches in Versamark at the top of the frame and heat embossed with Concord. The bottom grasses and upside down hanging branches were stamped with Versamark and heat embossed with Sienna, those are two of the Tuscany colors, which show great detail and I thought paired well with my sunset background.

Wetlands Shadow Box

After the frame was stamped, I cut out the middle and sponged the frame with Memento inks, Cantaloupe and Sweet Plum.

Wetlands Shadow Box

I also added more foliage to the back of the bottom for more dimension. The frame was then taped to the top layer of acetate.

Wetlands Shadow Box

I edged a piece of 5" x 7" white card with 1/2" Tear-ific Tape and added Rose Gold Velvet Glitter before attaching the finished front to the edged base.

Wetlands Shadow Box

The acetate makes the photography more challenging.  I hope you can see the dimension that the layers make though and that I have encouraged you to give stamping on acetate a try.

I'd like to join in the following challenges:

Till next time,

Shona

Wednesday, April 20, 2016

HOPE YOUR BIRTHDAY'S A HOOT

Hi there,

I'm back today to share another card using the Want 2 Scrap Chipboard Embellishments, this cute little Owl and the DC Twin Trunk Tree. I have also used a Dreamweaver Stencil, some Gold Metallic Creative Medium and the new Nuvo Crystal drops!


I began my project with taping the Dreamweaver Spiral Dots Stencil to black cardstock, taping the top first, then the bottom and then the sides. After applying the Gold Metallic Creative Medium remove the tape in the reverse order, this will give you a nice clean, unsmudged result.


Set this aside to try. I left it overnight. For my little Want 2 Scrap owl, I applied two coats of White Detail embossing powder, as I wanted some white to show through when he was finished.


I went over the rings of his eyes with the Versamarker pen and heat embossed with Gold Coast.  


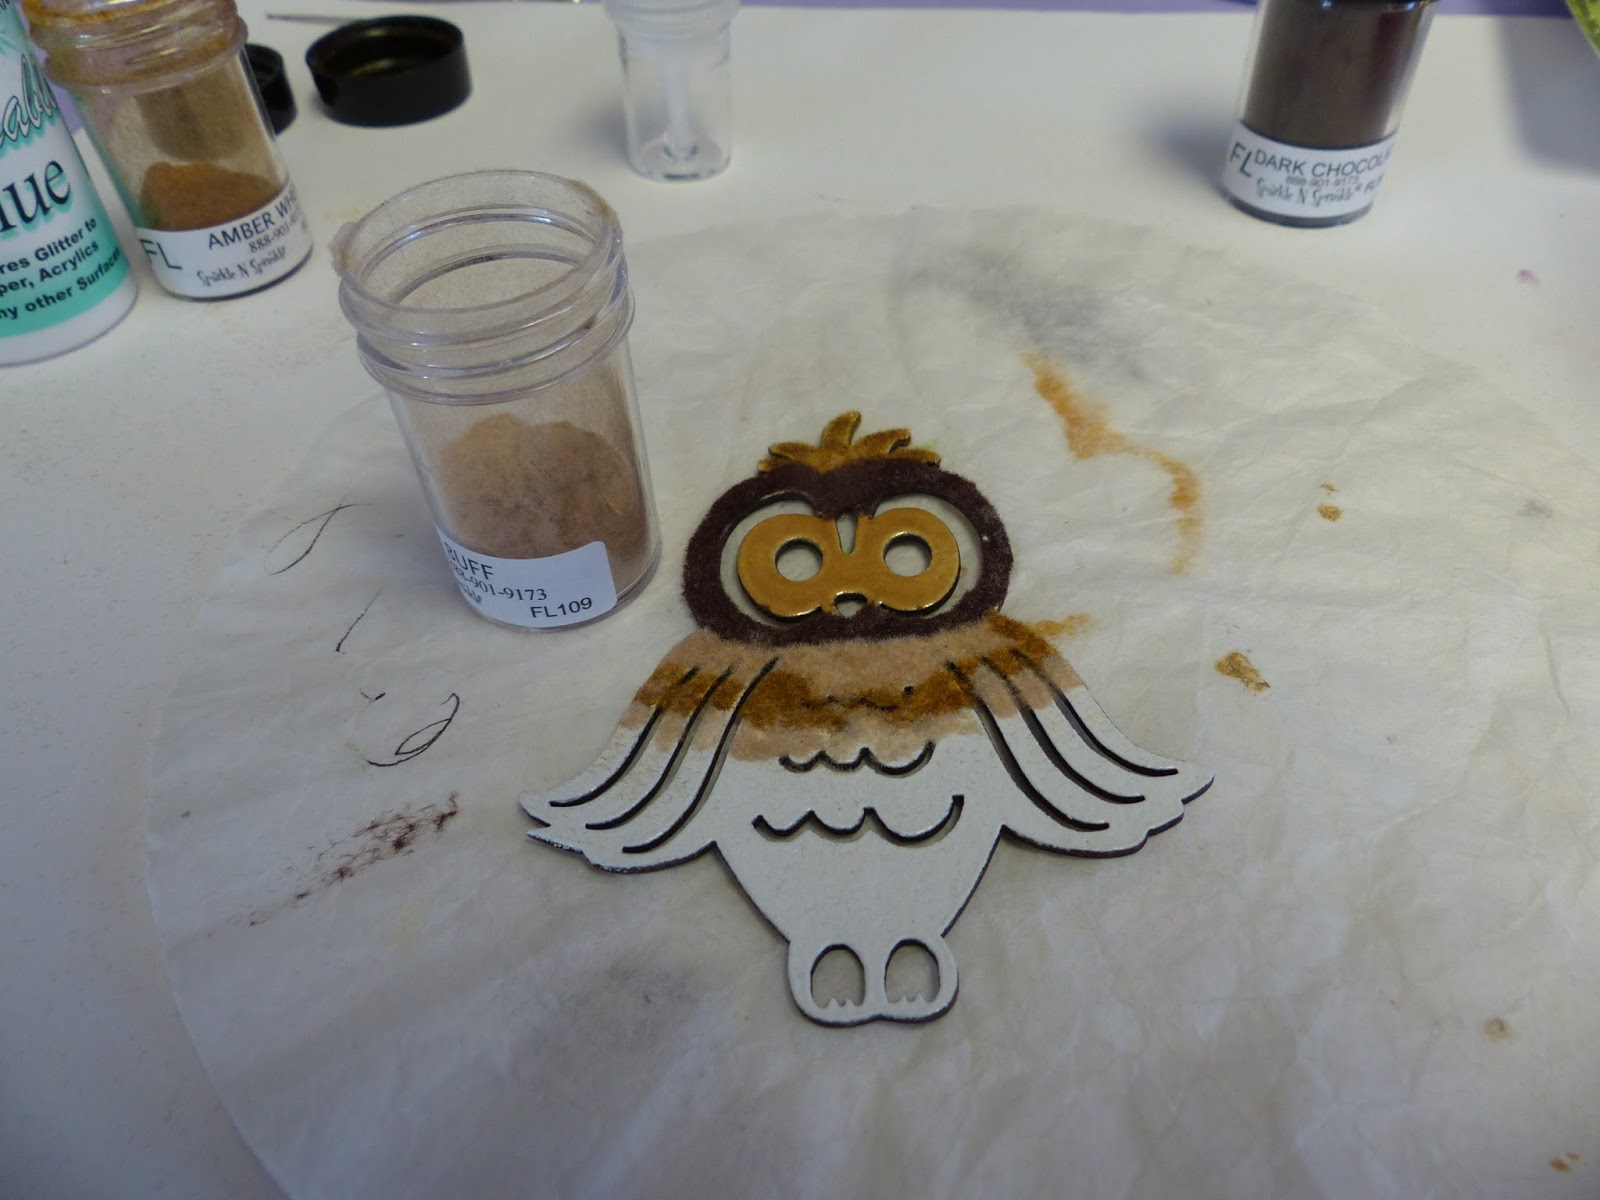
Then I began "coloring him in with Brushable Glue and three different Flockings, Dark Chocolate, Amber Wheat and Buff. I started at the top (with his crest) and worked my way down his body giving him uneven "stripes" of the different colors! I just brushed on another "stripe" of glue and applied another color of the Flocking, down the body until he was completely covered, with his little Dark Chocolate feet!


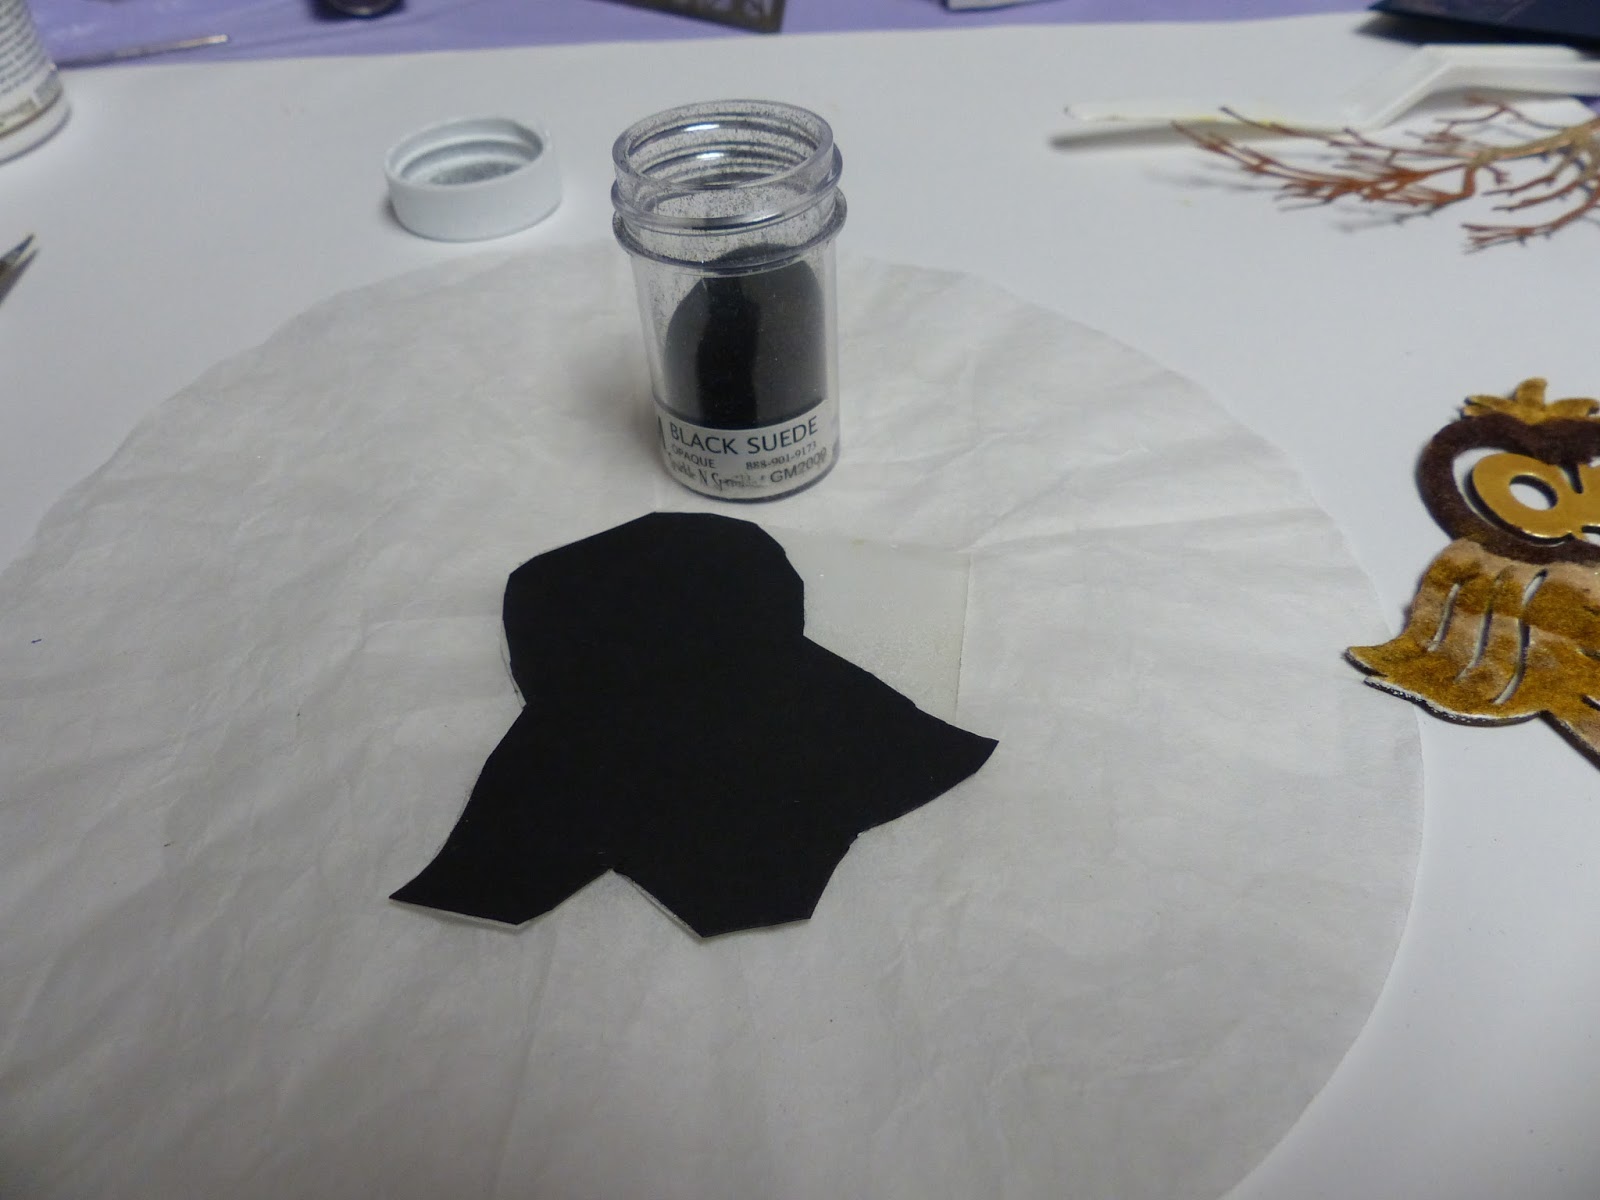
After he was colored in I covered a piece of black cardstock with Super Adhesive Sheet and cut it to the "approximate" shape of the owl. I removed the protective backing and placed the owl over the top.


I burnished Black Suede Velvet Glitter into all the nooks of the little owl. Yes, he looked a bit of a mess at this point!


But he cleaned up well with a couple of swipes of the chubby brush!


The sentiment shown above from the Owlettes Set 511, was stamped in Versamark and heat embossed in Teddy Brown and after it was die cut and embossed with Spellbinders Ribbon Tag Trio Two, it was highlighted around the edges with three of the new Nuvo Crystal Drops: Buttermilk, Dandelion Yellow and Copper Penny. 

Then on to his perch! Want 2 Scrap also carries these little paper silhouettes which is what this was. This one is the Twin Trunk Tree. After cutting one of trees away, I covered it in Versamark and heat embossed the branches with Sienna (which is one of the Tuscany Colors), I then chose Pebbled Copper for the "trunk". I did a couple of coats of each just to bulk it up a bit, as the silhouettes are much flimsier than the chipboard pieces. You will see in the photo below that there is a checkered finish to it too, after a couple of coats of embossing powder, the checks disappeared!


The tree was set sideways for his branch. The sentiment was attached with dimensional foam behind it and the ribbon threaded through it, which was attached to the back, before being layered on the mustard card base. I attached the owl to the branch with Tear-ific Tape and they were then attached with Dimensional Foam.


..... and that finished my project for today:


I'd like to join in the following challenges:

Fab 'n Funky Winged Things: Challenge # 301
Shopping our Stash # 248: Chip off the Old Block (Use Chipboard)
Critters and Creatures Linky Party No. 3
Love to Scrap Challenge Blog #76: Anything goes

Hope you've enjoyed your visit to my blog today. Please leave a comment to let me know you stopped by!.

Till next time,

Shona