Showing posts with label Nuvo Crystal & Glitter Drops. Show all posts

Thursday, September 21, 2017

Magnolia Birthday

Hi there,

Back today with a quick little card from the latest SNS Reveal, starring the Lovely Magnolia Set #853. This is a very versatile set and as you can see from my card I didn't even use the big flower from the set. I chose to make a little shaker card, so the little magnolias worked better.


I die cut the Tonic Happy Birthday from the middle of the white card front.


I then stamped the little magnolia around the die cut seven times in Black StazOn ink, as I was going to use the Nuvo Aqua Flow markers for the coloring.


I used only two Aqua Flow pens on an acrylic block and used that as a little paint palette. These markers really blend well and the tips go into the little spaces, so work well for corners and tight spaces.


After coloring, I made the shaker part of my card. I used mounting tape to make the well, using a piece of tulle instead of acetate. Some Shaved Ice was then put into the well before being covered with black cardstock.


So back now to the front! Nuvo Morning Dew Crystal Drops were added to the orange centers of the flowers. Then Dandelion Yellow, Honey Gold, Banana Split and Orange Marmalade were added around the rest of the card front.


The butterfly die, Little B Butterfly, was cut out and colored with the same Spiced Ginger Aqua flow marker.


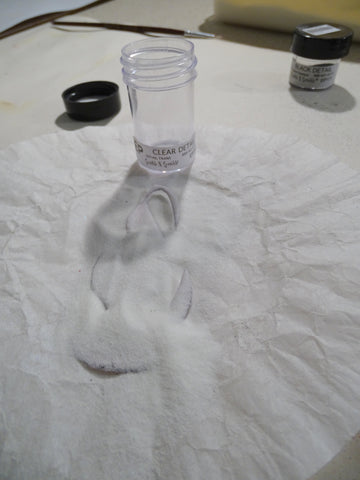
This was then applied with Versamark and heat embossed with Clear Detail.


It gave the butterfly a lovely shine. The card front was attached to a black layer and then to the white card base. The little butterfly was attached with a couple of cut up pop dots.


Hope you've enjoyed my share today?

Here are the products that were used in making this card, that can be found on the SNS website:

Versamark, StazOn
Nuvo Jewel Drops Orange Marmalade

I'd like to enter my card in the following challenges:
Cards und More Challenge #193: Flower Power
2 Crafty Critter Crazies Challenge #6: Use a critter
World Wide Open Design Team Challenge #26: anything Goes
Classic Design Team Challenge #17: Anything Goes

Thanks for stopping by! Hope you'll stop back soon,

Shona

Thursday, June 29, 2017

Amazing Mom!

Hi there,

Glad you've stopped by. Today I'd like to share another card from the June Reveal using the Baby, Oh Baby Set 875.


I did a little paper-piecing on this project. First I stamped the image on white cardstock with Memento Tuxedo Black and then colored everything but the dress with Copics. She was then fussy cut.


Then I stamped the image again on the designer paper in Versamark, and before heat setting. I brushed off the Black Detail powder from the rose. 
I fussy cut the dress after heat setting and then I covered the entire dress with Versamark and heat set with Clear Detail.
 
Using the new Nuvo Deluxe Adhesive 200n, which comes as a fine point applicator, I attached the dress to the colored image.
After die cutting the Spellbinders Grand Nestabilities Decorative Elements from white cardstock I daubed Nuvo Embellishment Mousse Peony Pink and Lilac Lavender
I ran the colored circle through my machine with the Darice Hearts Embossing Folder. This was attached to the designer paper used for the dress and then layered to a white card base.
I trimmed the girl using the decorative die cut at her legs so that she would match the bottom of the circle. I punched a small hole in front and behind her hand for the rose to go through. She was attached with 1/4" Tear-ific Tape at the legs and then her head was attached with Mounting Tape. The sentiment was stamped in Versamark and heat embossed with Mulberry. After cutting out the sentiment, I sponged a little Lulu Lavender around the edges. A white bow was tied around the circle and then the sentiment was attached with Mounting Tape. Nuvo Glitter Drops Sherbert Shimmer were added to the bottom of the sentiment and card base. The same drops were added to the pink of the headband and when this was dried I went in with Nuvo Crystal Drops Ebony Black to add the centers to the flowers. 
Here is a list of the SNS product that was used to make this card:
Stamp Set Baby, Oh Baby #857
Embossing Powders: Black Detail (EP171), Clear Detail (EP280), Mulberry (EP415), 


I'd like to enter my card in the following challenges:
World Wide Open Design Team Challenge #23: Anything Goes
Crafty Girls Creations #37: Anything Goes
Crafty Gals Corner #129: Anything Goes


Hope you enjoyed my share today?
Thanks for stopping by,
Shona

Thursday, October 6, 2016

MERRY CHRISTMAS CIRCLE FLIP-IT

Hi there,

Today I want to share a couple of new products over in the Sparkle N Sprinkle shop: Gilding Flakes and Glimmer Pastes along with one of the new Reveal Sets: Christmas Tags 805.


I took a Super Adhesive Sheet and trimmed off a little on the length and stuck it down on to a half sheet of white cardstock. I ran it through my machine with the Sizzix 657586: Card, Circle Flip-its Die.


I took the backing off the left front and the back front. I placed the backing from the left to the right edge of the back front, before applying the Silver Bullion Gilding Flakes to the sticky surfaces.


So then the two remaining background taken off and the Radiant Gold Flakes were applied to the stick surfaces. 


End result:


I cut the circle piece out of a Super Adhesive Sheet from the Circle Flip-Its die and applied it to the back of the circle. I pulled back the backing before applying the Silver Bullion to the right side


... and then peeled off the remaining backing and applied the Radiant Gold to the left.


The sentiment was stamped in Versamark and then heat embossed with Gold Detail and Silver Detail. It was cut out with Spellbinders Standard Circle die. Then I rubbed a little Indian Gold Embellishment Mousse around the edge of the circle.


I applied Moonstone Glimmer Paste to the entire piece and set it aside to dry, while I did the "to and from" tag for the back of the flip in Silver Detail embossing powder.


Nuvo Silver Lining Crystal and Silver Moondust Glitter drops were applied to the gold corners. Honey Gold Glitter and Bright Gold Crystal drops were applied to the silver corners. Once the Glimmer paste was dry the image was attached to the front panel with Foam Squares to finish off my project.


Hope you've enjoyed my share today.

Hugs,

Shona


Thursday, September 8, 2016

GRANNY WITCH

Hi there, 

I'm here today to share another Halloween card with you from the new reveal set 799: Call me Witch.

Granny Witch

Isn't this little Granny a hoot? I began with stamping her on white cardstock with Memento Tuxedo Black and she was colored with Copics.

Granny Witch

After she was colored, I sparkled up her buckles on her shoes and hat with a Sakura Glue pen and Reflection Velvet Glitter. She got Dimensional Glue applied to the her glasses and I used the Nuvo Medium Tip Pen to add Blissfull Blue Sparkle N Soft to her hair. Orange Crush was also applied to her blouse. She was cut out with the Spellbinders Mega Ovals Large, but before I removed the die I sponged some Dandelion Memento ink around her. Then some Indian Gold and Lilac Lavender Embellishment Mousse was rubbed on to the edges of the piece with a dauber. OK, now she needs a background.

Granny Witch

I took a piece of 5 1/4" by 4" piece of Super Adhesive tape and stuck it down to a piece of white cardstock, then removed the protective backing and started to line up various strips of Tear-ific Tape diagonally on top. When the whole piece was covered with the strips, I straightened the edges then lined up the Velvet GlittersPurple RainTiger Orange, Celebration, DaisyHyacinthMargarita and Golden Wheat were burnished in one at a time as each strips' backing was removed.

Granny Witch

This piece was layered on to black cardstock. The sentiment was stamped in Versamark and heat embossed with Concord, one of  my favorite detailed Tuscany colors. It was cut out with a QuickKutz Speech bubble die and was sponged with Cantaloupe ink.

Granny Witch

I made my broom from a skewer and some raffia. Coloring the handle with brown Copic Marker and then taking several pieces of raffia and bending them over to make the head of the broom. Some more raffia was wrapped around the base of the head, attaching it to the skewer. I punched a hole in the witch image and used invisible thread to attach the broom head to the image. I made a "long glue dot" by taking a piece of 1/8" Tear-ific tape and attached it to the bottom of the broom to keep it in place on the card. The witch and the sentiment were attached to the card with Foam Squares and then the Nuvo Crystal DropsCrushed GrapeWisteria Purple and Purple Rain Glitter Drops were randomly applied to spots on the card front to finish it off.

Granny Witch

Hope you liked my project today?

I'd like to play along in the following challenges:
My Time to Craft Challenge 328: Something that flies!

Till next time,

Shona

Wednesday, April 27, 2016

PEACE, LOVE AND JOY!

Hi there, 

Today, I'd like to share with you a Christmas card, using some Want 2 Scrap Chipboard pieces and the new Nuvo Crystal Drops. I have to say - I sure am having fun with these new drops!

Peace, Love, Joy

I began my project using the line and dots from Sparkle N Sprinkle's Donna's Stylin' Sayings Set 777. I put them both on an acrylic block and applied Versamark.

Peace, Love, Joy

Starting at the top I stamped the Versamarked images and heat embossed with Sangria Star. Moving down the card front I repeated the process another two times with Tuscan Star and then Moss Star. These are from the Tuscany color set, my favorite! They are very fine powders and are great for detailed work. I decided to use the sparkly versions of them this time, since there was to be a lot of sparkle on this Christmas card! The Want 2 Scrap Words of Love were applied with Versamark and each given two coats of the same three embossing powders. In order to have them stick well to the card front, I covered the lines and dots panel with a piece of Super Adhesive Sheet, cut it to size, removed the protective backing and positioned the words so that they all had different colored backgrounds, directly on top of the adhesive. Sparkling Snow Glitter was applied to the remaining sticky surface.

Peace, Love, Joy

The Pine Tree embellishment was applied with Versamark and heat embossed twice with Moss. I then added more Versamark and sprinkled on some Magic Speckle and heat embossed from the bottom (as this is an ultra thick powder and would fly off otherwise). This gave my tree a look of being snow-laden. I forgot to take a photo of the tree before he was lit!

Peace, Love, Joy

Various new Nuvo Crystal and Glitter Drops were applied to the tree as lights! I used the following colors: Golden SunsetSilver MoondustRuby SlippersWhite Blizzard,  Sweet LilacSugared AlmondApple GreenDandelion Yellow and Red Berry. So much fun! Once the drops were dry, (after an hour) a little white Mon Ami Pull Ribbon bow was tied to the top of the tree for the star.

Peace, Love, Joy

The card front was attached to an orange, then purple layer before the white card base. The Christmas tree was then attached to the card with Dimensional Foam to finish.

Peace, Love, Joy

Hope you like my sparkly creation? Leave me a comment to let me know you stopped by!

I'd like to also take the opportunity to enter this card in the following challenges:
Crafty Gals Corner Challenge #69: Anything Goes

Till next time,

Shona