Showing posts with label Tonic Tangerine. Show all posts

Thursday, July 26, 2018

Lovely Thoughts of You

Hi there,

Today I'd like to share my last July Reveal card. This time I am using the lovely Sketched Pear Blossom Set 904.


I began, using the Stamp Platform, stamping the image on white cardstock in Clear Mark and heat embossing with White Detail. Then I made a paint palette with an acrylic block and dropped a few Aquaflow marker colors on the block. The image was colored in with a water brush, picking up the colors from the block.


I stamped the image again with Clear Mark and heat embossed with White Detail,
this time on Kraft cardstock.


The color was bleached out of the image, using an aqua brush that was filled
with bleach.


The colored version was fussy cut, using the mini 5" scissors, into little half inch
squares. They were then popped up, with foam pads to their matching places
on top of the bleached version.


I made a frame from the Kraft cardstock with the Sizzix Dotted Oval die and cut
out the same frame from a piece of foam, using the Tangerine machine. These
were adhered together. Then I ran the Copic marker around the edges.


The frame was then sprayed with Antique Gold Mica Mist.


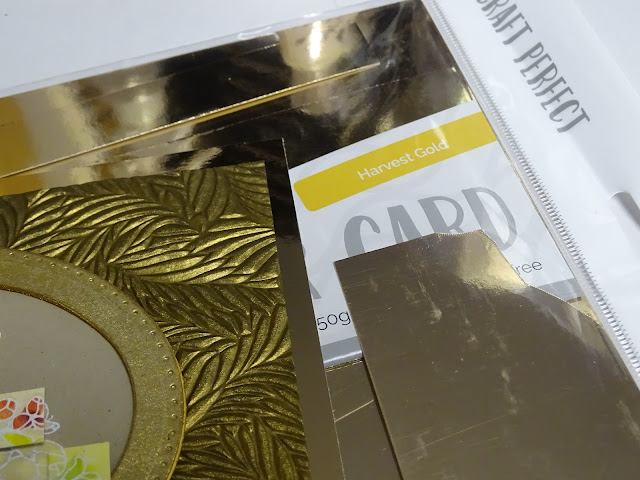
A piece of Copper Feathers Specialty Cardstock was cut in the Tonic Guillotine. The guillotine cuts through the fabric papers beautifully.


A few flowers were then sprayed with the same Antique Gold Mica Mist.


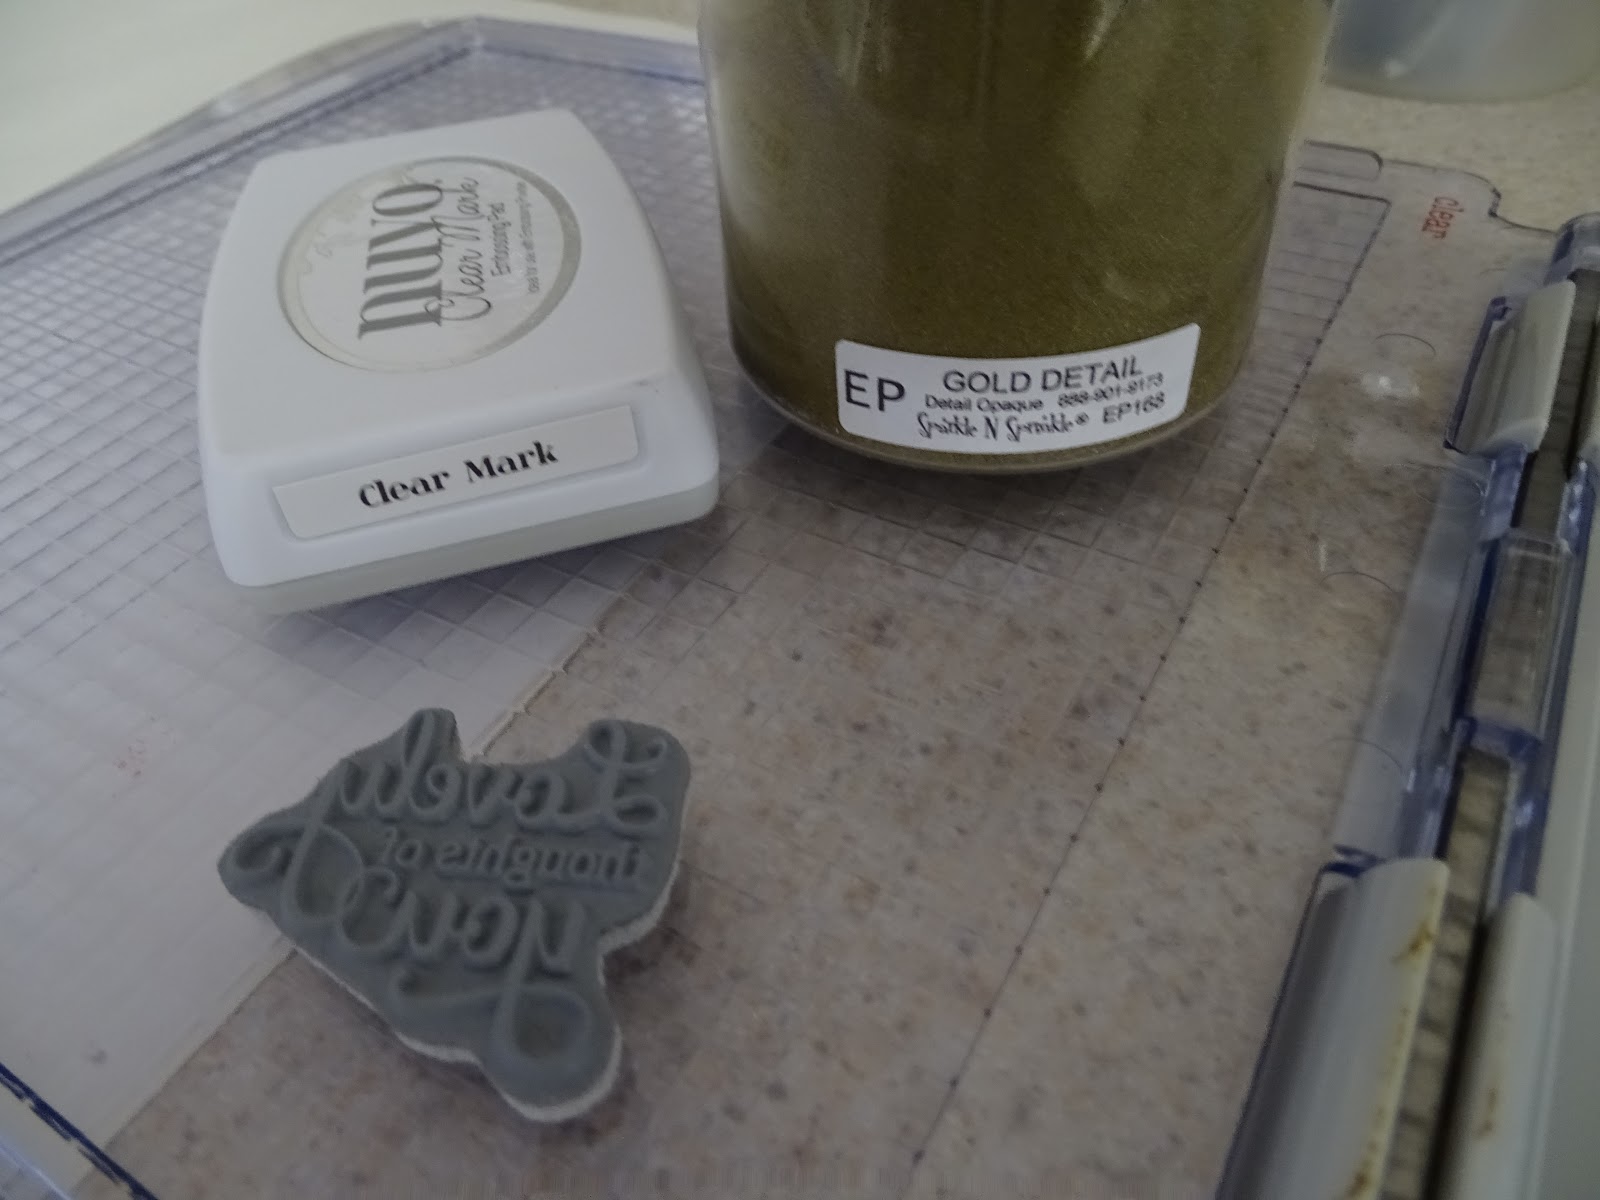
The sentiment from the set was stamped in the Stamp Platform on Kraft cardstock with Clear Mark and heat set with Gold Detail.

This was then die cut with a smaller oval from the Sizzix set and some Indian Gold Embellishment Mousse was sponged around the edges.


I dipped 4 large brads into my Versamark pad and dipped them in Halo embossing powder. Holding the brads with tweezers, I heat embossed them to give them some gold sparkle. A hole was punched in the tag and one of the brads was put through the sentiment and one of the flowers. The other three were for the three flowers.


The card was assembled at this point with the frame being attached to the specialty paper square. The flowers were attached with tape and foam pads around the frame and the brad for the sentiment was put through to the back of the specialty paper. The specialty paper was then attached to Harvest Gold Mirror Cardstock.


A few drops of Honey Gold Glitter drops were added around the card and on top of the flowers to simulate dew drops.


That finished off my card for today. Hope you've enjoyed my share? Below is a list of the products that I used:

Sketched  Pear Blossoms 904
White Detail (EP298), Halo (EP253), Gold Detail (EP168)
Sizzix Dotted Ovals Die
Craft Foam
4 Large brads
Copic E35

I'd like to enter in the following challenges:
Scrapy Land Challenge #94: Anything Goes
World Wide Open Design Team Challenge #7: Anything Goes
Classic Design Team Challenge #27: Anything Goes
Morgan's Artworld Open Challenge #7: Anything Goes

Till next time,

Shona

Thursday, March 29, 2018

Kindness is Always Beautiful

Hi there,

Hope Spring is starting to show up in your neck of the woods? It's certainly been slow around here - but we're hopeful!

Today I'm going to share with you an open die card, using the sentiment from the SNS March Reveal, Bearded Iris Set 889.


Using the Tangerine, I cut two pieces of glossy white cardstock with the Tonic Floral Blooms die.


I then die cut three pieces of card using the Sizzix Dotted Ovals die on the Tangerine. Cover another piece of card with a piece of 2 1/2" Tear-ific Tape and run it through the Tangerine with the same die - this will be the front panel.

 
Die cut the flowers and stem from the Tonic Woodland Aster die


Color the pieces with Copics while still in place - makes coloring easier!


The sentiment from the Bearded Iris set was stamped with Nuvo Hybrid Safari Green ink and was die cut with a smaller die from the Dotted Ovals. I sponged some Memento Dandelion ink on the oval before I removed the die.


I then removed the protective backing from the taped oval and placed the stem, flowers and sentiment to the sticky surface and then applied Cloud Nine to the remaining adhesive.


To assemble the card, fold over an 1/8" of an inch at the top of the back die cut card and apply a piece of 1/8" Tear-ific Tape which will act as a hinge when attached together.


Attach the front panel, with one of the other plain ovals directly behind it and repeat on the back of the card, so that you have a place to write a message.


Add the ribbon to the top of the card and add a few Limoncello Jewel Drops to finish off the card.


Hope you have enjoyed my share today.

Sparkle N Sprinkle is trying something new this month. Instead of the usual Blog Hop you need to leave a comment here and then pop over and leave a comment on the SNS Blog to be eligible to win the $20 gift certificate to the store. You have to comment at both places to be eligible for the prize. One winner will be randomly selected from one of the Designers' blogs and it might be mine! Good luck!

Here's a last look at my card:


Here is a list of the products I used for this card, most of which can be found over in the store:

Nuvo Safari Green Hybrid Ink,
Memento Dandelion Yellow
Sizzix Dotted Ovals
Copic Markers

White Organdy Ribbon

Wednesday, January 24, 2018

Always and Forever!

Hi there,

Today I would like to share with you a shaker card incorporating the Cherished Moments Bride Set 875, from the January Reveal, along with many Tonic products including the Floral Heart Set, Heart Blisters, Mirror Cardstock and embossed papers.


This is one of those cards that took on a completely different spin from what was originally thought of! I had intended making a quilt card using the Tonic Floral Heart Set so set about making different variations of the heart, using the stamp and the dies. together with my Tangerine. These craft papers are best cut with the Tonic Tangerine and Guillotine, I have trouble making clean cuts with the papers otherwise. The papers are actually made of fabrics so tend to tear when I use my Cutterpillar and Big Shot. Before long, I had a plethora of little hearts lying on my desk. There were die cut mirror card, die cut embossed paper, glittered, guilding flaked and heat embossed hearts all over the place! Unfortunately I didn't take a photo of them all, but then I also realized that it was going to make for a rather large card! Here are a couple of them using embossed paper and mirror cardstock, with a die cut piece of Super Adhesive Sheet behind the paper, the negative pieces of the mirror cardstock were inserted into the embossed paper outline:


I used the tweezers from the Tonic Floral Crafters Tool Set to do this, removing each little negative piece from the mirror cardstock and inserting it into its new position within the paper heart.


I had the refills for the Tonic Heart Blister set, which is featured in the January 2018 Multi Project Kit, unfortunately I didn't have the die to go with it, but did some improvisation so that I could use it as the focal part of my new idea! I cut a piece (3 1/4" x 6 3/4") piece of the Craft Perfect cardstock, Blush Heartbeat and using a die from the Spellbinders Classic Scalloped Hearts, I cut out the heart from the center of the cardstock. I stamped the sentiment from the Cherished Moments Set 875 in Nuvo Clear Mark onto red cardstock, which had been swiped with the anti-static bag first. I used the Tonic Stamp Platform, as I wanted to stamp it a couple of times to get a nice crisp impression. This was heat embossed with Bronzed Rose.


I then removed the protective backing from the bottom of the blister and attached that on top of the sentiment, some beads were slid inside using a glitter spoon and then I removed the rest of the protective backing and enclosed the beads inside the blister.


The beaded shaker was then placed through the die cut piece of blush heartbeat paper.


I took the positive part of the mirrored cardstock and attached it to a piece of Super Adhesive Sheet, which had been die cut with the heart outline. I then placed the negative pieces of the blush heartbeat embossed paper using the tweezers again to make the top heart. This was popped up with mounting tape to the top of the front panel.


The last heart used the positive part of the above embossed paper heart. This was also layered to a piece of Super Adhesive Sheet, cut with the outline heart die, but this time I burnished Peruvian Glitter to the exposed adhesive. This heart was then taped, using 1/4" Tear-ific Tape to a slightly bigger Rose Platinum Mirror cardstock Spellbinders scalloped heart. This was then mounted to the bottom of the panel.


A piece of red frilled thread was attached to the back of the paper panel and this was layered to a 3 1/2" x 7" piece of Rose Platinum mirror cardstock to finish off my project for the day.


Here is a list of the products I used in today's project. 

Bronze Rose (EP335)
Small Glitter Spoon
Spellbinders Classic Scalloped Heart
Red Frilled Thread
Mounting Tape
Glass Beads

I'd like to play along in the following challenges:
Crafty Gals Corner Challenge #157: Anything Goes
Creative Moments Challenge Blog #135: Always Anything Goes
Mod Squad Challenge: Valentine/Love (Use Red)
Scrapy Land Challenge #82: Use any die that Scrapy Land Carries
Cuttlebug Mania: Valentines
Crafting from the Heart Challenge #191: Anything Goes
World Wide Open Design Team Challenge #1: Anything Goes
Classic Design Team Open Challenge #21: Anything Goes

Glad you stopped by today, till next time,

Warm hugs,

Shona

Sunday, January 14, 2018

SPARKLE N SPRINKLE'S JANUARY REVEAL

                                  Happy New Year and 
                           Welcome to the January 2018 
               Sparkle N Sprinkle New Reveal Blog Hop! 

For my card today I chose to incorporated two of the January Reveal sets, Roses in My Heart Set 879 and Ornate Greetings Set 880. I actually did this for my Mother-in-law's birthday, but after it was created, I thought it looked more like a wedding card and hubby agreed!


We are pleased to reveal the following new stamp sets this month.

The sets are:


Cherished Moments - Bride 875
Digital Version: DIGI875B

Roses In My Heart 879
Digital Version: DIGI879FS

Ornate Greetings 880
Digital Version: DIGI880DE

Cara and Mouse Friend 881
Digital Version: DIGI881SG

Hello Foxy 882
Digital Version: Digi882B

You are definitely going to want both the digi version as well as the rubber version because when you purchase the digital versions, there are lots of extras that aren't available otherwise.  These extras can include additional images, additional sentiments, digi papers (in some cases), and a cut file.

The new sets are 20% off until the 20th of the month.  Head on over to the SNS store once you've finished the Blog Hop and start shopping.

SNS is always adding new products and new product lines to the store.  So stop by often to see what's new! 

One GRAND PRIZE WINNER will be announced on the 17th of the month.  One of the Designers is our Mystery Host and the winner will be selected from comments left on her blog.  You must leave acomment on each of the Designers' blogs in order to be selected as the winner, as you never know who the Mystery Host will be.  This is checked for compliance.

The GRAND PRIZE WINNER will be announced on the SNS Facebook page and on the SNS Blog and will receive a $20 Gift Certificate to the shoppe!

The Blog Hop order is:
(Tip: if you have difficulty with a particular link, try clicking on the Designer's blog title to be directed to their Home page.)

  
Belinda
Anne
Chris
Jess
Donna
Diane
Shona
Eret


We hope you enjoy the New Reveal Blog Hop as much as we enjoy creating new projects for it.  Be sure to visit the SNS Blog for even more inspiration.  Something new is posted most every day.


Did you know that SNS has a You-Tube Channel?  If not, then you are in for a real treat.  Subscribe today to get all the latest tips and techniques!


The Sparkle N Sprinkle Creative Challenge group is on Facebook.  

This is a closed group (just trying to keep out spammers), but we want anyone who to participate to join.  Click on the link and join in on the fun today! 

The Creative Challenges run from the 1st - 25th of each month.  A SNS image (either rubber or digi) is required.  If you don't have any yet, there are freebies located on the Home page of the SNS website.  Just scroll down the page a bit to see them.

The Creative Challenge Winner and Top Three will be posted on the last day of each month.  The winner will receive a $15 Gift Certificate to go shopping at the SNS store.

Please review all the Challenge Rules before submitting your photo 😀.  We can't wait to see what all you create using SNS images.

~~~~~~~~~~~~~~~~~~~~~~~~~~~~~~~~~~~~~~~~


I love the new Ornate Greetings set and wanted to make the sentiment the focal point of the card. So to begin I made the card base by cutting the outside frame of the Tonic Swirling Frame Layering die slightly above the top fold of the card, using my Tangerine die cutting machine.


Next I ran another piece of white cardstock with the two largest dies of the set through the Tangerine. I taped it in place, so that the dies would not move as they were die cut.


Nuvo Embellishment Mousse Mother of Pearl was applied to the two frames using a jumbo dauber. This particular mousse is my most used and although it is somewhat dry, I find that misting with some water rehydrates well. Here I used the Nuvo Light Mist Spray bottle.


Did you know you can emboss on top of the mousse? I swiped my colored piece with the Anti-Static bag, stamped the sentiment in Nuvo Clear Mark, using the Stamping Platform (to center it nicely and so it gave a nice even impression) and heat embossed in Gold Detail. I then die cut another sheet of cardstock, which had a piece of Super Adhesive Sheet layered on top. using the two outline frames of the die.


The mousse colored frames were attached to their respective sticky frames and Cloud Nine Velvet Glitter was applied to the exposed sticky areas.


For the flowers, I stamped only the flower part of the Roses in My Heart Set. I used the Stamping Platform for this process too, as I was stamping on vellum, and images can easily be smeared. I stamped the flower part of the image in Nuvo Clear Mark and this too was then heat embossed with Gold Detail. I stamped the image twice. Both pieces were colored on the back with Copics.


I then applied a piece of 2 1/2" Tear-ific Tape to the back of the vellum pieces and stuck them down on white cardstock.


The white background made the colors more vibrant. The bouquets were then fussy cut with Tonic 5" Mini Scissors. One bouquet being divided into two little bouquets. These scissors are amazing, cutting through the adhesive, sandwiched between the vellum and card and they never get gunked up.


After the pieces were all cut out, the card was assembled with Tear-ific Tape and Mounting Tape. A little piece of tulle was also added to the bottom left corner and a gold thread was added to the top for extra elegance. The center of the card was popped up on mounting tape.


Hope you've enjoyed my share today. Next and last on the hop is our very talented Eret, who has a stunning project for you also using the Roses in My Heart Set. Remember to comment on each of the designers' blogs to be eligible to win all the sets this month. Below you can find all the products that were used in my card, with their links to the SNS Website.

Vellum
Copics
Tulle
Mounting Tape

I'd like to join in the following challenges with my card:

Shopping Our Stash #337: Getting Sentimental
Simply Create Too: Challenge #138: Use Embossing
Moving Along with the Times: Challenge 62: Flowers
World Wide Open Design Team Challenge #1: Anything Goes
Classic Design Team Open Challenge #21: Anything Goes


Thanks for stopping by, 'till next time,

Warm hugs,

Shona