Showing posts with label Diamond Dust Glitter. Show all posts

Wednesday, July 8, 2015

FUNNY FARM CHRISTMAS

Hi there,

I'm here today to share with you another card from the new Reveal sets this month. This little guy, the Christmas Goose comes with a few fun sayings - so I decided to match him up with an older set for the sake of a laugh!


Firstly, I stamped the farm scene (from Set 652) on white glossy cardstock in Memento Tuxedo Black ink. I colored it roughly with Memento inks, London Fog, Summer Sky and New Sprout with a dauber, before going over the inks with some Copics: C5, E31, E35, Y17, for the details.

The Christmas Goose was stamped in Versamark ink on white glossy and heat embossed with Black Detail. He was fussy cut and I went around the outline with the black Copic to get rid of any stray white card. I then went on to color his hats, socks and lights, with some brighter shades of  Copics.


The colored light bulbs were given a little dab of Dimensional Glue to make them shine. The sentiment was stamped in Versamark on to the background (after applying the anti-static powder) and heat embossed with Black Detail. It gave a nice raised, detailed impression.


The background piece was centered to a piece of light blue cardstock, edged with 1/4" Tear-ific Tape. Diamond Dust Glitter (which is chunkier glitter) was then applied to the remaining exposed tape, to add a little extra bling to the piece.


Our Christmas Goose was then attached to the card front with Dimensional Foam, to finish. That ends my share for today. Hope I've inspired you to take another look at some of your old stash and stamp sets and use them in other ways than they were intended!

Be ready to join us again next week, when we will be doing an impromptu mini blog hop, featuring some other funny little birds!

Shona

Wednesday, October 8, 2014

PENGUIN PARTY TIME!

Hi there, 

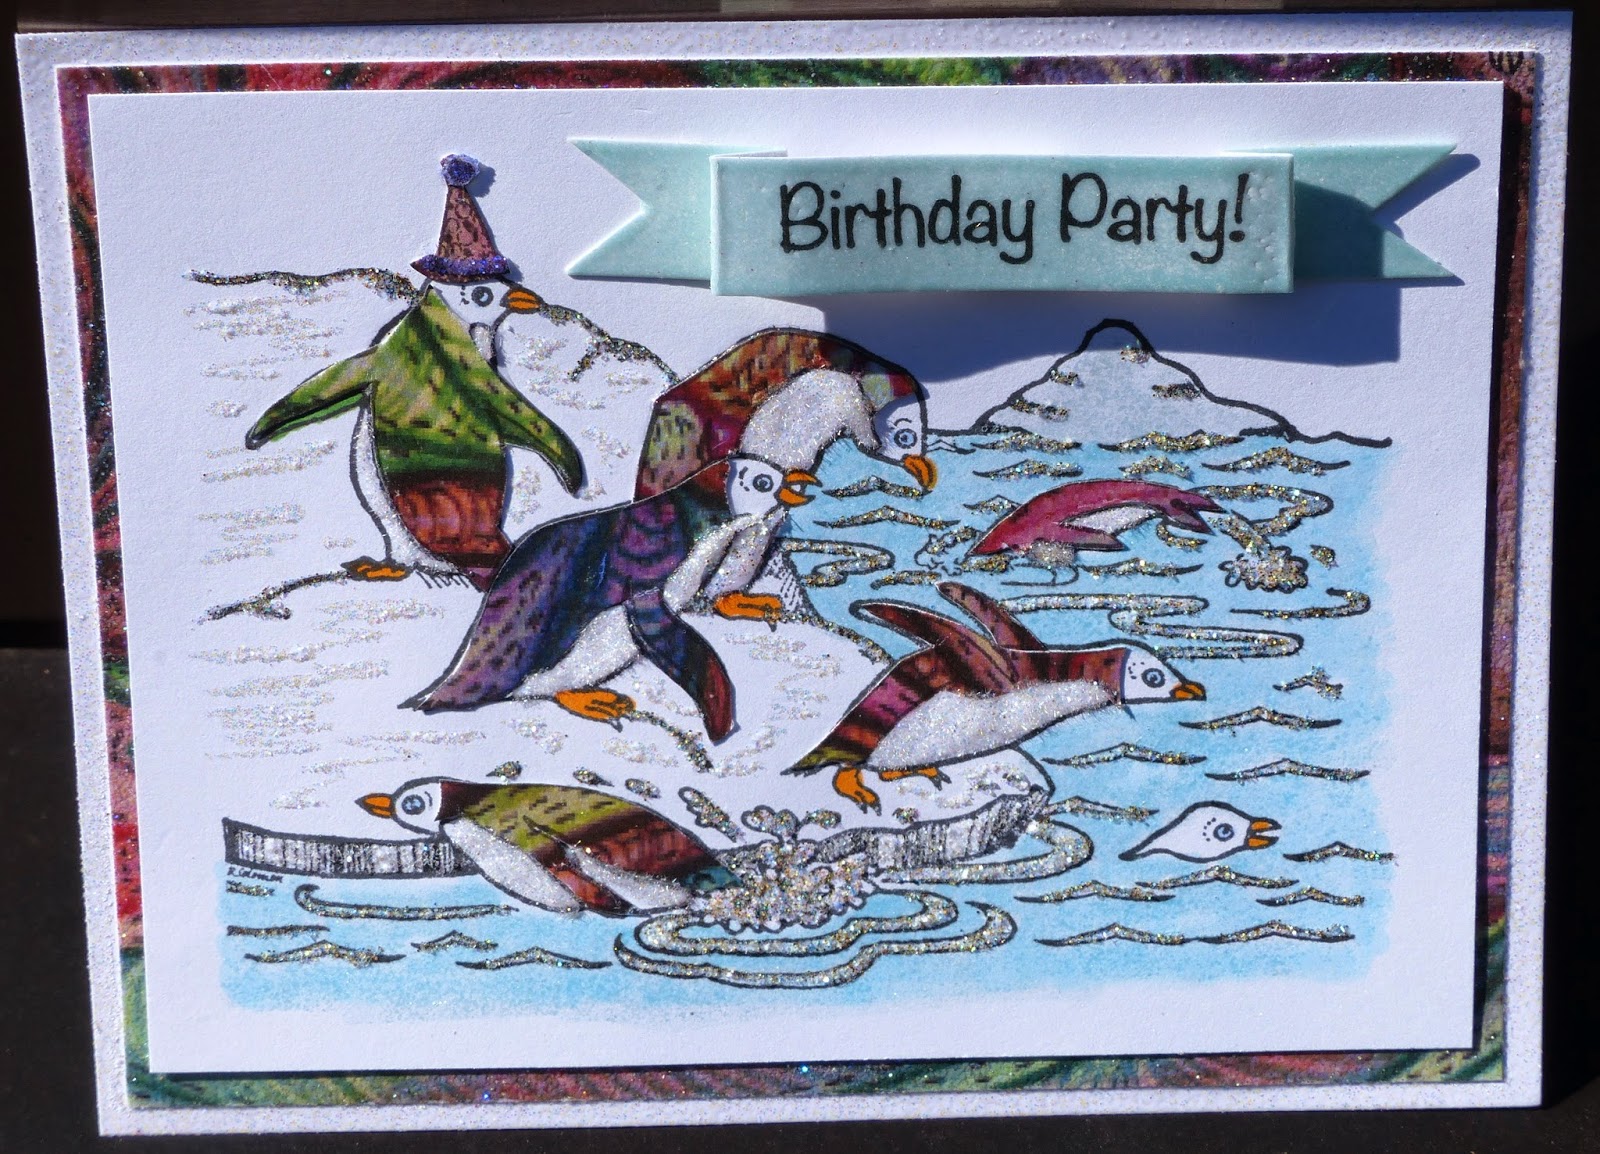
Here is the sneak preview that I shared with you last week. It's using one of the other SNS October Reveal Sets: 654 - Party Penguins. These guys are all dressed up in paper-pieced tuxedos ready for their festivities!


First, I stamped the image twice - once on white cardstock in black ink and then again on the Paisley, Pocket Full of Papers paper. I fussy cut the penguin backs from the DP, using the paper-piecing technique and set them aside, while I colored the image - beaks, feet, eyes and water (not the ripples) with Copics. I then took a Versamarker Pen and applied ink to the iceberg and over the top of the blue water and heat embossed with Ice. This gave the water a glassy look.


Try embossing the water in a vase of flowers or a jar to give the jar a glassy look! It looks great over a stamped and colored image!

I attached the designer paper penguin backs with Brushable Glue and added Twinkling Clouds with Dimensional Glue to the tummies. The party hat was done in the same way, but I used Purple Dust glitter for the trim.


I added Surf (G1117) glitter to the ripples in the water with a Sakura Glue Pen and Diamond Dust (G1116) to the edge of the ice block with Brushable Glue. The Sakura Pen was scribbled over the snow ledges and Sparkling Snow Glitter was applied. You can see from the photo above, the different dimensions achieved using the various glues and glitters.

I stamped the sentiment in Tuxedo black and cut and score to make the banner. It was also covered in Versamark and heat embossed with Ice.


The paisley designer paper was layered to a white card base. I then applied some Versamark around the edges and heat embossed with Sparkle. This gave a sparkly edge for the card front to be layered to. Full directions can be found in the SNS gallery if needed.


Hope you've enjoyed your visit today and that I've inspired you to get out some of your glitter and glues!

I would like to enter this card in the following challenges:

A Sprinkle of Imagination - Color Challenge
Tando Creative Challenge - As Cold as Ice
Love to Scrap - #39 - Anything Goes (No digis)

Thanks for stopping by,

Shona

Thursday, December 19, 2013

WARM WINTER WISHES

Hi there, So are you done making your Christmas cards yet? I'm getting there, only another 40 to go. Today I'm going to share one with you that I made using one of my photos taken last week in the early morning of a snow day!

I was lucky - as I was looking out the kitchen window last Tuesday, I saw this rather handsome little chap crossing over the back yard. I grabbed my camera quickly and took a few snaps, most of which were blurred, but then the clever little guy stopped (and posed!).


Unfortunately, you can't really make out his handsome tail, which was a fine specimen, but I thought the picture came out well nonetheless. I immediately thought of what I was going to do with this snap. It got e.mailed to Costco!

I used the Spellbinders Labels 23 to cut out the photo and then taped it down on to a glossy white cardstock base with the die still in place.  I ran a silver Uniball pen around the outside of the die, to create a border for the photo.


For the snow on the log and bottom of card, I applied Brushable Glue with our new "chunky" Diamond Dust glitter on top. For the tree branches I used a Sakura Glue Pen and Starfire glitter. See the difference in the textures of the glitters. All these Sparkle N Sprinkle products are acid free, so will not harm your photos at all.


The greeting, which is from Stamp Set 384: Holiday Penguins, was stamped in Versamark and heat embossed with Silver Lightning. This is a detail opaque powder, so it works well with sentiments.

.. and that was all I did! A quick and effective card for Christmas:


Till next time, "my" fox says - enjoy the holidays!

Shona