Showing posts with label Sparkling Snow. Show all posts

Thursday, April 6, 2017

Every Flower

Hi there,

Today I'd like to share another card using both the rubber stamp Corner Garden Stamp Set 842, together with the Digi Bundle Corner Garden #842. I'm having so much fun with this digi bundle!
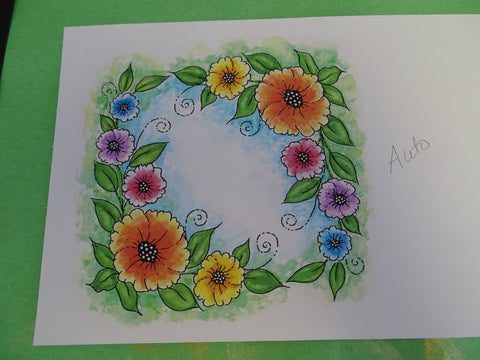
For my card today I ran off the the framed colored version of the image on to white cardstock. The joy of this digi set - there are black and white images to color yourself or you can take the pre-colored digis, where the work is already done for you! That's what I did here. 
I fussy cut the flowers and leaves and then thought to have them trailing over a trellis. I cut out Spellbinders Basic Lattice die from black cardstock and then daubed it with Nuvo Embellishment Mousse Mother of Pearl. This gave the trellis a wrought iron look. The vines were "placed" temporarily, which I decided my next step.
Sentiment was stamped in Versamark and heat embossed with Black Detail. This was then cut out with Spellbinders Standard Circles and some Peony Pink Embellishment Mousse was applied to the edge.
The trellis was backed with a piece of Super Adhesive Sheet, mounted to white cardstock and then pieces of mounting  tape were added to the vines to have them pop up.
Cloud Nine was applied to the sticky areas of the trellis. I edged white cardstock base with Nuvo Embellishment Mousses Lilac Lavender and Peony Pink.
Decided it needed more, so stuck down two doilies to the top left and bottom right corners of the edged card with 3/4" Tear-ific Tape behind them. The over lapping edges were trimmed, then I layered the card front  on top of the  base. The sticky areas of the doilies were also applied with Cloud Nine. Sparkling Snow was applied to the flowers and leaves of the vines using the Nuvo Fine Tipped Glue Pen.
I then stamped the little butterflies and two little additional flowers from the Stamp Set in Memento Tuxedo Black and colored them with Copics. They were then added to the gaps around the trellis with Mounting Tape. I added a little copper wire to the butterflies before sticking them down and that finished my card for today.

I'd like to enter my card in the following challenges:
Crafty Gals Corner Challenge 117: 3 layers or more
Stinkin' Inkers Challenge #1: showers of Flowers
World Wide Open Design Team: March 15th 2017 Challenge: Anything Goes
Scrapy Land Challenge #63: anything Goes
Ike's World Challenges #85: In the Garden
 
Product List:
Spellbinders Standard Circles
Spellbinders Basic Lattice
Copper Wire
2 Doilies
Thanks so much for stopping by today. Hope this has inspired you to try the combination of the digi and rubber stamp sets. I'm really liking the flexibility it offers.
Big hugs,
Shona

Tuesday, January 31, 2017

SPARKLE N SPRINKLE'S FEBRUARY 1ST REVEAL

Welcome to Sparkle N Sprinkle's
 February 2017 New Reveal Blog Hop!

We have another HUGE reveal for you this month, plus something new!


 There are SEVEN new rubber stamp sets being released this month, plus a new Digi Papers set (with 12 amazing papers), and a Digi Only Bundle set full of lots of extras. 

Also, when you purchase the digi versions of any of the SNS rubber sets, you are getting lots of extras that aren't available otherwise.  These extras include additional images not available with the rubber version, digi papers (in some cases), and now a cut file to use with your electronic cutting machines will also be included with all digi images purchased!

You're definitely going to want both the rubber versions as well as the digi versions of all our new releases.


The new sets are:


* 815 Leafy Flower Spring Wreath
Leafy Flower Spring Wreath digi version DIGI815B

* 826 Pansies (set one)
Pansies mini digi set DIGI826833FS

* Pansies fabulous digi bundle, includes papers DIGI826-833FS

* 832 Girlfriend Support Set 1
Girlfriend Support Set 1 digi version DIGI832

* 833 Pansies in Teacup (set two)
Pansies mini digi set DIGI826833FS

* 835 Sitting Pretty Kitty
Sitting Pretty Kitty digi version DIGI835LS

* 836 Luck of the Irish Enchantress - St. Patrick's Day
Luck of the Irish Enchantress - St. Patrick's Day  digi version DIGI836LS

* 837 Rory's Lucky Clover - St. Patrick's Day
Rory's Lucky Clover - St. Patrick's Day digi version DIGI837LS

* Eleven Watercolor Papers - Purple Pink (to coordinate with the Pansies sets)  DIGI4003FS

This month the digi versions of the Pansies (826FS) and the Teacup Pansies (833FS) have been combined into one HUGE digi bundle set: 
DIGI826-833FS  
There are tons of bonuses in this set, including decoupage sheet sets, a total of 34 images, 11 gorgeous digi papers, and a cut file.

The new sets are 20% off until February 3, 2017.  So once you finish the blog hop, head on over to the New Store and start shopping.

On Feb 3rd, ONE GRAND PRIZE WINNER will be selected from the comments left on the Designers' blogs listed below. Please leave a comment with each Designer in order to be eligible for the Grand Prize.  You never know who the Mystery Designer will be that has the winning comment.

The Grand Prize Winner, which will be announced on the SNS Facebook page and on the SNS Blog, will receive ALL of the new rubber stamp sets released this month.


The Blog Hop order this month is:

(*Tip: if you have difficulty with a particular link, try clicking on the Designer's blog title to send you to their Home page.)

We hope you enjoy the New Reveal Blog Hop as much as we do.  Thanks for joining us and remember to comment on each of the Designers' blogs to be eligible for the Grand Prize.  
 Wonder who the Mystery Host will be this month????


Have you checked out the SNS YouTube Channel featuring Demo Donna?  If not, then you are in for a real treat.  Subscribe today to get all the latest Demo Donna tips and techniques!


Today I chose to work with the pretty Pansies Set 826. The sentiments in this set are so pretty - I decided to make my project for a bride to be. I was cleaning up my stamping room after the holidays and I found a few things that I forgotten I had, including this Clearly for Art Modeling Film. I played around with it. It is like Shrinky Dinks, but it doesn't shrink, and it is more pliable, can be reshaped over and over again, as long as you heat it. You can use it clear, as is, or color it with alcohol inks - as in this sneak peak of a project to come:


So for my project today I stamped with Archival Jet Black ink, and turned it over and colored it with Copics. The colors were muted, so I decided to add a strip of 2 1/2" Tear-ific Tape to the colored side and then I fussy cut around them.


I took off the protective backing and added Sparkling Snow: I liked that effect.


The flowers were then individually cut out and then given some heat and I played with the leaves to make them look more life-like.


They were set aside, while I worked on my card. I stamped the row of pansies in Memento Tuxedo Black on either side of a square piece of  watercolor paper and colored in using the same Copics that I had for the flowers.


Once the coloring was complete, I die cut an oval out of the middle with the Spellbinders Die D-Lites Frill Oval. I elongated the oval by running it through again (about half an inch higher).


The pansies were applied with glue with the Nuvo Fine Tip Glue Pen and sprinkled with Sparkling Snow and each flower center was given a drop of Pale Periwinkle (Nuvo Jewel Drops).


The first cut out oval was stamped in Versamark and the sentiment from the same set was heat set in Concord (EP419). This is a very nice detailed font and the detailed Tuscan embossing Powders are perfect for these fine sentiments. I then threaded a piece of white ribbon around the oval, leaving the ends to trail down. I thought it looked like a veil. One of the prepared flowers was attached to the base of the "veil" using a rhinestone brad. 


The card front was then layered to a black card base and the veiled oval was attached to the center of the opening with mounting tape to finish off my project for today.

I'd like to enter my card in the following challenges:
Classic Design Team Open Challenge Blog: #11
HeARTful Stamping Challenges: Jan 29 - Feb 5: Anything goes with a stamped image
Pile it On Challenge # 125: Quotable


Hope you've enjoyed my share with you today. Next on the hop is our talented Belinda. Remember to comment on each of the designers' blogs to be eligible for the entire set of our new Reveal.

Till next time,

Big hugs,

Shona

Wednesday, December 14, 2016

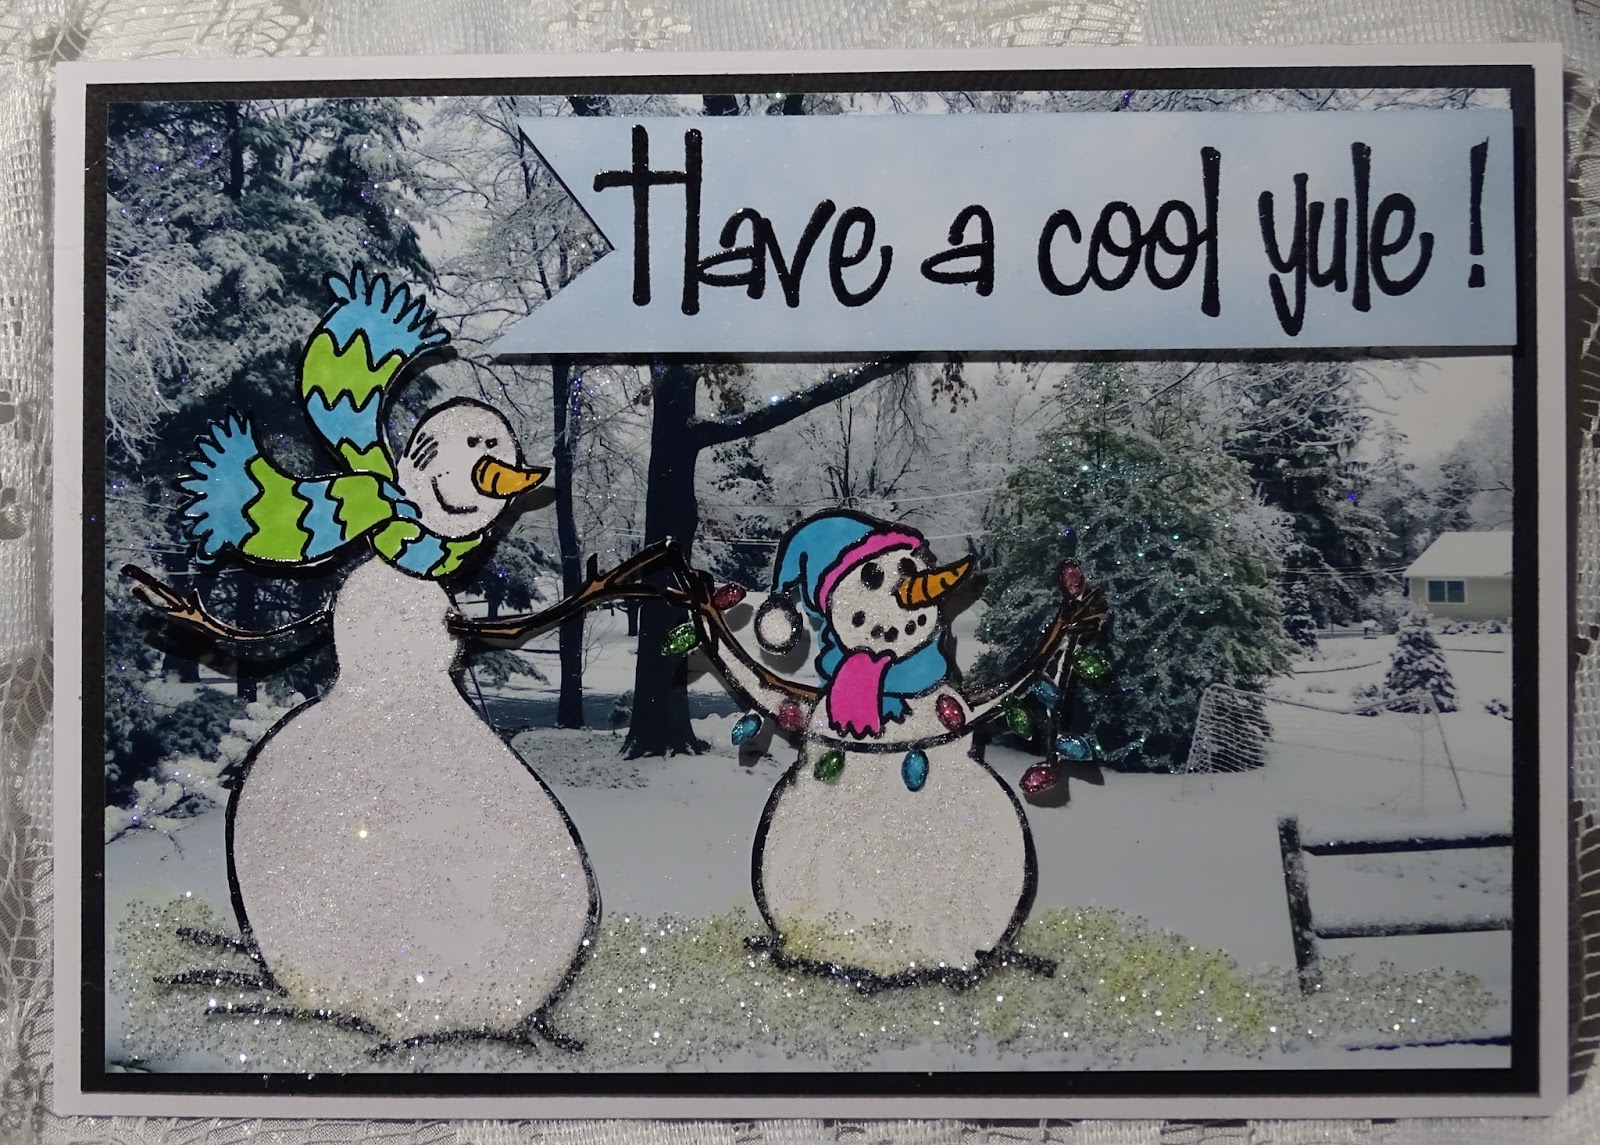
HAVE A COOL YULE!

Hi there,

So glad you stopped by today. Can you believe that we are less than two weeks away from the big day? I have no idea where 2016 went! Today, I'd like to share a card that I made, using one of the older Sparkle N Sprinkle sets Gothic Snow: Set 347 and another photo from my yard last winter. So much fun to use your own photos on a Christmas card!


This was a 5" x 7" print, as the stamps are pretty big - especially the sentiment. So I picked out the photo and stamped the snowmen on white cardstock with Versamark and heat embossed with Black Detail. The snowmen were then fussy cut.


Next was to create their background so the glitters and the adhesives came out!


I used the Nuvo Fine Tip Glue Pen for the trees and the finer glitters. I started with Crystal Ice, then applied some Sparkling Snow, Green Iris and Lavender Iris to the various trees.


The snow people were colored with Copics and then their bodies were applied with Brushable Glue and Twinkling Clouds Sparkle N Soft.


The little snow lady's string of lights were "lit up" with Nuvo Glitter Drops, Blue Lagoon, Emerald City and Sherbert Shimmer. While the drops were drying I moved on to the sentiment. From the same set, I stamped the sentiment in Versamark on white glossy cardstock and then heat embossed with Black Detail. I hand cut it out into a fish tail banner and sponged on some Memento Summer Sky. This was attached with Foam Squares.


The snow people were added to the scene with Tear-ific Tape at the bottom and then popped up at the heads with Foam Squares. Dimensional Glue was then brushed on at their feet ....


... and Diamond Dust was then applied.


The card front was layered to black cardstock and then to a white card base to finish.

I'd like to join in the following Challenges with this card:
Aurora Wings Challenge #41 Winter Wonderland
The Cutie Pie Challenge Blog #106 A Day in the Snow
Lawnscaping Challenge #143: Let it Snow
Make My Monday Challenge #36: Show me a Snowman
Simon Says Stamp: Let it Snow


Thanks for stopping by. Hope you've enjoyed my share with you today?

Till next time,

Big warm hugs,

Shona

Thursday, November 3, 2016

CANDLED SEASON'S GREETINGS!

Hi there,

If you are looking for the November 1st Sparkle N Sprinkle Release card, please scroll down.

I was playing around with a new fold, which I had seen in a UK stamping magazine last week and realized that the base of the fold was large enough to hold one of those little fake flickering tea lights, so set about to make a Christmas "lantern" with the new Christmas Candles Set 807, one of the new November releases. Here, with the light, you can just see the yellow hue shining through the glitter covered acetate, but it does look pretty awesome in the dark!


So the card base is 12" x 4 1/4", I used a thick cardstock that is textured differently on both sides, not sure who makes it though. This was scored at 1 1/2", 2 1/2", 4" and 8". When it is folded it should look like this:


For my front panel I cut out the Die-Namites Season's Greetings die, I die cut the same die again from the textured side of the cardstock, and put that die cut piece into the negative spot.


A piece of Super Adhesive Sheet was layered to a piece of Embossable Acetate. The protective backing was removed from the Super Adhesive Sheet and stuck to the inside of the card, with the sticky surface facing through the die cut opening.


Sparkling Snow Glitter was burnished in to the exposed adhesive.


The image was stamped in Memento Tuxedo Black and was colored with Copics, using the two reds and the two greens with the tip to tip technique. (This is taking the ink from the tip of the darker Copic onto the lighter color tip).


Once colored and fussy cut, Sparkling Snow was applied to the petals and Green Iris was applied to the leaves with the Nuvo Fine Tip Pen.


Nuvo Crystal Drops Buttermilk was applied to the Mistletoe and Autumn Red was applied to the berries.


For the inside, I took a piece of 3 3/4" x 4" piece of white cardstock and stamped the candles and sentiment from the image and then colored with Copics. Memento Dandelion Yellow was sponged over the piece. This was adhered to the inside of the card. A little fake tea candle can sit in the base.


Here is the side-angle view:


.... and here it is in the dark!!!!


Next year I need to do something like this for Halloween!!!

Hope you've enjoyed my share today.

I'd like to enter my card in the following challenges:
Scrapy Land Challenge #53: Use any type of die that Scrapy Land carries
World Wide Open Design Team #15: Anything Goes (3rd entry)
A Snowflakes Promise Challenge #32: Christmas
The Merry Christmas Challenge #5: Anything Goes
The Christmas Card Challenge #46: Make a Christmas Card

Let me leave you with a sneak peak to my card for next Thursday:


Hope to see you back then!

Big hugs,

Shona

Wednesday, October 19, 2016

AUTUMN GIRLFRIENDS

Hi there,

Today I'd like to share with you another of the October Reveal Sets over at Sparkle N Sprinkle: Autumn Girlfriends Set 810.  These two girls are having a blast in their pile of leaves! Isn't it fun when you have a friend that you can just do silly things with? I've got a girlfriend coming this afternoon, who is just like that! We share the same birthday, she was a neighbor, then she moved first to Connecticut and now is in New York. We see each other maybe three times a year, and each time we do, it's like she never left! There are lots of leaves in my yard this morning, maybe you'll catch us out there this afternoon!!!


I began by stamping the image in Memento Tuxedo Black ink and then colored with Copics. The sky and the grass were sponged with Memento Bamboo Leaves and Summer Sky inks.


The leaves were then applied with glue from the Fine Tip Nuvo Glue Pen and Sparkling Snow was sprinkled on top, to give the pile of leaves lots of sparkle!


The image was cut with Memory box Cross Stitched Frame Border. These girls love to sew together too!

My background was a piece of white cardstock which I misted with water using the Mini Mister and then tapped on some yellow, orange, red and green Nuance powders. I dried it with my heat tool, to quicken up the process! I then made another piece with the same colors and cut my leaves from that using the Sizzix Tattered Leaves die.


My leaves were applied with Moonstone Glimmer Paste, I applied the paste with a spatula on top of a piece of protective backing sheet from the Adhesive Sheets. It was important here, as some of the colors ran into the paste, so I reused it on the leaves, rather than putting it back in the jar, contaminated. Nothing was wasted!

I cut out the little die from the middle of the background sheet.


The sentiment was stamped in Versamark and heat embossed with Black Detail. The little leaves were colored with Orange Copic and then I attached it to the bottom of the image. These were then attached to the Nuance background with Foam Squares. The background was layered to a black card base.


The leaves were attached to the card using 1/4" Tear-ific Tape and Foam Squares. Some were placed on top of the image and some tucked under - like a pile of leaves. Those hanging over the edges were cut off with my scissors. 


That brings us to my finished card for today:


Hope you've enjoyed your stay and that I've inspired you to get some of the gorgeous Moonstone Glimmer Paste!

I'd like to enter my card in the following Challenges:
World Wide Open Design Team Challenge #15: Anything Goes
Path of Positivity Challenge #42: Friendship

Till next time,

Big Hugs,

Shona