Showing posts with label Tonic Stamp Platform. Show all posts

Sunday, January 14, 2018

SPARKLE N SPRINKLE'S JANUARY REVEAL

                                  Happy New Year and 
                           Welcome to the January 2018 
               Sparkle N Sprinkle New Reveal Blog Hop! 

For my card today I chose to incorporated two of the January Reveal sets, Roses in My Heart Set 879 and Ornate Greetings Set 880. I actually did this for my Mother-in-law's birthday, but after it was created, I thought it looked more like a wedding card and hubby agreed!


We are pleased to reveal the following new stamp sets this month.

The sets are:


Cherished Moments - Bride 875
Digital Version: DIGI875B

Roses In My Heart 879
Digital Version: DIGI879FS

Ornate Greetings 880
Digital Version: DIGI880DE

Cara and Mouse Friend 881
Digital Version: DIGI881SG

Hello Foxy 882
Digital Version: Digi882B

You are definitely going to want both the digi version as well as the rubber version because when you purchase the digital versions, there are lots of extras that aren't available otherwise.  These extras can include additional images, additional sentiments, digi papers (in some cases), and a cut file.

The new sets are 20% off until the 20th of the month.  Head on over to the SNS store once you've finished the Blog Hop and start shopping.

SNS is always adding new products and new product lines to the store.  So stop by often to see what's new! 

One GRAND PRIZE WINNER will be announced on the 17th of the month.  One of the Designers is our Mystery Host and the winner will be selected from comments left on her blog.  You must leave acomment on each of the Designers' blogs in order to be selected as the winner, as you never know who the Mystery Host will be.  This is checked for compliance.

The GRAND PRIZE WINNER will be announced on the SNS Facebook page and on the SNS Blog and will receive a $20 Gift Certificate to the shoppe!

The Blog Hop order is:
(Tip: if you have difficulty with a particular link, try clicking on the Designer's blog title to be directed to their Home page.)

  
Belinda
Anne
Chris
Jess
Donna
Diane
Shona
Eret


We hope you enjoy the New Reveal Blog Hop as much as we enjoy creating new projects for it.  Be sure to visit the SNS Blog for even more inspiration.  Something new is posted most every day.


Did you know that SNS has a You-Tube Channel?  If not, then you are in for a real treat.  Subscribe today to get all the latest tips and techniques!


The Sparkle N Sprinkle Creative Challenge group is on Facebook.  

This is a closed group (just trying to keep out spammers), but we want anyone who to participate to join.  Click on the link and join in on the fun today! 

The Creative Challenges run from the 1st - 25th of each month.  A SNS image (either rubber or digi) is required.  If you don't have any yet, there are freebies located on the Home page of the SNS website.  Just scroll down the page a bit to see them.

The Creative Challenge Winner and Top Three will be posted on the last day of each month.  The winner will receive a $15 Gift Certificate to go shopping at the SNS store.

Please review all the Challenge Rules before submitting your photo 😀.  We can't wait to see what all you create using SNS images.

~~~~~~~~~~~~~~~~~~~~~~~~~~~~~~~~~~~~~~~~


I love the new Ornate Greetings set and wanted to make the sentiment the focal point of the card. So to begin I made the card base by cutting the outside frame of the Tonic Swirling Frame Layering die slightly above the top fold of the card, using my Tangerine die cutting machine.


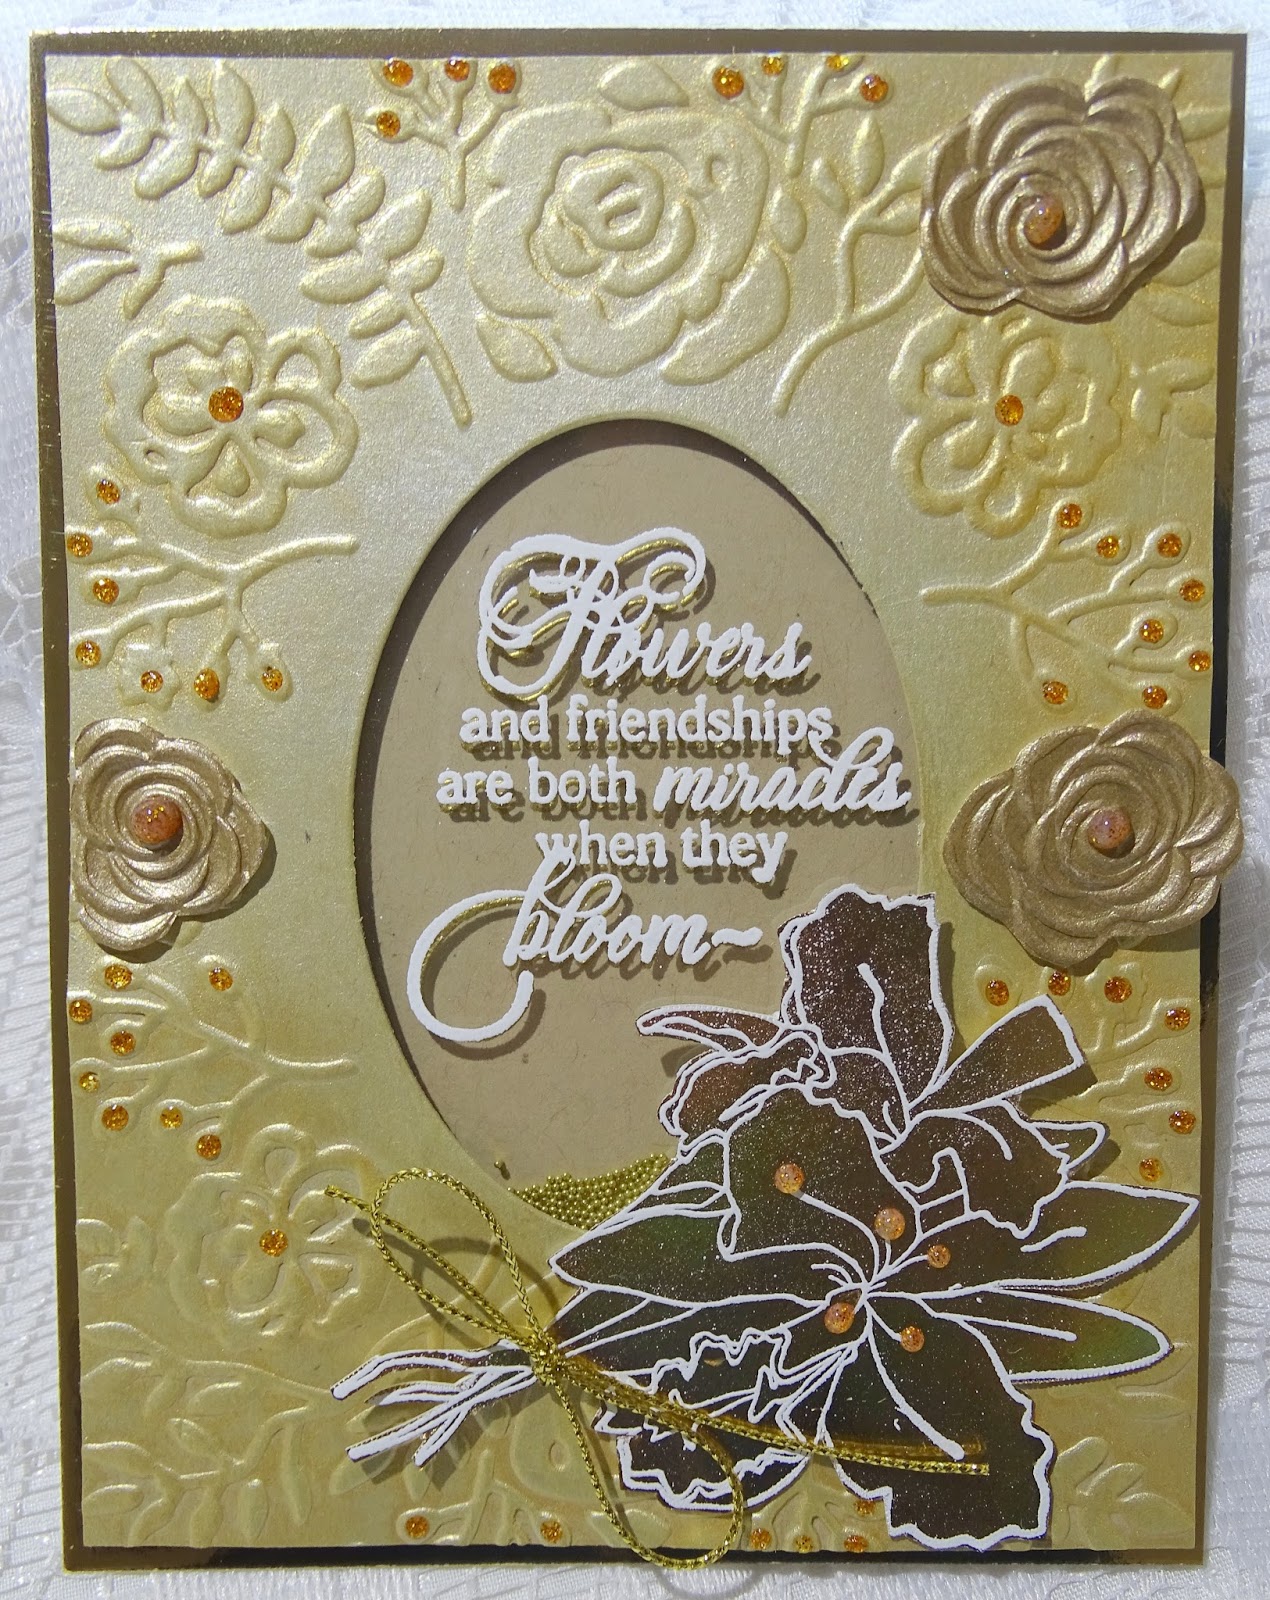
Next I ran another piece of white cardstock with the two largest dies of the set through the Tangerine. I taped it in place, so that the dies would not move as they were die cut.


Nuvo Embellishment Mousse Mother of Pearl was applied to the two frames using a jumbo dauber. This particular mousse is my most used and although it is somewhat dry, I find that misting with some water rehydrates well. Here I used the Nuvo Light Mist Spray bottle.


Did you know you can emboss on top of the mousse? I swiped my colored piece with the Anti-Static bag, stamped the sentiment in Nuvo Clear Mark, using the Stamping Platform (to center it nicely and so it gave a nice even impression) and heat embossed in Gold Detail. I then die cut another sheet of cardstock, which had a piece of Super Adhesive Sheet layered on top. using the two outline frames of the die.


The mousse colored frames were attached to their respective sticky frames and Cloud Nine Velvet Glitter was applied to the exposed sticky areas.


For the flowers, I stamped only the flower part of the Roses in My Heart Set. I used the Stamping Platform for this process too, as I was stamping on vellum, and images can easily be smeared. I stamped the flower part of the image in Nuvo Clear Mark and this too was then heat embossed with Gold Detail. I stamped the image twice. Both pieces were colored on the back with Copics.


I then applied a piece of 2 1/2" Tear-ific Tape to the back of the vellum pieces and stuck them down on white cardstock.


The white background made the colors more vibrant. The bouquets were then fussy cut with Tonic 5" Mini Scissors. One bouquet being divided into two little bouquets. These scissors are amazing, cutting through the adhesive, sandwiched between the vellum and card and they never get gunked up.


After the pieces were all cut out, the card was assembled with Tear-ific Tape and Mounting Tape. A little piece of tulle was also added to the bottom left corner and a gold thread was added to the top for extra elegance. The center of the card was popped up on mounting tape.


Hope you've enjoyed my share today. Next and last on the hop is our very talented Eret, who has a stunning project for you also using the Roses in My Heart Set. Remember to comment on each of the designers' blogs to be eligible to win all the sets this month. Below you can find all the products that were used in my card, with their links to the SNS Website.

Vellum
Copics
Tulle
Mounting Tape

I'd like to join in the following challenges with my card:

Shopping Our Stash #337: Getting Sentimental
Simply Create Too: Challenge #138: Use Embossing
Moving Along with the Times: Challenge 62: Flowers
World Wide Open Design Team Challenge #1: Anything Goes
Classic Design Team Open Challenge #21: Anything Goes


Thanks for stopping by, 'till next time,

Warm hugs,

Shona


Thursday, December 7, 2017

MERRY AND BRIGHT!

Hi there,

This morning I'd like to share a card using the cute Snowman Couple - Christmas Set 872 from the November Reveal.


Isn't this the cutest little couple? I stamped the couple on to white cardstock in Black Memento ink using the Tonic Stamp Platform.


I removed the lid and worked on my coloring, using Copics, while leaving the stamped image on the platform.


This allowed me to come back and apply Nuvo Clear Mark ink onto the stamp and place stamp on top of the colored version and then heat emboss with Clear Detail powder.


This gives a lovely shiny raised outline to your images:


After fussy cutting the snow couple with my Tonic 5" mini snips I applied White Blizzard Glitter Drops to the baubles and the buttons. This was then set aside to dry, while I worked on my card base. I used the Tonic Merry and bright die, running it through my Tangerine. I then daubed the entire card base with Powder Blue embellishment Mousse.


Spellbinders Mega Oval die was used to cut the top out of a piece of the Freshwater Pearls Specialty Papers from Tonic. These are cotton based papers and I had difficulty cutting through them with my Big Shot but the Tangerine went through them like butter! My Cutterpillar also had issues, but the Tonic Guillotine had no problem.


I had some glittery foam self adhesive snowflakes that I had never used so I adhered a few of them around the card front, then popped up my snow couple. I added the Powder Blue Embellishment Mousse to the snowflakes and added some Sparkling Snow Glitter, quickly before it dried, to make the background more monochromatic.


A part of the cut out oval was then turned around and attached to the base of the card as a snow drift, which finished my project for the day. 


Here is a list of the products I used in my project, most of which can be found on the SNS website:

Spellbinders Mega Ovals Dies
Copics: Y17, C1, BG01, B34, B63, RV02, V04, V15

I'd love to join in the following challenges:

World Wide Open Design Team Challenge #28: Anything Goes
Classic Design Team Open Challenge #20: Anything Goes
The Holly and Ivy Christmas Challenge 20: Anything Goes
Tuesday Throwdown #371: Christmas Scene
Always Fun Challenge #35: Snowmen
Christmas Cards All Year 'Round: December Challenge
Sweet Stampin' Christmas November Challenge: Anything Goes
Mod Squad Challenge: What a Flake! (use a snowflake)
Crafty Gals Corner Challenge # 152: Anything Goes
Cards und More #199: Snowmen
Cardz 4 Galz Challenge #62: Show Me a Snowman

Thanks for stopping by today,

Warm hugs,

Shona

Thursday, November 23, 2017

Golden Orchid Shaker

Happy Thanksgiving everyone!  Hope you are having a wonderful day, with lots of yummy food and warm friendships!

Today I'd like to share with you a shaker card created using the new Botanical Orchid Flowers Set 874 from the November Reveal.


I began by making the background using the Sizzix Impresslits 661955, which actually is an embossing folder with an oval die cut incorporated in the middle. I ran a piece of Kraft cardstock through the machine and then using a jumbo dauber I sponged Mother of Pearl and Indian Gold embellishment mousse over the embossed pattern.


I then used the Tonic Stamping Platform to stamp my sentiment that was to be the focal point of my shaker. First I swiped my Kraft cardstock with the anti-static bag and then the sentiment was stamped with Nuvo Clear Mark and then heat embossed with Gold Detail.


This step was repeated stamping Nuvo Clear Mark ink on Embossable Acetate (remember to use the anti-static bag) and this time I embossed with White Detail embossing powder. The embossed acetate was attached to the back of the card front. I then placed mounting tape on the back of the front panel and poured some beads on top of the gold embossing and offset the white embossing on top of the gold. This card front was then layered to a gold mirror card base.


The orchid was stamped onto the Tonic Craft Perfect Harvest Gold Mirror Card with Versamark and then heat set with White Detail. I then fussy cut the flower with my Tonic 5" mini scissors. This was then attached to the card front with tape and mounting tape with a little gold thread bow around the stems.


Three "flowers" were fussy cut from the Warm Dahlia Specialty Paper  and attached with mounting tape. Nuvo Glitter Drops Golden Sunset were applied to the card front to finish of this project.


Here is a list of the products used in my project today, most of which which can be found on the Sparkle N Sprinkle website.

Sizzix Impresslits 661955
Gold Beads
Mounting Tape

I'd like to join in the following challenges with my card:
Classic Design Team Challenge #19: Anything Goes
World Wide Open Design Team Challenge #28: Anything Goes
Crafty Creations #355: Anything Goes
Crafty Friends Challenge #71: Add a Sentiment

Thanks so much for stopping by!

Warm hugs,

Shona


Thursday, November 2, 2017

Spot the Cow!

Hi there,

Glad you stopped by today. My post today is "spot the cow"! I incorporated two of the new October Reveal sets and an older Set to make my farm scene today.


I incorporated one of the older sets into this design today - the Farm Sweet Farm Set 652. I love this beautiful barn image which I decided needed a sort of aged look - so I stamped the image in Black StazOn using my Tonic Stamp Platform and would then color with Copics. This would give a look of weathered paneling on the barn, as the StazOn will mix with the Copics. The image was restamped as you can see on the photo below it didn't cover all the image. When you have a big image like this the platform really comes in useful. Rather than throwing out several copies until you get it right, you just need to reink in the same place!


The tractor from Farm Fresh Tractor Set 877 and the milk urns from Farm Fresh Set 878 were stamped in Memento Black ink to be colored with Copics. The tractor and milk urns were colored in Copics and then fussy cut with the Tonic 5" Mini Scissors - could not craft without these anymore!!


The picket fence is Kraft cardstock cut with a Martha Stewart punch. This was sponged with Seaspray Green Embellishment Mousse


The barn was then given a background with Memento Summer Sky and Olive Grove inks and the picket fence put in place.


There was a gap on the left side I thought after assembly. So the milk urns were removed from the picture for a bit!


... and a little cow was added! I cut up the group of cows from Farm Fresh Set Cows 877 and masked where it would have to go on the top of the grass. She was stamped with the new Nuvo Acorn Brown ink


The sentiment from the Farm Fresh Tractors Set 877 was stamped in the top left hand corner in the Nuvo Clear Mark ink before being heat embossed with Sienna (fine detail embossing powder and rustic).


By placing this on the Tonic Stamp Platform you can use the grid to get it straight the first time and not mess your project up!!!


The cardfront was layered to a piece of burlap and then Kraft cardstock, for a fun rustic look! The tractor and the replaced milk urns were attached with mounting tape to finish off the card.


Hope you've enjoyed your visit to the farm today? Here are the products that were used on my card today, most of which can be found on the SNS website:

Farm Sweet Farm Set 652
Sienna Embossing Powder (EP413)
Memento Summer Sky, Olive Grove
Copics:YR21, YR24, YG11, YG67, G94,
C3, C5, W7, R37
Martha Stewart Picket Fence Punch
Mounting Tape

I'd like to play along in the following challenges:
2 Crafty Critters Crazies Challenge #8: Add a critter
World Wide Open Design Teal Challenge #27: Anything Goes
Classic Design Team Challenge #19: Anything Goes

Thanks again for stopping by!

Shona