Showing posts with label Embossing Powders. Show all posts

Wednesday, February 9, 2022

Snowflake Winter Wonderland

 Hi there and thanks for stopping by my blog today. 


My card today is for the Christmas Craft Creations February Challenge where the theme is Blue and Silver.


I began with stamping the Recollections Snowflake background stamp in Versafine Clair Paradise ink. 


I die cut a frame from silver cardstock and framed the background before layering to a silver card base.


A strip of double-sided tape was attached to a scrap of white cardstock.


I then die cut the different snowflakes from the Recollections Snowflake die set.


The dies were released from the strip and the sticky backing was removed ....


and glitters were applied to the sticky surfaces. I used, Silver Dreams, Surf and Fascination glitters.


The sentiment which was from an old Sparkle N Sprinkle set called Winter Swirl was stamped in Versamark. I applied Silver Lightning and Silver Detail embossing powders and heat set. I hand cut the banner and then edged it with blue Copic.


The sentiment and the snowflakes were added to the card front with foam pads and then I sprinkled Waterscape glitter over any sticky open areas, like the center of the snowflakes.


Here is a close up of the sparkle from the glitters.


That finished up my card for today. Please do pop over and see what the rest of my Teamies came up with. Lots of inspiration! We hope to see you join along in our Silver and Blue Christmas Challenge.

I'd like to join in the following challenges, please:

Thanks again for stopping by!

Till next time, stay warm!

Shona

Wednesday, June 9, 2021

CCC Butterfly Snowflake

 Hi there! Hope you are all doing well? Things here are improving. Getting out and about and although we can go into stores without masks, we're keeping ours on for the time being. It feels so good to have things open up a bit. 

I've been getting out to do activities with some of my Master Gardener friends - nice to be interacting with other humans again!

My June header is the first Monarch I've seen this year. It was visiting  my Waystation, though I didn't find any eggs.

My card today is for the Christmas Craft Creations Design Team. Our theme this month is Heat Embossing. I hope you will play along with us in the challenge, I chose to emboss with different powders through a homemade stencil.


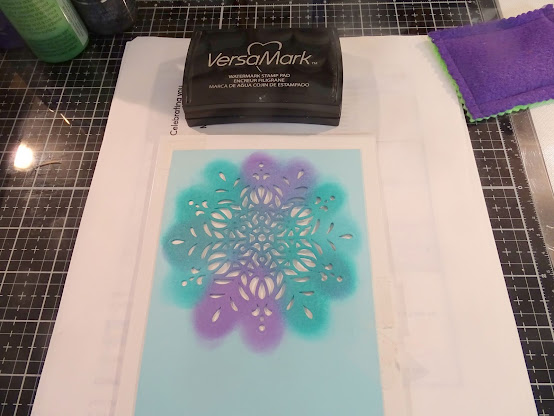
I had a piece of card that I must have die cut, when I was making my Christmas cards last year, which had obviously been used for stenciling before, so instead of putting colored inks through the "stencil", I used Versamark ink on to white glossy cardstock. (I used my embossing buddy over the cardstock first). 


Then I chose 4 blue/silver embossing powders to sprinkle on one at a time, in different areas of the sticky snowflake. I started with Silver Detail. 


Once I had finished applying all four embossing powders, I heat embossed and there was one little bit that wasn't clear on the left hand side. So I replaced the stencil and used the Versamarker pen and added a little more ink and embossing powder to that area. It was quickly heat embossed.


I looked for a sentiment and finally found one that was perfect for me! It was from an old Sparkle N Sprinkle set called Winter Swirl! You know how I love my butterflies!


 I stamped the sentiment in Versafine Clair Paradise and then heat embossed with Clear Detail.


I found a blue frame that worked perfectly size wise and I used strips of mounting tape to add it around the sparkly snowflake and sentiment. A piece of silver thread was tied to the spine of the card to finish it off. Below are the products that I used in my project:

Sparkle N Sprinkle Winter Swirl Stamp Set

Snowflake Stencil

Versafine Clair Paradise Ink pad

Versamark Ink pad

Versamarker

Embossing powders:

Silver Detail, Silver Lightning, 

Blue Silver, Electric Blue, and Clear Detail

Strip mounting tape

Silver Thread


I hope I have inspired you to come join in the fun of Heat Embossing, over at the Christmas Craft Creations Challenge?


Till next time, stay safe!


Shona

Saturday, February 27, 2021

Turner Syndrome Awareness

 Today I am sharing a card I made specifically for a Challenge that promotes Turner Syndrome Awareness. I first became aware of  Turner Syndrome two years ago when the stamping community, headed up by Lori Kobular, started the Turner Syndrome Awareness Blog Hop. 

Turner Syndrome is a genetic disorder where a female is born missing all or part of her second X chromosome leaving her with life-long medical issues and learning disabilities. This condition occurs one in 2,000 female births worldwide, but is more common among pregnancies that do not survive to full term. That is why Turner Syndrome Females are considered MIRACLES! I hope you will go to Lori's site to learn more!


Here is the mood board for the Challenge:


I started this card a couple of weeks ago and it changed directions several times before it was finished. I had this never before used Stampendous Hydrangea Garden stamp, stencil and die set that I recently came across during a clean-up in my stamping room. Since the Butterfly is also a symbol of TSF, I thought this set was the perfect choice!


I began with stamping the hydrangea bloom in my stamping platform with Versafine Clair Nocturne ink. The outline part of the stencil was placed around the bloom and I colored using inkers and some Distress Oxide inks.


This was returned to the stamping positioner and was reinked with Nocturne and then heat embossed with sparkle. The mask part of the stencil was then placed on top of the bloom in the stamping positioner and the leaves were positioned and stamped with the Nocturne ink.


I then placed the leaf mask over the first set of leaves and stamped a second set over to the left.


This was the result, once the masks were removed.


The leaves were then colored using inkers and different green inks, with the bloom and leaf stencils being put in place of areas not to be inked.


The butterfly was then stamped, colored with Copics and die cut.


I covered the butterfly with Versamark ink and then heat embossed with Clear Detail and then again with Super Thick Clear. This gave the butterfly a beautiful shiny coat!


Back to the hydrangea, Broken China was applied to the background and then misted with water.


I found this a little darker than I had wanted, so I'll deal with that later!!

I covered a piece of pink cardstock with double sided adhesive and cut out a frame with the Tonic Topnote Trellis Layering die.


Lavender Iris glitter was then applied to the sticky surface of the frame when I took of the protective backing.


To tone down main image I decided to cover it with vellum. I attached it with a little Pixie Spray to hold it in place temporarily. I attached the glittered frame to the piece using a flower and brad in each of the four corners.


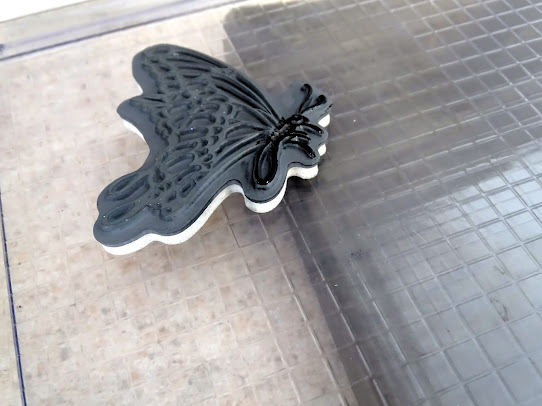
I placed the finished panel back in the stamp positioner and positioned the butterfly stamp on top of the vellum.


Just the body of the butterfly was then inked:


The glazed butterfly was then placed on top of the body of the butterfly. Now she has legs and antennae again! The card front was layered to pale purple and then on to a white card base.


I searched high and low for a sentiment. As luck would have it another dear stamping friend, Donna Ellis, had recently gifted us a sentiment that we could use on our personal projects and I thought it would be perfect for my card. However I did have to change the size to fit where I wanted it to go. So after adjusting the dimensions on my computer, I printed it out on the same pink cardstock that I had used for the frame. I then die cut the sentiment using the inside die cut of the Tonic die set. 


The sentiment was attached with some mounting foam. Some pink baker's twine was knotted around the spine of the card to finish off my project.


I hope you have enjoyed stopping over today? I also hope that you take the time to go back and check out the Turner Syndrome Awareness Blog Hop. Not are there many fun prizes to be won, but you can also learn much more about these miracle girls!

Below you will find a complete list of all the products that I used in my project today:

Donna Ellis’s sentiment

Stampendous Fran’s Hydrangea Garden Stamp and Stencil Set

Stampendous Fran’s Hydrangea Garden Die Cut Set

Versafine Clair Nocturne ink

Sparkle embossing powder

Distress Oxide Inks:

Worn Lipstick, Wilted Violet, Peeled Paint, Fossilized Amber, Broken China

Versafine Clair inks: Cheerful, Verdant, Shady Lane

Blending Brushes

Vellum

Copics markers: RV02, Y13, YG256, YG13, W-3

Versamark ink

Clear Embossing powder

Super Thick Clear embossing powder

Tonic Topnote Trellis Layering Die Set

Double sided adhesive sheet

Lavender Iris glitter

Flowers

Brads

Pink Baker’s twine

Foam mounting tape


Along with the Turner Syndrome Awareness Challenge I would also like to take part in the following challenges:

Creations in Pink Challenge #31: Anything Goes: Mainly Pink

Take care, until next time!

Shona
Wednesday, February 10, 2021

Let it Snow!

 Hi there and welcome to February! My header for this month is my two beehives in the snow. It was taken a couple of days after we received almost two feet of the white fluffy stuff! It was a bright, sunny day and although it was quite chilly, the bees were taking advantage of the sun and came out and took "cleansing flights". Bees won't poop inside the hive. If you look closely at the front of the hives, you can see several little black specks - those are a few of the bees out relieving themselves. A good sign for me that my bees are still alive! Just like us - they are eagerly awaiting the warmer days of Spring!

My card today for the Christmas Craft Creations design team is ironically "Let it Snow", made back in November, when we hadn't yet received the white stuff!!


The February Challenge theme is Blue and Silver.


I chose to paint with embossing powders this time! I ran the snowflake borders through my machine with a scrap piece of navy cardstock.


The two borders were stuck down along the top and bottom edges of a piece of white cardstock, to act as a stencil.


Versamark was then applied all over the cardstock. After applying the Versamark the "stencils" were removed. 7 different blue hues of embossing powders were ready for action!


I applied the different embossing powders one by one on to the Versamarked panel. I didn't bother to keep them separate, and now have a one of a kind embossing powder for another project!


Using my tweezers the panel was then heat embossed.


Silver Lightning embossing powder was then applied to a Versamarked Joy Crafts snowflake and was heat embossed.


The Tonic "Let it Snow" die was then die cut from silver cardstock.


The snowflake was attached to the embossed panel with a silver brad and the sentiment was attached with foam mounting strips. This was then layered to a piece of silver cardstock before being attached to a white card base.


Hope you have enjoyed my share with you today and that you will be inspired to join in with us over at Christmas Craft Creations with your own "blue and silver" project?

Below are the products that I used for my card today:

Snowflake Border die

Versamark

Background embossing powders: Carribean, By the Lake, 

  Pool side, Ice Rink, Bracing Blue, Blue Silver, Electric Blue

Snowflake die cut - Silver Lightning on top of Bracing Blue

Tonic Let it Snow die

Joy Crafts Snowflake die (6002/2020)

Silver Mirror Cardstock


I'd like to join in the following challenges with my project:

The Holly and the Ivy Challenge #87: Anything Goes

Dies R Us Challenge # 162: Use a company die that DRU carries

World Wide Open Design Team Challenge #01: Anything Goes

Christmas Crafts All Year Round February Challenge: Something that starts with C/and or D (Chilly Days)


Until next time stay warm and safe,

Shona

Thursday, May 9, 2019

Take Time to Relax!

Hi there,
I'm so glad you stopped by today. My card today features three Sparkle N Sprinkle Stamp Sets, two from the May Reveal: Cruisin' Digi 949Sand Dune Silhouettes 940 and one older Set 404, Ocean Treasures. This card shows not only how to work with more than one stamp set at a time, but also how digis and rubber can work together.


To begin with I printed out the version of the Cruisin' digi. After fussy cutting the car I applied Versamark and heat set with Clear Detail. I repeated this step and then after applying Versamark a third time, I heat set with Super Thick Clear. You need to heat from beneath to stop the thicker granules of embossing powder from flying off the project. This gave our car a lovely shine. 


I stamped my sand dune scene, starting with the sand dune stamp and then the grasses in the bottom left, then the little grass from the Ocean Treasures Set in the bottom right. All of these stamps were stamped in Versafine Clair Acorn. I then cut a line along the horizon of the scene.


Memento inks were applied directly to paper to color the sand.


When the inks were dry I took a brush and applied Brushable Glue on top of the sand and applied Sparkling Sands Flocking to give the sand some texture and sparkle.


The sentiment and birds were arranged on the stamp platform and were stamped with the Versafine Clair Acorn Brown again directly to the blue cardstock that I was going to use as the background.


The blue panel was attached to a Kraft card base then the sand dune scene was taped down with 1/4" Tear-ific Tape. The car was added with mounting foam to finish off my card for the day.


Listed below are the Sparkle N Sprinkle products used on my project that you will find on the website. You can use my personal code ShonaDT10 at checkout for a further 10% off these products and anything else that catches your eye!.

Ocean Treasures Set 404
Memento Inks: Desert Sand and Toffee Crunch
Mounting Tape

I'd like to join along in the following challenges:
Thanks again for stopping by. I do hope I've inspired you to try mixing stamp sets and using both the digis and stamps. I think this will make a fun Father's Day card!

Shona