Showing posts with label Die-Versions Dies. Show all posts

Friday, January 31, 2020

Plaid Happy Birthday

Hi there,
Today I'd like to share a different kind of card for me, i.e. no glitter or flocking! Picking myself off the floor! This card was made for the Dies R Us Design Team.


Just an FYI, the die I used today is a fraction of it's original price - $5.60 instead of $22.49, so grab it now if you can! I hadn't realized that when making this card and it is much bigger than I had thought it was too. This card ended up being just a little shy of a 5 x 7.


First, I stamped the plaid background from Concord & 9th in Versafine Clair Charming Pink. I used my Stamp Platform to do this to get good coverage. 


Re-inking and stamping three times, gave a nice even result.


Once it was dry, I die cut the Die-Versions Happy Birthday Solo Sentiments die from the middle of it, being careful that I didn't lose any of the little negative pieces. Then I ran black cardstock through with the same die.


A piece of Super Adhesive Tape was stuck to the back of the plaid negative piece and the black Happy Birthday outline was placed in the sticky space. The little plaid pieces were inserted into their respective spots. I neglected to take a photo of that ... my bad!


The plaid piece was then popped up with little mounting foam strips, but I moved it all slightly intentionally to the left.


Another "Happy Birthday" was die cut from another piece of black cardstock that would be used as the layer on top of the card base. This was then taped again slightly to the left so that it achieved more dimension.


The black piece was then layered to a white card base and then the focal panel was taped on top. A piece of black and white cord was tied around the top of the card to finish it off.


Here are the products that I used in my project today: 

Concord & 9th Plaid Background Stamp
Super Adhesive Sheet
Mounting Foam
Black and White cord

Hope you liked my project today? Please stop by and leave me a comment!

I'll be back tomorrow with my Turner Syndrome card, you won't want to miss that. There are tons of prizes up for grabs as you learn about Turner Syndrome Awareness! See you tomorrow!

Big Hugs,

Shona


Wednesday, August 26, 2015

LIVING AND COPING WITH CANCER

Hi there,

I have to say this month has been a bit of an eye opener for me.  The whole team brought so many different cancers to light (most of which I didn't know existed). Instead of using pink, which I did three times already, I decided to look for something a little different. I found the Silver and Blue Ribbon, which signifies living and coping with Cancer.

Living and Coping with Cancer

So to begin with, I made my background paper by spraying the Perfect Pearl, a Perfect Pearls Mist, over a piece of white cardstock. I then applied Color Burst Ultramarine Blue, which "erupted" and resulted in a pretty silvery blue mottled look - the perfect stage for my silver and blue combination.  I ran the background through the Darice "Cross with Words" embossing folder and sanded the raised words - removing the ink and leaving the white words. You can see the embossed words more clearly here.

Living and Coping with Cancer

The sentiment, from the Survivor Set 713, was stamped in Versamark and then heat embossed with Mediterranean (one of the Tuscany embossing powders). I hand cut the banner and daubed the piece with a little Memento Teal Zeal ink. It was then layered to a slightly larger piece of Silver Metallic cardstock.

Living and Coping with Cancer

On to the ribbons!  I die cut the Survivor Ribbon (from the Die-Versions Awareness Ribbon Words die set) out of the background piece on the bottom right. I then die cut two Cancer ribbons, from the Silver Metallic cardstock.  I covered the cancer wording of one of them with a strip of the silver cardstock before layering the Survivor ribbon offset on top.  The background was layered to a silver metallic frame, so that the glossy white card base would show through the Survivor ribbon.  I re-inserted the Survivor ribbon in the space where it came from, so that the words from the cross still matched up and then attached the sentiment and the Cancer ribbon with Dimensional Foam.

Living and Coping with Cancer

Thanks for stopping by today!
Hugs,
Shona

Friday, July 31, 2015

SPARKLE N SPRINKLE'S AUGUST 1ST REVEAL

Hi there and welcome to our August Reveal (with a twist). Today we are having a Joint Blog Hop with our friends over at Die-Versions. Die-Versions has come out with nine new dies and Sparkle N Sprinkle has come out with three sets, all based around cancer awareness.


Let's get hopping shall we? I'm first up on the hop, so you should have come here by way of the Die-Versions blog page. 


Sparkle N Sprinkle and Die-Versions are partnering up for a very special joint blog hop, called the Awareness Campaign.  A portion of the proceeds from the sale of the newly released Die-Versions dies and the stamp sets revealed in the joint blog hop will go to help with cancer research.  
Almost every one has been touched by cancer is one way or another.  Either you or a family member has had cancer or you know someone who has had cancer.  The Designers from both teams are joining together to help the fight to eradicate all cancers by inspiring you.

Die-Versions

Die-Versions is debuting NINE new Die-Versions low profile dies (July 2015 Reveal - scroll down to the end of the reveal) and Sparkle N Sprinkle is revealing THREE stamp sets for this Awareness Campaign.  All stamp sets will be 20% off until Aug 3.  

Sparkle N Sprinkle
Pink Ribbon Background 408  (digi version DIGI408)
Survivor 713    (digi version DIGI713T)
Awareness 714   (digi version  DIGI714T)

A Grand Prize winner will be chosen from comments left on the Designers' blogs and will be announced on August 4th.  You won't know who the Mystery Designer is until after the Joint Blog hop, so remember to leave a comment with each of the Designers.  

The Winner will be announced on the Die-Versions Facebook page, the Sparkle N Sprinkle Facebook page, the DV Blog, and on the SNS Blog and will receive a $25 gift certificate from BOTH Die-Versions and Sparkle N Sprinkle.

We hope you enjoy the Awareness Joint Blog Hop as much as we have enjoyed creating new projects for it.  We also hope that we have inspired you as well.  Thanks for joining us and remember to comment on each of the Designers' blogs to be eligible for the Grand Prize.  (We love reading them too since your comments also inspire us.)  


The Sparkle N Sprinkle Creative Challenge also begins today with lots of prizes and recognition badges.  Find out how you can become a SNS Featured Artist with special recognition on the SNS Facebook page as well as the Creative Challenge Winner's post.  From time to time, we also have special prizes just for Featured Artists.  The theme is always Anything Goes using Loose Glitter, Embossing Powder, and/or Flock.

My card features all three of the stamp sets: the Pink Ribbon Background Set 408, Survivor Set 713 and the Awareness Set 414. I chose to compliment these sets with the Die-Versions Awareness Ribbon Words DV-485.


I began by die cutting the Sizzix Circle Flip-Its card base. My background cardstock was made by stamping the Pink Ribbon Background stamp on glossy white in Versamark. It was then heat embossed with White Detail. Memento Rose Bud ink was then rubbed over the entire surface and I wiped any excess ink off the white embossing with a tissue. The two panels were die cut from this prepared background and were adhered to the card base.


The two Spellbinders Standard Circles were cut and then I stamped the two sentiments in Versamark and heat embossed again with White Detail. The little ribbon was stamped after the circle had been applied with the ink. See the difference in the detail.


I attached a strip of 1/2" Tear-ific Tape down the center of the middle panel, before attaching the inside sentiment. The exposed tape was covered in Cloud Nine Microfine Glitter and then the little ribbon was stamped on top of the Cloud Nine using the Rose Bud ink.


Now for the little ribbons! I took the three dies I wanted to use. There are six altogether in the set. I took three scraps that I had of Super Adhesive Sheets (big enough to fit the ribbon - you could also use the 2 1/2" Tear-ific Tape). Place the adhesive on to white cardstock and put the die face down on the glossy protective side. Otherwise the wording will be backwards. Gently remove the protective backing from the letters only.


Raspberry Soda glitter was burnished into the spaces of the letters. Then I removed the rest of the shiny backing and Cloud Nine was applied to the rest of the ribbon. The ribbons were attached to the card with 1/4" Tear-ific Tape


Hope you've enjoyed the first of these Cancer Awareness projects. While I was photographing my project earlier this week, I thought how ironic that a little brown butterfly should land on my card. I wondered "had he been part of a butterfly release to commemorate cancer awareness". Nature amazes me every day! Here he is:


OK, that's all from me for now. Now after leaving a comment, you need to follow the little butterfly and flutter over to Patti's blog. She's from the Die-Versions team. I'm sure looking forward to seeing all the wonderful creations for the Cancer Awareness theme from both teams! If you get lost along the way or have a problem with a link, the complete list of Designers is located on both the Die-Versions Blog as well as the Sparkle N Sprinkle Blog.  Happy Hopping!

Hugs,

Shona


Sunday, July 19, 2015

GEARED-UP FOR A GREAT BIRTHDAY!

Hi everyone,

I'm back today with a quick post of a card I sent to my brother-in-law for his 60th.  Paul loves to alter objects. We recently visited his studio down in Amissville, Virginia and he was altering an old gynecologist's examination table into a kitchen island table.  Well, I'm almost sure the buyers won't know it's original purpose!! Were he a card maker he would definitely be into Steam Punk - let's just leave it at that, shall we??!!

Here's the table that he is repurposing:


He just loves gears and metals! Here is a photo of a painting that he has recently completed. Note the still life that he put together to paint from!


Yes, I know - nuts right? (no - bolts too!)

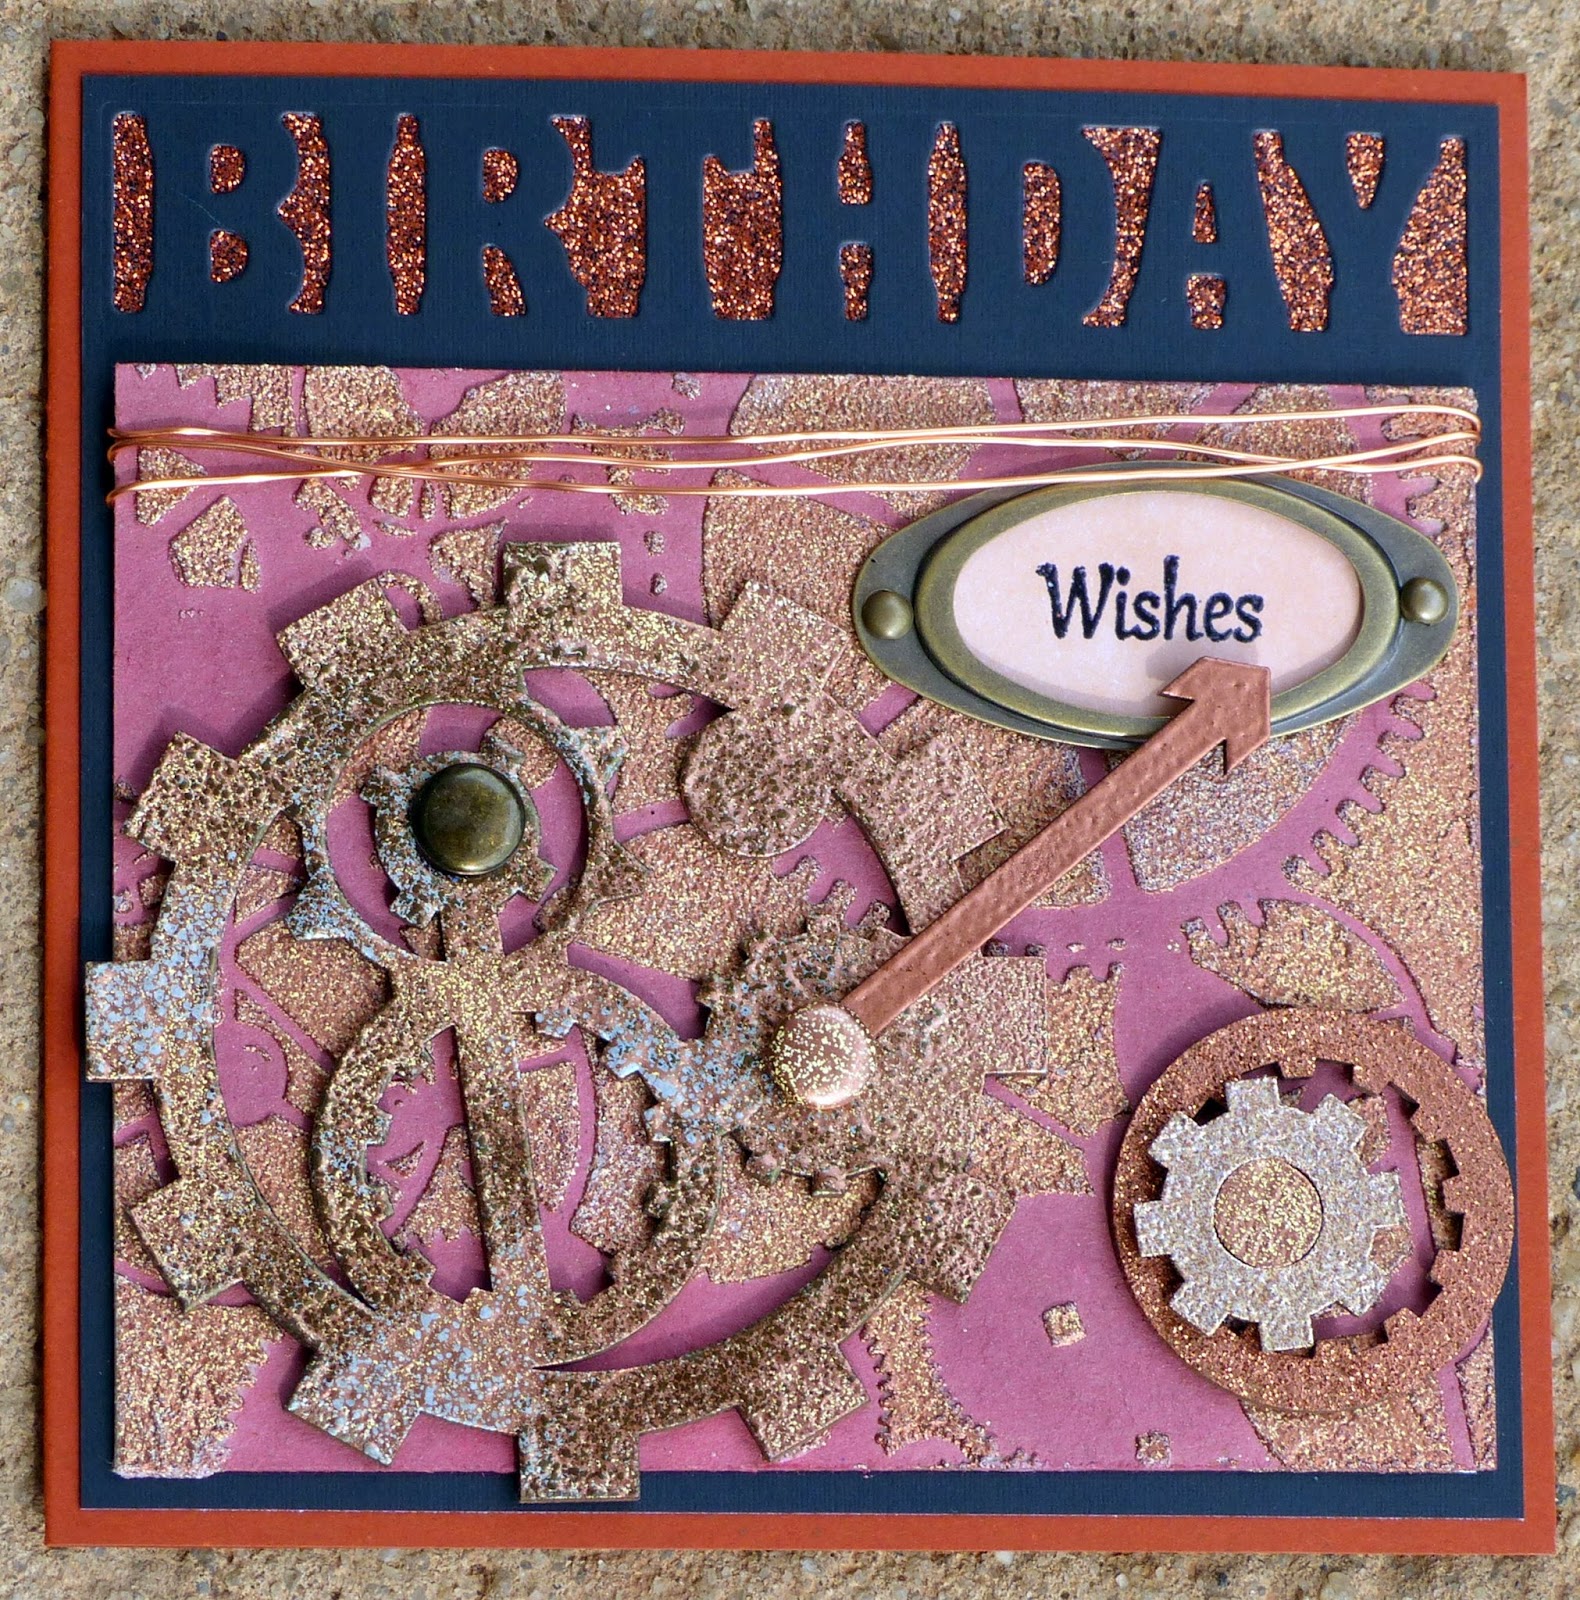
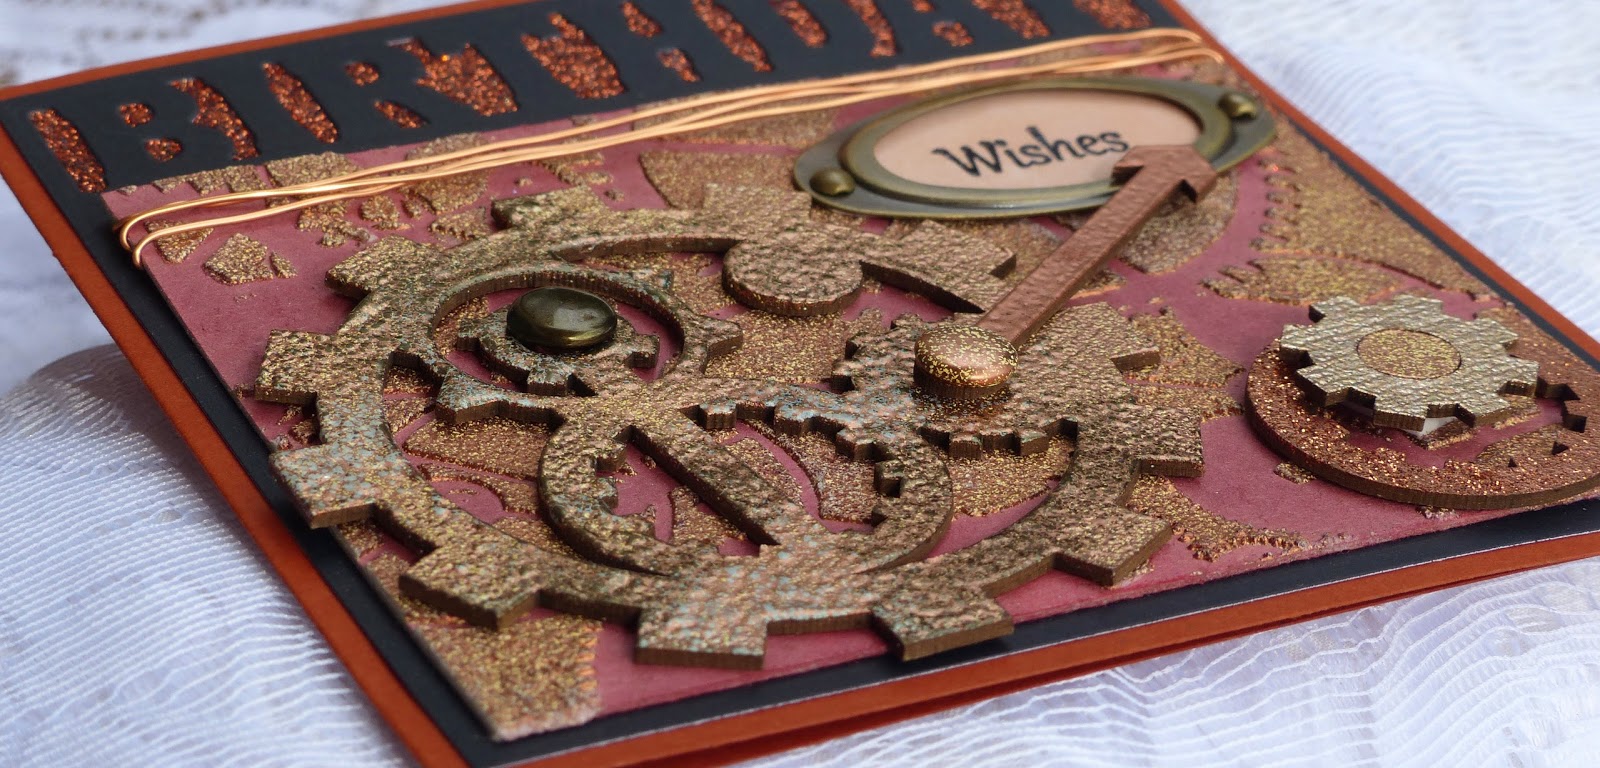
Anyway back to the card! I had this background which I had made a while back - which involved gears with metallic colors and I thought that would be perfect for him!

I took the plastic TCW Mini Gears Stencil (262s) and taped it down to a piece of black cardstock. I applied Dreamweaver Translucent embossing paste and then after removing the stencil I applied both Shazam and Abracadabra (separately) before heat embossing the entire background.

h

The Happy Birthday is a Die Versions Die Cut (DVJ-081) cut out of white card stock to which I applied Versamark ink and then heat embossed with Copper Dreams. To make it look a little more rusted and worn, I added some more Versamark and then sprinkled on some Magic Speckle and heat embossed with the heat tool from underneath (to stop the powder from flying all over - which it will do if you heat from the top - just saying!) Love that look - I mean the rusted look - not the powder flying all over the place!

I had the self-adhesive numerical silver stickers in my stash, so trying to keep the card with the metallic look, I stuck them in the space of the cog. The background was attached to black cardstock (which is white on the inside). Happy Birthday was attached with Dimensional Foam and the card was complete.


Happy 60th Paul!

I'd like to enter this card in the Scrapy Land Challenge: No. 22 - Vintage/Steam Punk

Hope you've enjoyed stopping by today.

Hugs,

Shona

Wednesday, March 4, 2015

ONE FOR THE GUYS!

Hi there and welcome to yet another "SNOW DAY"!!!!!

OK - I am so done with this "white nonsense", along with so many other folks in the North East. I'm dog-sitting for my bowling buddy for a couple of weeks, while she visits her Mom in South Africa. The poor little dog can't even find grass to pee on! ...and to make it worse I forgot to put her jacket on for this photo shoot! The photo's blurred because she was shaking.


The grass is a foot under her! I should have made a spot for her and left a tarp over it when it was snowing - but I didn't think that far ahead!! Oh well, we'll just muddle through, right? It could be worse - I could be living in Boston!

Well at least it gives me an excuse to just stamp. My share today is for a dear neighbor - Chet. He is the neighborhood fix-it angel! I was still in my stencil and embossing paste mode when I made this. So I had a masculine background to use.


I had made the background using the TCW Mini Gears stencil, white embossing paste and Sparkle N Sprinkle Pebbled Copper embossing powder. The background is chipboard which had first been sponged with Memento Rhubarb Stalk. The cogs and arrow are all from Blue Fern (Widget works and Industrial Gears). The brads were heat embossed with the Pebbled Copper and Blackened Bronze


The big cog was covered with Pebbled Copper and then I added a little Versamark ink and heat embossed again with a little Magic Speckle. This is an awesome embossing powder. - it gives a mosaic effect, and with the metallic colors it becomes, well let's just say, "well worn".

The other chipboard pieces were embossed with various metallic powders: Copper, Copper Dreams and Antiquities.


The Birthday Cut Out is from Die-Versions - yes I know I've been using it a lot - hoping they come out with a "Happy"! I cut it from a 5" x 5" piece of black cardstock. I applied a strip of 3/4" Tear-ific Tape behind the sentiment and then applied Embers Glitter to the front.


The sentiment was stamped in Versamark and then heat embossed with Black Detail. A little Desert Sand was sponged over the sentiment before I encased it with the hardware, which was from an old batch of Stampin' Up Hardware.

Well you know you have to use ribbon or lace for a girl card, right? What do you do for a guy?  I found some copper wire and wrapped it around the card front before adding it to the rust card base. Thought that it just finished off my card nicely. Happy Birthday Chet, dear friend!


Hope you've enjoyed my share with you today. 

I'd like to enter this card in the following challenges:

Stamping Sensations - One for the Guys!
Scrapy Land - Use a die cut that Scrapy Land sells

Hopefully next time I post it will be more Spring-like!

Hugs,

Shona
Thursday, February 26, 2015

TIE A YELLOW RIBBON!

Hi there, I have another card today to share  using embossing pastes, a stencil and an embossing powder.


I've been working a bit with different embossing pastes, stencils and embossing powders this month. This card came about after trying three different backgrounds:

It's using the Plaid Folk Art stencil: Ditsy floral. I've decided to call this a "negative" stencil, The reason being is that the embossing paste is actually the background, the card you use becomes the "image". To show what I mean - I did it three different ways:


The first is white cardstock, white paste with three different embossing powders. Then I changed it for the yellow cardstock, translucent paste with the same EP's. Then I changed out the EP to just Ebony Spark. The flowers appeared all of a sudden!

I looked at it for quite sometime wondering how I would incorporate it into a card. I had a piece of black cardstock with the Die-Versions Birthday Cut Out sitting in my "pile". I attached the background to the base and stuck a piece of 3/4" Tearific Tape behind the cut out, applying Mimosa Sparkle N Soft to the front. It has some yellow and orange tones to it, so I decided to color the Prima flowers with Dylusions Ink Sprays: Lemon Zest and Pure Sunshine.


I edged the tips of the petals with Versamark and then heat embossed with Tequila Sunrise, to match the two tones of the Mimosa Sparkle N Soft.


Three of the brads were heat embossed with Ebony Spark for the centers of the flowers and then another was heat embossed with Tequila Sunrise for the center of the bow.

I stamped the Wishes (from Set 402: My Rose Garden) in Versamark on white cardstock, hand cut it into a banner and sponged it with Memento inks: Cantaloupe and Dandelion. It was popped up on Dimensional Foam.


The yellow ribbon worked well, since it also had two tones. It was tied in a loose bow and then the card front was layered to a yellow card base.

I'd like to enter this card in the following challenges:
Crafty Boots Challenge: Use a sentiment
Craft-Dee BowZ: Make a handmade bow
Craftin Desert Diva's: Use Ribbon

Hope you've enjoyed my share today.

Hugs,

Shona
Thursday, January 8, 2015

WEDDING CONGRATULATIONS!

Hi there,

Hope the New Year is off to a good start for you. Today I'd like to share a card made from one of the other new December Reveal Sets. This time I chose to use the Love and Kisses Set 676. It was intended to be used as a Valentine card set, but I chose to change it up a little and make it into a fun engagement or wedding card.


I stamped the kissing couple in Memento Tuxedo Black ink on white cardstock and colored them with Copics B34, B66, B63, Y32, E31, YR00 and R00.  They were then fussy cut out. I applied a little Sparkling Snow glitter to the hearts on the girl's dress with a Sakura Glue pen.


I used the Die-Versions Congrats. Cut-Out at the base of a 5 1/2" x 5 1/2" piece of glossy cardstock. Then I ran the same piece of cardstock through the embossing machine with the Darice Fireworks embossing folder. Memento Rose Bud ink was applied directly to the white glossy cardstock, which made the fireworks pop!


A strip of 3/4" Tear-ific Tape was attached behind the Congrats. cut-out and the background was layered at this point to a red 6" x 6" card base. Cerise Glitter was then applied to the exposed sticky surface of the Congrats. background. Sparkling Snow was also applied to the firework lines with the Sakura Glue Pen.

The hearts were leftovers from a Cheery Lynn Doily Heart die cut, which were covered with Brushable Glue and then applied with Cerise Glitter.


The hearts and the couple were attached to the card front with Dimensional Dots to finish the card.

Hope I've inspired you to put a spin on your stamps. They don't always need to be used for what they were intended!


I'd like to enter this card in the Scrapy Land Challenge #9 - Anything goes using a brand of die that Scrapy Land carries (I used Die-Versions and Cheery Lynn)

Till next time,

Happy Stamping,

Shona

Friday, November 28, 2014

SANTA'S COMING TO TOWN!

Hi there, and I hope that if you celebrated Thanksgiving day - it was a wonderful one! It is scary how quickly the holidays came this year, isn't it. Before we know it, the big guy in the red suit is on his way! Oh look - Here he comes now!


Sparkle N Sprinkle is now carrying Die-Versions dies. There are many awesome designs and they have just introduced some fabulous Pop-Ups and Cut-Outs too. Today, I'm sharing a card with you using the Sleigh Ride die cut.

Apply a 4" x 5 1/4" piece of Super Adhesive Sheet to white cardstock and die cut "Sleigh Ride". Cut an oval using Spellbinders Classic Ovals Large from the center of the scene and set aside. The town and Santa portion of the scene will be used for another project.


I die cut the scene again, this time just from plain white cardstock. I applied Versamark to the die cut and heat embossed with Black Detail embossing powder. There is no need to emboss the entire oval, just the edges past where the where oval will go. (This will also ensure better adhesion for the Dimensional Dots.)

Remove protective backing from the framed piece and apply Gypsy Red Velvet Glitter. Remove protective backing from another piece of the Super Adhesive Sheet and place behind the window. Insert the embossed scene into the space and add Cloud Nine to the remaining exposed tape.


Remove backing from the white oval and apply Cloud Nine glitter. Stamp sentiment in Memento Love Letter ink directly on top of the glitter. This is a great way to get a sparkly greeting. Not only can you stamp on top of Cloud Nine, but you can color too! Check out the full tutorial here

... and the belt? It is a piece of 1/2" Tear-ific tape sandwiched between Black Suede Velvet Glitter. Check out our "glittered ribbon" tutorial for that technique! 


Layer the card front to a white glossy card base. Weave the glittered ribbon through the belt buckle and tape it down to the front of the card as shown.

Hope this has inspired you to try out some of our Velvet Glitters. Let me leave you with a sneak preview of another version of the same die cut, being used in a different way with some more of the Velvet Glitters: 


Will share this one with you shortly!

Till then, 

Shona