Showing posts with label Embossable Acetate. Show all posts

Thursday, December 14, 2017

You're the Cat's Meow!

Hi there,

Today I'd like to share a fuzzy, embossed card using one of the Sparkle N Sprinkle November Reveal sets, the Cat's Meow #870 and another of the Craft Perfect Embossed Papers, Blush Heartbeat.


This little cat is just full of himself, and with the heart paper it called out fuzzy warm Valentine wishes! So I layered a piece of Super Adhesive Sheet to white cardstock and cut out the Spellbinders 3 different sized Scalloped Hearts.


The sentiment was stamped on to a little piece of embossable acetate in Nuvo Clear Mark, after swiping the acetate well with the anti-static bag, to keep off stray powder specks. This was then heat embossed with Bronze Rose. I used the Tonic Stamping Platform to do this for even stamping.


After taking off the protective layer of the Super Adhesive sheet, I applied Buff Flocking to the sticky surface. The acetate sentiment and two pieces of the Blush Heartbeat Specialty paper were placed behind the scalloped hearts.


A scrap of Super Adhesive Sheet was layered to white cardstock and then Snow White flocking was burnished onto the exposed sticky surface, after the protective backing was removed. This was then placed in the Tonic Stamping Platform and the cat was stamped in Acorn Brown directly on top of the white flocking. I stamped it twice to give a crisp impression on top of the uneven flocking.


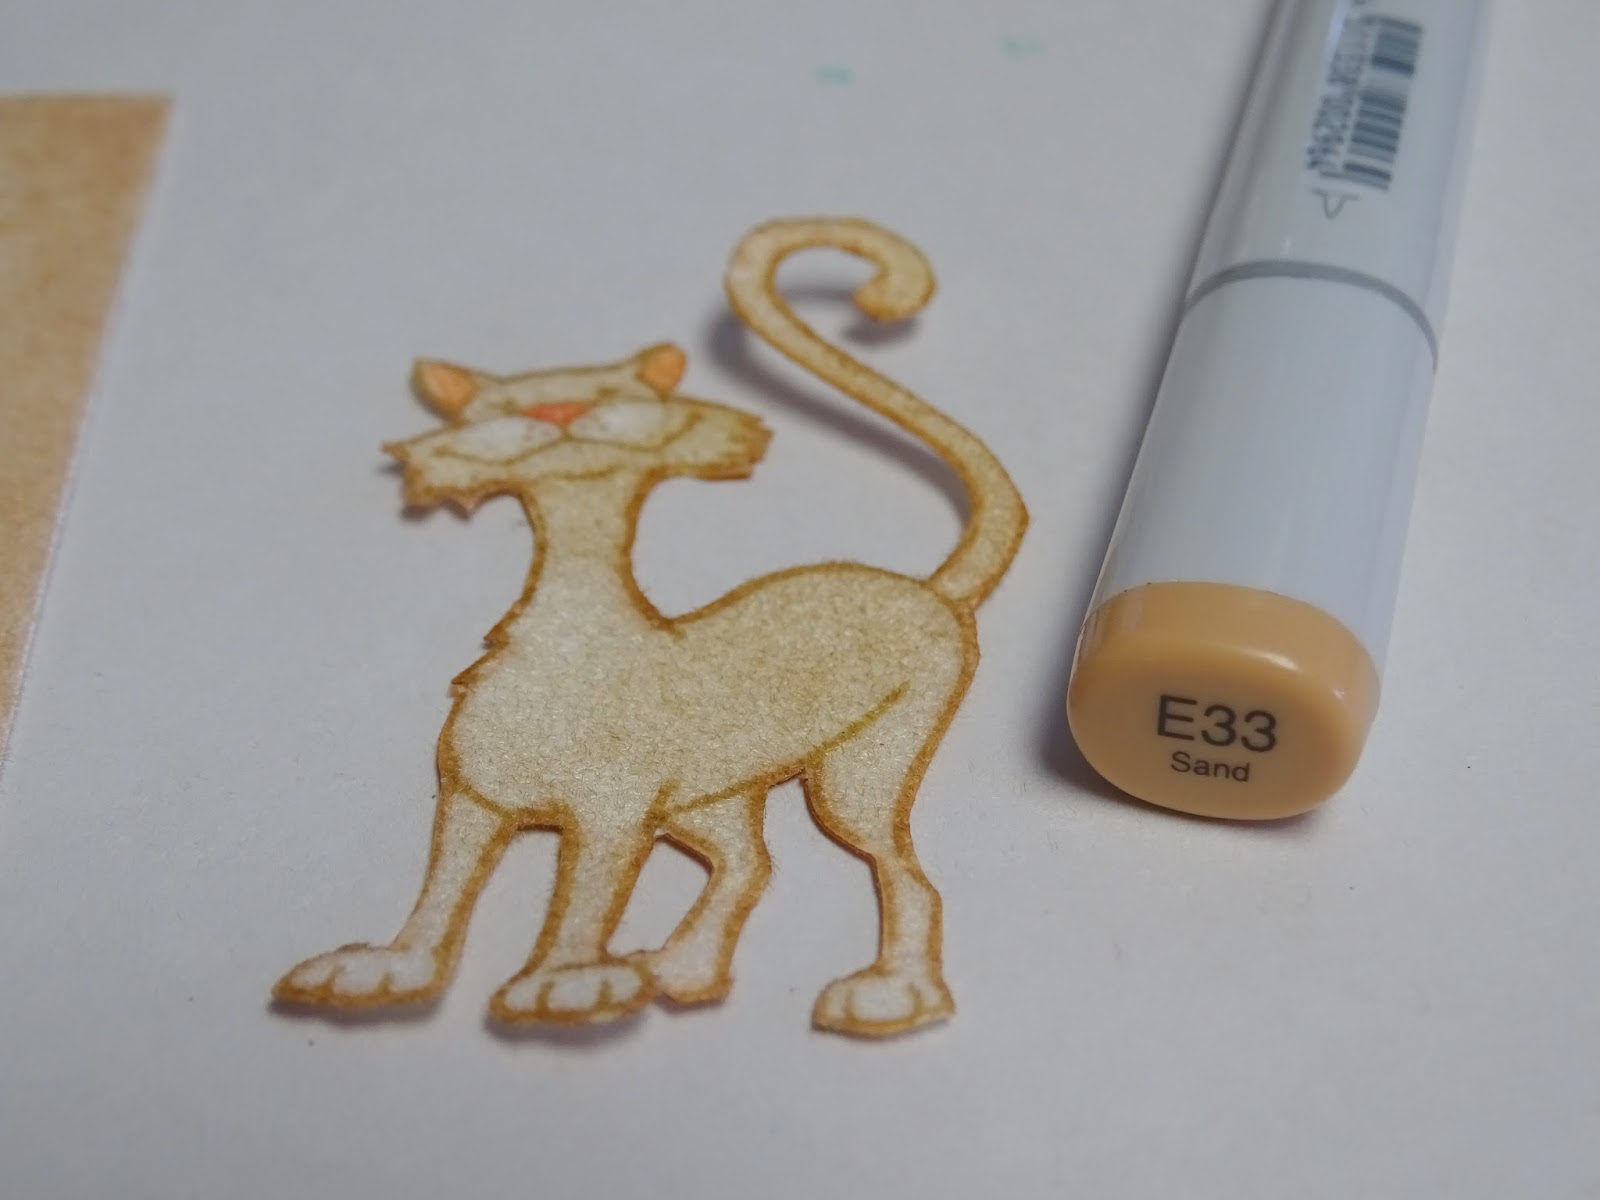
Acorn Brown was then sponged on top of the white flocking and Copic R02 and R22 marker were used to color the ears and nose. Just touch the flocking with the side of the Copic to color. The little cat was then fussy cut with Tonic Mini 5" scissors.


I then went around the outline with Copic E33 to reinstate the outline where it may have been cut into.

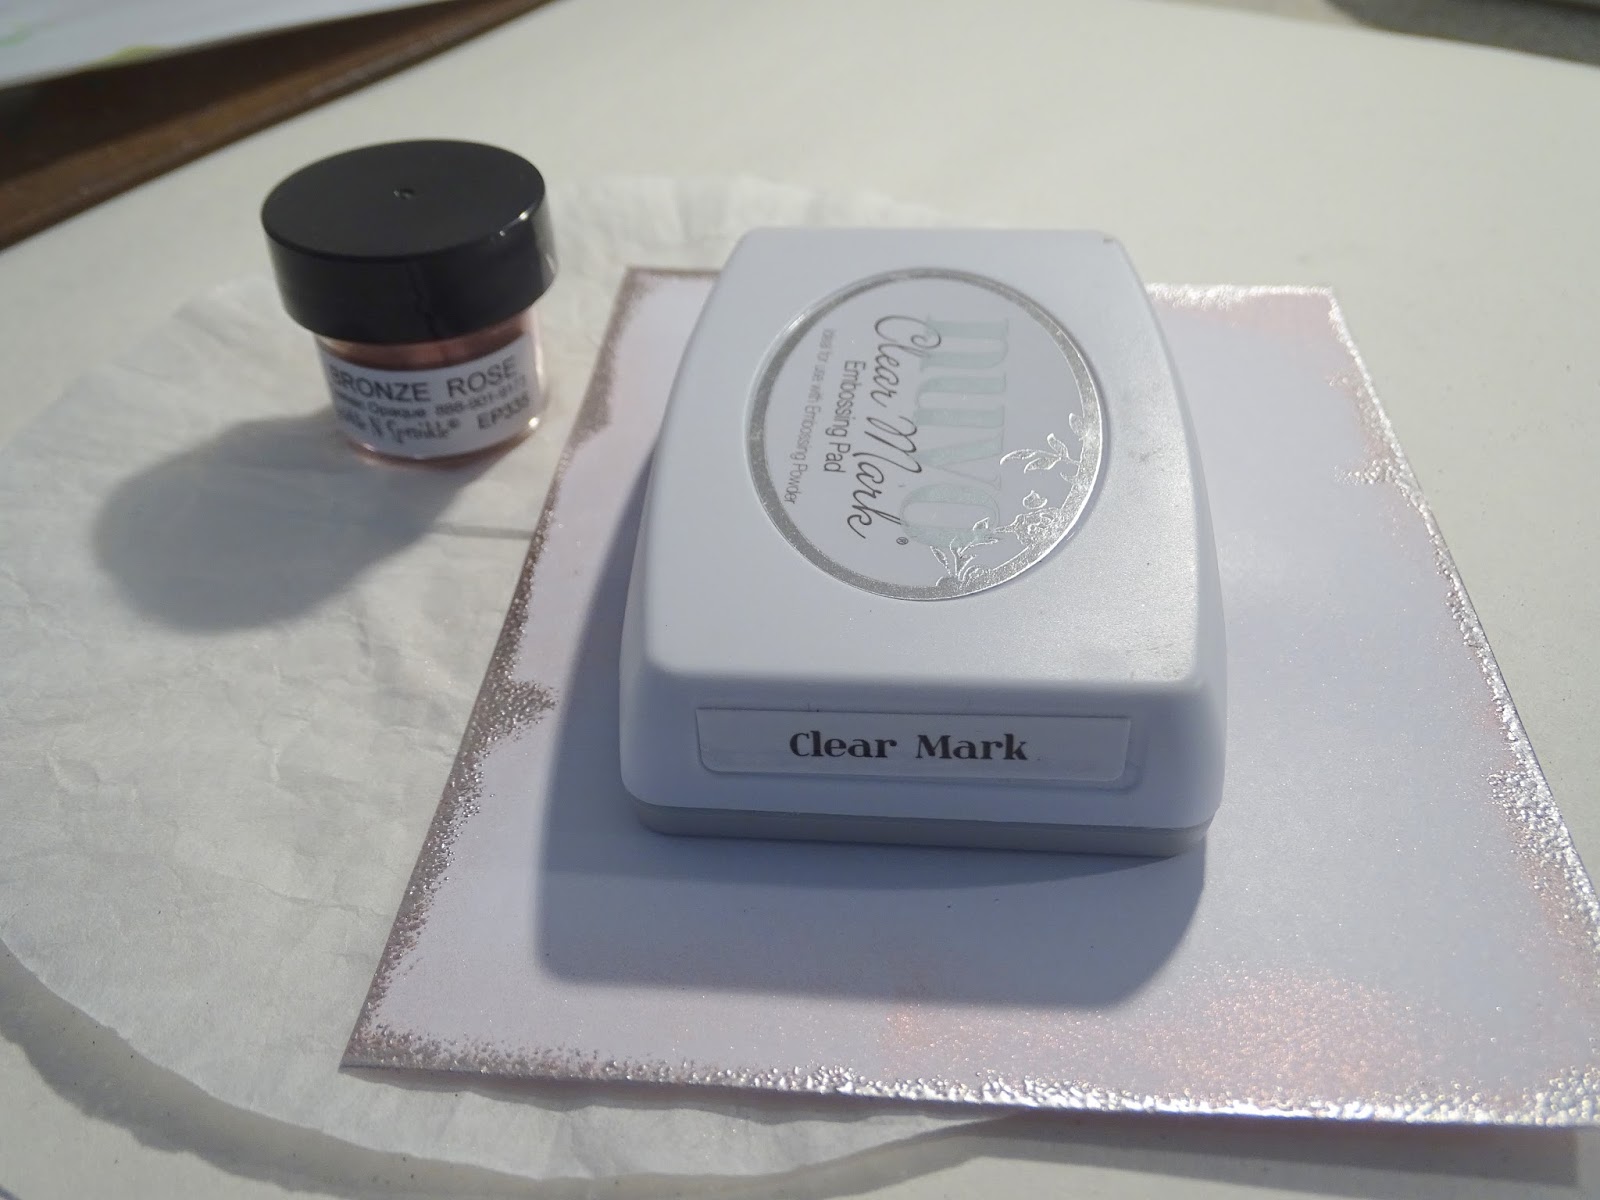
The white card base was edged with Nuvo Clear Mark ink and then heat embossed with Bronze Rose. Three heart shaped brads were dipped in Versamark and also heat embossed with the Bronze Rose.

The heart brads were placed on the card front and the panel was layered on to the edged card base. The little cat was popped up on the front with mounting tape and that finished off my project for the day. Here you can see the detail of the Bronze Rose embossing powder and the soft fuzziness of the Buff flocking.


Hope you've enjoyed my share. Below you will find links over at the store for most of the products that I used today:

Spellbinders Classic Scalloped Hearts
Copics

I'd like to join in the following challenges with my card:
2 Crafty Critters Crazies #9: Anything Goes with a Critter

Thanks for stopping by today. Hope you'll come back soon. Till then, warm, fuzzy hugs from a rather chilly New Jersey,

Shona

Thursday, November 23, 2017

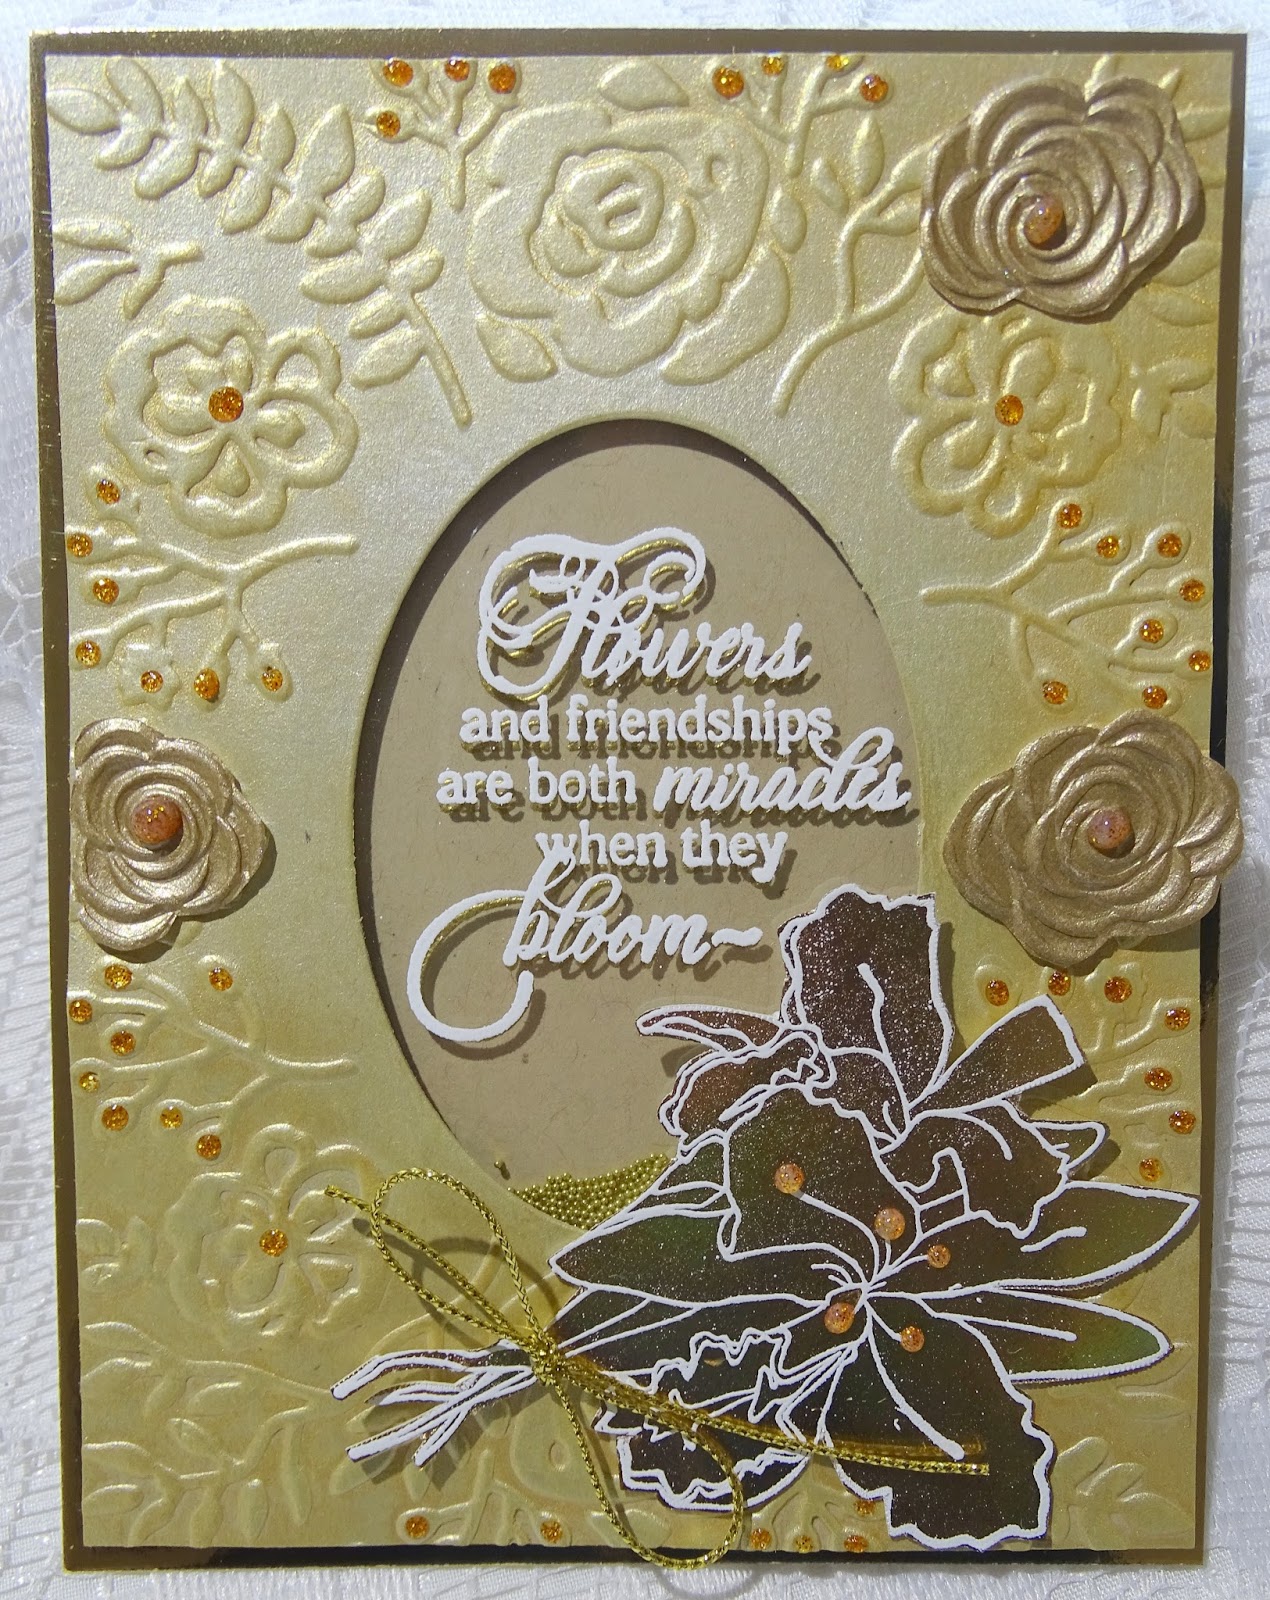
Golden Orchid Shaker

Happy Thanksgiving everyone!  Hope you are having a wonderful day, with lots of yummy food and warm friendships!

Today I'd like to share with you a shaker card created using the new Botanical Orchid Flowers Set 874 from the November Reveal.


I began by making the background using the Sizzix Impresslits 661955, which actually is an embossing folder with an oval die cut incorporated in the middle. I ran a piece of Kraft cardstock through the machine and then using a jumbo dauber I sponged Mother of Pearl and Indian Gold embellishment mousse over the embossed pattern.


I then used the Tonic Stamping Platform to stamp my sentiment that was to be the focal point of my shaker. First I swiped my Kraft cardstock with the anti-static bag and then the sentiment was stamped with Nuvo Clear Mark and then heat embossed with Gold Detail.


This step was repeated stamping Nuvo Clear Mark ink on Embossable Acetate (remember to use the anti-static bag) and this time I embossed with White Detail embossing powder. The embossed acetate was attached to the back of the card front. I then placed mounting tape on the back of the front panel and poured some beads on top of the gold embossing and offset the white embossing on top of the gold. This card front was then layered to a gold mirror card base.


The orchid was stamped onto the Tonic Craft Perfect Harvest Gold Mirror Card with Versamark and then heat set with White Detail. I then fussy cut the flower with my Tonic 5" mini scissors. This was then attached to the card front with tape and mounting tape with a little gold thread bow around the stems.


Three "flowers" were fussy cut from the Warm Dahlia Specialty Paper  and attached with mounting tape. Nuvo Glitter Drops Golden Sunset were applied to the card front to finish of this project.


Here is a list of the products used in my project today, most of which which can be found on the Sparkle N Sprinkle website.

Sizzix Impresslits 661955
Gold Beads
Mounting Tape

I'd like to join in the following challenges with my card:
Classic Design Team Challenge #19: Anything Goes
World Wide Open Design Team Challenge #28: Anything Goes
Crafty Creations #355: Anything Goes
Crafty Friends Challenge #71: Add a Sentiment

Thanks so much for stopping by!

Warm hugs,

Shona


Thursday, July 6, 2017

Lovely You!

Hi there, 
Today I'd like to share another card with you using the Swallowtail Butterflies Set 856.
I had received this background die (Spellbinders Contemporary Diamonds) in a surprise package and was wondering what to do with it, so decided to use some of the Sparkle N Sprinkle Velvet Glitters along with the inlay technique.
I layered a piece of Super Adhesive Sheet on a piece of white cardstock. I then put the cutting edge of the die down on top of the SAS. This has the machine use the die to cut into the adhesive but not all the way through the cardstock underneath. I removed the outline of the pattern. The die was then run through again on top of a blue piece of cardstock. I removed the "blue area" of protective backing and placed the blue die cut piece in its place.
There was another smaller die to the set and I cut that out from the inside of the square.
I then removed the protective backing of a few pieces of the die and added Jasper Blue Velvet Glitter. Ballerina was then added to other areas.
 Dogwood and Hyacinth glitter were then added in the same manner.
 A piece of Embossable Acetate was added to the back of the card front where the little window is and then a little "well" was made using Mounting Tape. Royal Purple and Fucshia Crushed Glass were put into the well before being covered over with cardstock. 
The protective backing was removed from the top portion of the card front and a little of both of the Crushed Glasses were sprinkled on before Cloud Nine Velvet Glitter was added to the remaining sticky adhesive. Cloud Nine was also added to the base section of the card.
The sentiment was stamped in Memento Danube Blue directly on top of the Cloud Nine at the base of the card. The card front was then layered to a piece of blue card stock with mounting tape as the window was up from the base. This was then layered to a white card base.
The butterfly was a left over piece from my butterfly card earlier this month. It was stamped in Versamark on Embossable Acetate and heat embossed with Cerulean. After being fussy cut with the 5" Tonic Mini Scissors, it was attached to the front with mounting tape.
Here is a list of the SNS products used:
Cerulean Embossing Powder
Versamark, Memento Danube Blue
Velvet Glitters: Cloud Nine (GM2000), Ballerina (GM2024), Hyacinth (GM2028), Jasper Blue (GM2012), Dogwood Rose (GM2021)
Fuchsia and Royal Purple Crushed Glass Glitter


I'd like to enter my card in the following challenges:
Cardz 4 Galz Challenge 51: Butterflies
World Wide Open Design Team Challenge #23: Anything Goes
Classic Design Team Open Challenge #16: Anything Goes

Hope you've enjoyed my share today. 
Stop by again soon, 
Shona

Wednesday, June 14, 2017

Sparkle N Sprinkle June 1st Reveal

Hi and Welcome to the Sparkle N Sprinkle
 June Reveal Blog Hop!

So excited to be the first on the blog hop today! Hope you enjoy what we have for you this month? I decided to do a little mixed media on my project. You'll hear a little about that later, but first let me give you the details on the blog hop!


We are now revealing our new stamp sets on the 15th of each month.  On the first of the month, a new video kit club will be revealed.

We are continuing to add new product lines, so be on the look out for them.  The newest addition is Hampton Arts.


We have four new rubber stamp sets plus one huge digi bundle being revealed this month.  

The sets are:


(Digital Version DIGI851BG - additional sentiment)
  (Digital Version DIGI854LS - additional sentiments)
(Digital Version DIGI856FS - see below)
(Digital Version DIGI857SG - additional sentiments)

DIGI856FS - Swallowtail Butterflies (includes lots of additional colored images, additional sentiments, and digi paper)


When you purchase the digi versions of any of the SNS rubber sets, you are getting lots of extras that aren't available otherwise.  These extras include additional images and/or sentiments not available with the rubber version, digi papers (in some cases), and a cut file to use with your electronic cutting machines will also be included with all digi images purchased!

You're definitely going to want both the rubber versions as well as the digi versions of all our new releases.

The new sets are 20% off until June 20, 2017.  So once you finish the blog hop, head on over to the New Store and start shopping.

On June 18th, ONE GRAND PRIZE WINNER will be selected from the comments left on the Designers' blogs listed below. Please leave a comment with each Designer in order to be eligible for the Grand Prize.  You never know who the Mystery Designer will be that has the winning comment.

The Grand Prize Winner, which will be announced on the SNS Facebook page and the SNS Blog, will receive ALL of the new rubber stamp sets revealed this month.


The Blog Hop Order this month is:

(*Tip: if you have difficulty with a particular link, try clicking on the Designer's blog title to send you to their Home page.)


We hope you enjoy the New Reveal Blog Hop as much as we do.  Thanks for joining us and remember to comment on each of the Designers' blogs to be eligible for the Grand Prize.  

 Wonder who the Mystery Host will be this month????


Have you checked out the SNS YouTube Channel featuring Demo Donna?  If not, then you are in for a real treat.  Subscribe today to get all the latest Demo Donna tips and techniques!


We are also happy to announce the new and improved SNS Creative Challenge.  It will now be held on Facebook. 

 Search for the Sparkle N Sprinkle Creative Challenge group and ask to join today.  This is a closed group, but we want anyone who wants to participate to join (just trying to keep out spammers 😀).  You can join today!

 The new challenge will begin July 1 and will run from the 1st - 25th of each month.  A SNS image (either rubber or digi) needs to be used.  If you don't have any yet, no worries, there are some Freebies located on the new website.  They are located on the Home page, just scroll down a bit to see them:

The Winner and Top Three will be posted on the last day of each month.  The Winner will receive a $15 Gift Certificate to the new on-line store.  Please review all the Challenge Rules before submitting your photo.

We hope to see you soon in our new Facebook Group!


Hope you're excited to get this Blog Hop on the Road? This set of stamps is just so versatile that I couldn't help but use the Swallowtail Butterfly set #856. Let's face it - who doesn't like butterflies? 

To begin with I made a fun background with the Nuance Powders - sprinkling on a little color here and there, on top on the Watercolor Cardstock then sprinkling with water and adding the different Nuance powders until I was happy with the result.


So then I thought to take a stencil and play with a little mouse Here I am using the Tim Holtz Stencil Speckles stencil with Nuvo Embellishment Mousse Cornflower Blue.


Just applied a little to the top corner with a spatula. 


Using the Misti Stamp Positioner, I stamped on top of the Embossable Acetate to get a good impression and heat embossed with Cerulean. These butterflies and the little butterflies from the same set were all done the same way and fussy cut.


The sentiment from the same set was stamped in Versamark and heat embossed with Cerulean EP421.


It was sponged with Summer Sky and then removed from the die before being applied with Dandelion.


Nuvo Crystal Drops were added different points of all the little butterflies. 


The background was edged with Versamark and heat embossed with Robin's Egg as was the card base. 

I found these little flowers in my stash. After they were situated on the card I then added the Crystal drops to the centers of the flowers.


The butterflies were attached from the back with mounting tape.


Here is a close up of the flower elements, with the Crystal Drops on top!


Hope you've enjoyed my share today? A little mixed media too! 

I'd like to enter my card in the following challenges:

Crafty Girls Creations: Challenge 37: Anything Goes
Simon Says Stamp: Emboss it!
Love to Create: Challenge 12: Anything Creative/Mixed Media
Classic Design Team Open Challenge Blog: Challenge 15: Anything Goes


The next stop on our blog hop is our talented Diane.

Till next time,

Shona

Thursday, November 3, 2016

CANDLED SEASON'S GREETINGS!

Hi there,

If you are looking for the November 1st Sparkle N Sprinkle Release card, please scroll down.

I was playing around with a new fold, which I had seen in a UK stamping magazine last week and realized that the base of the fold was large enough to hold one of those little fake flickering tea lights, so set about to make a Christmas "lantern" with the new Christmas Candles Set 807, one of the new November releases. Here, with the light, you can just see the yellow hue shining through the glitter covered acetate, but it does look pretty awesome in the dark!


So the card base is 12" x 4 1/4", I used a thick cardstock that is textured differently on both sides, not sure who makes it though. This was scored at 1 1/2", 2 1/2", 4" and 8". When it is folded it should look like this:


For my front panel I cut out the Die-Namites Season's Greetings die, I die cut the same die again from the textured side of the cardstock, and put that die cut piece into the negative spot.


A piece of Super Adhesive Sheet was layered to a piece of Embossable Acetate. The protective backing was removed from the Super Adhesive Sheet and stuck to the inside of the card, with the sticky surface facing through the die cut opening.


Sparkling Snow Glitter was burnished in to the exposed adhesive.


The image was stamped in Memento Tuxedo Black and was colored with Copics, using the two reds and the two greens with the tip to tip technique. (This is taking the ink from the tip of the darker Copic onto the lighter color tip).


Once colored and fussy cut, Sparkling Snow was applied to the petals and Green Iris was applied to the leaves with the Nuvo Fine Tip Pen.


Nuvo Crystal Drops Buttermilk was applied to the Mistletoe and Autumn Red was applied to the berries.


For the inside, I took a piece of 3 3/4" x 4" piece of white cardstock and stamped the candles and sentiment from the image and then colored with Copics. Memento Dandelion Yellow was sponged over the piece. This was adhered to the inside of the card. A little fake tea candle can sit in the base.


Here is the side-angle view:


.... and here it is in the dark!!!!


Next year I need to do something like this for Halloween!!!

Hope you've enjoyed my share today.

I'd like to enter my card in the following challenges:
Scrapy Land Challenge #53: Use any type of die that Scrapy Land carries
World Wide Open Design Team #15: Anything Goes (3rd entry)
A Snowflakes Promise Challenge #32: Christmas
The Merry Christmas Challenge #5: Anything Goes
The Christmas Card Challenge #46: Make a Christmas Card

Let me leave you with a sneak peak to my card for next Thursday:


Hope to see you back then!

Big hugs,

Shona