Showing posts with label Vellum. Show all posts

Saturday, February 27, 2021

Turner Syndrome Awareness

 Today I am sharing a card I made specifically for a Challenge that promotes Turner Syndrome Awareness. I first became aware of  Turner Syndrome two years ago when the stamping community, headed up by Lori Kobular, started the Turner Syndrome Awareness Blog Hop. 

Turner Syndrome is a genetic disorder where a female is born missing all or part of her second X chromosome leaving her with life-long medical issues and learning disabilities. This condition occurs one in 2,000 female births worldwide, but is more common among pregnancies that do not survive to full term. That is why Turner Syndrome Females are considered MIRACLES! I hope you will go to Lori's site to learn more!


Here is the mood board for the Challenge:


I started this card a couple of weeks ago and it changed directions several times before it was finished. I had this never before used Stampendous Hydrangea Garden stamp, stencil and die set that I recently came across during a clean-up in my stamping room. Since the Butterfly is also a symbol of TSF, I thought this set was the perfect choice!


I began with stamping the hydrangea bloom in my stamping platform with Versafine Clair Nocturne ink. The outline part of the stencil was placed around the bloom and I colored using inkers and some Distress Oxide inks.


This was returned to the stamping positioner and was reinked with Nocturne and then heat embossed with sparkle. The mask part of the stencil was then placed on top of the bloom in the stamping positioner and the leaves were positioned and stamped with the Nocturne ink.


I then placed the leaf mask over the first set of leaves and stamped a second set over to the left.


This was the result, once the masks were removed.


The leaves were then colored using inkers and different green inks, with the bloom and leaf stencils being put in place of areas not to be inked.


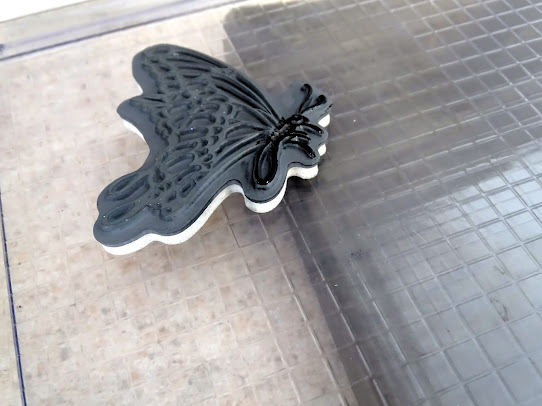
The butterfly was then stamped, colored with Copics and die cut.


I covered the butterfly with Versamark ink and then heat embossed with Clear Detail and then again with Super Thick Clear. This gave the butterfly a beautiful shiny coat!


Back to the hydrangea, Broken China was applied to the background and then misted with water.


I found this a little darker than I had wanted, so I'll deal with that later!!

I covered a piece of pink cardstock with double sided adhesive and cut out a frame with the Tonic Topnote Trellis Layering die.


Lavender Iris glitter was then applied to the sticky surface of the frame when I took of the protective backing.


To tone down main image I decided to cover it with vellum. I attached it with a little Pixie Spray to hold it in place temporarily. I attached the glittered frame to the piece using a flower and brad in each of the four corners.


I placed the finished panel back in the stamp positioner and positioned the butterfly stamp on top of the vellum.


Just the body of the butterfly was then inked:


The glazed butterfly was then placed on top of the body of the butterfly. Now she has legs and antennae again! The card front was layered to pale purple and then on to a white card base.


I searched high and low for a sentiment. As luck would have it another dear stamping friend, Donna Ellis, had recently gifted us a sentiment that we could use on our personal projects and I thought it would be perfect for my card. However I did have to change the size to fit where I wanted it to go. So after adjusting the dimensions on my computer, I printed it out on the same pink cardstock that I had used for the frame. I then die cut the sentiment using the inside die cut of the Tonic die set. 


The sentiment was attached with some mounting foam. Some pink baker's twine was knotted around the spine of the card to finish off my project.


I hope you have enjoyed stopping over today? I also hope that you take the time to go back and check out the Turner Syndrome Awareness Blog Hop. Not are there many fun prizes to be won, but you can also learn much more about these miracle girls!

Below you will find a complete list of all the products that I used in my project today:

Donna Ellis’s sentiment

Stampendous Fran’s Hydrangea Garden Stamp and Stencil Set

Stampendous Fran’s Hydrangea Garden Die Cut Set

Versafine Clair Nocturne ink

Sparkle embossing powder

Distress Oxide Inks:

Worn Lipstick, Wilted Violet, Peeled Paint, Fossilized Amber, Broken China

Versafine Clair inks: Cheerful, Verdant, Shady Lane

Blending Brushes

Vellum

Copics markers: RV02, Y13, YG256, YG13, W-3

Versamark ink

Clear Embossing powder

Super Thick Clear embossing powder

Tonic Topnote Trellis Layering Die Set

Double sided adhesive sheet

Lavender Iris glitter

Flowers

Brads

Pink Baker’s twine

Foam mounting tape


Along with the Turner Syndrome Awareness Challenge I would also like to take part in the following challenges:

Creations in Pink Challenge #31: Anything Goes: Mainly Pink

Take care, until next time!

Shona

Wednesday, June 22, 2016

BLEACHED FRIEND OF MINE

Hi there,

This is a scheduled post today, as I am in Scotland at my son, Struan's graduation and then jumping down to Italy for a week to visit old friends tomorrow. I am sharing a card using the new Wild Rose Stamp Set 785 and sentiment from the Nasturtium 2 Set 783, from the June Reveal.

Bleached Wild Rose

To begin, I stamped the Wild Rose image in the four corners of the black cardstock square in Versamark and heat embossed with White Detail. The leaves and petals were "colored" using an Aqua Pen filled with bleach. The sentiment was stamped in Versamark and heat embossed with Black Detail and I just tore around the saying. I used three copper brads to attach to the center of the front.  Sheer gold ribbon was wrapped around the bottom left corner and was attached to the back of the panel. This was layered to Kraft cardstock, which was pierced.

Bleached Wild Rose

A gold brad was dipped in Versamark and heat embossed with Black Detail. This was then wrapped around a little hand made bow and inserted through the ribbon to the back. The front panel was layered to black and finally to a white base to finish.

Bleached Wild Rose

Hope you've enjoyed this quick share today.

Till next time,

Shona

Wednesday, May 4, 2016

BLACK AND WHITE WITH DIGIS

Hi there,

Today, I want to share another recent attempt with the digi sets from the Sparkle N Sprinkle May reveal. Digi's have always been a challenge for me - as I don't do them often enough to remember how to work with them. Anyway, I persevered and managed to make a couple of masculine cards with the two fishing sets this month: Gone Fishin' Set 778 and Just Go Fishing Set 779.


I thought that the sentiment from the Just Go Fishing Set was perfect for a Father's Day card, so that is what I did with this one!

I printed out the silhouette image on white cardstock. The sentiment was printed on Vellum. I cut the sentiment to a 4 1/4" square and attached it on top of the silhouette image with four tiny black brads. I then trimmed the image down so that it had a 1/4" edge beyond the vellum.

The black and white dotted designer paper was layered to a 5 1/2" x 5 1/2" black card base. The image and sentiment was attached with Dimensional Foam. The Happy Dad's Day sentiment from the Fishin' with Dad Set 501 was stamped in Versamark and then heat embossed with White Detail. It was also attached to the card base with Dimensional Foam. A little black and white baker's twine was added to the left side of the card to finish off the card.


My second card today was pretty much done in the same manner.  I printed out the image from the Gone Fishin' Digi Set 778 on to white cardstock. As soon as it came out of the printer I applied Black Detail embossing powder to the wet ink and then heat set it. This makes the black more vivid behind the vellum.


The image panel was cut down to 4 7/8" x 3 7/8". The vellum panel was cut to 5 3/8" x 4 1/8" - once the vellum was attached to the image panel by the little square brads, the panel was attached to an A2 sized black card base with Dimensional Foam.


Hope you've enjoyed my adventure with fishing and digis today!

I'd like to enter my first card in the following challenges:
Cardz 4 Guys: Challenge 118 - Monochrome
Fantasy Stampers: Challenge 61 - Monochrome

Till next time,

Shona

Friday, February 5, 2016

Vellum Sympathy

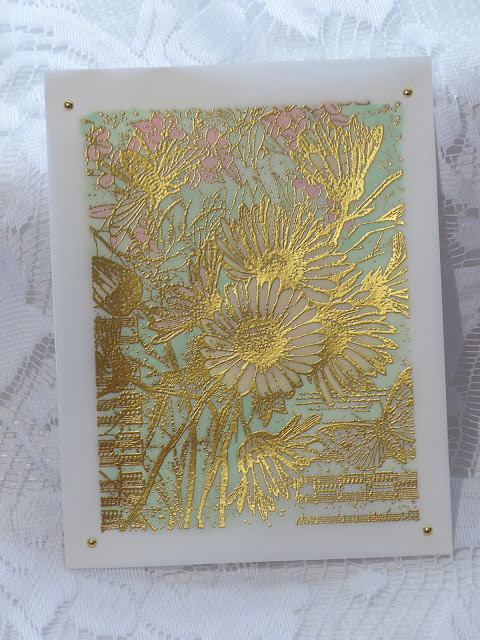
Hi there, today unfortunately, I am sharing yet another Sympathy card. The father of the husband of a dear friend passed away recently and I was figuring out what image to use and found this Technique Junkie Vintage Daisy Collage, which happened to have a bee in it at the top left. The husband is a beekeeper and so I felt moved to use this stamp on my project today.


First of all I stamped it on white cardstock in Versamark, heat embossed with Gold Detail, then colored it in using watercolor paints.


I found it to be too bright for a sympathy card, so how to mute it? I stamped the image again in Versamark and heat embossed with Gold Detail on top of Vellum.


I taped the Vellum version exactly over the top of the colored image and attached them together using four little gold brads in each corner.


Below you can see how the colors show through behind the Vellum.


I stamped the sentiment from the Sparkle N Sprinkle Sympathy Set 579 in Versamark and heat embossed with Black Detail. It was cut and embossed with a Spellbinders Grommet Tag and before removing the die, I daubered lightly over the script with Memento Dandelion ink. I also used Copic Marker R20 to color in the little heart to tie in with the flowers at the top of the image.


I added a little Dimensional Foam behind the sentiment before attaching it to the image with two larger gold brads. The entire piece was then attached to a 5" x 7" black card base with tape. A little gold ribbon was tied in a bow on the left side to finish off my card.


Hope you've liked my share today.

Till next time,

Shona


Wednesday, January 27, 2016

... AND THEY LIVED HAPPILY EVER AFTER!

Hi there, 

Thanks for stopping by! Today I'd like to share an easel card using the new Sparkle N Sprinkle Happily Ever After Set 770 and some Want To Scrap Chipboard.

Arch Wedding Easel

I decided to use vellum for a change and so began with stamping the couple on the vellum with Versamark and heat embossing with White Detail. I then colored the image on the back of the vellum with Copic Markers: E000, E02, E08, E13, E33, R20, V04, YG03 and N4.

Arch Wedding Easel

The base of the easel is 11" x 4 1/4", folded at 5 1/2" and 2 3/4".  I cut the arch with Spellbinders Grand Ovals and Ovals Large - a piece of white card was cut just with the Grand Ovals Die to be the backing for the vellum and arch. The arch was run through the Darice Brick Pattern Embossing Folder, a 4 1/4" x 2 3/4" piece of white card was also run through the same folder for the base of the card. Memento Potter's Clay and Desert Sand were swiped over to color the bricks.

Arch Wedding Easel

The vellum piece was sandwiched between the colored arch and the white arch base and was then taped to the end of the easel base. The 2 3/4" piece of bricked cardstock will be taped to the "inside" of the card after a sheer bow and the flower with brad center are added to the panel.

Arch Wedding Easel

Now onto the embellishments! I stamped the sentiment on white cardstock in Versamark and heat embossed with Sienna (my favorite Tuscany color! These are fine detailed powders that are great for sentiments and detailed images, when you want to use something other than black.) I die cut this with Lawn Fawn Stitched Tags.  This was attached on top of the ribbon with Dimensional Foam and serves as the "stop" for the easel. Another two ribbons were made and were attached with glue dots as shown.

Arch Wedding Easel

Three Prima Flowers were covered in Versamark and heat embossed with Copper Dreams. A silver brad was applied with Versamark and heat embossed with Sienna Star and became the center of the flower.  The Want To Scrap Chipboard word "Love" was applied with Versamark and heat embossed with Copper Dreams to tie in with the flower. This was attached to the card with Dimensional Glue.

Arch Wedding Easel

... and they Lived Happily Ever After!

Hope you've enjoyed my share today.

Warm hugs from a rather snowy (but melting now) New Jersey!

Snow Blizzard 2016 memories - my two younger kids - although 20 and 15 now - still very young at heart!


.... and what about these cool horizontal icicles trying to come in the house?...


Hope you have a wonderful day!

Shona

Wednesday, October 16, 2013

EXTRA, EXTRA, READ ALL ABOUT IT!

A few months back, the designers at Sparkle N Sprinkle were asked to submit cards for consideration to Cardmaker Magazine for a special issue on coloring techniques for cardmaking. I submitted six cards and was thrilled when I heard that they were going to use all of them in this special issue. Several other designers from Sparkle N Sprinkle are also featured in this issue, all using unique techniques. The magazine is full of great coloring tips and ideas, including a very informative section on Copic coloring: 


That's my little fishy card at the top on the front cover, but today I'm going to share another of the two cards with you.

The first one is Happy Bloomin' Birthday:


I ran a piece of vellum and white glossy cardstock through Pure Pleasure embossing folder at the same time. After separating them I applied the chalks with a blender pen to the back of the vellum and stamped the sun on the white glossy.  I taped them temporarily together and ran them through the embossing folder again. The two layers were attached to the peach with the pastel brads, after removing the tape.  The sentiment was heat embossed with Black Detail.

The second card I would like to share with you today was "colored" both with Copics and Flockings. Since making this card, I have learned that you can take it a step further and even color on the flocking with Copics!!  Here is a tutorial on how to do that! This way you can have flocking in every color that you have a Copic. Sorry, I digressed! Back to the card in question:


Isn't that "one cool cat"?  So my coloring technique here was to use flocking. The ribbon was two pieces of white ribbon, colored first with brown ink and then I stuck a strip of 1/4" Tear-ific Tape down the center of each piece.  I applied Amber Wheat flocking to one and Mustard Yellow to the other. Then I taped the two pieces together to make a two-toned ribbon. The frame was die cut and the same flockings were applied with Brushable Glue. The outside edge of the card is also flocked.  Full directions can be found here (or in the magazine!)

So that is my share for you today.  I'll be back in a few days with another couple of the cards.

See you then,

Shona