Showing posts with label Mulberry EP. Show all posts

Thursday, June 29, 2017

Amazing Mom!

Hi there,

Glad you've stopped by. Today I'd like to share another card from the June Reveal using the Baby, Oh Baby Set 875.


I did a little paper-piecing on this project. First I stamped the image on white cardstock with Memento Tuxedo Black and then colored everything but the dress with Copics. She was then fussy cut.


Then I stamped the image again on the designer paper in Versamark, and before heat setting. I brushed off the Black Detail powder from the rose. 
I fussy cut the dress after heat setting and then I covered the entire dress with Versamark and heat set with Clear Detail.
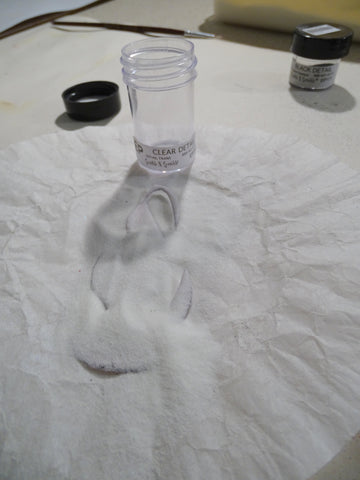
 
Using the new Nuvo Deluxe Adhesive 200n, which comes as a fine point applicator, I attached the dress to the colored image.
After die cutting the Spellbinders Grand Nestabilities Decorative Elements from white cardstock I daubed Nuvo Embellishment Mousse Peony Pink and Lilac Lavender. 
I ran the colored circle through my machine with the Darice Hearts Embossing Folder. This was attached to the designer paper used for the dress and then layered to a white card base.
I trimmed the girl using the decorative die cut at her legs so that she would match the bottom of the circle. I punched a small hole in front and behind her hand for the rose to go through. She was attached with 1/4" Tear-ific Tape at the legs and then her head was attached with Mounting Tape. The sentiment was stamped in Versamark and heat embossed with Mulberry. After cutting out the sentiment, I sponged a little Lulu Lavender around the edges. A white bow was tied around the circle and then the sentiment was attached with Mounting Tape. Nuvo Glitter Drops Sherbert Shimmer were added to the bottom of the sentiment and card base. The same drops were added to the pink of the headband and when this was dried I went in with Nuvo Crystal Drops Ebony Black to add the centers to the flowers. 
Here is a list of the SNS product that was used to make this card:
Stamp Set Baby, Oh Baby #857
Embossing Powders: Black Detail (EP171), Clear Detail (EP280), Mulberry (EP415), 


I'd like to enter my card in the following challenges:
World Wide Open Design Team Challenge #23: Anything Goes
Crafty Girls Creations #37: Anything Goes
Crafty Gals Corner #129: Anything Goes


Hope you enjoyed my share today?
Thanks for stopping by,
Shona

Thursday, March 9, 2017

God Shed His Grace on Thee

Hi there, 
Today, I'd like to share with you a card made using the Patriotic Girlfriends Set 827 from the new March Reveal.
 
To begin with, I stamped the image in the bottom left corner of the 5" x 5" white cardstock in Memento Tuxedo Black. I took a 5" x 5" piece of Super Adhesive Sheet and using a Lifestyle Nesting Circle Die I cut out the bottom corner of the square. This was stuck down on to the top of the cardstock with the stamped image and then lines were cut with an exacto knife lightly through the protective backing but not through the cardstock. Every third strip of protective backing was removed and Pinkerbell Glitter was applied.  
Each strip to the right was then exposed and applied with Cloud Nine. Then Rapture Blue was applied to give us the Red, White and Blue!
The girls were then colored in with Copics. America was stamped on top of the white strip of glitter in Memento Tuxedo Black and then was colored on top of the glitter with Copics.
Next I took a Heidi Swapp Star stencil and stenciled with Nuvo Embellishment Mousses, Blue Cornflower and Peony Pink. This is very fast drying, so I just did some and went back when dry and filled in the spaces.
Now I had both stars and stripes!
I took a 5 1/2" x 5 1/2" piece of corrugated blue cardstock and edged it with the Peony Pink Mousse.
The sentiment from the same set was stamped in Versamark and then heat embossed with Mulberry, this is one of the fine detailed Tuscan powders. It was hand cut into a banner shape and was backed with the same blue used in the base layers. A piece of a skewer was attached to the back of the flag with Tear-ific Tape and then it was attached to the card front with mounting tape.
The entire card front was attached to a base layer of glossy white cardstock to finish off the card.
I'd like to join in the following challenges this week:
Stampavie and more Challenge #282: Stars
Paperminutes #477: Musical Instruments
Classic Design Team Challenge #12: Anything Goes (1st March - 31st March)

Hope you've enjoyed popping by today?
Till next time,
Big hugs,
Shona

Thursday, December 22, 2016

MAY YOUR DAY BLOOM!

Hi there, 

Today I'd like to share my last December 2016 reveal card. I chose to work with the Rustic Flower Set 816.


To begin with, I stamped the jug of flowers in Versamark on Kraft cardstock and then I heat embossed with Sienna. The image was colored  with Copics.


This was then die cut using the Spellbinders Style Nouille Decorative Element, which was sponged with Wild Honey Distress ink before removing the die. I then placed a piece of Super Adhesive Sheet in the center of the reddish purple textured cardstock and removed the backing, the die cut image was centered on the adhesive and then Mystical Mauve was applied to the remaining sticky areas.


I used the Nuvo Fine Tip Glue Pen to add some of the Mystical Mauve Glitter to the purple flowers in the jug.


This tied the jug in nicely with the sparkly border.


The sentiment was stamped in Versamark on Kraft cardstock and then heat embossed with Mulberry, one of the detailed Tuscany colors. This was then die cut with Spellbinders Framed Tags One and was attached with Foam Squares, with one behind the hole which was then sprinkled with the Mystical Mauve Glitter.


I made up a flower from using various Prima flower parts, embossing a little Sienna powder to the larger petals. This was attached to the card front with a copper brad in the center.
Hope you've enjoyed my share today.

Big hugs,

Shona

Thursday, July 23, 2015

THE RIGHT SHOES!

Hi there,

Today I'd like to share with you another card using the Birds of a Feather Set 726. I loved this cool little lady with the high heels and decided to combine the set with the Cinderella Slipper Set 528 for my card today.


I stamped the chick in Versamark and heat embossed with Dragon Fruit. I used the Spellbinders Eyelet Circles die to cut and emboss and daubered a little Memento Lulu Lavender around the image before I removed the die. She was then colored with Copics: V01, RV02, RV04 and V04. A Sakura glue pen was used to apply Lavender Iris Glitter to her wing, tail and tufts. Dimensional Glue was added to her eye and to the heels. A little thread of Diamond Mesh from Mon Ami Gabby was attached for her necklace. She was set aside at this point for the glue to dry.


To make my background I spritzed white cardstock with water and then applied some Violet Color Burst on top of the spritzed cardstock. I dried the cardstock with my heat tool. The Cinderella Slipper was stamped randomly in Versamark and heat embossed with Belgian Cream. I then decided to go over the entire background with Memento Lilac Posies, I rubbed a tissue gently over the entire piece to take any ink off the embossing powder, this really made the shoes pop!


The sentiment from the Cinderella Slipper Set was stamped in Versamark and then heat embossed with Mulberry (one of my favorite detailed Tuscany EPs that I like to use for sentiments!). It was die cut with Lifestyle Crafts Nesting Rectangles, daubered with some more Lulu Lavender.


Three brads were "blinged" with Mulberry and attached to the circle along with some pink adhesive pearls and rhinestones (Want to Scrap Bling). Three white feathers were threaded through holes and attached to the back with tape. The card was finished by layering the background piece to the card based, which had been edged with 1/2" Tear-ific Tape, then some Diamond Mesh from Mon Ami Gabby was added around the sticky edges. There was still some stickiness around the mesh and so I applied Bubble Gum glitter to take care of that! The sentiment and the image were then added with Dimensional Foam to finish up the card.


I hope I have given you some inspiration today to maybe pick up this sweet little chick set. Both of these new sets are such fun and are so versatile, they can be used for many different occasions.

Hope to see you this weekend for our Joint Blog Hop with Die-Versions where we will be featuring Cancer Awareness. 

Thanks for stopping by today,

Shona