Showing posts with label Right Beside You Set 812. Show all posts

Thursday, February 1, 2018

Foxy and Fabulous!

Hi there,

So glad you stopped by today, where I have another card from the SNS January Reveal Sets, this time using the Hello Foxy Set 882 from the January Reveal. I have also incorporated some images from the three silhouette sets: Wetlands 1 Set 790, Wetlands 2 Set 791 and Right Beside You Set 812.


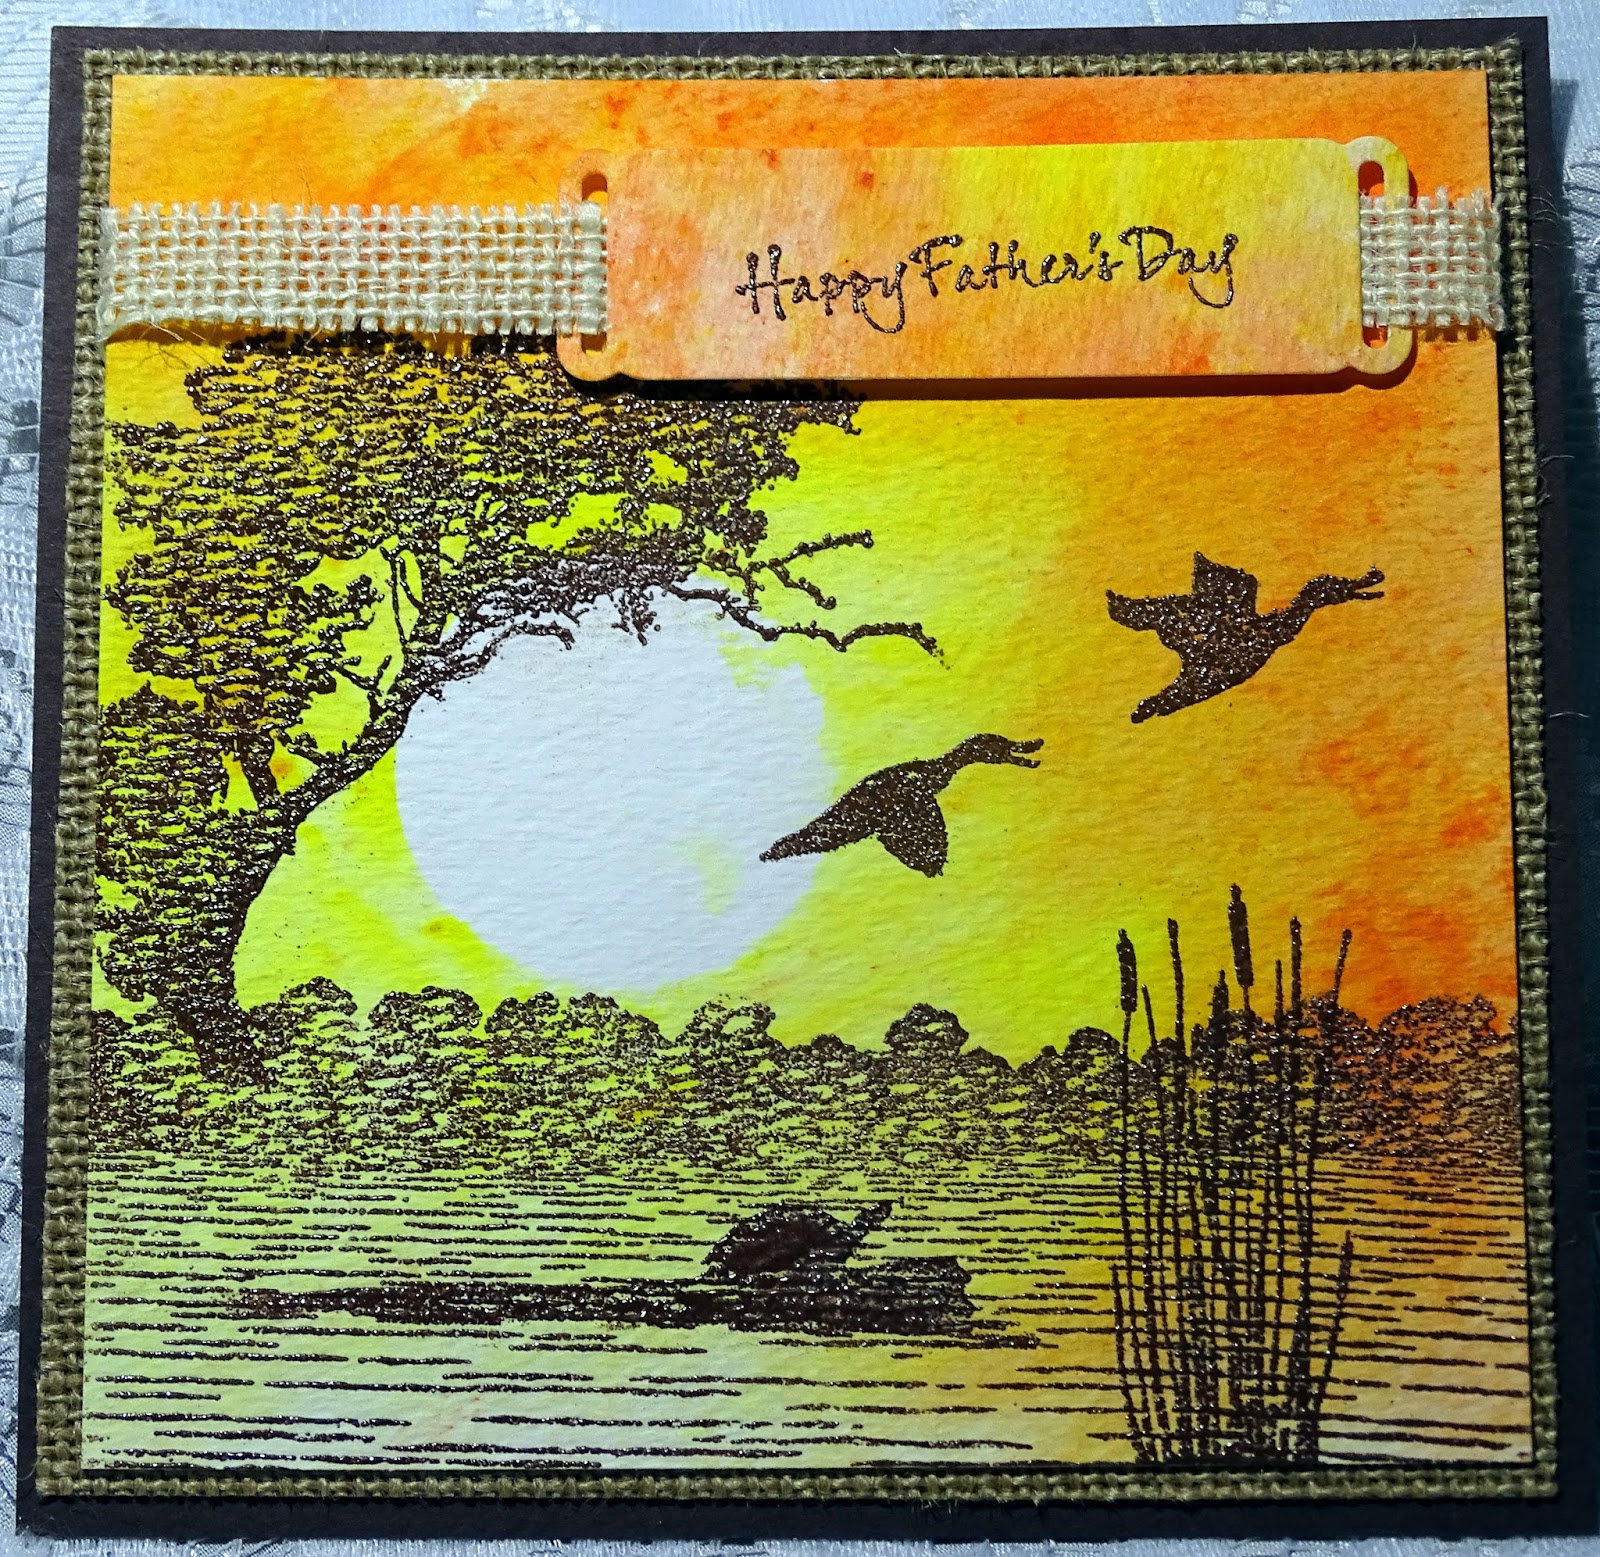
I made my background by sponging Memento inks Summer Sky, Dandelion and Cantaloupe to glossy white cardstock, using the Jumbo Daubers. Once the ink was dry, I applied the anti-static bag to avoid getting any embossing powder specks where I didn't want them, and the background images were positioned in the Stamping Platform (this way the scene was created and stamped in a oner!). They were inked with Nuvo Clear Mark and were then heat embossed with Black Detail.


I went back and added another of the grasses and then trimmed the panel in the Tonic Guillotine.


Mr. Fox was stamped in Acorn Brown ink on Kraft paper and was colored with the Copics. After he was colored, he was fussy cut using the Tonic 5" Mini Scissors and then Snow White flocking was applied to his tail, ears and chest with Brushable Glue.


Here you can see the fuzziness of the flocking. Nuvo Crystal Drops Morning Dew was also applied to his eyes and nose.


A scrap strip of Super Adhesive Sheet was attached to piece of white cardstock and then run through the Tangerine with a couple of the Tonic Layered Clouds dies. The protective backing was removed and Twinkling Clouds Sparkle N Soft was applied to the exposed adhesive.


The sentiment was stamped in Nuvo Clear Mark and was heat embossed with the detailed embossing powder Sienna. I ran a copic marker around the Spellbinders Framed One Tags. This was attached by a brad over the bird, so that it could move. The panel was layered to glossy white and then to a black card base. The fox and cloud were attached with Wobbles, to finish off my moving parts card today.


Listed below are the products I used to make my card. Click on the product to go directly to the Sparkle N Sprinkle website.

Black Detail EP (EP171)
Wobbles
Jumbo Daubers
Tonic Layered Clouds dies
Copics
Memento Inks
Spellbinders Framed One Tags
Blue Brad

I'd like to play along in the following challenges with my card:
Crafty Gals Corner Challenge #158: Anything Goes
Crafty Creations Challenge #359: Anything Goes
Inspiration Destination Challenge Blog #143: Anything Goes
Crafty Sentiments Design Challenge Blog: Anything Goes
2 Crafty Critter Crazies Challenge #11: Include a critter

Hope you've enjoyed my share today,

Warm hugs,

Shona


Thursday, October 26, 2017

Farm Sunset

Hi there,

Glad you stopped by today! I'd like to share a quick card that I made using some stamps from four different Sparkle N Sprinkle Sets and three of the Nuvo Embellishment Mousses.


This card is a breeze to make if you have the new Tonic Stamp Platform! First wipe the cardstock thoroughly with the Anti-static bag, this is important when using embossing powders. You don't want any stray flakes of the powder on your project. Then simply take your stamps and position them face down on to your cardstock in the platform. Here I used the cow image from the October Reveal set Farm Fresh - Cows Set #2 (878), the tree image is from the Right Beside You Set 812 and the birds are from Wetlands #2 Set 791.


I inked up the stamps with the Nuvo Clear Mark pad, I did it in the platform and this gets them all stamped evenly with the embossing ink in one go.


The card was removed from the platform and applied with Black Detail and heat embossed.


Now on to the background. This could have been done first and then stamped on top, after making sure the mousse was completely dry (it does dry quickly) and then applying the anti static bag over the background. I felt it was easier to do it this way. The mousse can be wiped off the images easily with a tissue. I covered the entire piece with Nuvo Embellishment Mousse Lemon Sorbet.  As you can see from the photo below I like to use the big jumbo daubers to do my mousse backgrounds, but the dual tipped blender brushes can also be used.


I then applied Orange Blush and Indian Gold to achieve my sunset look.


For my sentiment (from Farm Fresh - Tractor Set 877),  I just decided to stamp directly on the scene instead of using a die cut. So after the mousse was completely dry, I applied my Static Free bag again and then put the scene back in the platform. The sentiment was inked with the Clear Mark ink again and then heat embossed in black.


So to finish off my card I layered the scene on to black and tied a little knot in a piece of raffia (thought it looked like straw) and wrapped it around the back. I then layered the cardfront to a piece of leftover textured wallpaper, that was layered on to a Kraft card base.


Here is a list of the products used in my card:

Tonic Stamp Platform


Hope you've enjoyed your visit to my farm today.

I'd like to play along in the following Challenges:

Hugs,

Shona

Thursday, May 25, 2017

Scenic Masculine Silhouette Card

Hi there,

Today I'd like to share a card with you using some of the older sets from Sparkle N Sprinkle - in fact three! Right Beside You Set 812,  Wetlands 1 Set 790Wetlands 2 Set 791, along with some of the Nuvo Embellishment Mousses.
To begin with, I set up my scene on my stamping platform. You can also use the Tim Holtz Stamping Platform.
I stamped the entire scene in Versamark onto  a piece of Watercolor cardstock  5 1/2" x 5 1/2". It was then heat embossed with Cerulean. I used different elements from the three stamp sets, to make up my scene.  
Next I just took the Nuvo Embellishment MoussesCornflower BluePeony Pink and Indian Gold with my water brush filled with water and painted them over the scene, blending them in to one another as I went. The embossing powder resisted the paint for the most part and I used a paper towel to take of any puddling on top of the embossing powder. 
Then I looked at my scene and saw that two of my ducks were flying upside down!! So how to remedy that little scenario? Let's cover them up with some sentiments!
I stamped the sentiments in Versamark and heat embossed with Cerulean on the watercolor cardstock. They were fussy cut into banners and a little blue background was added to each of them and then they were popped up on mounting tape. Now I had three normal ducks!
This was layered to a piece of blue cardstock and then to the white card base. Here is the version I did for my Dad (with all the ducks in the the correct direction). I think this would also work well as a Father's Day card. It goes together quickly too!


Here is a list of products used in this project:
Embossing Powders: Cerulean (EP421)
Hope you liked my share today? Thanks for stopping by today,
Shona

Saturday, December 31, 2016

SPARKLE N SPRINKLE'S JANUARY 1ST REVEAL

HAPPY NEW YEAR EVERYONE!!!!! and .....

Welcome to Sparkle N Sprinkle's
 January 1, 2017 New Reveal Blog Hop!

We're starting the New Year off with a BANG! We have a huge reveal to share with you - our largest ever! Can you guess which set I used? It's a trick question!


 There are TEN new stamp sets (one is a digi-only set) being released this month!  These new sets are 20% off until January 3, 2017.  So once you finish the blog hop, head on over to the store and start shopping.  

The sets are:

Right Beside You 812  (digi version DIGI812)
Milton Friendly Giraffe 817  (digi version DIGI817)
Cattleya Orchid Friendship 818  (digi version DIGI818)

Easter Chicky 820  (digi version DIGI820)
Party #1 821  (digi version DIGI821)
Party #2 822  (digi version DIGI822)

Eggs-traordinary Kindness 825  (digi version DIGI825)

Emily Showers of Love 831   (digi version DIGI831)

On Jan 3rd, ONE GRAND PRIZE WINNER will be selected from the comments left on the Designers' blogs listed below. Please leave a comment with each Designer in order to be eligible for the Grand Prize.  You never know who the Mystery Designer will be that has the winning comment.

The Grand Prize Winner, which will be announced on the SNS Facebook page and on the SNS Blog, will receive ALL of the new stamp sets released this month (or the digi versions, if preferred).

The Blog Hop order this month is:


(*Tip: if you have difficulty with a particular link, try clicking on the Designer's blog title to send you to their Home page.)


We hope you enjoy the New Reveal Blog Hop as much as we do.  Thanks for joining us and remember to comment on each of the Designers' blogs to be eligible for the Grand Prize.  
 Wonder who the Mystery Host will be this month????


The Sparkle N Sprinkle Creative Challenge also begins today.  There are lots of prizes and recognition badges.  Come check out how you can become a SNS Featured Artist as well.  The theme is always Anything Goes using Loose Glitter, Embossing Powder, and/or Flock.


Have you checked out the SNS YouTube Channel featuring Demo Donna?  If not, then you are in for a real treat.  Subscribe today to get all the latest Demo Donna tips and techniques!


So did you find the hidden stamp? It was the big tree from the Right Beside You Set. You know how I love my silhouette stamps and this is no exception! I actually started out trying to create a Safari scene using the silhouette tree and Milton the Friendly Giraffe, but the styles were too different and the sizing didn't work either (another reason to use digi versions). So I began with making my background on watercolor cardstock, three of the Nuance Powder colors and the mini mister. I punched a circle from a Post-It Note to use as a mask for the sun.


I sped up the drying process with my heat tool. The tree from the new reveal set was stamped first in Versamark, leaving off the bottom of the image so that it would blend into the back of the bushes. All the images were heat embossed with Teddy Brown.


The bushes and water were from the Wetlands 1 set and the turtle, grasses and birds were from the Wetlands 2 set.


For the turtle stamp, I went over the turtle with my Versamarker Pen and added more Teddy Brown and heat embossed to fill him in a bit more and give him more dimension.


The sentiment from the Wetlands 2 set was also stamped in Versamark  and heat embossed with Teddy Brown, it really is a lovely detailed powder. I die cut with the Spellbinders Ribbons Tags Trio and threaded a little piece of canvas ribbon through the slits. I put some Foam Squares behind it for dimension. 


The card front was layered to burlap paper and then layered to a dark brown base to finish.


I'm the last on the hop this month. Have you commented on all the other Designers' projects? Some lucky winner will receive all ten of these fabulous new sets. You know that someone has to win!!! ...... and it could be you! What a great start to 2017 that would be, don't you think?

I'd like to join in the challenge over at the World Wide Open Design Team # 17: Anything Goes

May I wish you all a very happy and healthy 2017.

Big hugs,

Shona