Showing posts with label Tonic Mini Scissors. Show all posts

Thursday, March 1, 2018

Balloon Birthday Wishes

Hi there,

Thanks for stopping by today. I'd like to share another February Reveal card using the fun Balloon Bunch Stamp Set 887.


When I saw this set I knew that I was going to use it along with the Sizzix Balloon Step Up die. Sparkle N Sprinkle recently brought out some fabulous new colors in microfine glitters, a few of them were purplish hues, Hyacinth, Caspia Sea, and Purple Fig, so I decided to go with a pink and purple theme. I began by cutting out the card base with my Tangerine and stamping the balloon image twice with StazOn Black, using the Tonic Stamp Platform, so that I could overstamp to ensure a crisp image.


I made a little paint palette with an acrylic block and a couple of Aqua Flow Pens and used a Water Brush to color in my balloons. I fussy cut the balloons using my Tonic 5" mini scissors.


Using the Versamarker Pen I "colored" the background balloons and then covered them with Clear Detail embossing powder. This was then heat embossed. I then applied the Versamark ink again to a couple of the balloons and this time heat embossed with Super Thick Clear, from the bottom. This gave the balloons all different looks.


A scrap of Super Adhesive Sheet was layered to a scrap of white cardstock and then I applied Cloud Nine to the sticky surface after removing the protective backing. The balloon image was stamped directly on top of the glittered surface with StazOn Black and the front balloon was fussy cut and popped up on top of the other balloons.


Some purple and white bakers twine was attached to the back of the balloons with 1/4" Tear-ific Tape. Scraps of Super Adhesive Sheets were stuck down to scraps of purple cardstock and then run through the Tangerine with the balloon dies from the die set.


The protective layer was removed and then Hyacinth, Caspia Sea, Purple Fig and Cloud Nine were used to color the balloons and their strings.


The happy birthday (also part of the die set) was die cut on the Tangerine from a piece of pale purple cardstock layered with the Super Adhesive Sheet, to which Hyacinth Glitter was applied.


Then it was time to assemble the card. A piece of Super Adhesive sheet was die cut with the front panel die and then the balloons and the sentiment were attached to the sticky surface and then Cloud Nine was applied to the remaining adhesive. This was then attached to the front of the card base, after which I ran purple STA metallic pen around the outside of the white panel.


The other balloons were attached to the card base with mounting tape and a piece of card with Happy Everything was attached to the inside of the card to finish it off.


This finishes my card for today. Here's a side view:


Hope you've enjoyed my share today. Below are the list of products that I used, most of which can be found over on the SNS website:

Memento Grape Jelly
STA Purple Metallic Pen
Mounting Tape
Sizzix 660024 Balloon Step-Ups
Purple Bakers Twine

I'd like to play along in the following challenges:
Crafting with Dragonflies Challenge Blog #98: Special Folds
Crafty Creations Challenge #361: Anything Goes
Scrapy Land Challenge # 84: Anything Goes
City Crafter Challenge Blog Challenge #401: Die Cuts
Allsorts Challenge Blog Week 456: "B": Birthday Balloons
World Wide Open Design Team Challenge #2: anything Goes
Classic Design Team Challenge #23: Anything Goes

Thanks for stopping by!

Shona

Thursday, December 7, 2017

MERRY AND BRIGHT!

Hi there,

This morning I'd like to share a card using the cute Snowman Couple - Christmas Set 872 from the November Reveal.


Isn't this the cutest little couple? I stamped the couple on to white cardstock in Black Memento ink using the Tonic Stamp Platform.


I removed the lid and worked on my coloring, using Copics, while leaving the stamped image on the platform.


This allowed me to come back and apply Nuvo Clear Mark ink onto the stamp and place stamp on top of the colored version and then heat emboss with Clear Detail powder.


This gives a lovely shiny raised outline to your images:


After fussy cutting the snow couple with my Tonic 5" mini snips I applied White Blizzard Glitter Drops to the baubles and the buttons. This was then set aside to dry, while I worked on my card base. I used the Tonic Merry and bright die, running it through my Tangerine. I then daubed the entire card base with Powder Blue embellishment Mousse.


Spellbinders Mega Oval die was used to cut the top out of a piece of the Freshwater Pearls Specialty Papers from Tonic. These are cotton based papers and I had difficulty cutting through them with my Big Shot but the Tangerine went through them like butter! My Cutterpillar also had issues, but the Tonic Guillotine had no problem.


I had some glittery foam self adhesive snowflakes that I had never used so I adhered a few of them around the card front, then popped up my snow couple. I added the Powder Blue Embellishment Mousse to the snowflakes and added some Sparkling Snow Glitter, quickly before it dried, to make the background more monochromatic.


A part of the cut out oval was then turned around and attached to the base of the card as a snow drift, which finished my project for the day. 


Here is a list of the products I used in my project, most of which can be found on the SNS website:

Spellbinders Mega Ovals Dies
Copics: Y17, C1, BG01, B34, B63, RV02, V04, V15

I'd love to join in the following challenges:

World Wide Open Design Team Challenge #28: Anything Goes
Classic Design Team Open Challenge #20: Anything Goes
The Holly and Ivy Christmas Challenge 20: Anything Goes
Tuesday Throwdown #371: Christmas Scene
Always Fun Challenge #35: Snowmen
Christmas Cards All Year 'Round: December Challenge
Sweet Stampin' Christmas November Challenge: Anything Goes
Mod Squad Challenge: What a Flake! (use a snowflake)
Crafty Gals Corner Challenge # 152: Anything Goes
Cards und More #199: Snowmen
Cardz 4 Galz Challenge #62: Show Me a Snowman

Thanks for stopping by today,

Warm hugs,

Shona

Thursday, November 2, 2017

Spot the Cow!

Hi there,

Glad you stopped by today. My post today is "spot the cow"! I incorporated two of the new October Reveal sets and an older Set to make my farm scene today.


I incorporated one of the older sets into this design today - the Farm Sweet Farm Set 652. I love this beautiful barn image which I decided needed a sort of aged look - so I stamped the image in Black StazOn using my Tonic Stamp Platform and would then color with Copics. This would give a look of weathered paneling on the barn, as the StazOn will mix with the Copics. The image was restamped as you can see on the photo below it didn't cover all the image. When you have a big image like this the platform really comes in useful. Rather than throwing out several copies until you get it right, you just need to reink in the same place!


The tractor from Farm Fresh Tractor Set 877 and the milk urns from Farm Fresh Set 878 were stamped in Memento Black ink to be colored with Copics. The tractor and milk urns were colored in Copics and then fussy cut with the Tonic 5" Mini Scissors - could not craft without these anymore!!


The picket fence is Kraft cardstock cut with a Martha Stewart punch. This was sponged with Seaspray Green Embellishment Mousse. 


The barn was then given a background with Memento Summer Sky and Olive Grove inks and the picket fence put in place.


There was a gap on the left side I thought after assembly. So the milk urns were removed from the picture for a bit!


... and a little cow was added! I cut up the group of cows from Farm Fresh Set Cows 877 and masked where it would have to go on the top of the grass. She was stamped with the new Nuvo Acorn Brown ink. 


The sentiment from the Farm Fresh Tractors Set 877 was stamped in the top left hand corner in the Nuvo Clear Mark ink before being heat embossed with Sienna (fine detail embossing powder and rustic).


By placing this on the Tonic Stamp Platform you can use the grid to get it straight the first time and not mess your project up!!!


The cardfront was layered to a piece of burlap and then Kraft cardstock, for a fun rustic look! The tractor and the replaced milk urns were attached with mounting tape to finish off the card.


Hope you've enjoyed your visit to the farm today? Here are the products that were used on my card today, most of which can be found on the SNS website:

Farm Sweet Farm Set 652
Sienna Embossing Powder (EP413)
Memento Summer Sky, Olive Grove
Copics:YR21, YR24, YG11, YG67, G94,
C3, C5, W7, R37
Martha Stewart Picket Fence Punch
Mounting Tape

I'd like to play along in the following challenges:
2 Crafty Critters Crazies Challenge #8: Add a critter
World Wide Open Design Teal Challenge #27: Anything Goes
Classic Design Team Challenge #19: Anything Goes

Thanks again for stopping by!

Shona

Wednesday, October 18, 2017

Nature's Elegance

Hi there,

Back again to share with you one of my cards from the awesome October Reveal. Today I am using the beautiful set Lovely as a Leaf Set 869. So appropriate for this time of the year and there are lots of Nuvo products used on this card too.
I began making the background and the leaf embellishments by embossing Tonic Mirror Cardstock Rose Platinum and Harvest Gold with the Darice Foliage embossing folder. I die cut the center out of each background using Sizzix Framelits 661840 Die Set. I fussy cut four of the "gold " center leaves out using my 5" Tonic Mini Scissors. The leaves were used as the embellishments to the Rose Platinum background and then I had the opposite set for another card.
The leaf stamp was stamped with Acorn Brown on white cardstock using the Tonic Stamp Platform.
The lid was removed, and the image was colored with Aquaflow markers, keeping the image in place on the platform.
An acrylic block was used as a paint palette for the markers. The Nuvo Aqua Brush Pen was used as the water brush.
Once the image was dry I applied the Anti Static Bag before applying Nuvo Clear Mark to the stamp again and then returning the lid to the platform the image was stamped over the top of the image and heat embossed with Clear Detail. This gave a nice raised shiny appearance to the leaf.
The same process was done with the sentiment. First Acorn Brown and then Nuvo Clear Mark was heat embossed with Clear Detail.
The leaf image was sponged with Nuvo Embellishment Mousse Lemon Sorbet.
Autumn Frost Velvet Glitter was used to make my ribbon twine. I took a piece of 1/4" Tear-ific Tape and rolled it up and dipped it in the glitter.
This was then used for the little bow for my leaves along with a copper brad.
Three of the leaves were tied into a "bouquet" with a copper brad and then the sentiment was added with mounting tape and the last leaf was added on top with tear-ific tape. The card front was layered to a black card base and some Nuvo Honey Gold Glitter Drops were added to complete the card.
Here is a list of the products used for my card today. These can all be found on the SNS website for sale just by clicking on them:
Tonic Mirror Card: Rose Platinum, Harvest Gold
Nuvo Honey Gold Glitter Drops
Hope you've enjoyed my share today!

I'd like to play along in the following challenges:
Double D Challenges: "Leave: it to me
Crafty Sentiments Designs: Leaves Challenge
Ike's World Challenges #99: AG + Autumn
The Crafty Addicts Challenge Blog #41: Autumn Colors
Dies R Us Challenge Blog #83: Leaves
See you next week,
Hugs,
Shona

Thursday, September 14, 2017

Sparkle N Sprinkle's September Reveal

Welcome to the September 
Sparkle N Sprinkle New Reveal Blog Hop! 

Today I went with the cute little Birdhouse Friends Set 852 and paired it with a pup from one of the old SNS sets Dogs Sharpei Set 229. I needed a pal for the birds behind my wrought iron fence and he fitted in nicely! 


The Blog Hop is on the 15th of each month.  On the 1st of each month, SNS will release a new Video Kit Club.

SNS is always adding new products and new product lines to the store. So stop by often to see what's new!

We are pleased to reveal the following new stamp sets this month. The sets are:


Birdhouse Friends 852
(Digital Version DIGI852BG)

Lovely Magnolia 853  
(Digital Version DIGI853FS - see below)

A Puppy's Halloween 863
(Digital Version DIGI863FS)

Victorian Camille at Christmas 864

(Digital Version DIGI864LS)


DIGI853FS - Lovely Magnolia huge digi bundle (lots of extras not included in the rubber version.)

You are definitely going to want both the digi version as well as the rubber version because when you purchase the digital versions, there are lots of extras that aren't available otherwise.  These extras can include additional images, additional sentiments, digi papers (in some cases), and a cut file.

The new sets are 20% off until the 20th of the month.  Head on over to the SNS store once you've finished the Blog Hop and start shopping.

One GRAND PRIZE WINNER will be announced on the 17th of the month.  One of the Designers is our Mystery Host and the winner will be selected from comments left on her blog.  You must leave a comment on each of the Designers' blogs in order to be selected as the winner, as you never know who the Mystery Host will be.  This is checked for compliance.

The GRAND PRIZE WINNER will be announced on the SNS Facebook page and on the SNS Blog and will receive all the rubber stamp sets revealed this month.

The Blog Hop order is:
(Tip: if you have difficulty with a particular link, try clicking on the Designer's blog title to be directed to their Home page.)

Belinda
Anne
Chris
Jess
Diane
Shona
Eret


Did you know that SNS has a You-Tube Channel?  If not, then you are in for a real treat.  Subscribe today to get all the latest tips and techniques!


The Sparkle N Sprinkle Creative Challenge group is on Facebook.  
This is a closed group (just trying to keep out spammers), but we want anyone who to participate to join.  Click on the link and join in on the fun today!

The Creative Challenges run from the 1st - 25th of each month.  A SNS image (either rubber or digi) is required.  If you don't have any yet - no worries - there are some freebies located on the Home page of the SNS website.  Just scroll down the page a bit to see them.

The Creative Challenge Winner and Top Three will be posted on the last day of each month.  The winner will receive a $15 Gift Certificate to go shopping at the SNS store.

Please review all the Challenge Rules before submitting your photo 😀.  We can't wait to see what all you create using SNS images.

We hope you enjoy the New Reveal Blog Hop as much as we enjoy creating new projects for it.  Be sure to visit the SNS Blog for even more inspiration.  Something new is posted most every day.

Happy Hopping!
~~~~~~~~~~~~~~~~~~~~~~~~~~~~~~~~~~~~~~~~
This was one of those cards that just kept changing along the way! Does this ever happen to you? Oh, I could add that - oh, and that would make it better!!! Anyway, I started out with stamping the Birdhouse image on cream cardstock in Black StazOn, as I wanted to color the image with my new Aquaflow Pens, these are the new Tonic watercolor pens that are so fun to work with. I love the colors they have and they really blend nicely.


After it was colored in I intended using the new Tonic Pretty Piazza Window Box Set (for which you can also get an accessory set with it, which puts slits where you need them for the tabs on the fencing. But I realized 1: I had stamped the image too high up on the page and it would look stupid having the birdhouse appear like it was in the sky and 2: If I used the entire fencing it would cover up most of the image. So I improvised and used just the fencing part and not the two outline pieces of the fence and then cut the left hand side one short so that it worked with a regular sized card 4 1/4" x 5 1/2".


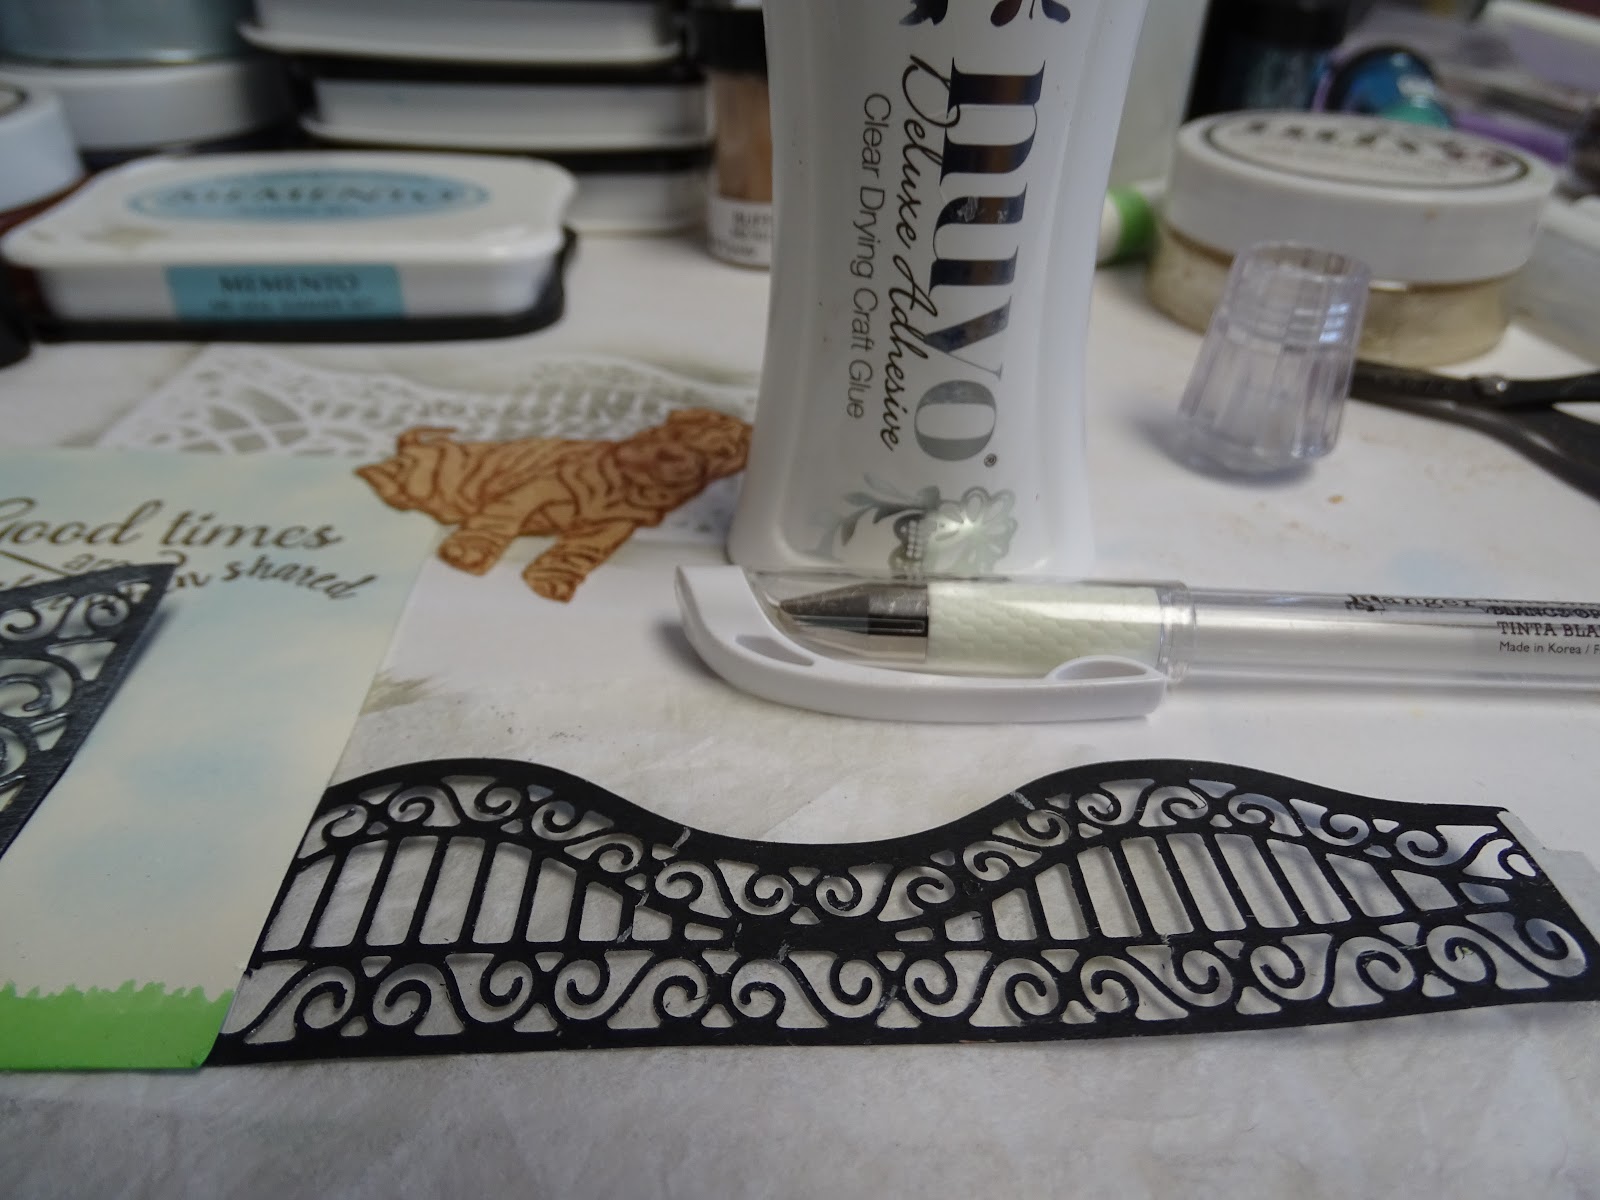
The ornate pieces do not have tabs. First after die cutting the two pieces in black cardstock I daubed them with Nuvo Mother of Pearl Embellishment Mousse, to give them a wrought iron look.


I cut the cream card down to 4" x 5, and put in the slit (on the right) using the Window Box Slit Die Set. I attached a piece of black cardstock to the bigger piece of fencing - on both edges. One would be wrapped around the cream cardstock and the other would serve as a tab on the right side, see below, which would go through the die cut slit. The shorter fence was just wrapped around the back of the cream cardstock, as it would have been too long to leave it complete and a little tab was also added to the end of that one, so it fit into the slit in the die cut of the larger piece of fencing..


I placed the fencing as they would be when set up, then put it on to my Tonic Stamping Platform, so that I would get the right placement for the sentiment. Then I laid the fences flat again before stamping the sentiment in Versamark and heat setting with Platinum.


Love the detail and shine in this embossing powder:


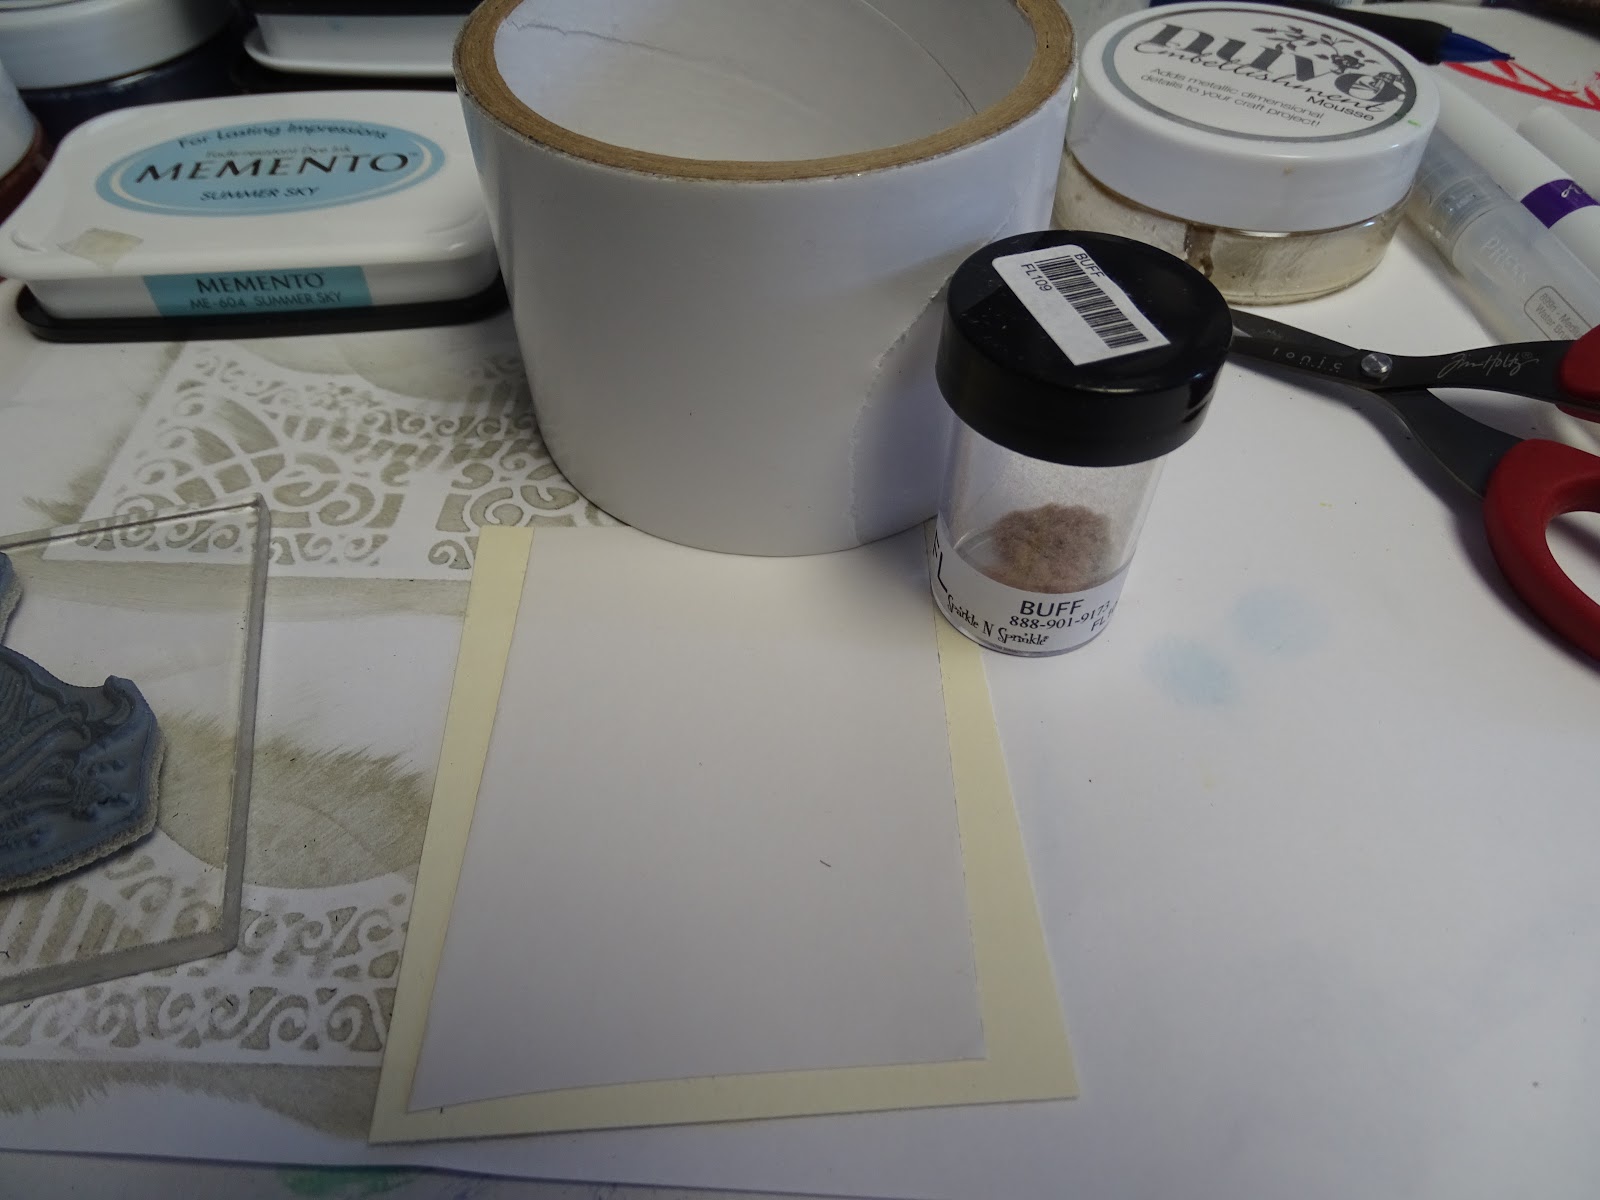
So on to my little doggie! I stuck a piece of 2 1/2" Tear-ific Tape down on to cream cardstock and removed the protective layer.


Buff Flocking was then burnished into the Tape with my finger giving a nice fuzzy coating.


This was put into my Stamp Platform again, as I figured it might need a couple of stampings! I applied the old SNS doggie image with Memento Rich Cocoa and stamped him directly on top of the flocking. I re-inked him and stamped him again to get a nice, detailed image on the flocking.


He was fussy cut using my Tonic 5" Mini Scissors and then I put him against the back of the front fence where I wanted him placed and marked the outer edges of him on the back of the fence with a white gel pen. I then went in and applied the Nuvo Deluxe Adhesive, which has a nice fine applicator to the rungs on the fence and then attached him face down to the fence.


I layered the card front to a pink border to finish of the card. Here are my friends sharing the front yard!


Hope you've enjoyed my project today. Here is a list of the products that I used, which can be found on the SNS website:

Birdhouse Friends # 852
Dogs Sharpei # 229
Versamark, StazOn Black, Memento Rich Cocoa, Summer Sky

Next and last on the blog hop is our very talented Eret! Remember to leave a comment with each of the designers, so that you can be eligible to win all four of the sets.

I'd like to join in the following challenges with my card today:
Worldwide Design Team Open Challenge #26: Anything Goes
Classic Design Team Open Challenge #17: Anything Goes
2 Crafty Critter Crazies #6: Must use an animal
Crafty Animals Challenge #6: Anything Goes
Sheepski Design Challenges #6: Feature a Creature

Thanks for stopping by today,

Hugs,

Shona