Showing posts with label Hybrid Ink. Show all posts

Saturday, December 15, 2018

Robin's Happy Holidays

Hi there,

It's been a while since I posted anything on my blog (almost 3 months actually) and today I'm posting my first Christmas card!  2018 was an extremely busy year for us and I had to take a leave of absence from Sparkle N Sprinkle, while I endeavored to catch up on life. I hope to be back in the stamping saddle by the beginning of the year.

I went back to Scotland to visit my Mum and Dad at the beginning of 2018 and while I was there I took photos of this gorgeous wee robin, who was singing at the top of his lungs, around the back of the train station. My Dad really liked it - so much so that it is his screen saver.  He e.mailed me a month back and hinted that it would make a good Christmas card. I've been pondering what I could do with it, and so here it is:


I also wanted to use the gorgeous Sparkle N Sprinkle Stamp Set 897, designed by a dear friend, Donna Ellis. I managed to incorporate all three stamps from the set on my card! I began by die cutting the wreath from some green cardstock.


This was then covered with Versamark and heat embossed with a bit of Moss and Pear Star embossing powders.


Next I die cut my robin photo and kept the inlaid bits intact, as I wanted to use them in the card. I then added some sparkle to the photo with the Quickie Glue pen and some Sparkling Snow Glitter and Twinkling Clouds Flocking.


I then layered a piece of Super Adhesive Sheet on to a 5 1/2" square piece of red cardstock. The wreath and photo were placed on top of the adhesive and then the various inlay pieces were added to the wreath.


Cherry Sparkle Flocking was added to the remaining sticky surface. I then stamped the sentiment and the little ivy leaf in Versamark on vellum using the Stamp Platform and heat embossed with Moss.


The green cardstock that the red piece was going to be layered on was die cut with the small wreath and three sprigs from the Sizzix Holiday Greens Mini dies.


These were also heat embossed with Moss and Pear Star. Glitter Accents Winter Cranberry was added to the holly sprig and set aside to dry.


I stuck a piece of 2 1/2" Tear-ific Tape on a piece of scrap white cardstock, removed the backing and then attached the vellum sentiment. This was die cut with the small wreath and then fitted in to the prepared wreath.


I used the pretty saying from the stamp set on the inside of the card. I stamped with Hybrid Safari Green ink, using the stamp platform, stamping twice to get a good crisp image. I then ran a piece of 1/4" Tear-ific Tape along the bottom of the inside of the card, removed the backing and added some of the Cherry Sparkle Flocking.


The card was then assembled. Red front layered to the green and then card base. The little wreath was attached with foam pads and the three sprigs were attached using little bits of 1/8" Tear-ific Tape. Below you can see the sparkle of the Sparkling Snow and Twinkling Clouds on the branches.


 .. and here you can see the sparkle from the Glitter Accents:


Here is the inside of the card.


I hope you've enjoyed my share today.  Here is a list of the products I used:

Spellbinders Wreath die
Sizzix Holiday Greens Mini die

Today I'd like to join in the following challenges:
Craft Stamper Challenge: Take It Make It - December

Hope to be back to blogging on a weekly basis in the New Year. In the meantime, I hope you all have
a wonderful Christmas, full of love and fun and I wish everyone a happy and healthy New Year!

Shona

Thursday, September 20, 2018

Skating Penguin!

Hi there,

I'd like to share my last September 2018 Reveal card. Today I am using the cute Dancing Penguin Stamp Set 913.


I made the background by sticking a piece of Super Adhesive Sheet to the back of the designer paper.


The igloo was created by cutting a piece of a circle out of watercolor paper using a Grand Circle die in the Tangerine and then dry embossing with the Darice Brick Pattern embossing folder.


The snow drifts were made in the same way with Impression Obsession Hills die and then dry embossed with Crafts Too Polka Dots embossing folder. The hills and the igloo were then applied with Moonstone Glimmer Paste. These were set aside to dry while I worked on the Penguin.


The Penguin was stamped in the Stamp Platform in Black Shadow Hybrid Ink. I then removed the top of the Stamp Platform, so I could work on my coloring desk while leaving the image in the same spot on the platform.


I used Aquaflow Watercolors and Nuvo Alcohol Markers with a Blending Pen to color the penguin. The Hybrid ink allows both mediums to be used! Once colored I put the stamp platform back together again and then stamped with Clear Mark ink and heat embossed with Clear Detail over the top of the image. He was then fussy cut with the 5" Mini Scissors.


Brushable Glue and Snow White Flocking was applied to the belly and hat trim.


Nuvo Crystal Drops Morning Dew were applied to the beak, bell and feet for a glossy effect.


I cut out a window for the slider on the designer paper panel.


This was then mounted onto Cobalt Blue Mirror cardstock, leaving a space on the right side where the pull tab will move in and out.


The hills and igloo were mounted on to the card front. A strip of white cardstock was slipped into the slider space. The penguin was attached with mounting tape to the left hand side and a balsa wood arrow was covered with Clear Mark Ink and heat set with Cerulean. The arrow was attached with Nuvo Deluxe Adhesive.


The sentiments for the stamp set were stamped in the Stamp Platform with Empire Blue Hybrid Ink. They were then die cut with Memory Box Cross Stitched Frame Borders. The "Sending you" sentiment was layered on to the Cobalt Blue Mirror cardstock.


Snowflakes from the set were stamped in Clear Mark and embossed in White Detail on a strip of the Mirror Cardstock which would then be attached as the base of the easel card with the second sentiment centered on top.


The card base was made and then the card assembled. Here is the card before the penguin emerges!


... and here he is "sliding on by!"


Dancing Penguin Stamp Set 913
Nuvo Deluxe Adhesive
Crafts T00 Polka Dots embossing folder
Darice Brick Pattern embossing folder
Mounting Tape
IO 343-T die: Hills
Memory Box Cross Stitched Frame Borders die
Balsa wood arrow

I'd like to play along in the following challenges:
World Wide Open Design Team Challenge #09: Anything Goes
Classic Design Team Open Challenge September #9: anything Goes
Morgan's ArtWorld Open Challenge #9: anything Goes
2 Crafty Critter Crazies Challenge #18: Include a critter
Craft Stamper Take it Make it Challenge September: Anything Goes

Thanks so much for stopping by today, hope you've enjoyed my share?

Shona

Thursday, July 5, 2018

Happy Birthday America!

Hi there,

Hope my American friends had a lovely day yesterday. I'm up first with the start of the new July Reveal. I know I'm a day late with this card, please forgive me, but I thought it may be fun to  show a different feel to the new Emma's Best Birthday Set 902, with a little help from Baxter - July 4th digi set 901!!!


I thought it would be fun to combine Baxter and Emma into a Fourth of July celebration card. So I started by printing the digis of the flag and Baxter on my computer.


The flag was cut down to 4 1/2" x 4 1/2" and then Baxter was fussy cut with the 5" mini scissors. I deliberately left a little white edge around him.


Emma was stamped in Hybrid Black Shadow ink, using the Stamp Platform and was then colored in with the Nuvo Alcohol Pens and she also was fussy cut leaving a little white edging.


The sentiment (from the Happy Birthday set) was stamped, also using the Stamp Platform, in Nuvo Clear Mark ink and heat embossed with Cerulean on to a scrap of white cardstock.


The star was cut out from the flag using the Tonic Shaker and Die set with the Tangerine.


The little stars from the Spellbinders Star Circles were mounded on top of the sentiment and the shaker element was placed over the top.


The shaker element was then placed in behind the star hole in the flag.


I used the Tonic Mirror Cardstocks Cobalt Velour and Ruby Red for the card base.


Some Gypsy Red and Denim Velvet Glitters were added to the cake icing with the Nuvo Smooth Precision Pen.


Nuvo Crystal Drops Morning Dew was applied to the flag poles, the tray, the candle flame, Emma's shoes and Baxter's nose to finish off my little scene.


I hope you have enjoyed my share today.

Below is a list of the products that I used in my card today:

Emma’s Best Birthday 902
Spellbinders Star Circles

Have you checked out the Sparkle N Sprinkle Creative Challenge over on Facebook yet? If not, you really need to head over there and enter with anything that uses an SNS image, either rubber or digi - and just to make it easier you can pick up free digis over on the website! So, really there are no excuses! The July Challenge has just recently opened and you have until the 25th of July to enter - winners will be announced the 3rd of August. Good Luck!

I'd like to play along in the following challenges:

Thanks for stopping by today,

Shona

Thursday, April 19, 2018

Calla Lilies with Love!

Hi there,

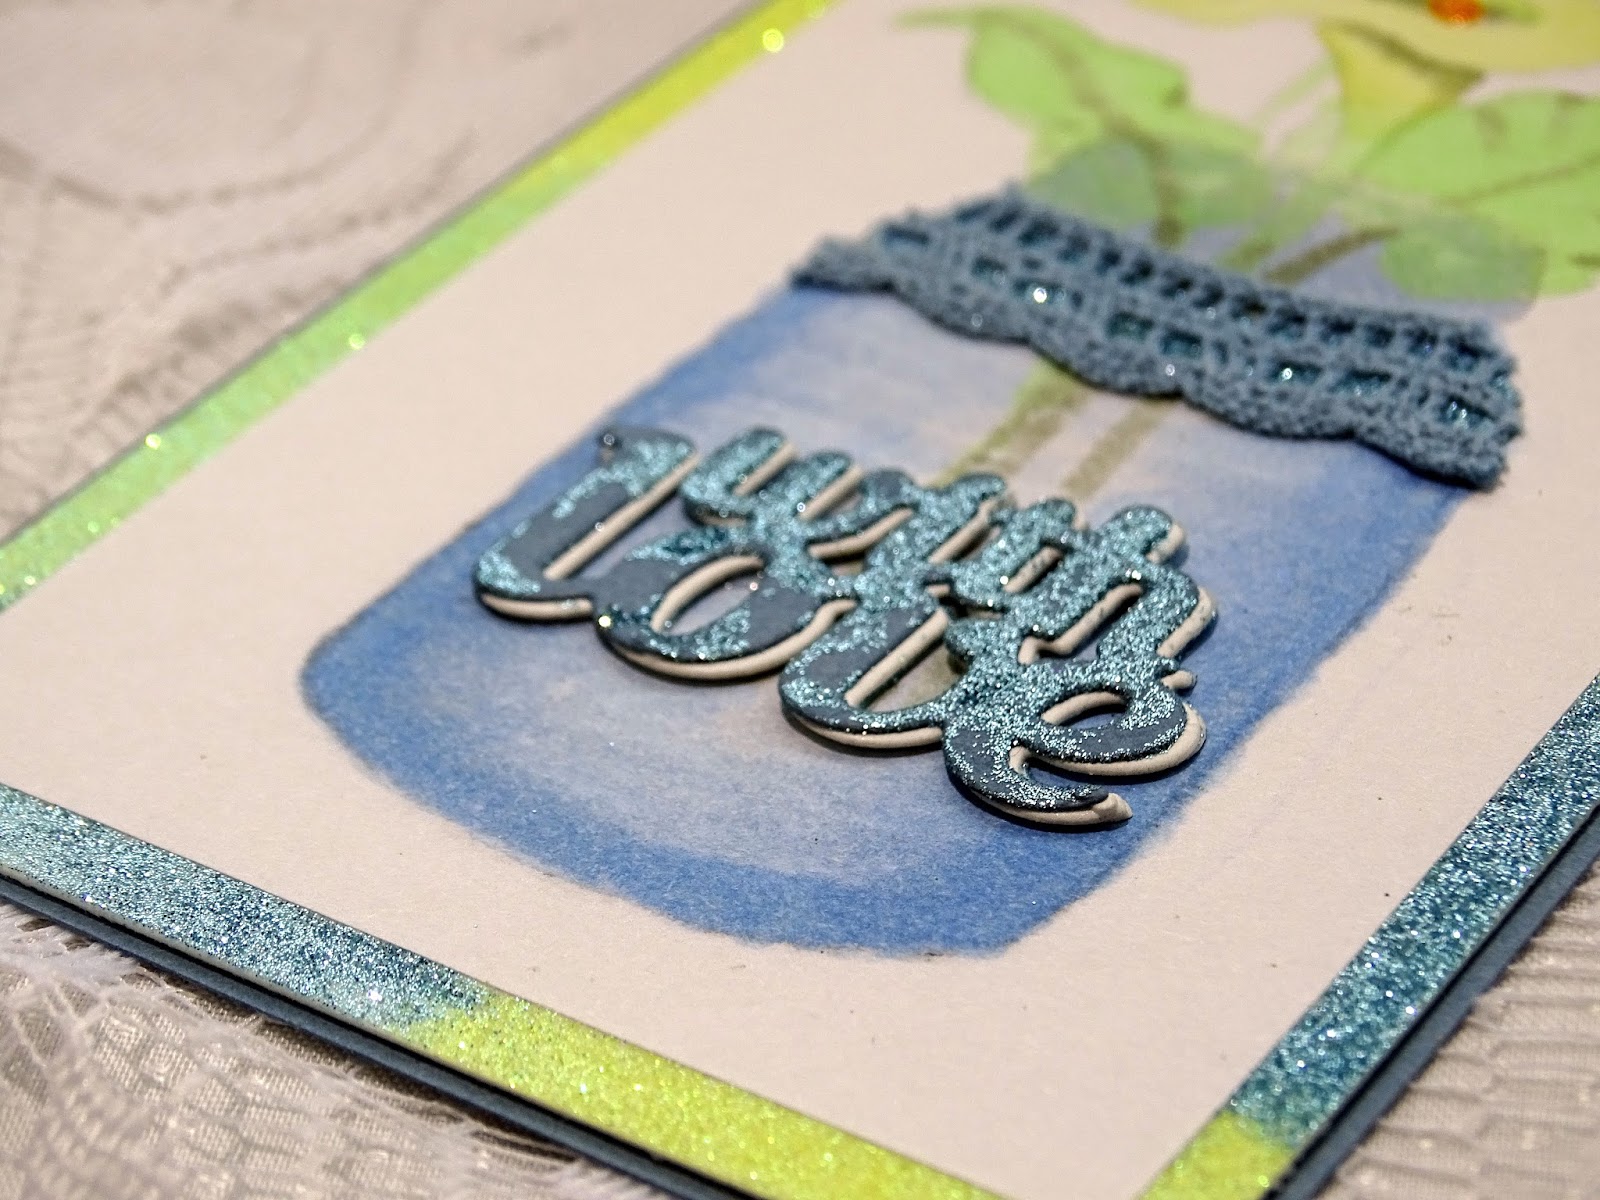
Thanks for stopping by! Today I'd like to share my second April Reveal project, which highlights the new Calla Lilies Set 888 along with the jar from an older set, Fill the Jar 423. The jar can now be found in the Bugs in a Jar set 510, featuring the Faux no line watercoloring technique, which blogger friend Verna introduced me to.


For this technique you stamp on to normal printer paper, not cardstock, color in your image and then turn the paper over to get the no line effect. So I began with stamping the Calla Lilies with the Hybrid Safari Green ink using the Stamp Platform.

The jar from the Fill the Jar set was stamped with Memento Tuxedo black using the Stamp Platform for positioning.


This was then colored in with Copics.


Turning the paper over you will see that the lines are not seen - and it looks like a watercolor painting. You can use the Copic Blender pen to take away any color that is too "outside the lines" if you wish.


I then cut a piece of 3 1/4" x 6 3/4" piece of Super Adhesive Sheet and centered it on to a piece of white cardstock. My image which measured 3" x 6 1/2", was then centered on top of the Super Adhesive Sheet. This gives a sticky edge to which you are going to apply Daisy (GM2019), Margarita (GM2032) and Ocean Breeze (GM2039) Microfine Glitters. After the glitters were applied I used the Tonic Guillotine and cut off the white edge (which served as rigidity) as the panel will be layered to a piece of 7" x 3 1/2" blue cardstock.


Next I cut out the Tonic Mini Moments With Love die, using the Tangerine - once from blue cardstock and twice from white.


Using the Nuvo Medium Glue Pen, I stuck the three die cuts together.


I placed a little strip of adhesive-backed lace to the top of the jar and filled in any remaining adhesive with the Ocean Breeze Glitter.


Nuvo Deluxe Adhesive was applied to the Die cut piece and it was adhered to the front of the jar.


Some of the adhesive was also applied to the front of the die cut, not completely covering it and then I added some more of the Ocean Breeze glitter, for a slightly distressed look.


Nuvo Glitter Drops White Blizzard were added to the center of the flowers for extra "pop" and dimension.


and that finished off my project for the day.


Hope you've enjoyed my share today. This really is a fun technique, thanks again Verna for the inspiration! Listed below are the materials I used to make my card today, most of which can be found in the Sparkle N Sprinkle store.

(using Faux no line watercoloring technique)
Recollections Lace on a roll
Copic Markers

Remember to leave a comment here, and then pop over and leave one on the SNS blog and that will get you in the running to win a $20 gift certificate to the store. The winner will be randomly picked from the comments at the end of the month. Good luck!

I'd like to play along in the following challenges:
Get Creative Challenge #68: No pattern Paper
Crafts Galore Encore Challenge # 50: Anything Goes
World Wide Open Design Team Challenge #4: Anything Goes
Classic Design Team Challenge #24: Anything Goes
Craft Stamper April Challenge: Anything Goes

Thanks again for stopping by,

Shona