Showing posts with label Want to Scrap Chip Board. Show all posts

Thursday, September 15, 2016

LOVE IS LIKE A BUTTERFLY!

Hi there,

September 15th already? Where did the summer go? I do really enjoy the Fall weather, especially since we had such a hot summer this year, but I really don't enjoy having to get up at 5.45am to get the youngest up for the High School bus which comes at  6.28am!!

Before summer is officially over, I would like to share this butterfly tag that I made, which was inspired by my garden where the Coneflowers and Joe Pye Weed, in particular, have had many visits from the beautiful Swallowtail butterflies. I've taken many photos of them again this year and have often wondered "what happened to that little guy's tail?" .... and it always amazes me how different each one of the markings are, although they are the same species. Another Mother Nature miracle!


I decided to have a little play this time! What fun. I still used many SNS products, but this time the stamps I used were from quite a while back set 437: Fancy Butterflies. I started with a Kraft tag and daubed on Nuvo Embellishment Mousse: Mother of Pearl, Peony Pink and Lilac Lavender.
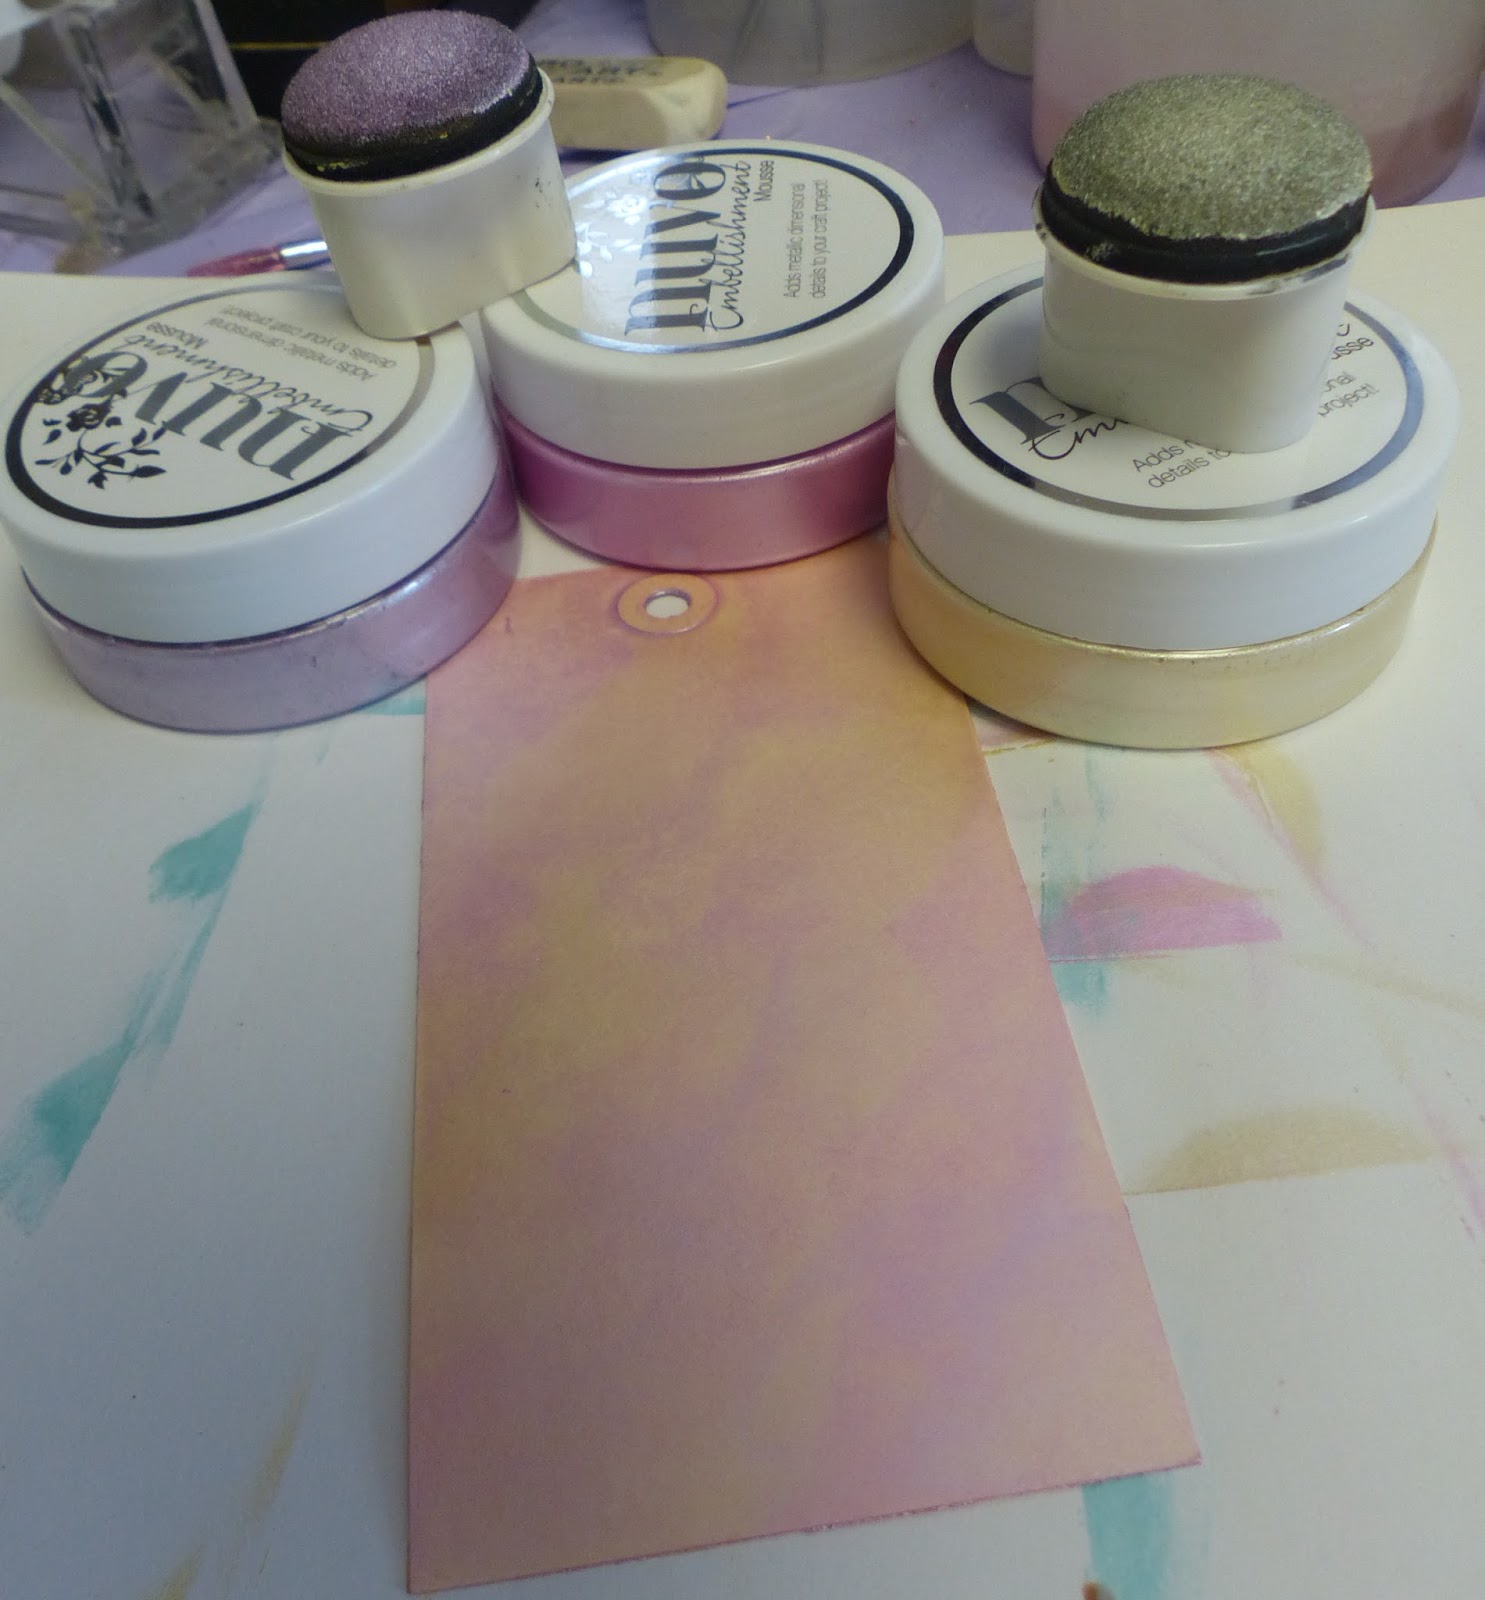

Then I took the smaller butterflies from the set and stamped them sporadically all over the tag with Memento Lulu Lavender.


I then stamped the bigger butterflies in Versamark and heat embossed them with White Detail.


The "Want to Scrap" Butterfly chipboard piece was daubered with Stampendous embossing ink. This saves marking your Versamark pad with the chipboard.


I heat embossed Dragon Fruit to the bottom and Mulberry to the top half of the butterfly. Then I started to play around!


Magic Speckle was sprinkled around and heated from the bottom (otherwise the powder would have gone everywhere!)  Love the mosaic look that this EP gives. Then a little more Dragon Fruit, then a little more Magic Speckle! You get the idea!


I took Crafter's Workshop: Mini Butterfly Meadow stencil and stenciled a few little insects on the tag. I positioned the stencil at different spots around the tag and put the Nuvo Embellishment Mouse in the little areas. Clean the stencil immediately - this stuff is really quick drying!


After I added the Mousse insects, I quickly gave them a little "bath" with Crystal Ice, which gave them a lovely sparkle.


After the sentiment was stamped in Versamark and heat embossed with Concord, I took some of the Peony Pink Mouse and used my finger to edge the tag. The tag was then layered to a slightly bigger piece of black cardstock.


I did the same method with the Love "Want to Scrap" piece, as I did with the butterfly, except I heat embossed with Concord and then added a  little Magic Speckle again.


The Butterfly was added with Foam Squares and "Love" was attached with Dimensional Glue. Black and Pink Ribbons were threaded through the hole. Then Nuvo Drops Ebony Black, Raspberry Pink and Glitter Drops Purple Rain were then just dotted around the piece as I saw fit, to finish my project for today.


I'd like to enter my tag in the following challenges
Fab 'n' Funky Challenge : Inspired by Nature
Stampotique Designs Challenge no. 257: Put a bug on it
Ike's World Challenge 72: Things that Fly

Here are a couple of photos of the butterflies in my yard. See what I mean about the tail?


Hope you've enjoyed your visit today.

Hope to see you back again soon,

Hugs,

Shona


Thursday, May 12, 2016

ALL OF YOUR HEART

Hi there, 

Today I am sharing another card using the beautiful Nasturtium Set 783 #2 from the May reveal.

All of Your Heart

I used the colored digi version of the Nasturtium border stamp again, enlarging the size quite a bit. I then ran the piece through Crafts-Too Tropical Flowers embossing folder and sanded the color off the raised flowers.

All of Your Heart

The piece was then covered with Versamark and heat embossed with Clear Detail. Next I went on to the Want 2 Scrap Round Flourish Chipboard frame. This was also applied with Versamark and then heat embossed first with Black Detail. Versamark was reapplied and then Dalmatian embossing powder was heated from the underneath, as this is one of the Ultrathick enamels. This gave the frame a lovely speckled effect.

All of Your Heart

The flower panel was cut to fit into the inner circle of the frame, I used 1/8" Tear-ific Tape to hold the edges down. I then took a piece of 5 1/2" square black cardstock and centered a piece of 5" square Super Adhesive Sheet on top. I laid the framed flowers on the square at an angle and stuck it on to the very sticky surface of the adhesive.

All of Your Heart

Black Suede Velvet Glitter was then burnished in to all the nooks and crannies of the remaining sticky adhesive. This gave the cardfront a soft and sparkly surface.

All of Your Heart

The sentiment was stamped in Versamark on to white cardstock and was heat embossed with Black Detail. It was die cut with a Spellbinders Grommet Tag and before removing the die I sponged on some Memento Lady Bug and Morocco inks.

All of Your Heart

A Mon Ami Red Pull Ribbon was threaded through the tag and was attached behind the black card front. The sentiment and ribbon were attached with Dimensional Foam. the card was then layered on red and then a white card base to finish.

I'd like to play in the following challenges:
Crafting for all Seasons #126: Add some embossing
The Sisterhood of Crafters: No Design Paper

Hope you've enjoyed my share with you today.

Till next time,
Shona

Monday, February 15, 2016

STENCILS, BLACK EMBOSSING PASTE AND NEON GLITTERS!

Today, I've got a new technique to share with you using a stencil, some Dreamweaver's Black Embossing Paste, the new Sparkle N Sprinkle Neon Glitters and some Want 2 Scrap Chipboard!


First I attached the TSC Designs Wild Lilies Stencil to a 11 1/2" x 11 1/2" piece of bright green cardstock.


Notice that I didn't tape it done all the way round - I found that this added a more funky, artsy look which went well with the glitters - in other words it was OK for the paste to go under the stencil a little! Apply the Dreamweaver black embossing paste over the stencil. Remove stencil and set aside to dry. I left mine overnight. Clean the stencil with soapy water.  When dry, replace the stencil, tape down again and using a paint brush go over each section with Brushable Glue that you want to "paint" with each color. I began with the flower petals that I was going to "color" with pink.


Remove the stencil carefully, and put it in soapy water, while you apply the first of the glitters - Exulted Pink! Shake off the excess glitter and put back into your jar, then leave to dry - it takes 10 minutes at the most. Clean off the stencil while you're waiting on it to dry.


On to Energized Orange! Replace the stencil and apply more glue where you want the orange glitter to go:


.... continue with Electrified Yellow for the stems and then finally with Exhilarated Green for the leaves. 


Now we get to play with the Want 2 Scrap Chipboard Pieces! Sparkle N Sprinkle now carries a wide variety of words and embellishments and bling from Want 2 Scrap. They are great for scrapbook pages!


Apply the Chipboard piece with Versamark and then heat emboss with Silver Detail. Then reapply the Versamark and this time heat from underneath with the Super Thick Silver (this will stop the bigger particles from flying off the word).


Now how to adhere them to the page? I've done it both with tape (the 1/8" Tear-ific Tape) and with Dimensional Glue, but what I've found as the easiest way is to give them a background to stick to. In this case I chose to use Spellbinders Classic Scalloped Hearts. I applied a piece of Super Adhesive Sheet to a piece of hot pink cardstock and ran it through my embossing machine. The smaller hearts were able to fit on the 2 1/2" Tear-ific Tape.


Remove the protective backing of the tape and stick the word (or words) down before applying the pink glitter to the remaining sticky surface.


The hearts with their words were attached with Dimensional Foam So now how are we looking?


1/4" Tear-ific Tape was attached around the edges of a 11 3/4" square of the hot pink cardstock and then the page was centered on top before being applied with the Neon pink around the sticky surface. This was then attached to a 12" x 12" black Scrapbook page.


I didn't want to cover up, or clash with the colors of the fun flowers, but really needed to make it into a "Scrapbook" page, so I had a black and white wallet size photo made of a photo a couple of years back of David and me. I made a little frame the same way as the hearts using Spellbinders Classic Rectangles Small.


There was an annoying little black piece in the photo in the top corner, so I covered it up with another little scalloped heart. I used the inside of the little frame to die cut it from.


.... and that finished off my page. I was going to do 25th (for a Silver Wedding), but I really loved the look of the flowers and wanted to leave it open as much as possible. 

I'd like to enter the Challenge at Our Crafty Corner with my scrapbook page.


Here's a sneak peak at my next project. Using a Dreamweaver stencil this time and painting on top of the paste with a paint brush instead of through a stencil. This worked better for a card size project as it was more detailed.


Hope you've enjoyed my share today! See you again, later in the week!

Hugs,

Shona

Wednesday, February 10, 2016

THE SECRET GARDEN!

Hi there, 

Today I want to share with you my take of a card from the Secret Garden Set 773!. I am an avid gardener (to the point that it really gets in the way of my stamping over the summer months!) And then on top of that ... my eldest son Struan, was involved with Broadway as a child, and he was picked to play Colin Craven, the Crippled Boy, in a musical reading of the show, so I ending up learning the story quite well. It always holds a special place in my heart.

Secret Garden

Little Mary Lennox  and the Robin were stamped on white cardstock in Memento Tuxedo Black and were colored with Copics: Y17, Y21, Y32, YR61, E07, E33, E13, E35,  YG03, YG67, N4, B32, B95, B63 and C1. The key and the lock in the image were applied with Silver Dreams Glitter and the flowers with Celestial Glitter, after being applied with the Sakura Glue Pen. 


I cut an arch from a piece of Kraft cardstock, using the Spellbinders Mega Ovals Large (stopped cutting 2/3 of the way down the shape, so as not to cut out the bottom - cutting a straight line along the base to line up the two sides to leave an arch aperture for Mary).  After inking this with Memento Rich Cocoa, I then ran it through the Darice Brick Pattern Embossing Folder and ran Memento Toffee Crunch directly over the surface of the bricks.

I made a fun flower, combining two colors Beige and Brown of the Mon Ami Gabby Pull ribbon and punched a hole at the side of the arch to poke the pull thread through and attach with tape on the back side of the arch. The edges of the arch and the Kraft card base were distressed with Rich Cocoa before attaching Mary behind the aperture.

The sentiment from the set was split in two and stamped on white cardstock with Versamark and heat embossed with Silver Detail. The two pieces were cut into banners and were distressed on the edges with Rich Cocoa before being attached to the card front with Dimensional Foam.


A Want to Scrap Chipboard Antique Key 4304 was applied with Versamark and heat embossed with Silver Detail and applied again with Versamark and heat embossed with the new Super Thick Silver. Love the look of this enameled powder! The key was attached with Dimensional Glue to the card front. The Robin was cut from his original image and was placed with Dimensional Foam, to look like he was holding the key for Mary.

If you're interested, the following is a video of part of the Secret Garden Reading that my son took part in, as Colin Craven, 11 years ago! It is the part where Mary shows him the Secret Garden.


Hope you've enjoyed my share today!

Warm hugs,

Shona

Wednesday, January 27, 2016

... AND THEY LIVED HAPPILY EVER AFTER!

Hi there, 

Thanks for stopping by! Today I'd like to share an easel card using the new Sparkle N Sprinkle Happily Ever After Set 770 and some Want To Scrap Chipboard.

Arch Wedding Easel

I decided to use vellum for a change and so began with stamping the couple on the vellum with Versamark and heat embossing with White Detail. I then colored the image on the back of the vellum with Copic Markers: E000, E02, E08, E13, E33, R20, V04, YG03 and N4.

Arch Wedding Easel

The base of the easel is 11" x 4 1/4", folded at 5 1/2" and 2 3/4".  I cut the arch with Spellbinders Grand Ovals and Ovals Large - a piece of white card was cut just with the Grand Ovals Die to be the backing for the vellum and arch. The arch was run through the Darice Brick Pattern Embossing Folder, a 4 1/4" x 2 3/4" piece of white card was also run through the same folder for the base of the card. Memento Potter's Clay and Desert Sand were swiped over to color the bricks.

Arch Wedding Easel

The vellum piece was sandwiched between the colored arch and the white arch base and was then taped to the end of the easel base. The 2 3/4" piece of bricked cardstock will be taped to the "inside" of the card after a sheer bow and the flower with brad center are added to the panel.

Arch Wedding Easel

Now onto the embellishments! I stamped the sentiment on white cardstock in Versamark and heat embossed with Sienna (my favorite Tuscany color! These are fine detailed powders that are great for sentiments and detailed images, when you want to use something other than black.) I die cut this with Lawn Fawn Stitched Tags.  This was attached on top of the ribbon with Dimensional Foam and serves as the "stop" for the easel. Another two ribbons were made and were attached with glue dots as shown.

Arch Wedding Easel

Three Prima Flowers were covered in Versamark and heat embossed with Copper Dreams. A silver brad was applied with Versamark and heat embossed with Sienna Star and became the center of the flower.  The Want To Scrap Chipboard word "Love" was applied with Versamark and heat embossed with Copper Dreams to tie in with the flower. This was attached to the card with Dimensional Glue.

Arch Wedding Easel

... and they Lived Happily Ever After!

Hope you've enjoyed my share today.

Warm hugs from a rather snowy (but melting now) New Jersey!

Snow Blizzard 2016 memories - my two younger kids - although 20 and 15 now - still very young at heart!


.... and what about these cool horizontal icicles trying to come in the house?...


Hope you have a wonderful day!

Shona

Monday, November 30, 2015

SPARKLE N SPRINKLE'S DECEMBER 1ST REVEAL

Hi everyone - hope your Thanksgiving (if you are in the US) was amazing and that you are well on your way to a beautiful holiday season and recovered from Part One of over-eating!

Welcome to the December 1st Reveal! Yikes December already (I haven't even started my Christmas cards yet!)


This month the Designers were given a Surprise Package full of products found at the SNS Shoppe and were asked to create projects with these products.  So sit back, enjoy the Hop and get ready to have those creative juices flowing! Here are two of the products that were in my package that I chose to create with:


On Dec 3rd, ONE GRAND PRIZE WINNER will be selected from the comments left on the Designers' blogs listed below. Please leave a comment with each Designer in order to be eligible for the Grand Prize.  You never know who the Mystery Designer will be that has the winning comment.

The Grand Prize Winner, which will be announced on the SNS Facebook page and on the SNS Blog, will receive a $20 gift certificate to go shopping at the SNS Shoppe.


The Blog Hop order this month is:

(*Tip: if you have difficulty with a particular link, try clicking on the Designer's blog title to send you to their Home page.)

We would also like to thank all the Guest Designers who joined us this year: Diane, Ashley, Ani, Chris, Irit, and Jess.  It was a pleasure having each of you on the team as Guest Designers!

We hope you enjoy the Surprise Package Blog Hop as much as we enjoyed creating projects for it.  Thanks for joining us and remember to comment on each of the Designers' blogs to be eligible for the Grand Prize.  
 Wonder who the Mystery Host will be this month????


The Sparkle N Sprinkle Creative Challenge also begins today.  There are lots of prizes and recognition badges.  Come check out how you can become a SNS Featured Artist as well.  The theme is always Anything Goes using Loose Glitter, Embossing Powder, and/or Flock.


Have you checked out the SNS YouTube Channel featuring Demo Donna?  If not, then you are in for a real treat.  Subscribe today to get all the latest Demo Donna tips and techniques!


In Thanksgiving mode I envisaged my birds - one in the nest waiting on the other to fly home! First I created the background. I took the Cherry Blossom Dreamweaver Stencil and taped it down on top of the mustard cardstock. Start taping at the top, then bottom and then the two sides. Once you have applied your preferred medium, remove the tape in reverse order so that you are left with a "hinge" effect at the top edge so that the die comes up cleanly and doesn't smudge the wet paste. Put the stencil into warm soapy water and clean off any excess paste at this point.


I used Dreamweaver's Matte Black Embossing Paste. Leave it to dry, this should take 30 mins at least. When dry, replace the stencil on top of the dry embossed image and using a dauber apply glue (I used the Essential Glue Pad) through the stencil to the flowers. Then using a stencil brush apply the Pearl Ex powders. I used Dreamweaver Metallic F/X: Kiwi Mica and Purple Satin.


Undo the tape again in the reverse order and remove the stencil - putting it back in the soapy water. 


I made my frame using the Spellbinders Lattice Rectangles. I cut out the die from white cardstock and then covered the piece with Versamark and applied Gold Detail embossing powder, before applying more Versamark and then the Fleur de Lis enamel powder. These chunky powders should be heated from below to prevent "fly aways". 


Cut the background to fit the inside of the frame and attach with 1/8" Tear-ific Tape. We are now ready for the birds! These were from Want to Scrap, I again applied Versamark and Gold Detail powder first and then reapplied Versamark and heat from underneath with Super Thick Gold. I heated them up again with the heat gun and while the embossing powder was still hot I sprinkled a little Fleur de Lis on their bellies and on the "tail" and then heat set..


I made a little ribbon for the "nest" with my Craft-Dee BowZ, and wrapped it around the frame before attaching to black cardstock which was then layered to a Gold Mirror cardstock base. The birds were attached with Dimensional Foam Squares, one nestled in the nest and the other flying home!


That completes my share for today! Hope you've enjoyed your visit? The next stop on our blog is Jess. Remember to leave a comment on each of our blogs in order to be eligible for the Grand Prize - 1 $20 gift certificate to the store!

Good Luck!

Shona