Showing posts with label Flocking. Show all posts

Tuesday, April 19, 2022

Snow Much Fun

 Hi there and thanks for stopping by! I was able to change my header today. I had had a quick trip to Scotland last week to celebrate my Dad's 90th birthday. My three brothers and some of their families, my hubby and daughter Gillian had a great weekend of celebration with Mum and Dad, whom we had not seen for almost 2 1/2 years. Needless to say we had a wonderful time, making more memories! I got back on Friday to very warm weather and had to go into my hives to check for swarming clues and try to reduce the chance of it happening. I took a few photos, this one is of the girls festooning between two frames. Aren't they so cute?

My card today is for the Holly and Ivy Christmas Challenge. Using the skiing snowman from a stamp and die set, that I recently purchased from Lifescraft, I have my little guy speeding down the snowy slope!


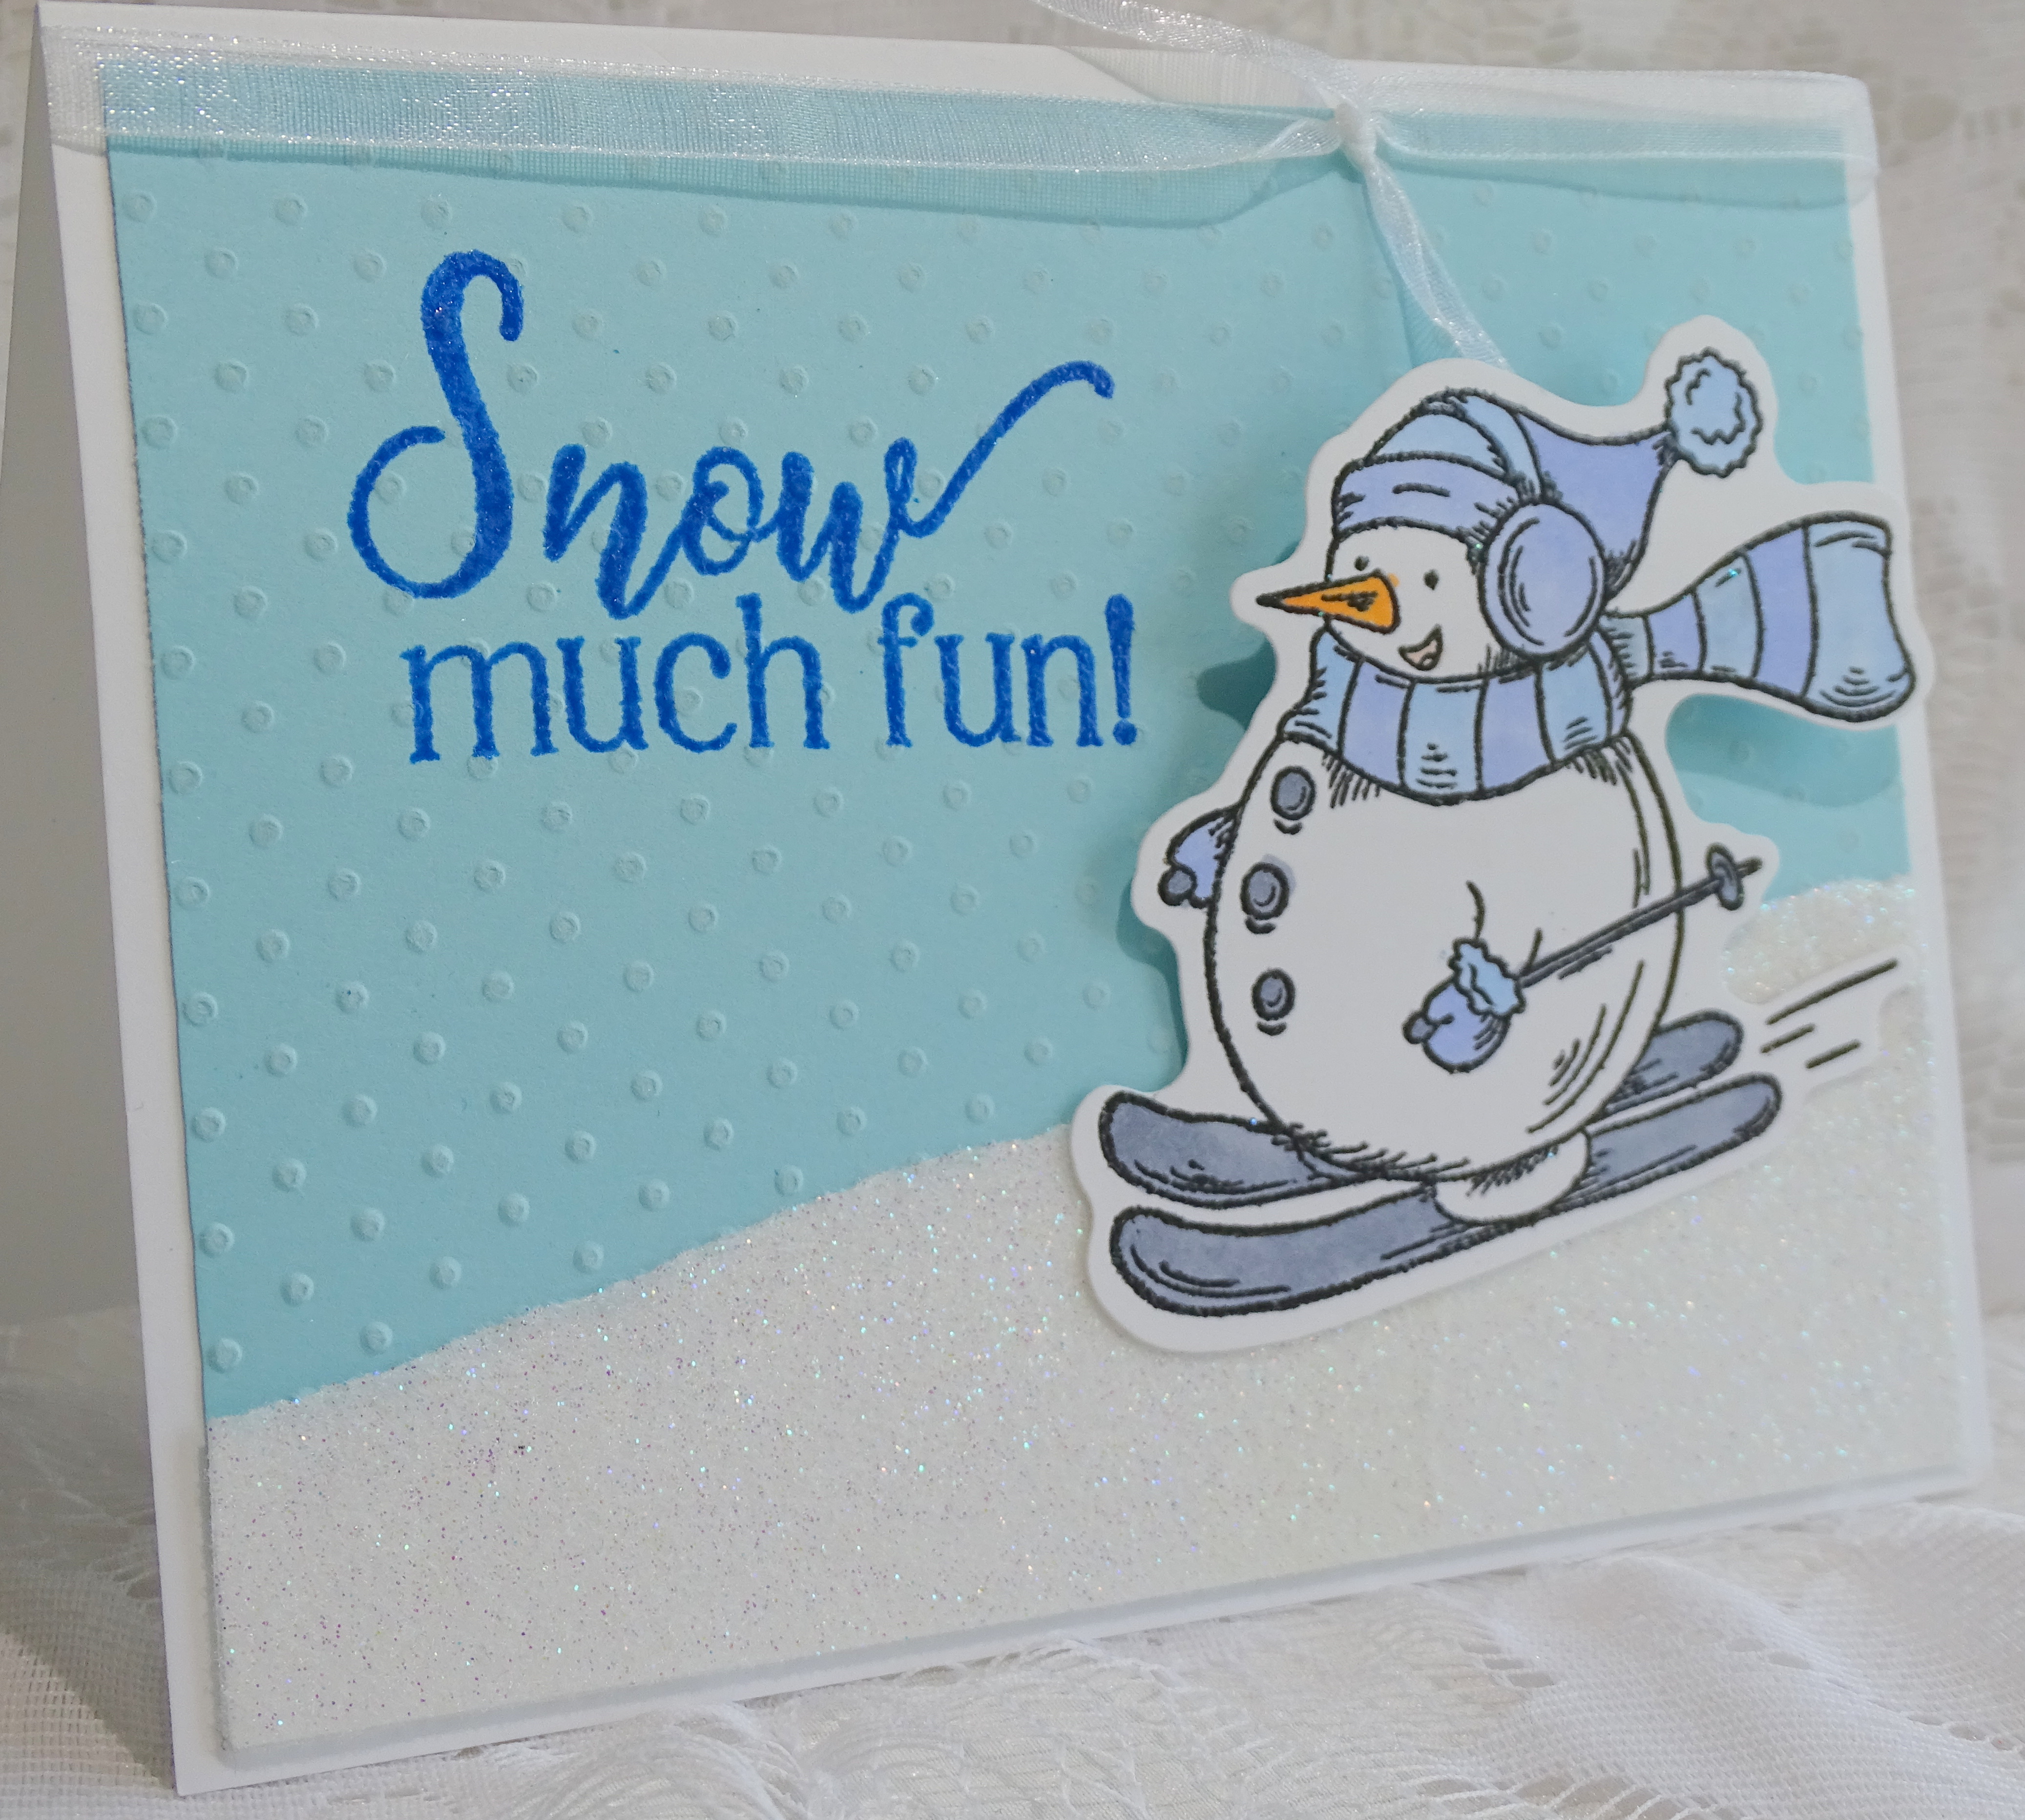
I began with stamping the snowman from the stamp set in Versamark Clair Nocturne ink. 


He was then heat embossed with Clear Detail.


I colored him with Copics and then die cut him.


I took a piece of light blue cardstock and using the Cuttlebug dotted embossing folder, I sanded the raised dots down to make them more white, like snowflakes. A piece of double-sided tape was layered to a scrap of white cardstock and was layered to the base of the blue background. I removed the protective layer from the tape and added Twinkling Clouds flocking to the sticky surface.


I placed the sentiment, from the same stamp set in my stamping platform and stamped directly on to the blue sky using Versafine Clair Paradise ink, I then added some Blue Ribbon glitter to add some sparkle.


The background was added to a white card base and then the little snowman was taped down to the snow and his body popped up with a foam pad for some dimension. White organdy ribbon was tied around the top of the card to finish.


I hope I have inspired you to pop on over to the Holly and Ivy Challenge? It's always an anything goes theme!

Till next time!

Shona


Wednesday, January 12, 2022

Eat, Drink and bee Merrry

Hi there and welcome back to my second blog of the new year! Today I am sharing the card I made for the January Christmas Craft Creations Challenge, where we have to include some stenciling. For my card I am using the cutest little Bee Merry set from Clearly Besotted. A "newbee" for me!!


I began by stamping the cute little stamps in Versafine Clair Nocturne ink and heat embossing them with Clear Detail.


The images were then colored with Copics and fussy cut.


I inked the honey comb background using one of the Recollections Stencil set and Distress Oxide Peeled Paint ink. 
 

The sentiment was die cut with an old Spellbinders Hexagon die to match the stenciled background. I added some of the Peeled Paint before removing the die.


Dimensional Glue was applied to the snow on top of the hive to which I added Diamond Dust Glitter. 


Sparkling Snow glitter was applied to the bauble using the same glue and Snow White Flocking to the Santa hat.


The glue was also applied on top of the colored lights. Everything was set aside to dry.


Here is a close-up of the finished card, once the pieces had been attached with foam pads to the stenciled card base. Hopefully, you can see the dimension of the different glitters and flocking.


A red and white bakers twine was tied around the side of the card to finish off.


Below, you can see the products that I used on my card today:


Clearly Besotted Bee Merry set

Recollections Stencils 658160

Distress Oxide Peeled Paint ink

Versafine Clair Nocturne ink

Clear embossing powder

Copics

Spellbinders Hexagons dies

Dimensional Glue

Diamond Dust Glitter

Sparkling Snow Glitter

Snow White Flocking

Foam pads

Red and white bakers twine


I hope I've inspired you to take a look at the rest of the Team members' cards. Please give the stenciling theme a try while adding  to your 2022 Christmas card stash!

I'd like to join in the following challenges with this one:
Dies R Us Challenge #184: Using a die that DRU carries
Peace on Earth Challenge #7: Anything Christmas Goes
Stamps & Fun = Creativity #401: Colors of Christmas
Critter Crazy Challenges #58: Anything Goes with critters

So that's it from me today! Hope to have you stop by soon! Till the next visit, stay safe and warm!

Cheerio for now from chilly New Jersey,

Shona

Wednesday, April 14, 2021

Flocked Season's Greetings

 Hi there and thanks for stopping by my blog today! My April header is of my Star Magnolia tree. Although still small and fenced-off, so that the deer don't get to it - it is covered in these beautiful blooms. Can't wait till it reaches a height where it will be safe from those rats with antlers! 

Today I have a card for the Design Team of Christmas Craft Creations and this month the challenge is "No Stamping"!  So come on ladies - get out those dies and stencils and join in the fun. It is CCC's one year birthday this month, so there are a few prizes up for grabs!! I hope you will join in the fun?


I'm afraid I didn't have my camera up in the stamping room when I made my card, as it was raining torrentially and I didn't want to go over to get it!! So this will be a photoless post!

I began by die cutting the Tutti Designs Holly Panel from green cardstock layered with double stick adhesive. The cardstock side was taped down to the red cardstock, around the edges and under some of the leaves to keep it flat. I removed the protective backing from the die cut and applied Grass Green Flocking.

In hindsight, I should have attached the berries (red rhinestones) before putting down the flocking as the self-adhesive on some of the rhinestones was not terribly sticky!!

I die cut the Impression Obsession Christmas Stitched Words from the same green cardstock and put double sided tape behind, so that the Cherry Sparkle Flocking would adhere to the letters. These were then attached to the panel with mounting tape. The rhinestones were added now, but as I said it would have been easier had I done that before the flocking!

The front panel was attached to a white card base and that finished off my card for today! Please join in the fun. It's our birthday month, so several prizes are going to be up for grabs!


Here is a list of the products that I used:

Tutti Designs Holly Panel 

Impression Obsession Christmas Stitched Words

Grass Green Flocking

Cherry Sparkle Flocking

Self-Adhesive red pearls

Double Stick Tapes

I'd like to join in the following challenges with my card:

The Holly and Ivy Christmas Challenge #92: Anything Goes

Happy Little Stampers - April: Anything Goes with Dies

Merry Little Christmas Challenge #33: Anything Christmas Goes

World Wide Open Design Team Challenge #4: Anything Goes

Till next time, stay safe,


Shona


Wednesday, May 13, 2020

Holly Season's Greetings

Hi there and welcome to May! I've been missing for a while, between the kitchen renovations, and then battling with families of raccoons up above the garage, where I normally stamp! So, needless to say, I've not been doing much of anything up there! We caught another two on Friday night in have-a-heart traps, but there are probably more to be caught!  The pest control ran out of traps!!

Thankfully the weather has started to get really nice, tonight is the last of the frost warnings and I am looking forward to planting my annuals on Thursday!! In the meantime, my perennials have been keeping me amused. Columbine, such a dainty and beautiful plant is my header for May.

Anyway, on to my card today, which is for the Christmas Craft Creations Design Team.  


This month the theme is:


Of course, I couldn't make up my mind what die to use, so I ended up using 4!

I began with die cutting the Tutti Holly Panel from green cardstock.


Sticker paper was attached to the back of the panel and then I added Cherry Sparkle flocking.


Then I stuck a piece of 2 1/2" Terrific-Tape down on white cardstock and cut it out with the Spellbinders Mega Oval Large die.


The Winterland Holly was cut from the same green cardstock.


The Tonic Season's Greetings sentiment was then cut from red cardstock and both of the dies were arranged on top of the sticky oval.


The remaining sticky surface was then applied with Snow White Flocking.

The front panel was taped to a red card base and then the sentiment was added with mounting tape. A few self-adhesive rhinestones were added for the holly berries.


Below you can see the dimension and fuzziness of the flocking a bit better!


Here is a list of what I used on my card today:

Cottage Cutz Winterland Holly
Tutti Designs Holly Panel
Tonic Season’s Greetings
Spellbinders Mega Oval Large
Sticker Paper
2 ½” Tear-ific Tape
Cherry Sparkle Flocking
Snow White Flocking
Self Adhesive red rhinestones


I hope you've enjoyed my share today?

Please leave a comment and then head on over to the Christmas Craft Creations blog where you can see all the other Designer's creations and then upload yours to the link. All you need to do is use a die cut!! How easy is that?

I'd like to join in the following challenges:

The Holly & the Ivy Challenge #71: Anything Goes
Unicorn Challenge Blog #54: Use Dies
MLCCB #22: Anything Goes
CHNC Challenge Blog #489: Include a tree (Holly)
Crimbo Crackers Challenge #210: Use a Die Cut
Fezziwigs says anything festive goes Challenge #10

Stay safe everyone!

Shona

Wednesday, February 12, 2020

Santa Suit Christmas

Hi there, 

Happy February! My February header is one of the first signs that Spring might be on its way - the little Snowdrop! Check out the little pollinator too!

Today's card is for the Christmas at Sweet Stampin' Creative Challenge Design Team. This month's challenge is to use words! I chose to use the Poppy Merry Christmas Background die.


I'm afraid I don't have my usual step by step photos for this card. We just started a big renovation project in our kitchen, where my desk computer (where all my real pictures are stored) used to reside and hubby hasn't had the time to get it up and running yet! So I have had to take these pictures with my phone.

I die cut a piece of red cardstock with the Poppy die and then cut the bottom quarter off. Super adhesive tape was stuck to the back of the two pieces. A piece of black cardstock was cut for the background and a strip of double sided adhesive was laid horizontally for the belt.

The two pieces of red cardstock were then placed on top and Night Sky Flocking was burnished into the exposed tape.


I poked four holes at the inside of the corners of the buckle. I tied the buckle down with invisible thread coming through the holes and taped it down at the back. This panel was then added to a white card base.


That finished my project for today. Hope you like my project? Please stop by and leave me a comment. Here is a list of the products used today. 


Poppy Merry Christmas Background die
Super Adhesive Tape
Night Sky Flocking
Buckle Hardware
Invisible Thread
  
I'm sitting in the dining room, writing my blog on my chrome book, while the guys are demolishing the kitchen and family room behind the wall! 

Here is yesterday's progress. Cabinets, island and appliances gone!


Today, it is sheetrock and tile removal.

I'll be back soon. 

Shona

Friday, December 27, 2019

Cardinal Joy!

Hi there, 

I'm sharing my last 2019 card today !! I just don't know where this year went! Today I am highlighting Dee's Distinctively Cardinal Frame for DRU.


Here is the cardinal frame die cut:


I started with backing a piece of white cardstock with a piece of Super Adhesive Sheet. The die was placed face down on to the adhesive side, so that when I ran it through it only cut the adhesive sheet and not completely through to the cardstock.


I then ran the die cut through with red cardstock and fussy cut the two birds.


I picked off the protective backing from the cardinals and branches and placed the red cardstock cardinals in their appropriate spots. 


I then took Glistening Emeralds flocking and burnished it in to the remaining sticky surface.


The remainder of the protective backing was then peeled off and Sparkling Snow glitter was burnished in as a sparkly background.


I found the perfectly sized frame for my piece - the Cheery Lyn Celtic Square Boutique Stacker Frame. This particular one is not in the store, but there are other stacker frames. The medium sized frame was cut out of green cardstock.


This was layered to red cardstock and then to a white card base before adding the focal piece with foam tape for dimension. I added Nuvo Crystal Drops Ebony Black for the eyes.


The last step was to add the sentiment. I taped a piece of adhesive tape to a scrap of red cardstock. This time I put the "joy" die on the other side so that it would be sticky on the back of the word.


I took of the sticky backing from the die and stuck it on the top of the glittered panel.


It was a bit fiddly getting the adhesive off the back of the dot of the "joy", but I really liked the result. Hope you do too?


Here are the products that I used in my card today:


Memory Box Sketchblock Joy

Glistening Emeralds Flocking
Sparkling Snow Glitter
Nuvo Crystal Drops Ebony Black

Wishing you all a wonderful, happy and healthy New Year!
See you again in 2020!

Shona

Friday, November 8, 2019

Holly Season's Greetings

Hi there, 

Today I have a Christmas card for the Dies R Us team featuring the Elizabeth Crafts Season's Greetings and Memory Box Ornate Holly dies. I added some Glistening Emeralds flocking along with some red and green mirror cardstock.


Here are the two dies that I used in today's card:


Memory Box - Dies - Ornate Holly


First, I die cut the Elizabeth Craft Season's Greetings sentiment from red mirror cardstock.


Then I layered a piece of white cardstock with a piece of Super Adhesive Sheet and die cut using the Memory Box Cross Stitched Frame Borders. After removing the protective backing I centered the sentiment on to the sticky panel.


Unfortunately the Glistening Emeralds flocking covered up the cross stitch pattern, but I know it is there!! I also forgot to take a picture of that process! I cut a piece of white cardstock 1/4" larger than the die cut and edged it with red Krylon pen.


I then cut out a couple of the Memory Box Ornate Holly from green mirror cardstock.


After assembling all the layers, the ornate holly sprigs were cut and arranged on top and I used self-adhesive red rhinestones as the holly berries, which adhered the sprigs to the card front.


Here is a list of the products that I used in my project today!

Elizabeth Craft Dies Season’s Greetings
Memory Box Ornate Holly
Super Adhesive Sheet

Glistening Emeralds Flocking
Craft Perfect Red Mirror Cardstock
Craft Perfect Green Mirror Cardstock

Red Self Adhesive Rhinestones

Red Krylon Pen

I'd like to play along in the following challenges:

Scrapy Land Challenge #125: Anything Goes using a die that SL sells
Holly and the Ivy Challenge #59: Anything Christmas Goes
Take It Make It November Challenge: Anything Goes
World Wide Open Design Team #10: Anything Goes Challenge
Classic DT Open Challenge #11 - November: Anything Goes

Hope you've enjoyed my share today,

Till next time,

Shona