Hi there,
Thanks for stopping by! For the February Reveal I left you with a sneak peak of my four seasons. Today I'm going to share with you a set of cards made with the new
Seasonal Trees Set 680. I used some little furry animals to bring my seasons to life!

So let's begin with winter:
For this card, I stamped the tree with Versamark then heat embossed with
Silver Lightning. The little snowflakes were done in the same way. The deer was a die cut, which was cut from a piece of white cardstock covered with
2 1/2" Tear-ific Tape. After removing the protective backing I then applied
Amber Wheat flocking to the entire piece. Copic Marker E47 was used to add color to the hooves, eyes and antlers. Here is the
tutorial on how to add highlights to flocking, using Copic markers.
The snow banks were made by adding a strip of 2 1/2" Tearific Tape to a 4" wide strip of white card. I tore the tape in half lengthwise at an angle. After removing the protective backing,
Twinkling Clouds was applied. The sky was sponged with Memento
Summer Sky.
The sentiment (
Penguin Trio Set 616) was stamped in Versamark and heat embossed again with Silver Lightning. The eyelet was also heat embossed with the same embossing powder.
The card front was centered on an A2 card base which had been edged with 1/4"Tear-ific Tape and then Reflection Glitter was applied to the sticky edges.
On to Spring:
This time the tree was stamped with Versamark and heat embossed with
Pear. The sentiment (from Spring Swirl Set 425) tag was done in the same fashion. The little yellow brads were added to the tag and another was applied with Versamark and heat embossed with
Pear Star to hang on the tree.
The bottom of the card front was dry embossed with a Darice (Nature 3-pack) embossing folder. I then applied Memento inks: Pear Tart, Cantaloupe and Summer Sky to color the background.
The little kitty (from Kitty Trio Set 231) was stamped in Memento Tuxedo black on top of a piece of white cardstock covered with Tear-ific Tape and then
Buff Flocking. Copics YR02 and E25 were used to add highlights to the fuzzy cat.
The card front was layered to a piece of yellow cardstock and then to the card base which had been edged with Versamark and heat embossed with Pear Star.
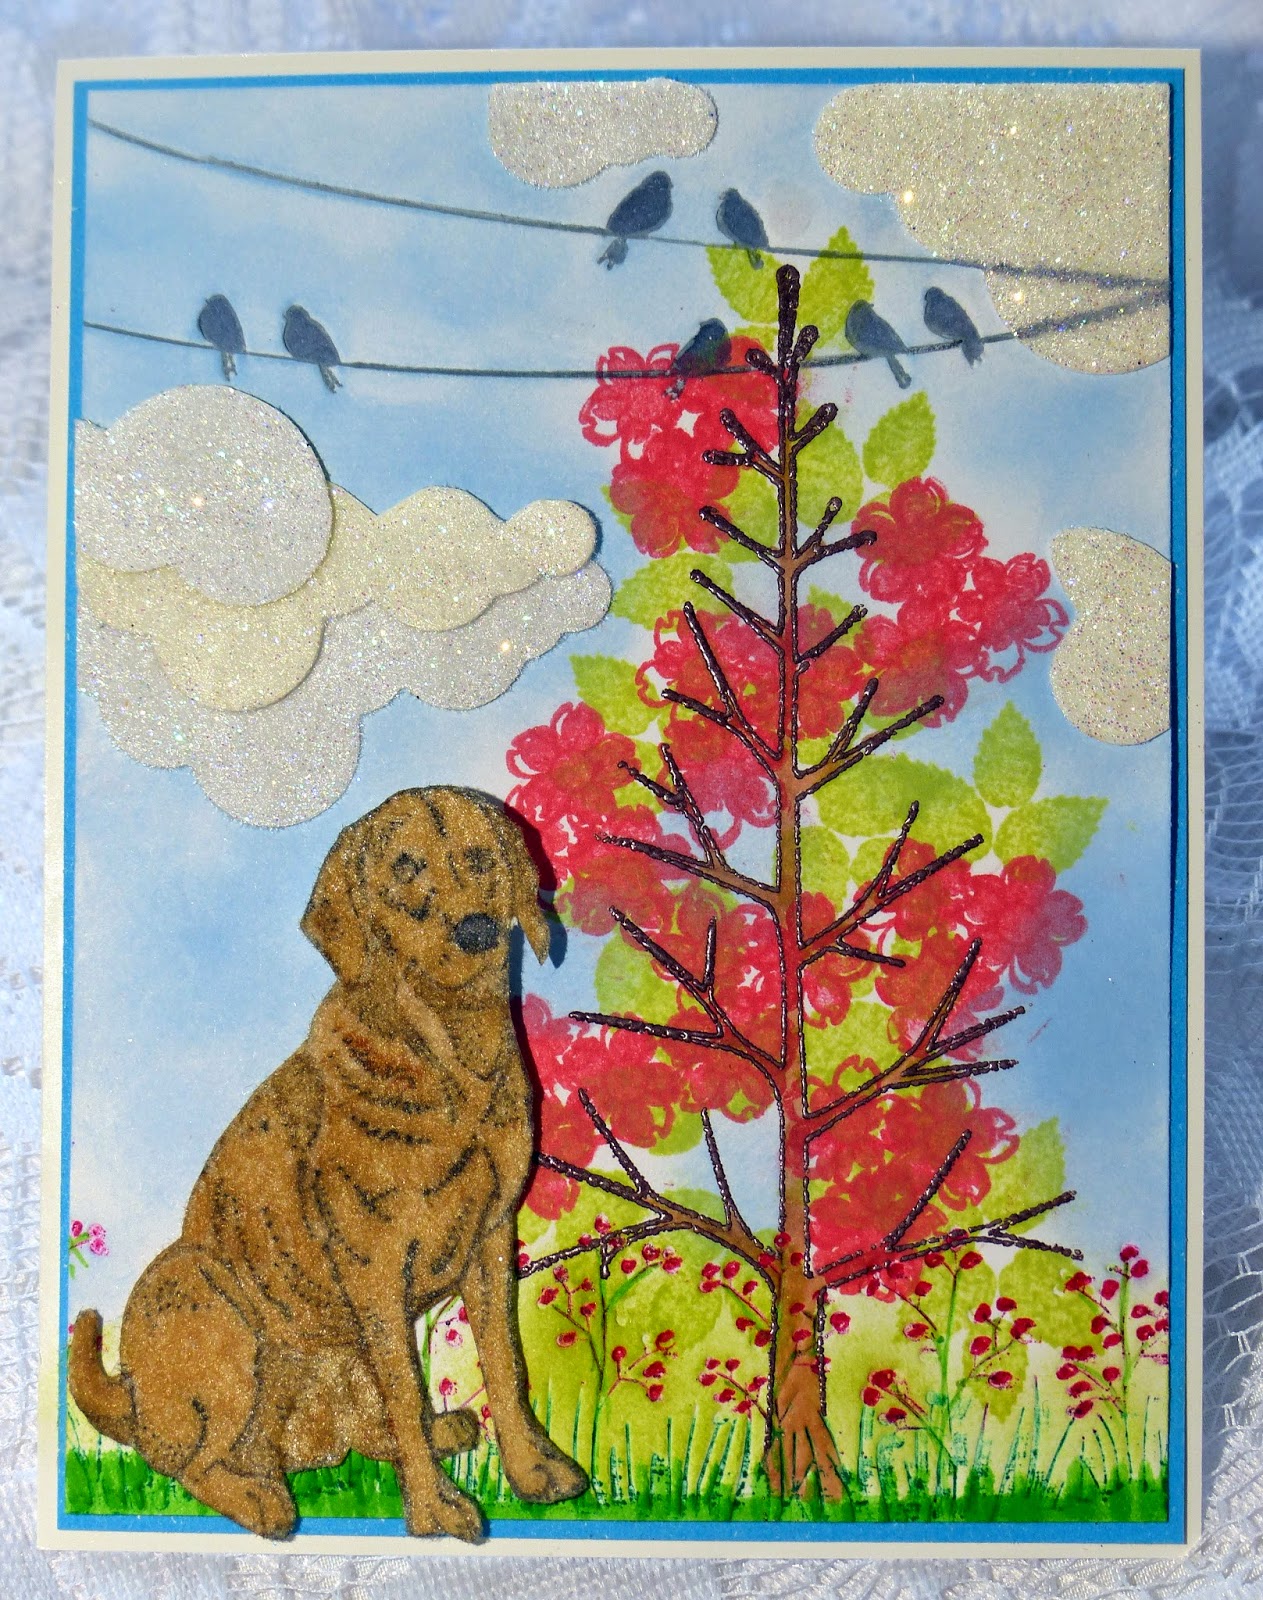
Summer is up next!
This time the tree was stamped in Versamark and heat embossed with
Teddy Brown. The leaves and flowers were stamped with Memento inks, Pear Tart and Lady Bug. Two of the Darice borders were used - the flowers on the bottom and the birds on the top. Flowers were inked with Lady Bug and the birds were inked in Gray Flannel. Summer Sky and Bamboo Leaves were also sponged on the background.
The doggy was stamped in Memento Tuxedo Black on top of Buff Flocking. He was highlighted with Copics E33 and C5.
The clouds were done with white cardstock covered in Tear-ific Tape and then die cut with Spellbinders Rainy Day Dies. The protective backing was removed and they were applied with
Twinkling Clouds Sparkle N Soft.
.... and to finish the year - Fall:
The tree was stamped in Memento
Espresso Truffle ink. The fall leaves were stamped in the background with Memento inks: Peanut Brittle, Angel Pink, Potters Clay and Pistachio. The cattails was the third of the Nature 3-pack. and I went over them with some Toffee Crunch ink before adding
Celestial Glitter to the plumes with a
Sakura Glue Pen.
The sentiment (
Harvest Pumpkins Set 228) was stamped in Versamark and heat embossed with
Sienna. It was sponged with Cantaloupe and then cut up before being attached to cardfront with dimensional dots.
The critters (The Collector Set 682) were again stamped on top of a Buff flocked cardstock and then highlighted. This time Copics E00, E31, E33, R21, BV00, YG25 and W5 were used.
The card front was layered to purple cardstock, then on to a card base that had been edged with Versamark and heat embossed with Abracadabra.
.... and that concludes my four seasons!
Hope you've enjoyed my take on the seasons and also that you'll give the little fuzzy animals a try. So much fun - with one flocking and a few Copics - the possibilities are endless.
Hugs,
Shona