Showing posts with label embossing folders. Show all posts

Tuesday, March 22, 2022

Joy to the World

Hi there and welcome back and Happy Spring!!!

 Today I have my second card for March for the Holly and Ivy Challenge. I decided to go with a monochromatic card and do white on white.


 I recently bought a few articles from Lifescraft and one of them was this town houses and trees die. 


I ran it through my die cutting machine with white cardstock. Yellow cardstock was taped to the back of the die cuts to look like there was light coming from inside the houses. 


Next I ran the Cuttlebug dot embossing folder through with a piece of white cardstock. This would be my snowy background!


Adhesive foam was then added to the back of the die pieces.


The two pieces were then layered to the front of the snowy background.


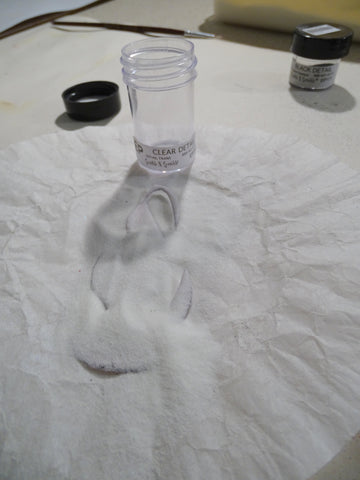
The second piece was layered to the top of the first to give some dimension. The sentiment from an old Sparkle N Sprinkle set was stamped in Versafine Clair Nocturne ink and heat embossed with Clear Detail.


This was then die cut with the Spellbinders Grommet Tag die.


The sentiment was attached to the front panel with pale yellow brads to finish my card off for today.


Hope you've enjoyed your visit today and that I have inspired you to join in the fun over at the Holly and the Ivy Challenge? It is always an anything goes theme and it is a great way to add to your 2022 Christmas card stash! You know how fast time flies!!

Till next time, take care!

Shona

Wednesday, October 9, 2019

When they saw the star!

Hi there,

I'm here today with my October card for Christmas at Sweet Stampin'.  This month we had the optional twist of using stars in our Christmas project. I had recently picked up the Recollections Christmas Noel embossing folders and clear stamp set, so decided to dry and wet emboss the star embossing folder for my background. 


I began with running the blue cardstock through my Big Shot with the Recollections star embossing folder. I then took a rubber brayer and Versamark ink and ran it across the raised pattern and then applied Detail Silver embossing powder.


I then stamped the image from the Sparkle N Sprinkle set 720: Three wise Men with Versafine Clair Twilight ink and heat embossed with Clear Detail embossing powder. 


I stamped the sentiment from the same set in the Twilight ink again and heat embossed with Clear Detail again. Then I tore around the sentiment to make it look like a sand dune and sponged a little of the Twilight ink around the edges.


The three wise men were taped to the star background, after I colored their gifts with a yellow Copic marker and the sand dune was popped up with mounting foam. The front panel was layered to a white card base and then the white organdy ribbon was tied around the left side of the card to finish it off.


Hope you've enjoyed my share? Below are all the products I used on my card:

Sparkle N Sprinkle 3 Wise Men Set 720
Recollections Christmas Noel Embossing Folders & Clear Stamps
Versamark Ink
Silver Detail  (EP257)
Clear Detail (EP280)
Versafine Clair Twilight Ink
Brayer
Copic Marker Y17
White Organdy Ribbon
Mounting Tape

I hope you will take a look over on the Christmas at Sweet Stampin' Challenge.
We'd love to see what you come up with, with the optional twist of "Stars"!

Till next time!

Shona


Thursday, March 22, 2018

Clunker Birthday Wishes

Hi there,

So glad you dropped by today. We've got another snow day, so what better way to spend it than in the craft room! Here is my second March Reveal card. I just love this stamp set - I Love Old Trucks set 890 - perfect for all the men in your life! Some Copper Gilding Flakes, bleach and  Nuvo embellishment mousse covered gears for this make today:


So to begin I stamped the truck using the Stamp Platform onto black cardstock with Nuvo Clear Mark ink. Stickum embossing powder was applied to the ink and heat embossed till it became tacky.


The Gilding Flakes were pressed on to the tacky embossing powder and excess flakes were brushed away with the Texture Brush.


I "colored" my truck with bleach in a Water Brush. This gave an old worn-out look. I then die cut the image using Memory Box Cross Stitched Frame Borders using the Tangerine Machine.


For my background I ran the Darice Steam Punk embossing folder and rust cardstock through the Tangerine. I used the Nuvo Large Glue Pen to run over the raised gears and when it dried enough to tacky, I applied the Sunkissed Copper Gilding Flakes, taking off the extra with the Texture Brush.


I then ran this piece through the Tangerine again - this time with the Cuttlebug Diamond Plate and then this time I applied some Fresh Copper embellishment Mousse over the entire piece using a Jumbo Dauber.


The Want 2 Scrap paper gears were embellished using some Fresh Copper, Indian Gold, and Black Ash embellishment Mousses using the Jumbo Dauber.


The Happy Birthday Banner was cut out of both black cardstock and rust cardstock. I then lay 1/2" Tear-ific Tape behind the negative space and inserted the black sentiment. Autumn Frost glitter was then burnished into the open sticky areas.


The card was put together with mounting tape and pop dots. The gears were added with brads and pop dots, with Autumn Frost being added to the sticky centers of the gears (from the pop dot).


Hope you've enjoyed my share today?


Below are the products I used to create my card this week, most of which can be found on the SNS website.

I love Old Trucks Set 890
Tonic Stamp Platform
Bleach in Water Brush
Copic Marker E08
Memory Box Cross Stitched Frame Borders
Want 2 Scrap Paper Gears
Cuttlebug Embossing Folder Diamond Plate
Darise Embossing Folder Steam Punk
Copper brads

Large round pop dots

We're trying something new this month instead of our traditional Blog Hop. Now you have to leave a comment both here on my personal blog and then head over to the SNS blog post and leave a comment there as well for your chance to win a $20 gift card to SNS! One lucky winner will be chosen from one of the Designers' posts on the last day of each month. A comment must be left on both the SNS Blog and the Designer's post in order to qualify. The winner will be announced on the 3rd of the following month, both on the SNS Blog and on the SNS Facebook page. Thanks for leaving us some love and good luck!

I'd like to join in the following challenges with my card today:

Watercooler Wednesday #162 Charlotte's Masculine: Anything Goes
Challenge 4 Guys Challenge #190: Things with Tails (Tail lights!)
World Wide Open Design Team Challenge #3: Anything Goes
Classic Design Team Open Challenge #23: Anything Goes


Thanks again for stopping by,
Warm hugs,

Shona

Thursday, June 29, 2017

Amazing Mom!

Hi there,

Glad you've stopped by. Today I'd like to share another card from the June Reveal using the Baby, Oh Baby Set 875.


I did a little paper-piecing on this project. First I stamped the image on white cardstock with Memento Tuxedo Black and then colored everything but the dress with Copics. She was then fussy cut.


Then I stamped the image again on the designer paper in Versamark, and before heat setting. I brushed off the Black Detail powder from the rose. 
I fussy cut the dress after heat setting and then I covered the entire dress with Versamark and heat set with Clear Detail.
 
Using the new Nuvo Deluxe Adhesive 200n, which comes as a fine point applicator, I attached the dress to the colored image.
After die cutting the Spellbinders Grand Nestabilities Decorative Elements from white cardstock I daubed Nuvo Embellishment Mousse Peony Pink and Lilac Lavender
I ran the colored circle through my machine with the Darice Hearts Embossing Folder. This was attached to the designer paper used for the dress and then layered to a white card base.
I trimmed the girl using the decorative die cut at her legs so that she would match the bottom of the circle. I punched a small hole in front and behind her hand for the rose to go through. She was attached with 1/4" Tear-ific Tape at the legs and then her head was attached with Mounting Tape. The sentiment was stamped in Versamark and heat embossed with Mulberry. After cutting out the sentiment, I sponged a little Lulu Lavender around the edges. A white bow was tied around the circle and then the sentiment was attached with Mounting Tape. Nuvo Glitter Drops Sherbert Shimmer were added to the bottom of the sentiment and card base. The same drops were added to the pink of the headband and when this was dried I went in with Nuvo Crystal Drops Ebony Black to add the centers to the flowers. 
Here is a list of the SNS product that was used to make this card:
Stamp Set Baby, Oh Baby #857
Embossing Powders: Black Detail (EP171), Clear Detail (EP280), Mulberry (EP415), 


I'd like to enter my card in the following challenges:
World Wide Open Design Team Challenge #23: Anything Goes
Crafty Girls Creations #37: Anything Goes
Crafty Gals Corner #129: Anything Goes


Hope you enjoyed my share today?
Thanks for stopping by,
Shona

Wednesday, March 22, 2017

Sending You a Smile!

Hi there, today I'd like to share with you a card I made using the new Flowers Silhouettes Set 824.
Such a fun and versatile little stamp set. I decided to go monochromatic with my card this time round, incorporating some of the awesome Nuvo products that Sparkle N Sprinkle now carries. To begin with I made some plaid background paper by daubing Nuvo Embellishment Mousse Peony Pink in stripes on white glossy cardstock and then turning it a quarter turn and sponging lines over the top with Lilac Lavender. I then ran the plaid cardstock through the embossing machine with Spellbinders Floral Doily Motives. 
A circle was then cut (using Lifestyles Nesting Circles) from the middle of the plaid background. The image was stamped on glossy white cardstock and then heat embossed with Concord (one of the fine detailed embossing powders that work so well on detailed images). A portion of the image was cut and embossed with the same circle used to cut the plaid layer. 
After turning the "doily", to break up the plaid a piece of Super Adhesive Sheet was put behind the entire piece. Purple Rain Microfine Glitter was added to the sticky surfaces around the doily.
The flowers were then colored with Copics. Next a piece of pink cardstock was dry embossed with the Die’sire Ornate Butterflies Embossing Folder. Nuvo Embellishment Mousse Lilac Lavender was sponged over the raised butterfly pattern.
This was then cut into a circle using Lifestyles Nesting Circles, and three butterflies were fussy cut from the middle of the piece to be used as embellishments.
 
A real doily was then sponged with Nuvo Embellishment Mousse Peony Pink, as the last layer to the card base. 
The sentiment was stamped in Versamark and heat embossed with the same Concord EP and was die cut with the little doily from the Floral Doily Motifs set. 
The card was put together with Tear-ific Tape and Mounting Tape on top of a textured pink base. Pale Periwinkle Nuvo Jewel Drops were added around the card for some extra dimension.
That finishes my card for today. Hope you've enjoyed my share today?
I'd like to enter my card in the following challenges:
Double D Challenges: Things that Fly
Shona

Saturday, January 28, 2017

A BIRD SINGS BECAUSE IT HAS A SONG!

Hi there,

A quick extra post in here today, as I had a couple of hours just "doodling" in my stamp room. Felt like creating, but didn't have a deadline or required project - such a great feeling. I did want to open and use a new embossing powder from Sparkle N Sprinkle - Robin's Egg


There was a little chipboard bird from Want to Scrap, left-over from another upcoming project, sitting alone on my desk and so I started with those two things. First I covered the bird in Versamark (I use an old pad, specifically set aside for chipboard pieces), then I applied a couple of layers of Belgian Cream, before applying the Robin's Egg. I did this because the Robin's Egg is a light color and it is better to have it go down on white rather than the brown chipboard.


Next I pulled out a virgin embossing folder - Cuttlebug: Bit of Paisley. I ran a piece of cardstock, that had already been die cut with the Memory Box Cross Stitched Framed Border, through my machine and then inked the raised pattern with Memento Summer Sky.


Another newbie was used for the "branch". So I die cut Spellbinders: Foliage Flourish out of a piece of black and white dotted designer paper. I applied a coat of Brushable Glue to the underside and then glued it down to the embossed card front.


The sentiment is a favorite of mine from the Sparkle N Sprinkle Bird Song Set 496. This was stamped in Versamark and heat embossed with Black Detail. Before removing the Memory Box Cross Stitched Framed Borders, I sponged with Memento Summer Sky.


I tied two sheer blue bows together and wrapped them around the back of the card front and layered to the black and white dotted paper before layering to white card base. The bird and sentiment were attached with mounting foam.


The final touch was the Nuvo Jewel Drops Sea Breeze, which were added sporadically over the project and one Nuvo Crystal Drop of Ebony Black was added for the bird's eye! I have to say it was kind of fun, just getting to play!


I'd like to enter this card in the following challenges:
Moving Along with the Times: Challenge 37: Swirls and/or curls
Craft Rocket Challenges: #31 Add a Bow
Craft-Dee Bowz: January Challenge: Use a hand-made Bow
Perfectly Created Chaos: #9 Black, White + 1 Color

I'll be back in a couple more days, with my card for the new February 1st Sparkle N Sprinkle Reveal. Till then enjoy the weekend!

Big hugs,

Shona
Thursday, December 8, 2016

WISHING EWE A HAPPY VALENTINE'S DAY!

Good morning to Ewe!

Today, I'm jumping ahead to 2017, with this fun little set from the December Reveal, Will Ewe be Mine Set 813, to wish the recipient a Happy Valentine's Day.


I n"ewe" right away that I wanted these little lambs to be fluffy, and what better way to do that than with some fun Snow White flocking! Did you know you can color your flocking? Just dab a Copic marker using the side of the nib and the color transfers nicely on to the flocking. If you are doing larger areas - you can use a dauber. I used the marker for the inside of the little lambs' ears.

So to begin, I stuck a piece of 2 1/2" Tear-ific Tape to a piece of white cardstock. I took off the protective backing and added the Snow White Flocking to the sticky surface and burnished it in well with my finger tool. Once I was happy with the coverage, I stamped the image in Memento Tuxedo Black directly on top of the flocking. I then stamped the image on black cardstock in Versamark and heat embossed with White Detail.


After coloring in the lambs' ears, I fussy cut the two white lambs on the left and right so that I could pop them up along side the little black sheep.


I covered the silver brads in Versamark and then dipped them in the Red Apple embossing powder and heat set them.


Using a Versamarker Pen, I added a little embossing ink to the inside of the black sheep's ears and heat embossed with Petal Pink.


The white sheep were then adhered on top of the black version and I used a needle with silver thread to make the heart rope, before adding all the little hearts to the image.


Dimensional Glue was used to add the googly eyes. The red background was die cut with Lifestyle Crafts Nesting Scallop Rectangles before being embossed with the Darice Hearts embossing folder. This was then layered over the image then layered on white cardstock.


The sentiment was stamped on red cardstock in Versamark and then heat embossed  with Black Detail, this was also cut out using one of the smaller Lifestyle Crafts Rectangles. A piece of red and white gingham ribbon was attached to the back of the sentiment and this was popped up with Foam Squares at the base of the card.


The ribbon was attached to the back of the card front before being layered to the black card base to finish.

I'd like to join in the following Challenge with my card today:
World Wide Open Design Team Challenge: 15th November - Anything Goes


I hope "ewe've" enjoyed my share today!

Big Hugs,

Shona