Showing posts with label Paper Piecing. Show all posts

Saturday, February 28, 2015

SPARKLE N SPRINKLE'S MARCH 1ST REVEAL

Hi there and welcome to a new month! Let's hope by the end of this one we have got some daffodils! I'm sure everyone is ready. Before we know it we'll be complaining of the heat. Well for now pour a nice cup of hot coffee and join our Sparkle N Sprinkle mainly "Coffee Shoppe" themed blog hop. I decided to incorporate two of the new sets for my reveal card, Set 694: Coffee Time and Set 696: Best Friends Forever.


This month SEVEN new rubber stamp sets are being introduced. These sets are 20% off their regular price until March 3rd. All the new sets are available on Cling Mounted Rubber and as a digital image. Glasses #698 is the stamp set featured in This Month's Technique Video.

Here are the seven new sets:


Coffee Time #694   (digi version DIGI694)
Coffee Shoppe #695   (digi version DIGI695)
Best Friends Forever #696  (digi version DIGI696)
Mustache #697   (digi version DIGI697)
Glasses #698  (digi version DIGI698)
Expresso Yourself #699  (digi version DIGI699)
Coffee Talks #700  (digi version DIGI700)


On March 3rd,  one Grand Prize Winner will be selected from the comments left on the designers' blogs listed below.  The Grand Prize Winner will receive
all SEVEN of the new rubber stamp sets (or digi sets, if you prefer)


The winner of the blog hop will be announced on March 3 on Facebook, the SNS blog, and on our blogs.  This month's Blog Hop order is:

(Tip: if you have a problem with a particular link, try clicking on the person's blog title to send you to their Home page.)

Don't forget to leave a comment with each Designer to be eligible for the Grand Prize.  We love reading your comments and hope we have inspired you as well.  If you absolutely can not leave a comment for some reason, please email icinganne@yahoo.com with your comment and the name of the blog or Designer you are commenting about.

~~~~~~~~~

The new SNS Creative Challenges also begins today, with lots of prizes and recognition badges.  The theme is always Anything Goes using Loose Glitter, Embossing Powder, and or Flock.
~~~~~~~~~
We hope you enjoy the New Reveals as much as we do!  Last month the winner came from Anita's blog.  Wonder which Designer contains the Grand Prize winner this month?
So now you've got all the information, here is my card share today:


I decided to create a scene with the two sets and have the friends having a coffee at their favorite coffee shoppe after their shopping spree.

After I stamped the two images with Memento Tuxedo Black, they were cut out using my newly acquired Brother Scan N Cut (thanks to my MIL). They were colored with Copic markers. The table cloth and chair seats were paper pieced with some designer paper snippet.

I used a Versamarker pen with Clear Detail embossing powder to go over the metal of the chairs. Some Dimensional Glue was added to the coffee cups.


I ran dark brown cardstock through a Sizzix Bricks embossing folder and took my Brilliance Moonlight White ink and swiped it over the raised pattern. I applied Belgian Cream embossing powder over the ink and heat embossed to achieve the stucco look of the wall.


The sentiment (from another of the sets, Coffee Talks) was stamped in Versamark ink and heat embossed with Moss. This is one of the Tuscany embossing powders, which are my favorites for sentiments when you don't want to use black. They always give a clean detailed impression. I cut and embossed with the Spellbinders Fancy Tags, sponging on some Memento Pear Tart before removing the die.

The bricked background was layered to a white card base which had been edged with Versamark and heat embossed with another of the Tuscany embossing powders, Cayenne.

The images and sentiment were then attached to the card front with Dimensional Dots to complete the card.


So that's it from me for today. Here are a couple of sneak peaks, using some of the other coffee themed sets. Stop by my blog to get details on these soon. AND if you are local - you need to pop over to the brick and mortar SNS store for the "Main Street Shop Hop. Details below:


Main Street Shop Hop

If you live anywhere in the Tampa Bay area of Florida, Sparkle N Sprinkle is participating in the Main Street Shop Hop, along with other local crafting stores.  The Shop Hop begins March 21st. 

You can purchase a tote for $10 to participate.  Included in the tote are lots of goodies, plus your shopping passport.  Spend $5 at each participating store to get your passport stamped.  Once you have all of your stamps, turn in your passport for a chance to win HUGE prizes!  In addition to receiving 10% off your purchases, each store will be offering Make N Takes so you can fill your scrapbook with treasured memories. 
For more information about this event, please visit the SNS Events Calendar.  When you hover your mouse over the event, detailed information about that specific event pops up.
~~~~~~~~~

Hope you've enjoyed your stay today? Remember to leave me a comment before heading over to see what the talented Eret has brewed up for you today!

Hugs,

Shona

Wednesday, October 8, 2014

PENGUIN PARTY TIME!

Hi there, 

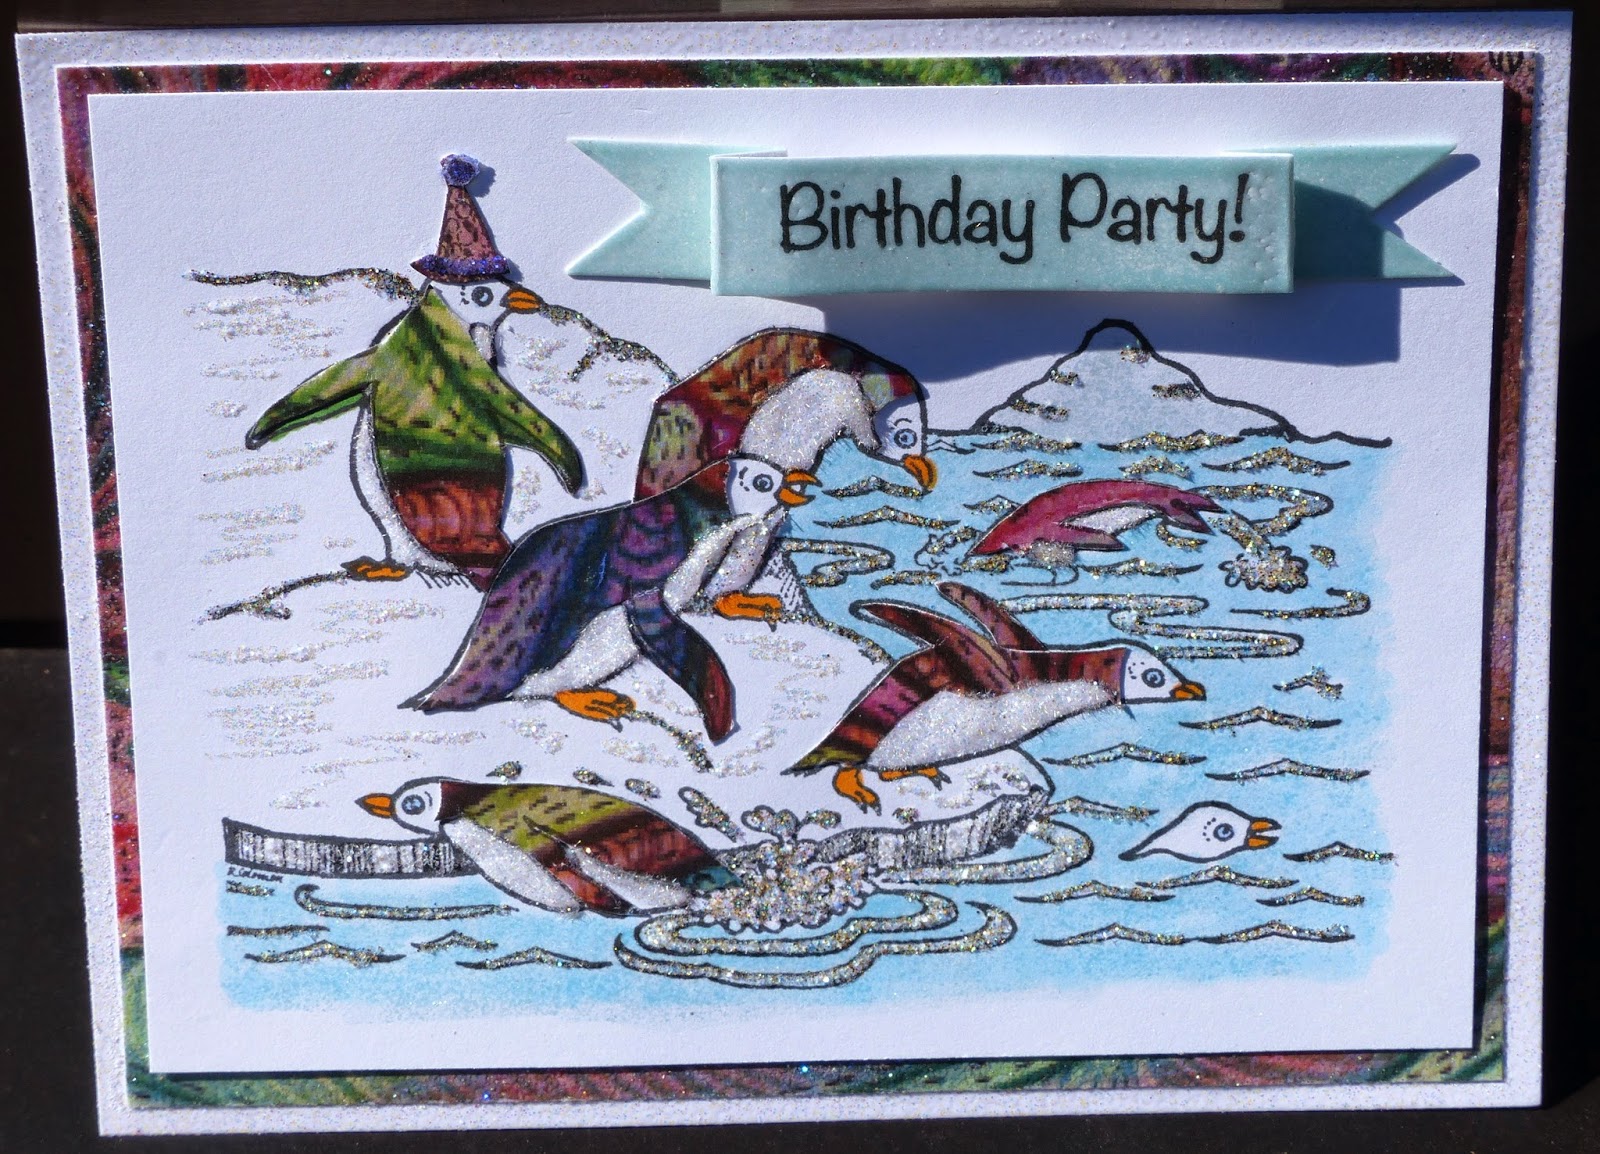
Here is the sneak preview that I shared with you last week. It's using one of the other SNS October Reveal Sets: 654 - Party Penguins. These guys are all dressed up in paper-pieced tuxedos ready for their festivities!


First, I stamped the image twice - once on white cardstock in black ink and then again on the Paisley, Pocket Full of Papers paper. I fussy cut the penguin backs from the DP, using the paper-piecing technique and set them aside, while I colored the image - beaks, feet, eyes and water (not the ripples) with Copics. I then took a Versamarker Pen and applied ink to the iceberg and over the top of the blue water and heat embossed with Ice. This gave the water a glassy look.


Try embossing the water in a vase of flowers or a jar to give the jar a glassy look! It looks great over a stamped and colored image!

I attached the designer paper penguin backs with Brushable Glue and added Twinkling Clouds with Dimensional Glue to the tummies. The party hat was done in the same way, but I used Purple Dust glitter for the trim.


I added Surf (G1117) glitter to the ripples in the water with a Sakura Glue Pen and Diamond Dust (G1116) to the edge of the ice block with Brushable Glue. The Sakura Pen was scribbled over the snow ledges and Sparkling Snow Glitter was applied. You can see from the photo above, the different dimensions achieved using the various glues and glitters.

I stamped the sentiment in Tuxedo black and cut and score to make the banner. It was also covered in Versamark and heat embossed with Ice.


The paisley designer paper was layered to a white card base. I then applied some Versamark around the edges and heat embossed with Sparkle. This gave a sparkly edge for the card front to be layered to. Full directions can be found in the SNS gallery if needed.


Hope you've enjoyed your visit today and that I've inspired you to get out some of your glitter and glues!

I would like to enter this card in the following challenges:

A Sprinkle of Imagination - Color Challenge
Tando Creative Challenge - As Cold as Ice
Love to Scrap - #39 - Anything Goes (No digis)

Thanks for stopping by,

Shona

Saturday, January 25, 2014

PUT ON YOUR PARTY DRESS!

Another snowy day!  I've really had enough of this!  Just got back from a Church Retreat this afternoon and have put the heat on up in my stamping room, as I've got a "few" projects that are calling me. Thought I'd put up a quick post of my sneak peak from last week, as I wait for the room to heat up:


Using the same Feather Fancy paper, one of the new papers in the exclusive line of papers offered by Sparkle N Sprinkle, but using the paper piecing technique instead.

The dress, from set 525: Dress Up, is stamped on top of a section of the paper and then cut out. I colored in the dots with a black Copic pen. Versamark was applied to the paper pieces and they were heat embossed with Sparkle embossing powder. After attaching the paper on top of the stamped image (on the die cut), I colored the belt and applied Dimensional Glue to make it nice and shiny!

I decided to use the same paper for the background, but wanted to "dress it up" a bit, so I ran it through a dot embossing folder and sanded the raised pattern which left me with white dots (should have taken a photo - but didn't!) Now what? How about we put little dots of our new Mega Tack Glue and cover them with some velvet glitters? I chose to use Luau Green and Orchid Rose.


Look at the dimension of those dots! 


I had cut a window at the base of the paper before I put on the dots, and stamped the sentiment in good old "Belgian Cream" embossing powder. This powder really gives a great detailed look on top of dark cardstock.

Edging the same cream cardstock, as the die cut, with 1/2" Tear-ific Tape, then centering the black base to the cream, applying Cloud Nine Velvet Glitter to the exposed sticky edges, to finish of the card. The die cut with dress is popped up with dimensionals.

I'd like to enter this card in the Bloggers Friday Challenge - Make your own background.  


Hope you've enjoyed seeing what I did with the papers and this awesome new set. Here's another sneak peak at another card, using the same set, but the other dress image and going with a more vintage look:


Till next time!

Hugs,

Shona