Showing posts with label Shaped card. Show all posts

Wednesday, September 9, 2020

Warmest Snowman Wishes

 Hi there, and welcome to September!

Isn't it crazy how quickly the summer just passed by? We're enjoying a little cooler weather now - though today we are back up at 86 degrees - we'll soon be able to open the windows! The butterflies are slowing down, not that they were very profuse at all this year. However, I started tagging my Monarchs that I have reared this summer and they will be heading to Mexico shortly. I've had many more Black Swallowtails this year, but if I didn't catch them as eggs, I'm afraid they got parasitized as caterpillars. The last four of the chrysalises bore Parasitoid Wasps instead of beautiful butterflies 😢.

My header for September is the last hatched one that dodged the bullet! Mother Nature can be so cruel. It also makes me feel better about bringing in the Monarchs as soon as I see the egg being laid.

So anyway, on to my card for the Christmas Craft Creations design team, where this month we were to asked to create a shaped card.


As you can see, I went with a snowglobe shape. I had received the stamp set as a freebie with a magazine and it came with an embossing folder. 


After fussy cutting the snowglobe I then traced it on to a piece of folded cardstock for the backing of the card and die cut the middle.


Next I colored the base of the snowglobe using a sponge with Memento inks - Desert Sand and Peanut Brittle.


The scene was then stamped on to the top of the folded piece of cardstock, using the stamp platform. 


The scene was colored in with Stampin' Up pencils. After which I heat embossed the image with Sparkle embossing powder.


The snowglobe frame was also embossed with Sparkle embossing powder before being stuck down over the image.


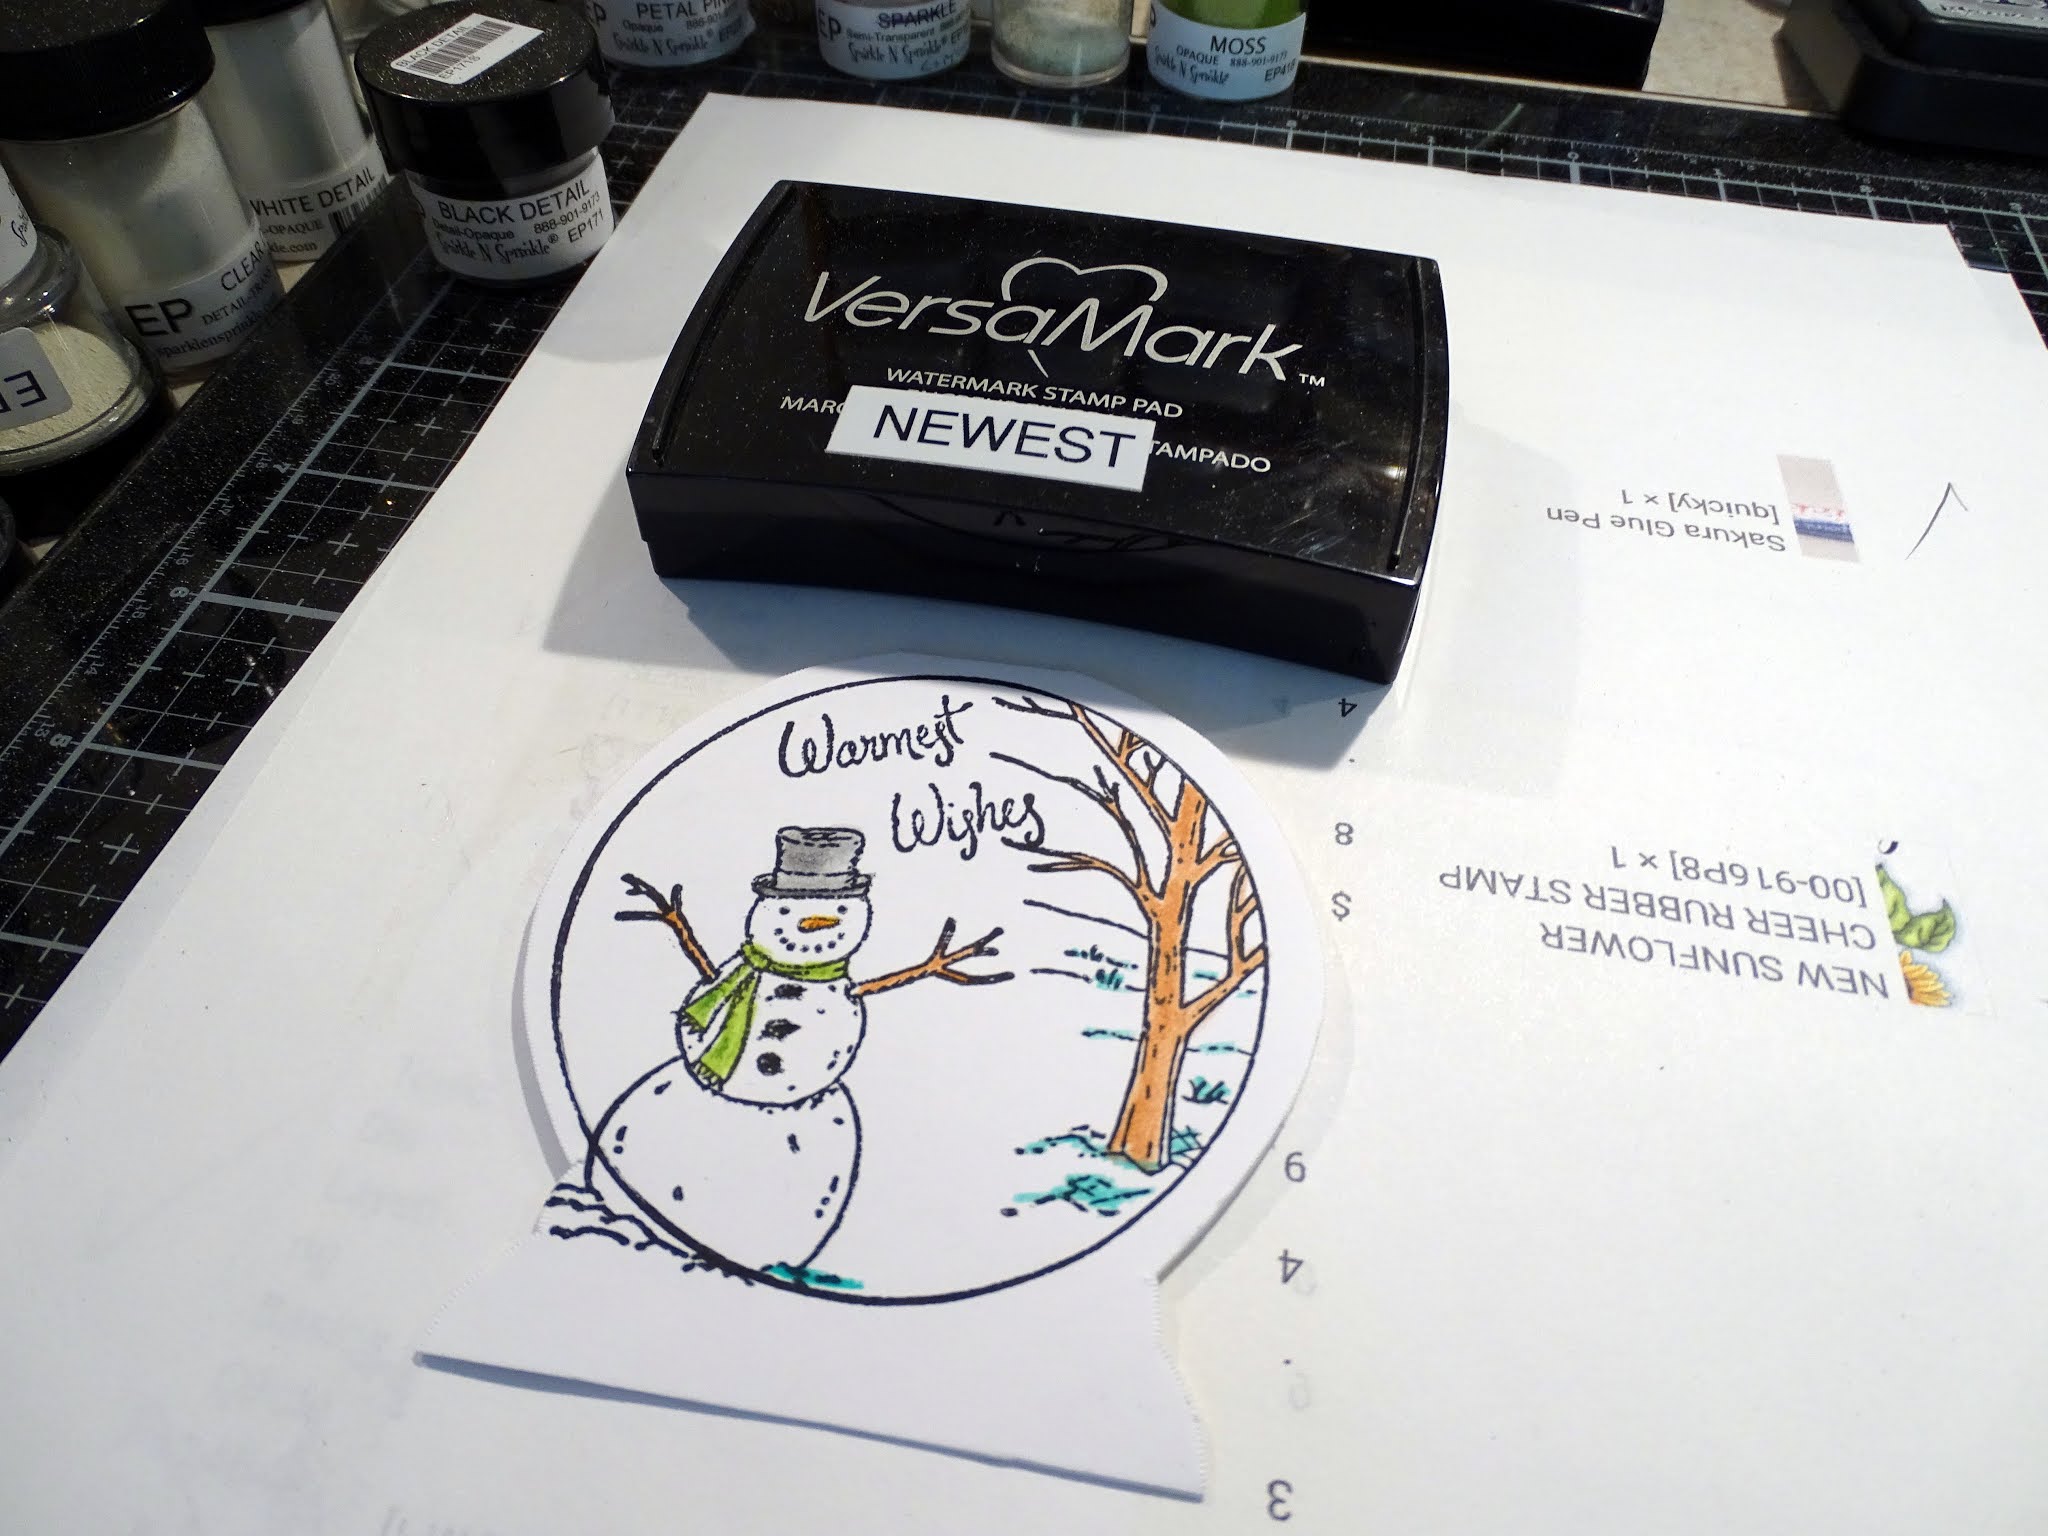
Some Nuvo Glitter Accents Fresh Snowfall was added to the tree branches and the ground for a more snowy effect. and that finished up my card for today.


Here is a list of the products used in my card today:

Beautiful moments: Embossing Folder & Stamp Collection

 (freebie from magazine)

Versafine Clair Nocturne ink

Stampin’ Up watercolor pencils

Memento ink: Peanut Brittle, Desert Sand

Nuvo Glitter Accents: Fresh Snowfall

Tonic Circle Layering Basics die set


Hope you've enjoyed stopping by today. Check out the work of the other designers over on the Challenge blog for more inspiration and to join in with your "shaped card"!


Till next time, stay safe!


Shona

Friday, March 13, 2015

SHARING YOUR SORROW

Hi everyone,

Well, I'm back quickly because unfortunately I have a sympathy card to share. Our family friend of 30 years, our softball coach - when David and I first met and "Uncle" Tommy to the kids, passed away rather unexpectedly this week. It's taken me a few days to get over the shock and put "ink" to "paper". Tommy was very connected to the Irish community in D.C. and so I wanted to keep the card in the green family in his honor. So out came the Brusho Crystals again!


I spritzed normal white cardstock with water and then sprinkled the paper with Yellow, Leaf Green and Emerald Green Brusho Crystals. I chased them around the paper with my heat gun until it was dried. (Not quite sure where the random pink spots came from?) So now what? It was a pretty background, but you know I can't leave well enough alone, and I had no idea in what direction this card was going.

I cut out the Die-Namics Daisy Bunch (love this die) from a lime green and yellow cardstock, saving the negative pieces of the die. One of the negatives was temporarily taped to the brusho surface after applying lots of anti-static dust. I used a dauber with Versamark to pounce down through the negative die. I lifted up the "stencil" and applied Black Detail embossing powder, which was then heated.


I covered that entire piece with Versamark and heat embossed with Clear Detail, then applied a little Magic Speckle on top of that, which gave it a marbled look. (Wish I had taken my camera upstairs with me!) It looked too dark, so I decided to put the die back over the top of the black "image" and cut it from the brusho piece. I used it in the inside of the card instead:


So then I took the yellow die cut piece and placed it back in the space where the black version had been. It was taped down from the back. I cut all the flowers off the green version and glued it on top of the yellow version. Using a Sakura Glue Pen I added Spirited Green Glitter to the stems and leaves and then Sunny Daze Glitter to the petals and buds.

I used Spellbinders Classic Scalloped Circles Large to cut out the center piece. The Grand Scalloped Circles was used to cut the black base card (leaving a fold uncut at the top of the circle). I die cut the same size Grand circle for the outside frame, from the brusho panel and glued that to the black base. I turned the front circle piece slightly so that the scallops had the black showing behind. It was then attached with Dimensional Foam.

h

The sentiment from Sympathy Set 579 was stamped in Versamark onto yellow cardstock and then heat embossed with Pine (one of the awesome Tuscan colors, which come in various colors and are detailed powders so are great for sentiments, when you don't want to use black). I fussy cut the sentiment and sponged it with a little Memento Pear Tart ink before attaching it to the card with dimensionals and tape.


I liked the inlay look. It gives dimension to the card without adding the bulk.

I'd like to enter this card in the following challenges:
Creatalicious Challenges #72: No square or rectangle cards
Scrapy Land Challenge #13: Use brand of die that Scrapy Land Sells

Here's a photo of Tommy giving me flowers as I arrived at the church before our wedding in Scotland. I think I remember he was crying more than I was!


I hope Wava, Tommy's wife will like the card. We're all going to miss this really special man. 

Hugs,

Shona