Showing posts with label embossing paste. Show all posts

Thursday, December 3, 2015

BIRTHDAY QUEEN OF HEARTS!

Hi there, I really appreciate you stopping by today. There has been a lot of using embossing pastes and stenciling going on here - instead of Christmas cards! Will get to that in my next post (I hope!) I went up to my stamping room today and found myself knee deep in embossing paste again!


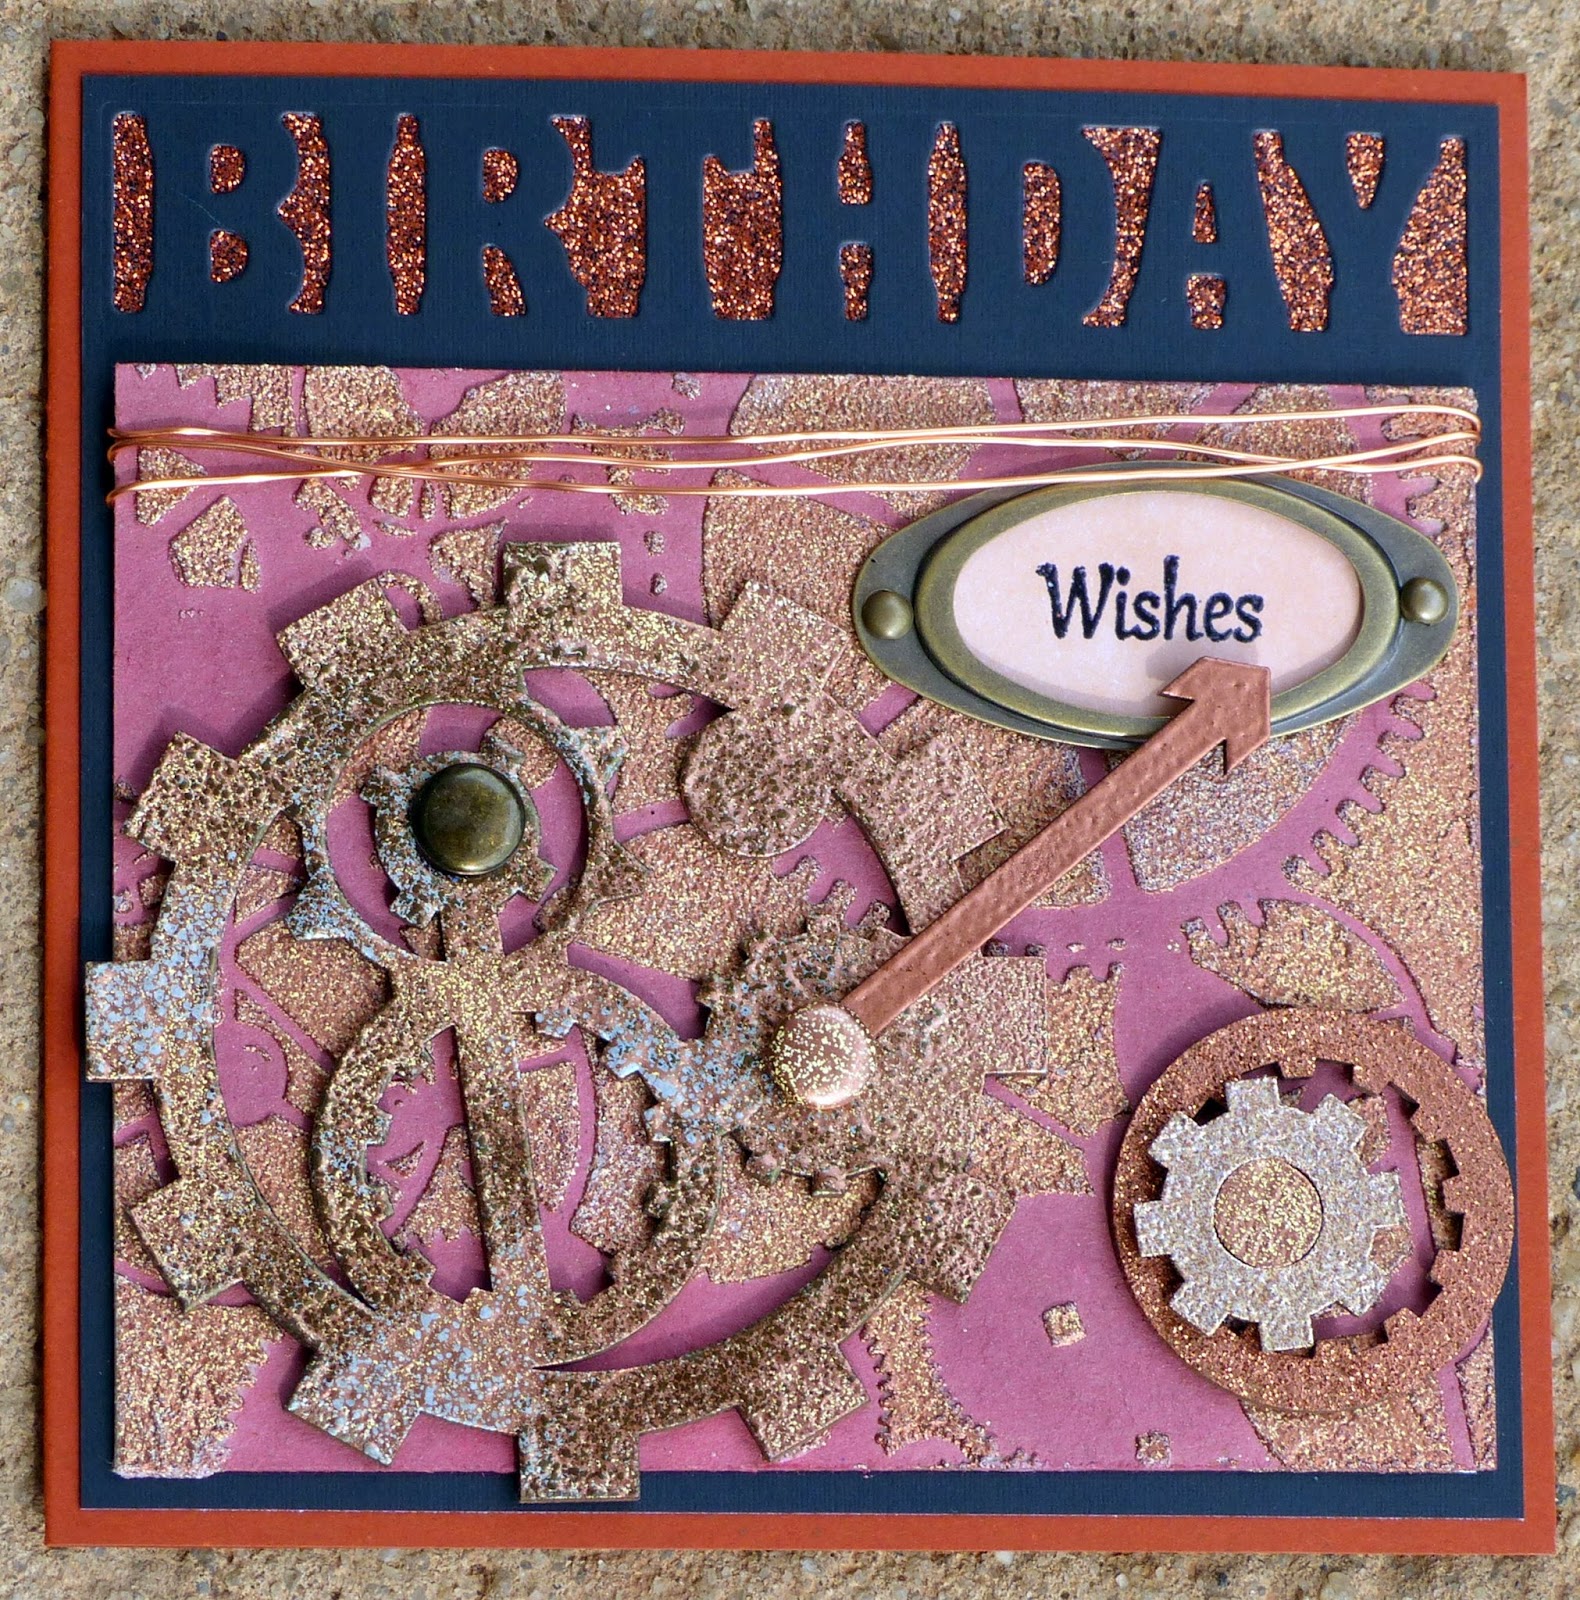
When I saw the new Birthday Queen Set 759 from Sparkle N Sprinkle, I had a  perfect background in my mind! I went to work with the Heidi Swapp Heart Stencil. I taped the stencil down on pink cardstock and applied Dreamweaver's Matte Black Embossing Paste.  I removed the stencil and cleaned it in soapy water.


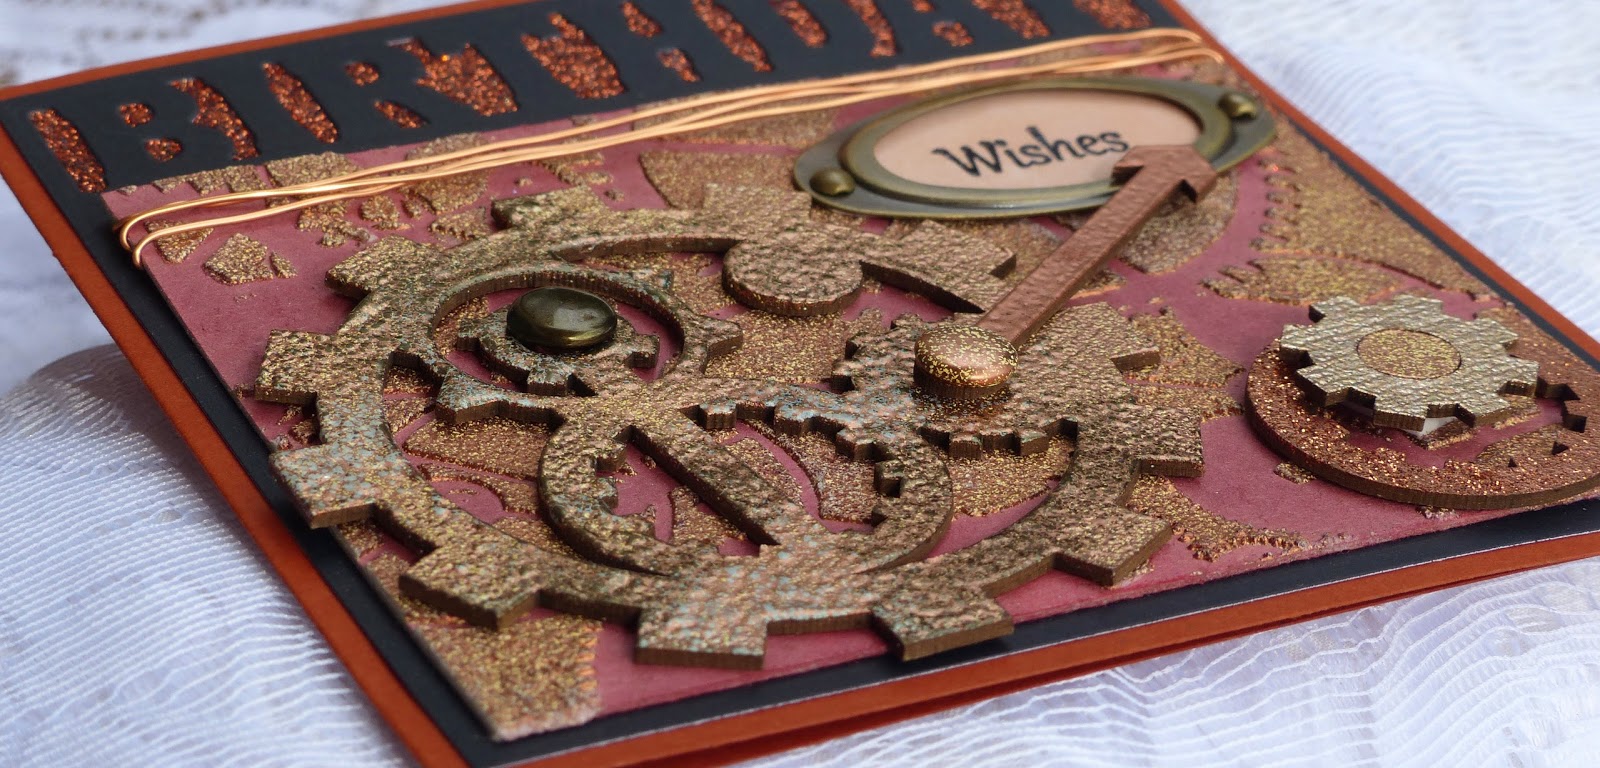
When the paste was dry, I taped the stencil back on top and applied glue (from the Essential Glue Pad) with a dauber to the dried paste. Dreamweaver Metallic F/X Rose Berry Pearl Ex Powder was then applied to the sticky paste with a stencil brush.


Loved the velvety result!

The Birthday Queen from the new Birthday Queen Set 759 was stamped in Memento Tuxedo Black Ink and colored with some Copics and Spectrum Noir markers.


She was cut out using Spellbinders Floral Ovals and some Memento Angel Pink was sponged on to the background before I removed the die. I applied some added sparkle accents with the Sakura Glue Pen and some Bubblegum Glitter.


I stamped the sentiment in Versamark on white glossy cardstock and heat embossed with the new Rosa (EP462) embossing powder. The sentiment was then cut with Spellbinders Classic Scalloped Heart die and the edges were distressed with Versamark and a little more of the Rosa powder. Plum sheer ribbon was used to make my bow, which tied in nicely to the color of the hearts in the background.

The background piece was then layered to a piece of white cardstock which had the same distressed treatment as the sentiment heart. The image, sentiment and ribbon were then added with tape and dimensionals as shown to complete my card today.


Hope I've given you some inspiration to get out the Pearl Ex powders and some embossing paste!

Hugs,

Shona

Sunday, July 19, 2015

GEARED-UP FOR A GREAT BIRTHDAY!

Hi everyone,

I'm back today with a quick post of a card I sent to my brother-in-law for his 60th.  Paul loves to alter objects. We recently visited his studio down in Amissville, Virginia and he was altering an old gynecologist's examination table into a kitchen island table.  Well, I'm almost sure the buyers won't know it's original purpose!! Were he a card maker he would definitely be into Steam Punk - let's just leave it at that, shall we??!!

Here's the table that he is repurposing:


He just loves gears and metals! Here is a photo of a painting that he has recently completed. Note the still life that he put together to paint from!


Yes, I know - nuts right? (no - bolts too!)

Anyway back to the card! I had this background which I had made a while back - which involved gears with metallic colors and I thought that would be perfect for him!

I took the plastic TCW Mini Gears Stencil (262s) and taped it down to a piece of black cardstock. I applied Dreamweaver Translucent embossing paste and then after removing the stencil I applied both Shazam and Abracadabra (separately) before heat embossing the entire background.

h

The Happy Birthday is a Die Versions Die Cut (DVJ-081) cut out of white card stock to which I applied Versamark ink and then heat embossed with Copper Dreams. To make it look a little more rusted and worn, I added some more Versamark and then sprinkled on some Magic Speckle and heat embossed with the heat tool from underneath (to stop the powder from flying all over - which it will do if you heat from the top - just saying!) Love that look - I mean the rusted look - not the powder flying all over the place!

I had the self-adhesive numerical silver stickers in my stash, so trying to keep the card with the metallic look, I stuck them in the space of the cog. The background was attached to black cardstock (which is white on the inside). Happy Birthday was attached with Dimensional Foam and the card was complete.


Happy 60th Paul!

I'd like to enter this card in the Scrapy Land Challenge: No. 22 - Vintage/Steam Punk

Hope you've enjoyed stopping by today.

Hugs,

Shona

Wednesday, March 4, 2015

ONE FOR THE GUYS!

Hi there and welcome to yet another "SNOW DAY"!!!!!

OK - I am so done with this "white nonsense", along with so many other folks in the North East. I'm dog-sitting for my bowling buddy for a couple of weeks, while she visits her Mom in South Africa. The poor little dog can't even find grass to pee on! ...and to make it worse I forgot to put her jacket on for this photo shoot! The photo's blurred because she was shaking.


The grass is a foot under her! I should have made a spot for her and left a tarp over it when it was snowing - but I didn't think that far ahead!! Oh well, we'll just muddle through, right? It could be worse - I could be living in Boston!

Well at least it gives me an excuse to just stamp. My share today is for a dear neighbor - Chet. He is the neighborhood fix-it angel! I was still in my stencil and embossing paste mode when I made this. So I had a masculine background to use.


I had made the background using the TCW Mini Gears stencil, white embossing paste and Sparkle N Sprinkle Pebbled Copper embossing powder. The background is chipboard which had first been sponged with Memento Rhubarb Stalk. The cogs and arrow are all from Blue Fern (Widget works and Industrial Gears). The brads were heat embossed with the Pebbled Copper and Blackened Bronze


The big cog was covered with Pebbled Copper and then I added a little Versamark ink and heat embossed again with a little Magic Speckle. This is an awesome embossing powder. - it gives a mosaic effect, and with the metallic colors it becomes, well let's just say, "well worn".

The other chipboard pieces were embossed with various metallic powders: Copper, Copper Dreams and Antiquities.


The Birthday Cut Out is from Die-Versions - yes I know I've been using it a lot - hoping they come out with a "Happy"! I cut it from a 5" x 5" piece of black cardstock. I applied a strip of 3/4" Tear-ific Tape behind the sentiment and then applied Embers Glitter to the front.


The sentiment was stamped in Versamark and then heat embossed with Black Detail. A little Desert Sand was sponged over the sentiment before I encased it with the hardware, which was from an old batch of Stampin' Up Hardware.

Well you know you have to use ribbon or lace for a girl card, right? What do you do for a guy?  I found some copper wire and wrapped it around the card front before adding it to the rust card base. Thought that it just finished off my card nicely. Happy Birthday Chet, dear friend!


Hope you've enjoyed my share with you today. 

I'd like to enter this card in the following challenges:

Stamping Sensations - One for the Guys!
Scrapy Land - Use a die cut that Scrapy Land sells

Hopefully next time I post it will be more Spring-like!

Hugs,

Shona

Thursday, February 26, 2015

TIE A YELLOW RIBBON!

Hi there, I have another card today to share  using embossing pastes, a stencil and an embossing powder.


I've been working a bit with different embossing pastes, stencils and embossing powders this month. This card came about after trying three different backgrounds:

It's using the Plaid Folk Art stencil: Ditsy floral. I've decided to call this a "negative" stencil, The reason being is that the embossing paste is actually the background, the card you use becomes the "image". To show what I mean - I did it three different ways:


The first is white cardstock, white paste with three different embossing powders. Then I changed it for the yellow cardstock, translucent paste with the same EP's. Then I changed out the EP to just Ebony Spark. The flowers appeared all of a sudden!

I looked at it for quite sometime wondering how I would incorporate it into a card. I had a piece of black cardstock with the Die-Versions Birthday Cut Out sitting in my "pile". I attached the background to the base and stuck a piece of 3/4" Tearific Tape behind the cut out, applying Mimosa Sparkle N Soft to the front. It has some yellow and orange tones to it, so I decided to color the Prima flowers with Dylusions Ink Sprays: Lemon Zest and Pure Sunshine.


I edged the tips of the petals with Versamark and then heat embossed with Tequila Sunrise, to match the two tones of the Mimosa Sparkle N Soft.


Three of the brads were heat embossed with Ebony Spark for the centers of the flowers and then another was heat embossed with Tequila Sunrise for the center of the bow.

I stamped the Wishes (from Set 402: My Rose Garden) in Versamark on white cardstock, hand cut it into a banner and sponged it with Memento inks: Cantaloupe and Dandelion. It was popped up on Dimensional Foam.


The yellow ribbon worked well, since it also had two tones. It was tied in a loose bow and then the card front was layered to a yellow card base.

I'd like to enter this card in the following challenges:
Crafty Boots Challenge: Use a sentiment
Craft-Dee BowZ: Make a handmade bow
Craftin Desert Diva's: Use Ribbon

Hope you've enjoyed my share today.

Hugs,

Shona

Friday, February 20, 2015

TIME FOR COFFEE!

Thanks for stopping by! If you haven't already got one, maybe you should pour yourself a cup of coffee to get you in the mood for the card I'm sharing today.

Every month, my Mum sends me the Craft Stamper Magazine, which is the UK's big stamping magazine. It's always full of great ideas and I usually find a technique to try that I would have never have thought of.

The January issue had an article about using coffee and tea as a coloring agent. I'm on the Design Team for Sparkle N Sprinkle, and on the first of March they will be revealing four new coffee-related sets. I decided to use the Coffee Shoppe scene for my card today. Think of this post as a "sneak preview". I am blogging this earlier than the reveal as I also want to enter this card in the Craft Stamper February Challenge - use a stencil.


So to begin with, I took a piece of watercolor paper and poured some coffee in the center of it and spread the coffee around with a brush, letting it pool in different areas. I then took my heat gun and chased the drips around the paper. Fun and it smells so good!


After it was completely dry, I flattened it out and swiped it with my anti-static bag. Always try to remember to do that before using a stencil - particularly when you are going to use embossing powders or glitters on top of the paste.

Copper Embossing paste was spread over the Tim Holtz Clockwork Stencil:


The stencil wasn't wide enough for the 4 3/4" x 6 3/4" piece of cardstock, so I just turned the stencil over (after cleaning it) and did the bottom half. It didn't matter that there was a line as it would be broken up by the scene and the clock. After removing the stencil I applied Bronze Splendor Glitter to the piece and left it overnight to dry.


The Coffee Shoppe was stamped in Versamark on watercolor paper and then heat embossed with Teddy Brown and was fussy cut. I dipped an aqua brush in my little jar of coffee and started to paint. To get the various degrees of tones of color on the scene I went over specific areas varying amounts of times, letting the coffee dry between applications.


The clock is the BigZ Dies Weathered Clock, I cut it out of watercolor paper and covered the face in Pebbled Copper embossing powder. The hands were heat embossed with Abracadabra embossing powder. I dipped the brad in Versamark and then it was also heat embossed with Pebbled Copper.


The sentiment, from the same Set 695, was stamped in Versamark and then heat embossed with Teddy Brown. I cut and embossed with Spellbinders Fancy Tags and then distressed the edges a little with Memento Potter's Clay ink.

Then all that was left was to assemble the card, which I did with tape and Dimensional Dots. The card front was layered to a rust colored card base, keeping the monochromatic look. 


Hope you've enjoyed my share with you today and that I've inspired you to get more from your morning coffee other than caffeine!

As I mentioned I would like to enter this card in the Craft Stamper February Challenge - Stencilling.

Till next time,

Shona

Sunday, February 15, 2015

PANDA ANNIVERSARY

Thanks for visiting my little part of the world.  Hope things are well wherever you are.  We've just survived another "blizzard", which really wasn't a blizzard, I'm glad to say, but I'm typing this softly so as to not tempt fate! Feeling so bad for those in the New England area.

So, now with Valentine's Day behind us, what's next? Spring? Well, my share today has a little bit of both - some love and some fresh greens!


I've been having a lot of fun with various stencils and Sparkle N Sprinkle embossing powders this month. I love the effect of the TWC Mini Bamboo Stencil along with the cute Sparkle N Sprinkle Panda's Birthday Set 465. I sponged white cardstock with Memento inks, New Sprout and Bamboo Leaves and left it to dry. I found it best to treat the inked surface with the anti-static bag before putting the paste through the stencil - less stray embossing powder that way! 


After the embossing paste was spread over the stencil, I applied some Moss Star and then some Bullfrog embossing powders.


After being left overnight to dry, it was then heat embossed - so pretty:


The pandas were stamped in Versamark and heat embossed with Black Detail. They were then colored with Copics: N0, N2, 0, G07, YG09 and R02. I sponged some Pear Tart ink around the image before fussy cutting.


The leaves of the bamboo in the image were highlighted with Green Iris Glitter.

The banner (Sizzix Banners Framelits) was cut from a scrap of Super Adhesive Sheet, after being applied to piece of white cardstock. The protective backing was removed and the Spellbinder's Inspire Dies was cut out from black cardstock and then placed on top of the sticky surface:


Luau Green Velvet Glitter was then applied to the remainder of the banner - great way to use up strips of left-over Super Adhesive Sheets!


I heat embossed the little heart brads with Moss Star, Pear Star and Bullfrog which were then added to the card front along with the image and sentiment which were attached with Dimensional Dots before being layered to black and then to the white card base.

I hope you've enjoyed my share for today.

I'd like to enter this card in the Craft Stamper Challenge: Take a Technique - Stencilling

Thanks for stopping by,

Hugs,

Shona

Sunday, May 18, 2014

SPARKLE N SPRINKLE MAY REVEAL

Hi, and welcome to Sparkle N Sprinkle's May's Reveal.
Our website was not playing nicely, so we are a bit late showing off our May projects with the new images.


This month Sparkle N Sprinkle is introducing EIGHT new rubber stamp sets and 5 new digital sets. Through May 21, the rubber stamp sets are 20% off their regular price.
The beautiful Nesting Bird set is available:
 on Cling Mounted Rubber
as a digital image
and is also included in Jazzy Jill's Technique Video for the month.

SPECIAL FOR VIDEO KIT CUSTOMERS ONLY:
FREE shipping any size order. When checking out in the on-line store, please use a credit card (not PayPal) and write VIDEO KIT CUSTOMER in the COMMENTS section. Your account will be manually adjusted.
Video Kit Customers using PayPal, please phone the office to receive free shipping.
Offer expires May 21, 2014.

On May 21 EIGHT winners will be selected from the comments left on the designers' blogs listed below. Each winner will receive a new stamp set, and the choice of one embossing powder and glitter to go with their new set.

The new stamp sets are:

Travel Mixed Media #607
Floral Flourish #634
Leafy Flourish #641
Nesting Bird #602   (digital available)
Church Sympathy #604   (digital available)
Across the Miles #603   (digital available)
Spunky with Flowers #605 (digital available)
Garden Silhouette #600 (digital available)


The blog hop winners will be announced on May 21 on Facebook, the SNS blog, and on our blogs:

Anita Scroggins
Steff Munnings
Donna Ellis
Remember to comment on each of the Designer's blogs to increase your chances of winning!


My personal favorite set this month is Set 600: Garden Silhouette. I happen to love using silhouette stamps and gardening is another of my creative passions. 


Sparkle N Sprinkle is now carrying stencils and embossing paste. Did you know that you can make gorgeous, sparkly and dimensional  backgrounds for your projects using embossing paste, a stencil and your choice of embossing powder? Here is the tutorial in the tips and techniques section if you'd like to check it out. 

I went a little crazy with this technique one evening. I used different stencils and varied the embossing powders used.  Here's a look at some of the results:


I wish I had taken a photo of all the backgrounds I made, before I started using them!! One of my favorites was made using the Clockwork stencil by Tim Holtz. I made two backgrounds, one using Blue Silver Embossing Powder and the other with Silver Lightning

The first card shown used the Blue Silver version. Here is the Silver Lightning background:


Don't you just love the chunky sparkly dimension?

My only advice with this technique is set aside some time to do several at once. You will need to have soapy water on hand to clean the paste off the stencil as soon as you take it off the cardstock. I placed the stencils in a basin of soapy water immediately and cleaned them all at the end.  As long as they are soaking in the soapy water it is an easy clean-up, just don't let the paste dry on the stencil!  The other benefit to doing more than one at a time, is you need to apply the embossing powder to the paste while the paste is wet, but you have to wait till the paste is dry to heat emboss the powder. I left the backgrounds overnight to dry and then embossed them all in the morning. So much fun!! It felt like Christmas morning - opening presents!!

As soon as I saw this sentiment in the Garden Silhouette set, I knew I had to make something with my clockwork backgrounds. For my first card, I inked up a mirror background stamp with the Creole Spice Kaleidacolor ink pad and then spritzed it with water before stamping onto glossy white cardstock. I left it a short while to dry. The colors will become muted and "dreamy". The image was stamped on top with Memento Tuxedo Black


I applied Versamark to the Prima flower and heat embossed with the Silver Lightning embossing powder again. It was attached to the background with a brad, then the image and background were layered to black glossy cardstock. I stamped the sentiment in Versamark on glossy black cardstock and heat embossed with Belgian Cream. It was cut up and taped to the focal image. Complete instructions, if needed, can be found here.

For a totally different look, using the same stencil, I added a "few" glitters to my second card:


As I mentioned before, one of my other passions is gardening and I love taking photos of everything that happens out there! The flowers in the card were cut out from this photo, taken last year:


After cutting out the flowers, I applied Lavender Iris, Bubble Gum, Raspberry Soda and Pretty Princess glitters with a Sakura Glue Pen to add some pink sparkle, to highlight the gorgeous colors of the Coneflower! 

The sentiment was stamped in Versamark and heat embossed with Black Detail and then cut and embossed with Spellbinders Fancy Framed Tags Three. I distressed the edges with some Memento Sweet Plum ink before adding a little Versamark and heat embossing with Sangria Star.

To assemble the card and pull the silver and pinks together, I decided to add a glittered border, using the same stencil and a couple of the Velvet glitters. I applied 2 1/2" Tear-ific Tape to the right side of pink cardstock. Versamark was applied to the back of the stencil that will be touching the tape, this makes it easy to release from the tape afterwards. Remove protective backing of tape and lay the stencil on top. Apply Orchid Rose and return excess glitter to jar. Take off the stencil (you will need to remove the Versamark ink from it - some soapy water works fine) and then apply Reflection glitter to remaining exposed tape. There is a tutorial for this technique in the Tips and Techniques Section, if you need more detailed instructions. 

A strip of Orchid Rose balances out the left side of the card and the flowers were attached with dimensional tape of various depths, to create lots of dimension. This card and directions can be found in the gallery, here.


I'd like to enter this card in the challenge over at The Artistic Stamper, where the theme is "In the Garden".

Hope you've enjoyed your visit with me today, I'm leaving you today with a sneak peak of another card I made using the Garden Silhouette set.


Till next week!

Hugs, 

Shona

Thursday, January 16, 2014

FANCY FEATHERED PEACOCK

Hi there! today I'd like to share with you, a card I made using the Dreamweaver Peacock stencil and one of the Pocket Full of Paper line that Sparkle N Sprinkle is now carrying. These papers are exclusive to Sparkle N Sprinkle and they are all gorgeous. 


I thought that the peacock stencil went really well with this particular paper - Feather Fancy. If you are a regular to my blog, you'll also see that I've included some of my "old neighbor's ribbon stash"!  I would love to find more of that, if anyone has any idea, please share info!


I temporarily attached the stencil to the paper and applied embossing paste over the stencil.  Remove the stencil and wash it. When the paste is dry, (I leave it overnight to be safe) put the stencil back over the dry paste and apply Versamark, remove stencil and heat emboss with Black Detail. The base of embossing paste really makes the "image" pop!


I ran 1/4" Tear-ific Tape along the sides of the card and attached the ribbon, then ran 1/2" Tear-ific Tape over the edge of the card (on top of the edge of the ribbon) and applied Black Suede Velvet Glitter to the exposed tape. These tapes, in various widths are the best for sticking down glitters or flockings. No need to wait on glues drying and using the 2 1/2" or Super Adhesive Sheets you can make your own instant glittery or flocked shapes! Check out how, right here!


I embossed the sentiment with Belgian Cream, this is my favorite white embossing powder to use on dark cardstock. It is an opaque embossing powder and gives great coverage, even with a detailed stamp.

Well that's all for today, hope I've inspired you to look out some stencils and start playing. I bet, you can't stop at one card though!

Now I'm going to leave you with a sneak preview of what my next blog share will be. Using the same Feather Fancy paper, and one of the new sets that were revealed this month, Set 525: Dress Up, I paper pieced one of the dresses:


Loving these papers! See you soon,

Shona