Showing posts with label Memory Box dies. Show all posts

Friday, February 28, 2020

Heart Embossed Butterflies

Hi there, I'm back to share with you a monochromatic card that I made for the Dies R Us Design Team, using the Memory Box Large Circle Burst die and the Poppystamps Embossed Heart Butterfly. I want to give a shout out to Lori Kobular for this gorgeous die - I won it over on the recent Turner Syndrome Awareness Blog Hop! Thanks so much Lori - I love it!!


I had a piece of purple card stock laying on my desk that I had die cut with the Circle Burst last week. I was thinking monochromatic for my card today and I was thinking pink, so instead of using it as a die cut, I used the piece as a stencil. Using a finger dauber, I applied Distress Oxide Worn Lipstick through the stencil.


I then die cut the Embossed Heart Butterfly and after cutting, I ran it through the machine again with an embossing pad to emboss the hearts. Leaving the die in place, I daubed the Worn Lipstick to the little raised hearts. I repeated this three times. 


Fuchsia metal antennae were attached to the back of the butterflies with tape. The sentiment from Sparkle N Sprinkle set Pansies was stamped with Versafine Claire Morning Mist. I used my stamp positioner for this, to be able to stamp a couple of times to get a clear impression.


The sentiment was then heat embossed with  Sparkle embossing powder.


The three butterflies were attached with foam tape for dimension. 


Below are the products that I used on my card today:

SNS Pansies Set 826
Sparkle (EP107) 
Fuschia metal thread
Mounting Foam

I hope you've enjoyed your visit today!

I'd like to join in the following challenges:
World Wide Open Design Team Challenge #2: Anything Goes
Cut it Up Challenge #194: Your favorite color
Crafty Gals Corner Challenge #204: Add a Heart

See you next time!

Shona

Friday, December 27, 2019

Cardinal Joy!

Hi there, 

I'm sharing my last 2019 card today !! I just don't know where this year went! Today I am highlighting Dee's Distinctively Cardinal Frame for DRU.


Here is the cardinal frame die cut:


I started with backing a piece of white cardstock with a piece of Super Adhesive Sheet. The die was placed face down on to the adhesive side, so that when I ran it through it only cut the adhesive sheet and not completely through to the cardstock.


I then ran the die cut through with red cardstock and fussy cut the two birds.


I picked off the protective backing from the cardinals and branches and placed the red cardstock cardinals in their appropriate spots. 


I then took Glistening Emeralds flocking and burnished it in to the remaining sticky surface.


The remainder of the protective backing was then peeled off and Sparkling Snow glitter was burnished in as a sparkly background.


I found the perfectly sized frame for my piece - the Cheery Lyn Celtic Square Boutique Stacker Frame. This particular one is not in the store, but there are other stacker frames. The medium sized frame was cut out of green cardstock.


This was layered to red cardstock and then to a white card base before adding the focal piece with foam tape for dimension. I added Nuvo Crystal Drops Ebony Black for the eyes.


The last step was to add the sentiment. I taped a piece of adhesive tape to a scrap of red cardstock. This time I put the "joy" die on the other side so that it would be sticky on the back of the word.


I took of the sticky backing from the die and stuck it on the top of the glittered panel.


It was a bit fiddly getting the adhesive off the back of the dot of the "joy", but I really liked the result. Hope you do too?


Here are the products that I used in my card today:


Memory Box Sketchblock Joy

Glistening Emeralds Flocking
Sparkling Snow Glitter
Nuvo Crystal Drops Ebony Black

Wishing you all a wonderful, happy and healthy New Year!
See you again in 2020!

Shona

Friday, December 6, 2019

Reindeer Snow Globe Shaker

Hi there, 


Well, here we are again - December! That was the quickest year ever, wasn't it? My December header is a little herd of deer in our front yard, enjoying all those extra acorns that Mother Nature provided for them this year! My first card for December is for the Dies R Us Design Team and also includes a deer - a snow globe shaker card, using the Memory Box Evergreen Reindeer and the Tutti Cross Stitched Nesting Circles.


Here are the dies I used:


Tutti Designs - Cross Stitch Nesting Circles

I ran both dies through the big shot at the same time. 


In an effort to make it look like a snow globe, I used the Spellbinders Mega Ovals Large to cut a base - cutting it out first and then die cutting another piece out of the "top" - from a piece of wood-grained self-adhesive cardstock.


I then stuck acetate to the back of the "globe" with double stick tape.


A piece of digi paper was attached to the front of a white card base for the background. Happy Holidays from an old Sparkle N' Sprinkle Set was stamped in Versafine Clair Monarch under the globe and heat set with Clear embossing powder.


Mounting tape was then attached to the back of the globe panel.


A few spoons of Stampendous Shaved Ice was then added on top of the background paper.


The top panel was then placed on to the card base to finish off my card.


Below you will find the products that I have used in my project today: 


Christmas Sayings Set 223 (SNS)
Spellbinders Mega Ovals Large
Clear Detail embossing powder
Stampendous Shaved Ice
Mounting Foam

Don't forget to come join in the fun at the Dies R Us Challenge Blog. There's a new challenge theme offered on the 1st and 15th of each month and one lucky randomly drawn winner will receive a gift voucher prize to the Dies R Us Store. For your convenience, all the important Dies R Us links are provided below.
https://blogger.googleusercontent.com/img/b/R29vZ2xl/AVvXsEighVxYJgFzUbJcKmgwwTAKf2gnEI1PpQg7k3sVTOytC957HBjLxz5QC86xDfNiQFxp6piLaHJ0i9WGDP4N5_LmjYWRQzbBJBRUtwONipoIxRwWEWzr1gaRYgty89197x1pKLlfuRZCd97B/s1600/-logo+collage.jpg
click below for:


I hope you've enjoyed my share today?

Till next time,


Tuesday, September 10, 2019

Decorations Challenge for CASS

Hi there,

Wait, what happened to August (not to mention summer)? My September blog header is a "late bloom" of my hardy hibiscus! Such a huge flower, though I have to say the leaves didn't look so spectacular this year!! I know that Japanese beetles got to them last year and it looks like that again, however the big saucer blooms are so fun and although they only last a couple of days, it has put on a lovely display of blooms the entire summer.

I'm here today with my monthly post for Christmas at Sweet Stampin', where they have an anything goes Christmas challenge and this month there is an option to use decorations! Surely, you have a stamp or die cut of some kind of Christmas decoration?  We would love to see you join in the fun. So now on to my card:


I was able to attend the Scrapbook Convention last month, where I took a few fun classes and picked up a few fun items! One of the classes was with Rubbernecker Stamps using their Watercolor Background Set 1227. For my card background, I started with one of the background images and mixed some water from a waterbrush and some Nuvo Catherine Wheel Shimmer Powder, using the waterbrush I painted the image and stamped it on to a piece of watercolor paper. I continued this process several times.


After the red splatters were dry (I used my heat tool to ensure it was), I came in and repeated the process with Nuvo Green Parade Shimmer Powder.


I die cut a piece of red and green cardstock using the Memory Box Addison Background Ornament die.


I then cut the Addison Ornament twice from Gold Mirror cardstock.


The gold ornaments were adhered to the red and green ornaments using a little Nuvo Deluxe Adhesive. The middle bauble was made by die cutting the ornament out of red cardstock and then putting a piece of Super Adhesive Sheet on top of Gold Mirror cardstock and running it through with the background die cut. The Adhesive sheet was peeled back to reveal the sticky gold surface on to which I placed the red ornament.


The sticky surface of the ornament was then filled in with 24KT Gold glitter.


I stamped the sentiment from Hero Arts CL551 on to white cardstock with Versafine Claire Golden Meadow. This was then heat embossed with Gold Detail embossing powder. It was placed at the bottom of the card and then the ornaments were added with mounting foam.


The bauble tops were glued in place using some Nuvo Deluxe Adhesive and then I added a little gold thread and taped them to the back of the background piece before layering to a green layer. This was then layered to a white card base.


Here's a close up of the ornaments:


Hope you've enjoyed my share today? Please stop by and join in the fun over at
the Christmas at Sweet Stampin' Creative Challenge. Below is a list of my card
ingredients!:

Rubbernecker Stamps 1227 Watercolor Background Set
Hero Arts CL551
Detail Gold (EP168)
Versafine Clair Golden Meadow
Super Adhesive Sheet
24kt Gold (GM2038)
Gold Mirror Cardstock
Nuvo Shimmer Powders: Catherine Wheel and Green Parade
Water Brush
Nuvo Deluxe Adhesive
Memory Box Addison Ornament Background
Memory Box Addison Ornament
Foam Mounting Tape
Gold Thread

I would like to take part in the following challenges:
World Wide Open Design Team Challenge #8 - Anything Goes
Classic DT Open Challenge #9 - Anything Goes
The Holly and the Ivy Christmas Challenge #55: Anything Goes
Take it Make it Challenge - September: Anything Goes
Scrapy Land Challenge #121: Anything Goes (use a die that SL carries)

Till next time,

Shona


Thursday, April 20, 2017

Christmas Holly Blessings

Hi there, 
Today I'd like to share with you a card made using the pretty Christmas Holly Blessings Set 841 from the April Reveal..
I began by stamping the image on white cardstock with Memento Olive Grove. I fussy cut around the vase and die cut the piece with Memory Box Cross Stitched Frame Borders, using the out of the box technique (placing the edge of the vase over the top of the frame so it doesn't get cut off).
 
Next I colored the vase with the Nuvo Fine and Medium Tip Glue Pens and left it till it got tacky, then I applied Nuvo Gilding Flakes: Radiant Gold to the vase for a lovely shiny appearance.
The image was colored with Copics: BG93, YG03, G99, R29 and then I began going over the berries with the Nuvo Red Berry Crystal Drops. It is best to apply the drops a little at a time, leaving space around them and letting them dry before going in and applying more, otherwise they will run in to one another and become one big blob.
At this point I made my background, which was a white piece of cardstock, run through a Cardmaker Magazine Holly Embossing Folder. This was then daubed with Spring Green Nuvo Embellishment Mousse.
The berries were also applied to the border in stages, like the image. Sentiment, from the set was stamped in Versamark and heat embossed with Gold Detail. This was cut out from one of the smaller dies from the MB die set and was sponged with Lady Bug Memento ink before the die was removed. Three little Red Berry drops were added to the sentiment and then both the image and sentiment were popped up with mounting tape onto the background , which had been previously layered to red cardstock with 1/4" Tear-ific Tape.
That finishes off my card for today. Hope you've enjoyed my share? 
I'd like to play in the following challenges with my card:
Christmas at Sweet Stamping: April - Anything Christmas
Holly and the Ivy Challenge: Anything Christmas
Make My Monday: Challenge #44: Embossing Heat or Dry
Here is a list of the products used in my project. Click on the product and it will take you directly to the SNS store, where they can be purchased.
Thanks for stopping by today,
Hugs,
Shona

Saturday, January 28, 2017

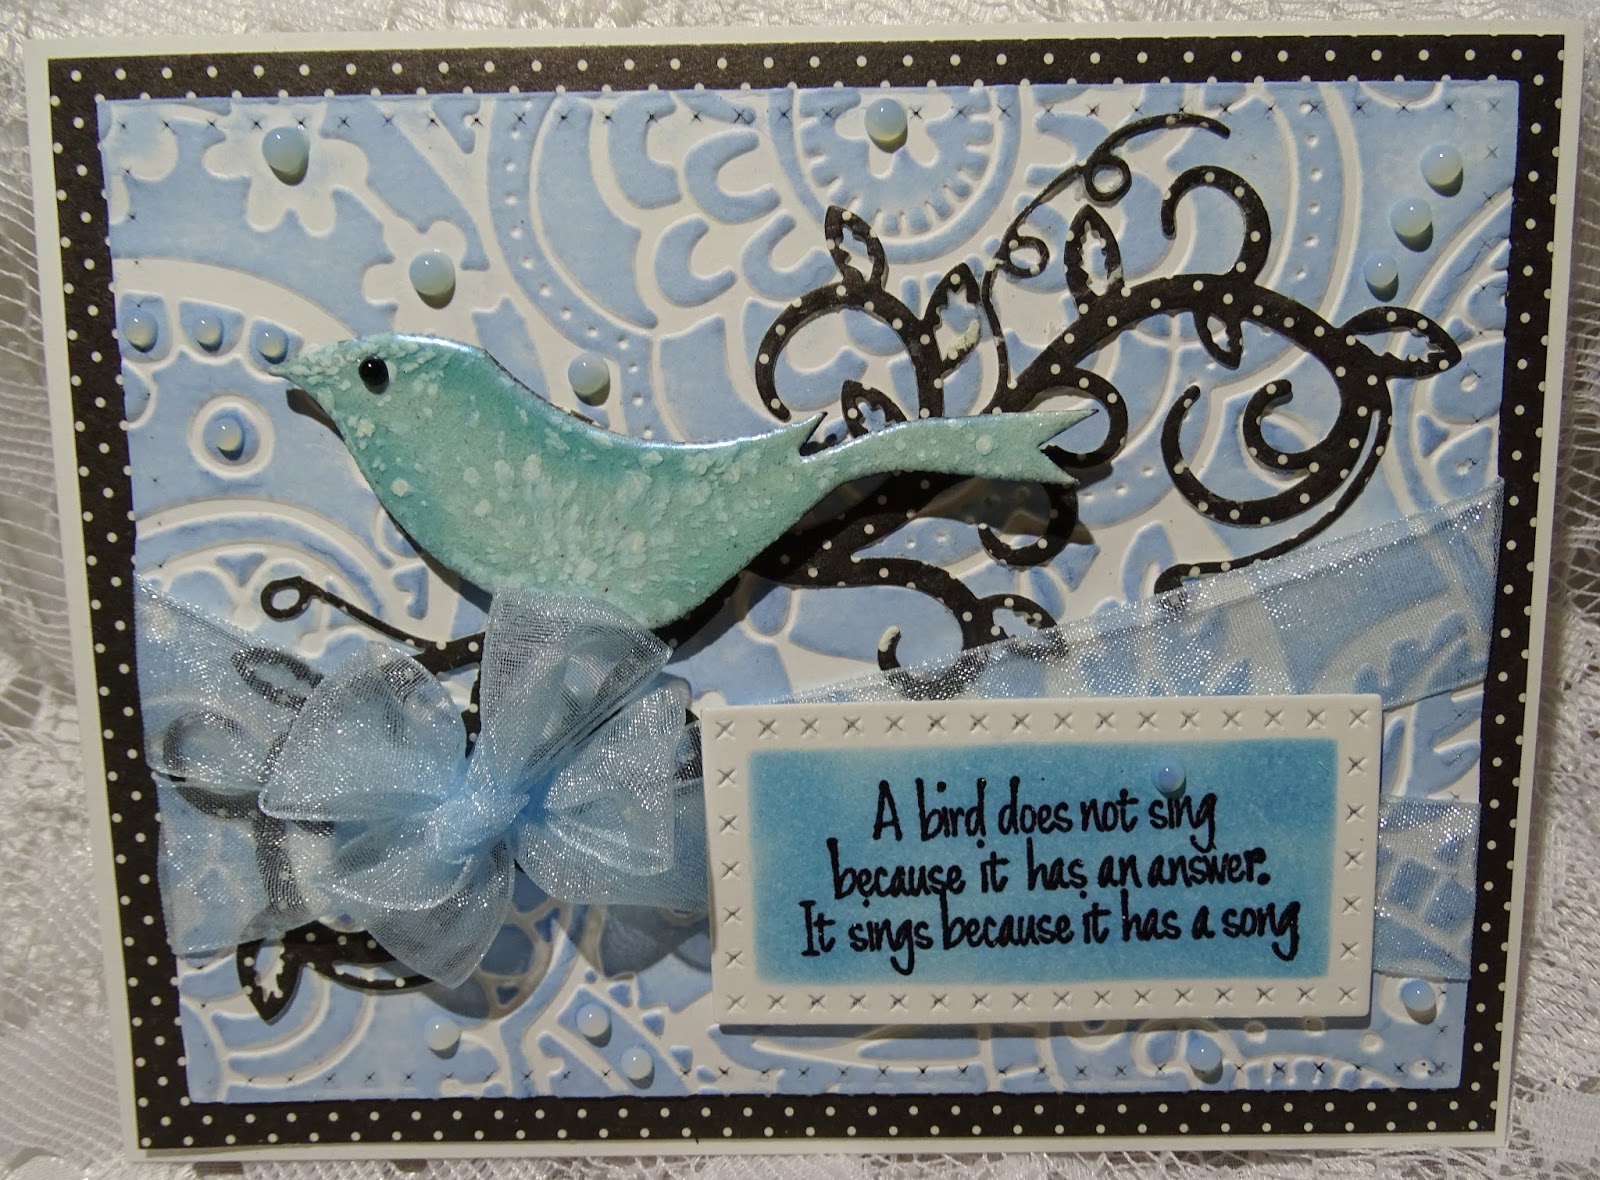
A BIRD SINGS BECAUSE IT HAS A SONG!

Hi there,

A quick extra post in here today, as I had a couple of hours just "doodling" in my stamp room. Felt like creating, but didn't have a deadline or required project - such a great feeling. I did want to open and use a new embossing powder from Sparkle N Sprinkle - Robin's Egg! 


There was a little chipboard bird from Want to Scrap, left-over from another upcoming project, sitting alone on my desk and so I started with those two things. First I covered the bird in Versamark (I use an old pad, specifically set aside for chipboard pieces), then I applied a couple of layers of Belgian Cream, before applying the Robin's Egg. I did this because the Robin's Egg is a light color and it is better to have it go down on white rather than the brown chipboard.


Next I pulled out a virgin embossing folder - Cuttlebug: Bit of Paisley. I ran a piece of cardstock, that had already been die cut with the Memory Box Cross Stitched Framed Border, through my machine and then inked the raised pattern with Memento Summer Sky.


Another newbie was used for the "branch". So I die cut Spellbinders: Foliage Flourish out of a piece of black and white dotted designer paper. I applied a coat of Brushable Glue to the underside and then glued it down to the embossed card front.


The sentiment is a favorite of mine from the Sparkle N Sprinkle Bird Song Set 496. This was stamped in Versamark and heat embossed with Black Detail. Before removing the Memory Box Cross Stitched Framed Borders, I sponged with Memento Summer Sky.


I tied two sheer blue bows together and wrapped them around the back of the card front and layered to the black and white dotted paper before layering to white card base. The bird and sentiment were attached with mounting foam.


The final touch was the Nuvo Jewel Drops Sea Breeze, which were added sporadically over the project and one Nuvo Crystal Drop of Ebony Black was added for the bird's eye! I have to say it was kind of fun, just getting to play!


I'd like to enter this card in the following challenges:
Moving Along with the Times: Challenge 37: Swirls and/or curls
Craft Rocket Challenges: #31 Add a Bow
Craft-Dee Bowz: January Challenge: Use a hand-made Bow
Perfectly Created Chaos: #9 Black, White + 1 Color

I'll be back in a couple more days, with my card for the new February 1st Sparkle N Sprinkle Reveal. Till then enjoy the weekend!

Big hugs,

Shona