Friday, November 1, 2019

Glitered Baubles

Hi there,

My November header photo was taken on a hike in my local woods last week. I was delighted to find this American Witch-hazel tree in bloom.  Another thing that surprised me on the walk that day was the amount of acorns that were littering the ground, and falling all around me as I walked. So on a side note for those interested in gardening and wildlife - did you know that 2019 is a "Mast Year"? 


Now on to my card! Today I have a twist (or maybe I should say a turn) on one of the Dies R Us Christmas dies. When I saw this die I thought how fun it would be to have a "cut out" on the opening of the card and so this is what I came up with.


I used the following dies for my project today:


Tutti Designs - Dies - Ornaments Panel
In order to have the Impression Obsession Ornament Panel "opening" to be on the right side, I die cut the mirror gold cardstock from the back. 


I then cut out the "Merry" and "Christmas" from the Tutti Designs Christmas Stitched Words (what a fun little set of dies!) I will definitely be using this set a lot this year!


A piece of Super Adhesive Sheet was layered on to red cardstock and then cut it down to 4" x 6 1/2". After removing the protective backing, I then arranged the Ornament Panel and the Stitched Words onto the card front, and used the left-over protective backing to burnish in the metallic cardstock.


Gypsy Red microfine glitter was then applied to the remaining sticky surface.


I hand cut around the top right corner and the panel was then layered to green, which was also then hand cut. This was then layered to a white card base and the top right corner was then hand cut again.


Here is a close up of the sentiment:


... and that finished off my card for today.


Here are the products that I used on my card today:

Super Adhesive Sheets
Gypsy Red Microfine Glitter
Gold Mirror Cardstock

Don't forget to come join in the fun at the Dies R Us Challenge Blog. There's a new challenge theme offered on the 1st and 15th of each month and one lucky randomly drawn winner will receive a gift voucher prize to the Dies R Us Store. For your convenience, all the important Dies R Us links are provided below.
https://blogger.googleusercontent.com/img/b/R29vZ2xl/AVvXsEighVxYJgFzUbJcKmgwwTAKf2gnEI1PpQg7k3sVTOytC957HBjLxz5QC86xDfNiQFxp6piLaHJ0i9WGDP4N5_LmjYWRQzbBJBRUtwONipoIxRwWEWzr1gaRYgty89197x1pKLlfuRZCd97B/s1600/-logo+collage.jpg
I hope you've enjoyed my share today?

Till next time,


Friday, October 11, 2019

Glittered Snowman

Hi there, 

Today I have my second card for Dies R Us with another glittered project for Christmas. This time I chose to use the Tutti Designs Arched Fir Branch with the Tutti Designs Jolly Snowman peeking out from behind.


Here are the two dies I used on my card today:


For my background I started with the Sizzix Plaid and Snowflake embossing folder set, running the snowflake folder through my machine.


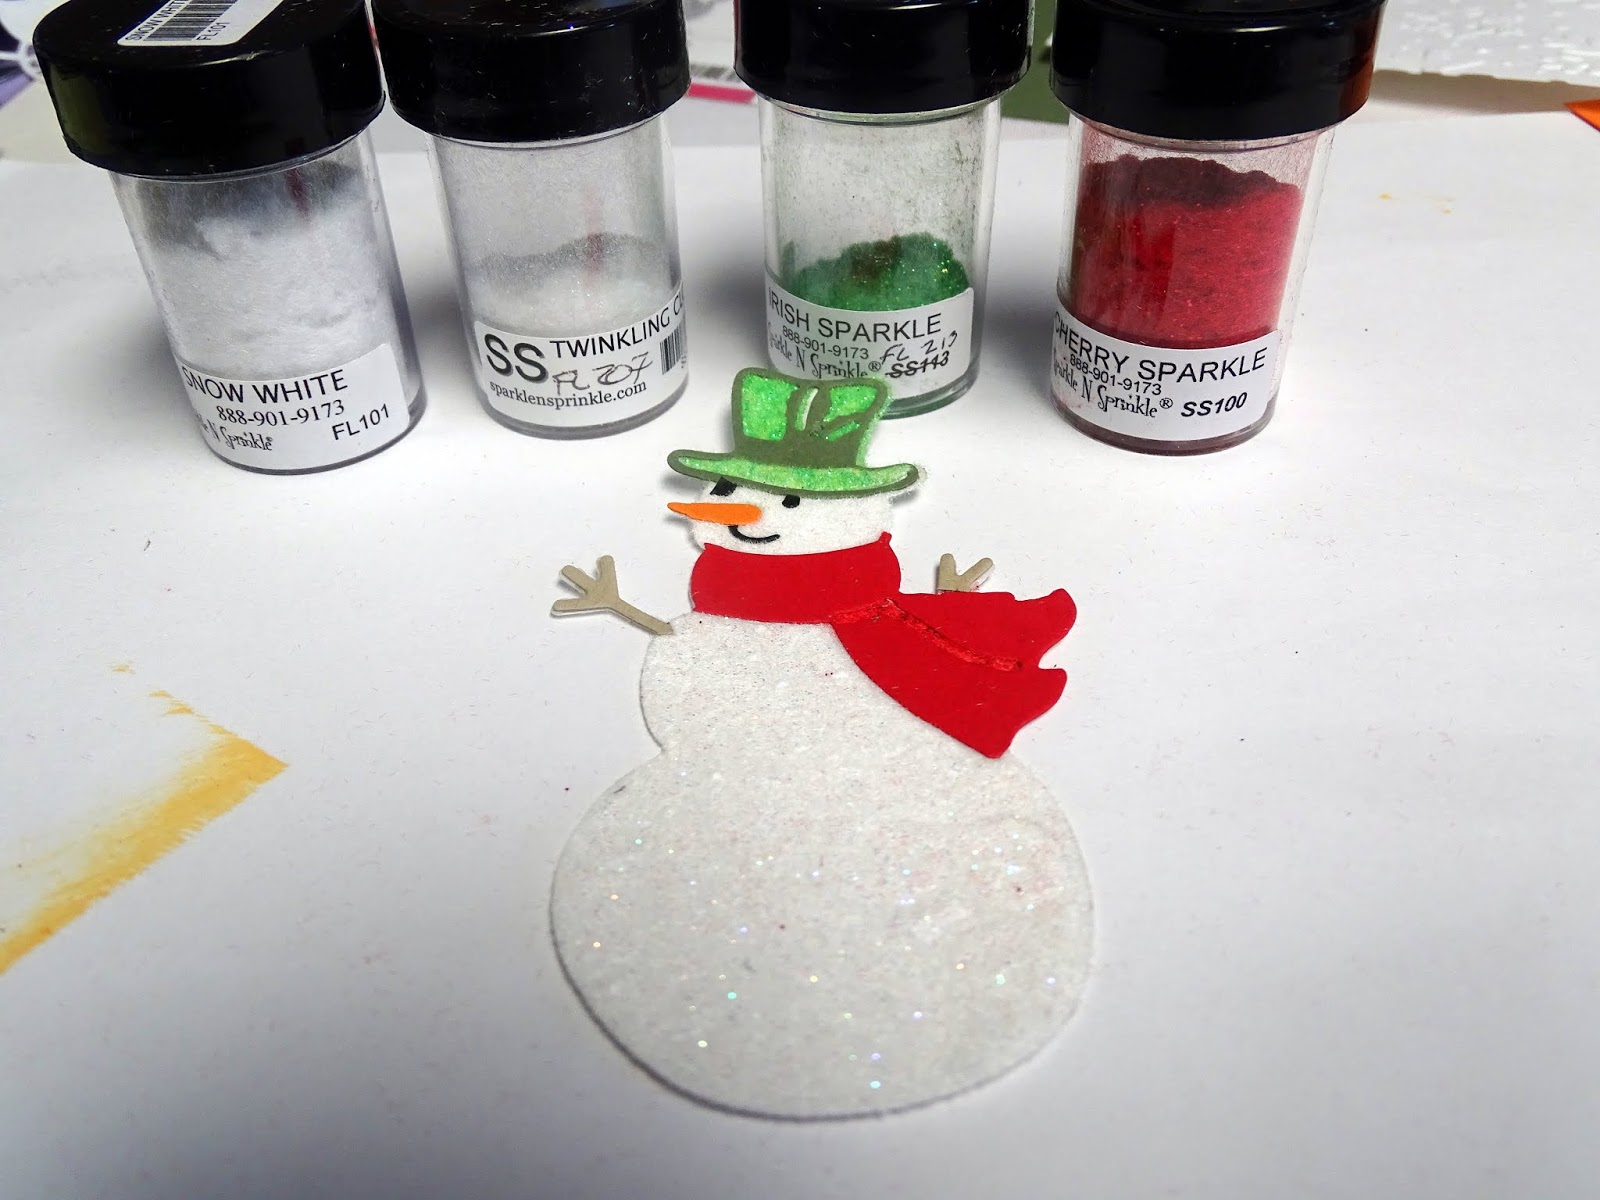
Next I worked on the snowman. First I die cut him from a piece of white cardstock applied with a layer of Super Adhesive Tape.   


Different parts of him were then cut from red, green, orange and black cardstock to "color" him in.


The protective backing of the adhesive was picked off the scarf, and inlaid with the red card, and I continued until all the colors were done.


Then I picked off the outline of the die cut and put down Snow White flocking.


I used Cherry Sparkle and Irish Sparkle to add to the inlaid pieces of the scarf and hat.


Twinkling Clouds was applied to the little swirls on his belly, but the contrast in the design did not show up as well as I'd have liked, so I decided to redo his belly. I die cut a piece of white cardstock layered with the Super Adhesive Tape again and then cut out the shape of the belly and picked out the little swirls.


This time the details showed up much better!


The Arched Fir Branch was then die cut from olive green cardstock and attached to the top of the front panel. The snowman was tucked under the fir branch with mounting tape.


The card front was layered to red before being layered to the card front. Happy Holidays from Sparkle N Sprinkle Sayings Set 223 was stamped along the bottom in Memento Love Letter Ink and that finished my card off for today. 

Here is a list of the products that I used today:

Sparkle N Sprinkle Christmas Sayings Set 223
Memento Ink Love Letter
Tutti Designs Arched Fir Branch
Tutti Designs Jolly Snowman
Sizzix Plaid and Snowflake Set embossing folders
Snow White Flocking (FL101)
Twinkling Clouds (FL201)
Irish Sparkle (FL213)
Cherry Sparkle (FL200)

I hope you've enjoyed my share today?

Till next time,

Shona

Wednesday, October 9, 2019

When they saw the star!

Hi there,

I'm here today with my October card for Christmas at Sweet Stampin'.  This month we had the optional twist of using stars in our Christmas project. I had recently picked up the Recollections Christmas Noel embossing folders and clear stamp set, so decided to dry and wet emboss the star embossing folder for my background. 


I began with running the blue cardstock through my Big Shot with the Recollections star embossing folder. I then took a rubber brayer and Versamark ink and ran it across the raised pattern and then applied Detail Silver embossing powder.


I then stamped the image from the Sparkle N Sprinkle set 720: Three wise Men with Versafine Clair Twilight ink and heat embossed with Clear Detail embossing powder. 


I stamped the sentiment from the same set in the Twilight ink again and heat embossed with Clear Detail again. Then I tore around the sentiment to make it look like a sand dune and sponged a little of the Twilight ink around the edges.


The three wise men were taped to the star background, after I colored their gifts with a yellow Copic marker and the sand dune was popped up with mounting foam. The front panel was layered to a white card base and then the white organdy ribbon was tied around the left side of the card to finish it off.


Hope you've enjoyed my share? Below are all the products I used on my card:

Sparkle N Sprinkle 3 Wise Men Set 720
Recollections Christmas Noel Embossing Folders & Clear Stamps
Versamark Ink
Silver Detail  (EP257)
Clear Detail (EP280)
Versafine Clair Twilight Ink
Brayer
Copic Marker Y17
White Organdy Ribbon
Mounting Tape

I hope you will take a look over on the Christmas at Sweet Stampin' Challenge.
We'd love to see what you come up with, with the optional twist of "Stars"!

Till next time!

Shona